
Saber Guide: Best Build, Skills, Emblem, Combos, Counters and Skins

Saber is a single-target Assassin who wins by stacking Physical Defense reduction, reaching an exposed damage dealer, and ending the fight before the enemy's protection arrives. His current Pro Setup pattern centers on Hunter Strike, War Axe, Endless Battle, Malefic Roar, and a late damage or survival slot. He is easy to understand, but a mistimed Charge or Triple Sweep can leave him with no exit.
Quick Answer: How Should You Build and Play Saber?
Take Orbiting Swords at level 1 and prioritize it, keep Charge as the backup upgrade, and level Triple Sweep whenever available. Activate Orbiting Swords before entering, use Charge to reach the carry, and cast Triple Sweep only when the target is isolated. Jungle Saber normally uses Assassin Emblem with Rupture, Weapons Master, Lethal Ignition, and Retribution.
- Pick Saber when: the enemy back line has one fragile target without reliable rescue.
- Adapt when: Estes, Faramis, heavy armor, or grouped protection can outlast the first combo.
- Default rule: prepare swords, attack from fog, eliminate the damage dealer, then leave before the counterturn.
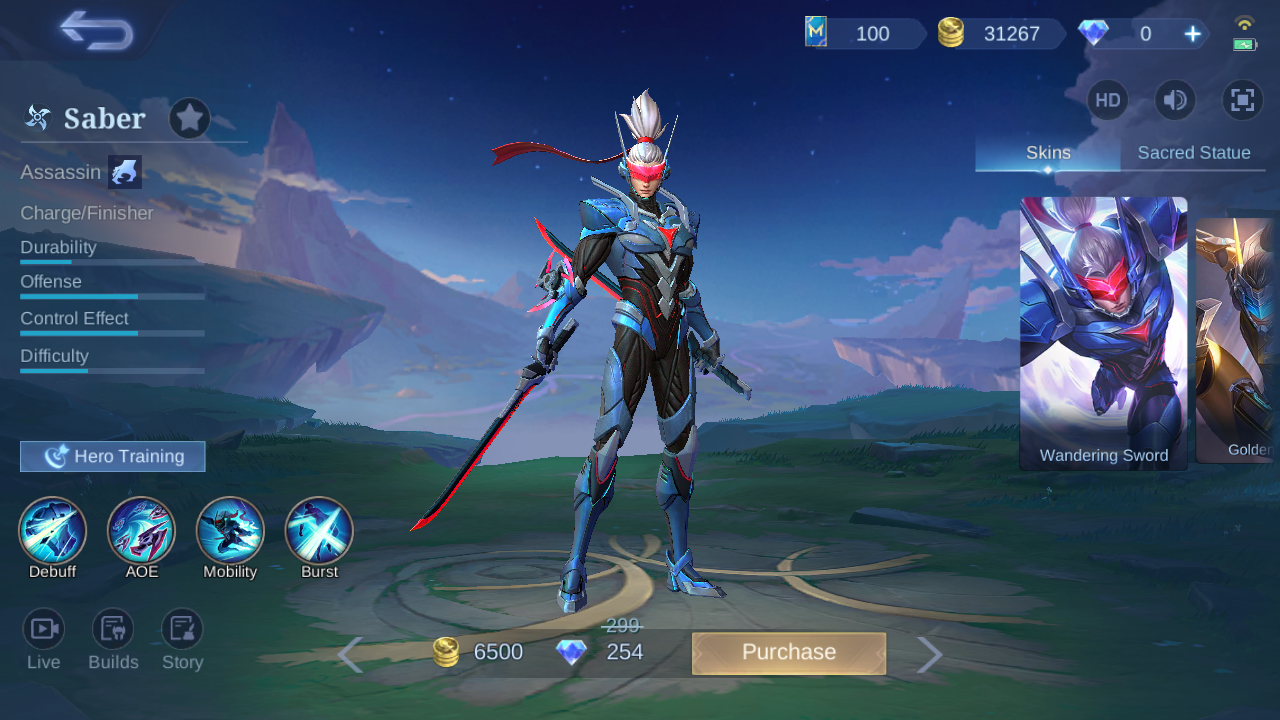
Saber at a Glance
| Role | Specialty | Best job | Main risk |
|---|---|---|---|
| Assassin | Charge / Finisher | Delete one exposed carry and exit | Rescue, armor, and using Charge with no escape plan |
| Durability | Offense | Control | Difficulty |
| Approx. 36% | Approx. 64% | Approx. 64% | Approx. 36% |
Attribute bars are approximate visual measurements.
Saber Skills: Mechanics and Decisions
 Enemy's Bane
Every damage instance reduces the target's Physical Defense by 3-8 for five seconds, stacking up to five times.
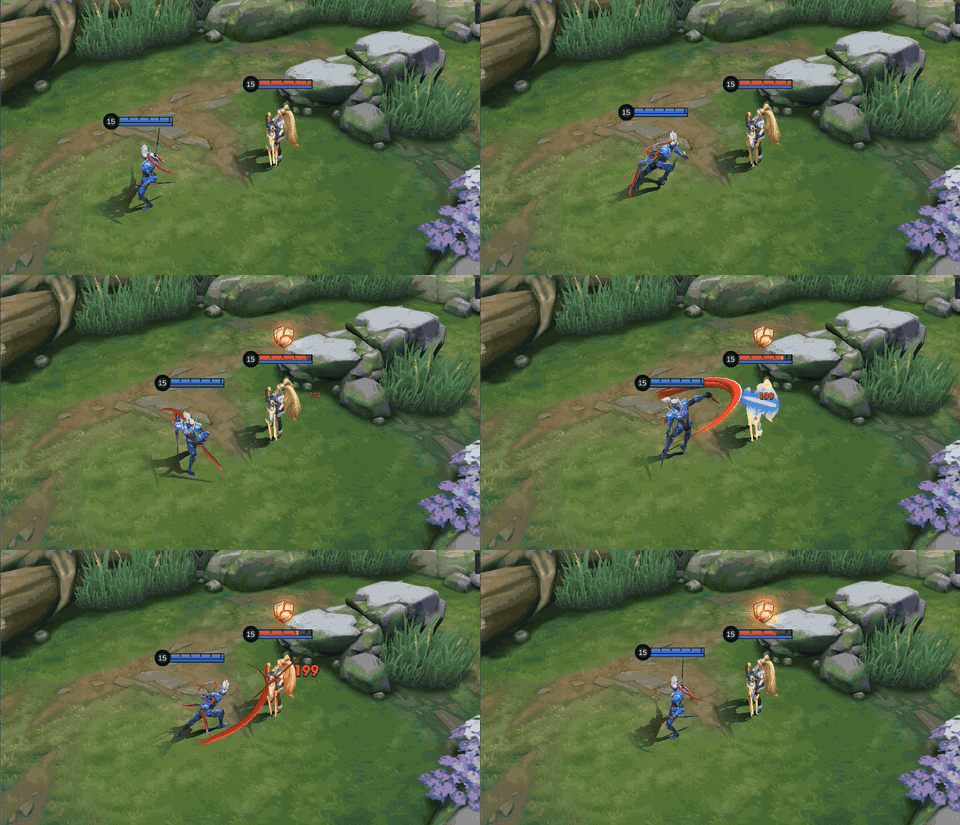
you can touch the target several times before the all-in
Orbiting Swords rapidly prepares the target for the physical burst that follows
Do not spend the entire defense-shred window on a tank if the intended carry is still out of reach
 Orbiting Swords
Five swords orbit Saber. Contact deals Physical Damage; Basic Attacks send swords through the target, and each sword attack reduces the cooldowns of Orbiting Swords and Charge.
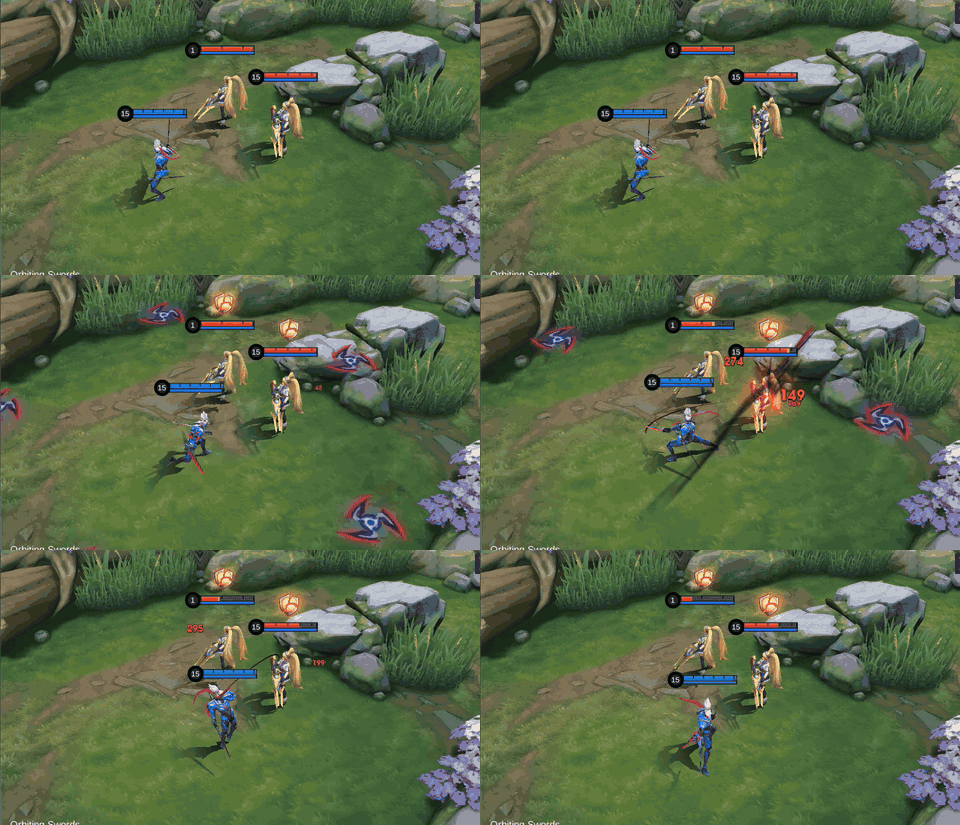
you are approaching a fight, clearing, or preparing Triple Sweep
the five hits stack Enemy's Bane and add damage without delaying the dash or ultimate
Do not reveal the engage too early when a hidden angle is more valuable than poke
 Charge
Saber dashes through enemies, then gains an enhanced Basic Attack that dashes to the target, deals Physical Damage, and slows by 60% for one second.
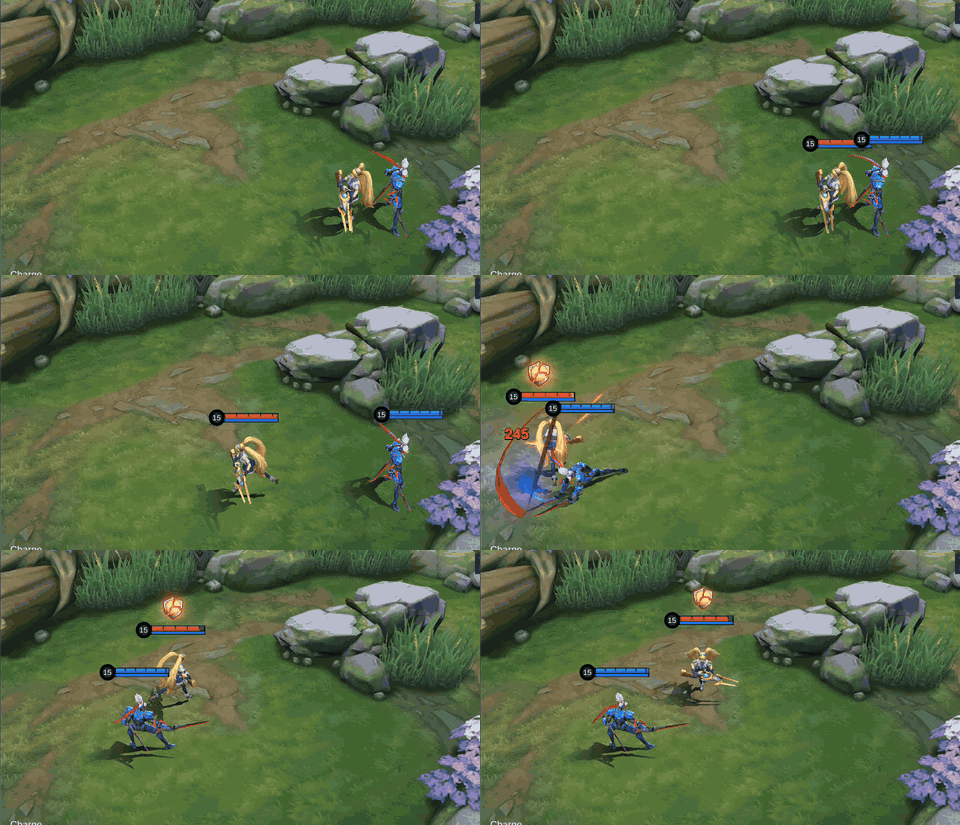
the target is inside a safe finishing route or you need to cross terrain
the enhanced attack closes the last gap while the slow prevents a clean walk-away
Do not consume Charge to enter if enemy cover will make the same skill necessary for escape
 Triple Sweep
Saber charges an enemy hero, knocks them airborne for 1.2 seconds, and strikes three times; the third hit carries the largest scaling.
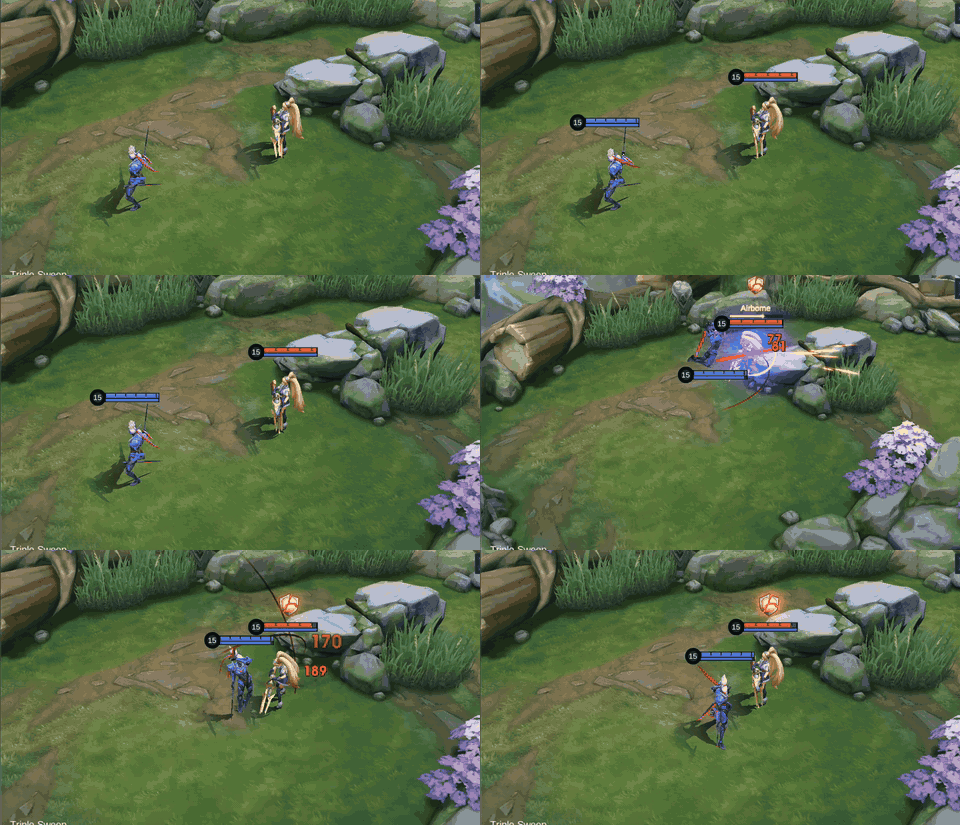
a damage dealer is isolated and defensive rescue is not already in position
unaffected-by-Resilience airborne time creates a reliable single-target burst window
Do not ult the first visible tank or dive through Estes and Faramis protection without a follow-up plan
Saber Skill Priority and Combos
Skill upgrade priority
Take Orbiting Swords at level 1 and prioritize Skill 1, use Charge as the backup upgrade, and level Triple Sweep whenever available. The priority keeps Saber's poke, defense reduction, and repeated sword damage ahead of his mobility tool.
Teamfight combo
 Orbiting Swords→
 Charge→
 Triple Sweep
Order: Orbiting Swords → Charge → Triple Sweep. Why: swords begin Enemy's Bane stacks before the ultimate's heaviest hit. Do not: enter until the intended target is separated from rescue or key protection is spent.
Laning and pick combo
 Orbiting Swords→
 Charge→
 Triple Sweep
Order: Orbiting Swords → Charge → Triple Sweep. Poke or clear with the orbit first, approach from fog, then use Charge to close. Do not: show the full route while the enemy can retreat under protection.
How to Play Saber by Game Phase
Early game
Use Orbiting Swords to clear and stack defense reduction. When jungling, route for level four without exposing the first gank. Do not force a turret dive when the same time can secure an objective or a safer lane pick.
Mid game
Play from bushes and side angles. When a carry rotates alone, prepare swords before appearing. Why: hidden preparation removes reaction time. Do not lead a front-to-back fight where every defender sees Charge.
Late game
Track defensive items, revival effects, and rescue cooldowns. When one combo no longer kills, coordinate follow-up or wait for chip damage. Do not trade Saber for a tank while the enemy marksman remains untouched.
Five Saber Mistakes That Lose Picks
- Activating Orbiting Swords after engaging. Prepare it first so every hit contributes immediately. Why: the target begins losing Physical Defense before Triple Sweep lands.
- Using Charge with no exit. Enter only when the kill or a safe escape route is realistic.
- Ulting the nearest hero. Triple Sweep is most valuable against the damage source, not the easiest frontliner to click.
- Ignoring rescue heroes. Estes healing and Faramis protection can turn a clean-looking burst into a lost trade.
- Copying six items without reading the match. Change boots, penetration timing, and the final defense slot when the draft demands it. Why: a copied damage slot cannot replace the resistance needed to finish or leave.
Best Saber Emblem and Battle Spell
Default jungle route
Assassin Emblem: Rupture, Weapons Master, Lethal Ignition. Battle Spell: Retribution.
Saber is the jungler and must secure Turtle or Lord
penetration, item-scaled attack, and burst reinforce the one-combo plan; Retribution controls objectives
Do not take Retribution into lane or roam
Lane or roam finisher
Assassin Emblem: Rupture, Weapons Master, Lethal Ignition. Battle Spell: Execute.
a non-jungle target may survive Triple Sweep at low HP
Execute adds a true-damage finisher after the combo
Do not choose Execute when Saber is responsible for jungle objectives
Reach alternative
Battle Spell: Flicker.
a new approach angle or second escape matters more than Execute
Flicker can extend the pick angle and preserve Charge for the exit
Do not choose Flicker if the role still requires Retribution
The account's talent nodes were locked, so role-specific recommendations were cross-checked against current external guidance accessed August 2, 2026; visible in-game Pro Setup rows independently showed Retribution and Execute contexts.
Current Saber Pro Setups
These are the first five ranked rows visible in the in-game snapshot. The sample favors jungle burst, with one Tough Boots route and Rose Gold Meteor appearing when survival matters.
Build 1
| Item 1 | Item 2 | Item 3 | Item 4 | Item 5 | Item 6 |
|---|---|---|---|---|---|
 Hunter Strike Hunter Strike |  Flame Hunter's Magic Boots Flame Hunter's Magic Boots |  War Axe War Axe |  Endless Battle Endless Battle |  Malefic Roar Malefic Roar |  Blade of Despair Blade of Despair |
Build 2
| Item 1 | Item 2 | Item 3 | Item 4 | Item 5 | Item 6 |
|---|---|---|---|---|---|
| War Axe | Flame Hunter's Magic Boots | Endless Battle | Malefic Roar | Blade of Despair |  Sky Piercer Sky Piercer |
Build 3
| Item 1 | Item 2 | Item 3 | Item 4 | Item 5 | Item 6 |
|---|---|---|---|---|---|
 Tough Boots Tough Boots | Hunter Strike | War Axe | Endless Battle | Malefic Roar |  Rose Gold Meteor Rose Gold Meteor |
Build 4
| Item 1 | Item 2 | Item 3 | Item 4 | Item 5 | Item 6 |
|---|---|---|---|---|---|
| Flame Hunter's Magic Boots | Hunter Strike | War Axe | Endless Battle | Malefic Roar | Rose Gold Meteor |
Build 5
| Item 1 | Item 2 | Item 3 | Item 4 | Item 5 | Item 6 |
|---|---|---|---|---|---|
| Hunter Strike | Flame Hunter's Magic Boots | War Axe | Endless Battle | Malefic Roar | Blade of Despair |
Saber Equipment Matrix
Use the ranks column to see where each base item appeared in the five-row sample. Flame Hunter's Magic Boots is grouped under Magic Boots while its jungle condition stays explicit.
| Item | Role | Buy when | Do not |
|---|---|---|---|
| Hunter Strike | Physical Attack, cooldown reduction, penetration, and a movement burst after repeated damage. | you need the first penetration spike and a faster exit after the combo | Do not buy when the enemy forces an immediate defensive item. |
| Magic Boots | Cooldown reduction and movement; the Flame Hunter version is the observed jungle blessing. | more frequent rotations and objective-path casts matter | Do not buy when Tough Boots are required against repeated magic control. |
| War Axe | Sustained Physical Attack, HP, cooldown reduction, and combat stacks. | skirmishes last beyond the opening Triple Sweep | Do not buy when every fight ends instantly and raw penetration is the only useful window. |
| Endless Battle | Hybrid stats and a post-skill True Damage Basic Attack. | Charge's enhanced Basic Attack can land after a skill | Do not buy when you cannot safely deliver the Basic Attack proc. |
| Malefic Roar | Physical Attack and percentage Physical Penetration. | frontliners or protected carries have meaningful Physical Defense | Do not buy when targets remain low-defense and a survival slot is urgent. |
| Blade of Despair | Very high Physical Attack and extra damage into low-HP targets. | the core is complete and one clean combo must finish | Do not buy when its cost delays the penetration or defense needed to function. |
| Sky Piercer | Adaptive Attack, movement, and a low-HP execution effect that grows with successful kills. | your team needs reliable cleanup and you can protect its stacks | Do not buy when you are frequently dying and cannot preserve the passive. |
| Tough Boots | Magic Defense and control-duration reduction. | enemy magic burst or repeated control blocks the approach | Do not buy when cooldown boots provide more value and control is light. |
| Rose Gold Meteor | Physical Attack, Attack Speed, Lifesteal, and a low-HP shield. | magic burst threatens Saber during the exit | Do not buy when the shield will not solve the enemy's main physical or true-damage threat. |
Saber Counters and Team Synergy
Targets Saber punishes


When Layla or Eudora is isolated, Saber can exploit their limited escape window. Why: airborne control prevents a normal walk-out. Do not dive through their full team just because the target is fragile.
Protection that counters Saber



Estes sustains the target, Faramis can invalidate the kill window, and Baxia reduces recovery while absorbing pressure. When these heroes group tightly, wait for cooldowns or attack another angle.
Damage partners


Kadita and Cyclops add fast damage after Saber's control. When allies are in range, call the same target before entering. Do not burst alone while their follow-up is rotating elsewhere.
Best isolated prey

When Natalia is revealed and separated, targeted airborne control denies normal movement during the combo. Do not chase into unseen backup after the first reveal expires.
Saber Base Stats
| HP | 2500 | HP Regen | 7 | Physical Attack | 118 |
|---|---|---|---|---|---|
| Physical Defense | 20 | Attack Speed | 1.08 | Attack Speed Ratio | 100% |
| Mana | 500 | Mana Regen | 4 | Magic Defense | 15 |
| Magic Power | 0 | Movement Speed | 260 | Role | Assassin |
Level-one stats as of August 1, 2026.
Saber Skins and Availability
Eight Saber skin cards were visible in the Shop search. Availability below is a dated label, not a promise that a purchase, draw, membership, or limited event remains open.
| Card | Skin | Tag | Observed availability |
|---|---|---|---|
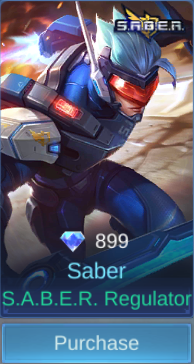 | S.A.B.E.R. Regulator | S.A.B.E.R. | 899 Diamonds / Purchase |
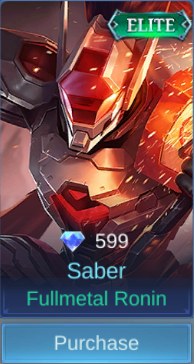 | Fullmetal Ronin | ELITE | 599 Diamonds / Purchase |
 | Golden Flash | Standard | 299 Diamonds / Purchase |
 | Force Warrior | STAR | 12/2016 StarLight Member |
 | Codename - Storm | LEGEND | Magic Wheel |
 | Onimaru | LUCKYBOX | Limited-time Event |
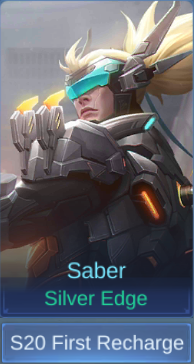 | Silver Edge | Standard | S20 First Recharge |
 | Iron Hound | STAR | 02/2023 StarLight Member |
Saber Story
Duan Meng was a gifted swordmaster obsessed with becoming invincible. After losing to Zhixu, he was recruited by Laboratory 1718 and transformed through mechanical technology. The process erased much of his memory and gave him the codename Saber. He eventually broke free, driven to recover his identity and finish the duel that still defines his past.
Saber FAQ
What is Saber's best build?
Start from Hunter Strike, War Axe, Endless Battle, and Malefic Roar, then choose Blade of Despair, Sky Piercer, or Rose Gold Meteor according to finish power and survival needs.
What is Saber's best Emblem?
Assassin Emblem with Rupture, Weapons Master, and Lethal Ignition is the default burst route.
What Battle Spell should Saber use?
Use Retribution in jungle, Execute as a lane or roam finisher, and Flicker only when extra reach or escape is more valuable.
What is Saber's combo?
Activate Orbiting Swords, close with Charge, and finish with Triple Sweep after confirming the target is isolated.
Who counters Saber?
Estes, Faramis, and durable protection such as Baxia can survive or undo the opening burst; armor and grouped rescue also reduce his value.
Is Saber good for beginners?
His buttons are straightforward, but good results still require target selection, map vision, defensive-item tracking, and an exit plan.
Verdict: Is Saber Worth Learning?
Yes, when you want a direct Assassin who teaches fog-of-war picks and target priority. Learn him to punish exposed carries, but judge success by the target and timing rather than by whether Triple Sweep was available. For more matchup context,
Top up Mobile Legends: Bang Bang safely on ManaBuy




Copyright © FUTURE OUTLOOK TECHNOLOGY LIMITED.Company Registration No.: 77374965 All rights reserved.UNIT 135,1/F.,143 WAI YIP STREET,KWUN TONG HK