
Faramis MLBB Mid Lane Guide: Best Build, Emblem, Combos, and Counters

This guide reflects MLBB game version 2.1.88.12027, observed in-game on August 14, 2026. Faramis is strongest when he clears quickly, moves with a diver, and saves Nether Realm for the moment an objective fight becomes unavoidable.

Why Play Faramis in Mid Lane?
Faramis combines reliable wave clear with unusually strong protection for a five-player fight. Ghost Bursters gains value when enemies or minions are close enough to accept its split bounces. Shadow Stampede turns walls into approach routes and pulls marked heroes toward Faramis when the state ends. Nether Realm then gives nearby allies extra HP, a short speed boost, debuff removal, and a brief Resurrection window when the Specter breaks.
That package is less about winning a long solo duel and more about deciding where a fight happens. Clear the lane, arrive first, and make the enemy choose between leaving the objective or fighting inside your realm. Faramis still deals meaningful magic damage, but the best result usually comes from protecting two or three allies while punishing a clustered enemy team.
Faramis Skills and Practical Uses

Vicious Retrieval
Buff / Passive. Every 4 seconds, the next skill that hits an enemy hero or summoned object creates a Soul Fragment. Absorbing one restores 100 plus 50% Total Magic Power HP and adds 2 Magic Power, up to 40 stacks. On death, each stored fragment cuts the respawn timer by 3%, up to 90%.
Best use: Collect fragments before major objectives so the permanent Magic Power and shorter death timer improve Faramis's next fight.
Avoid: Do not step into unsafe vision for a fragment; the passive rewards steady collection, not a risky detour.
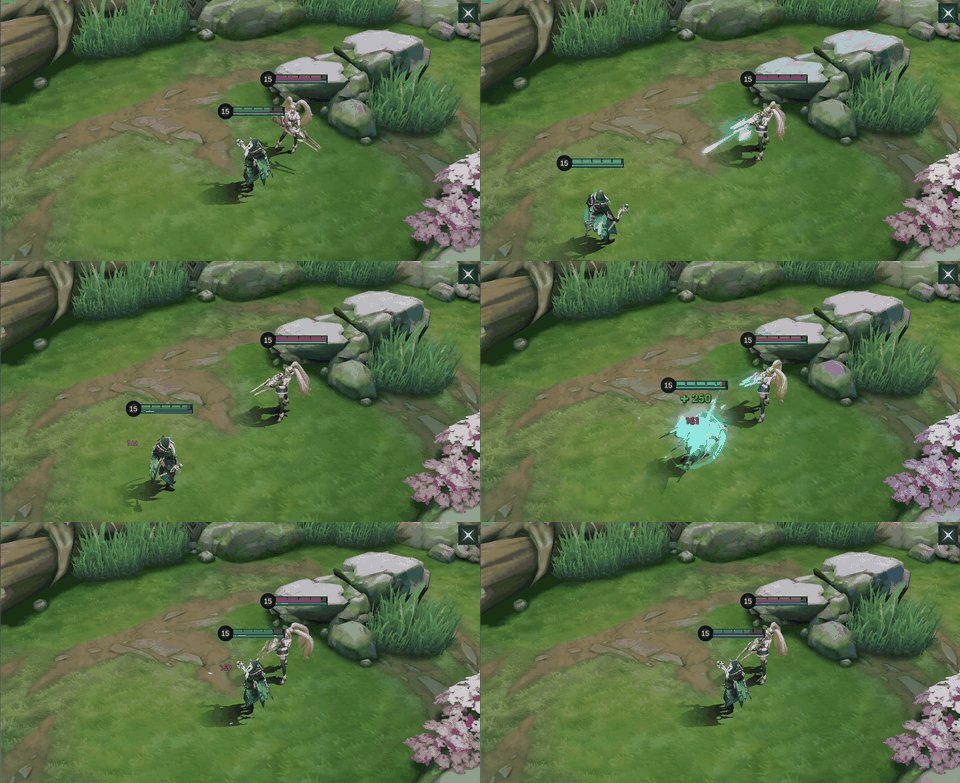

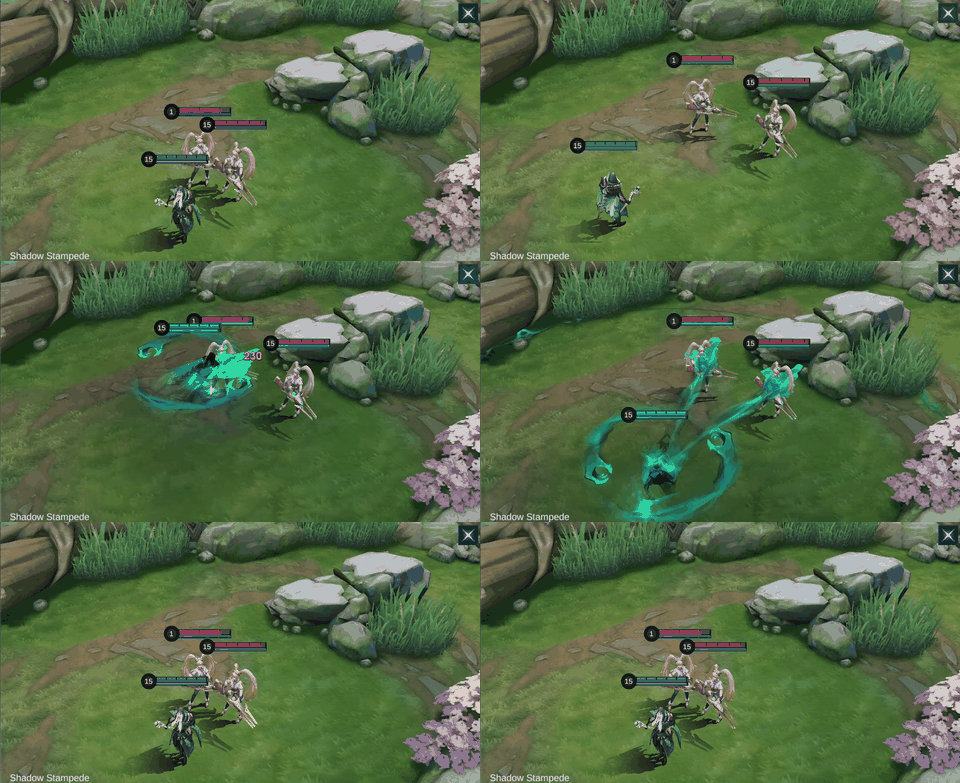
Shadow Stampede
Mobility / Control. Faramis enters Shadow state for 3 seconds, gains 70% Movement Speed and 25 Physical and Magic Defense, crosses terrain, and reduces this skill's cooldown by 20%. Touching a hero deals 250 plus 60% Total Magic Power Magic Damage and marks them; ending the state pulls marked heroes and repeats the damage.
Best use: Pass through a wall, touch one or more targets, then recast from a safe side to pull them toward allies.
Avoid: Do not mark more enemies than the team can punish; the return pull can place Faramis in the center of a losing fight.

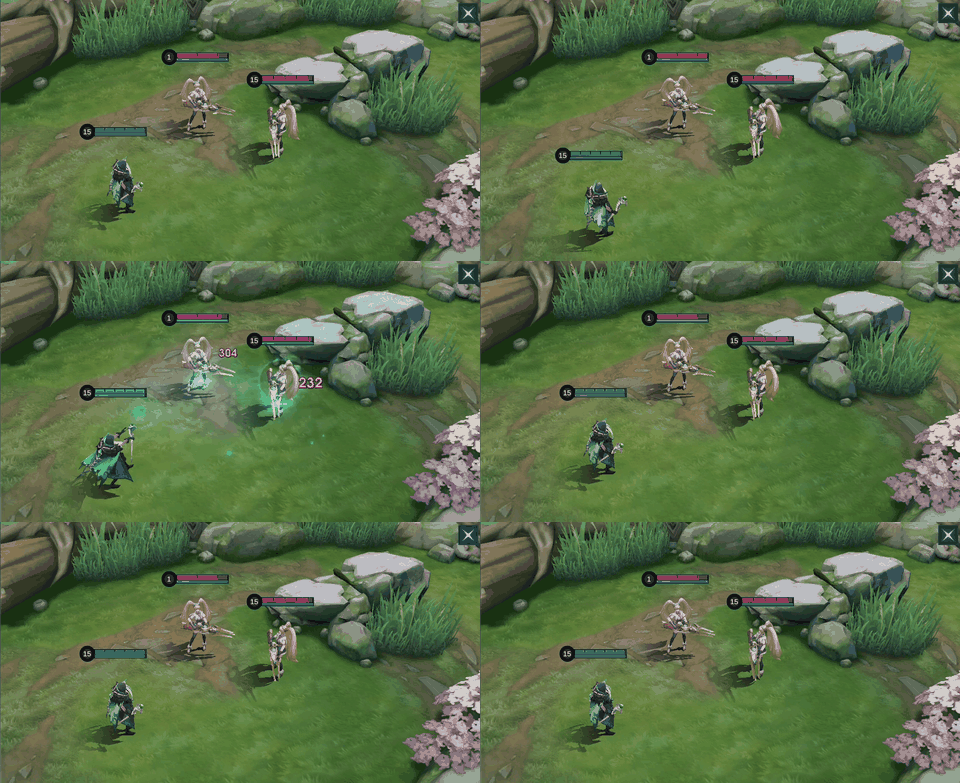
Ghost Bursters
Magic Damage. Faramis releases energy in a fan for 330 plus 144% Total Magic Power Magic Damage. On a hero hit, the blast splits and bounces twice for 200 plus 86% Total Magic Power damage; it splits once on non-heroes.
Best use: Cast into clustered heroes or a hero standing near another target to gain both split bounces.
Avoid: A lonely target gives fewer bounces, so hold the cast briefly when enemies are about to group.

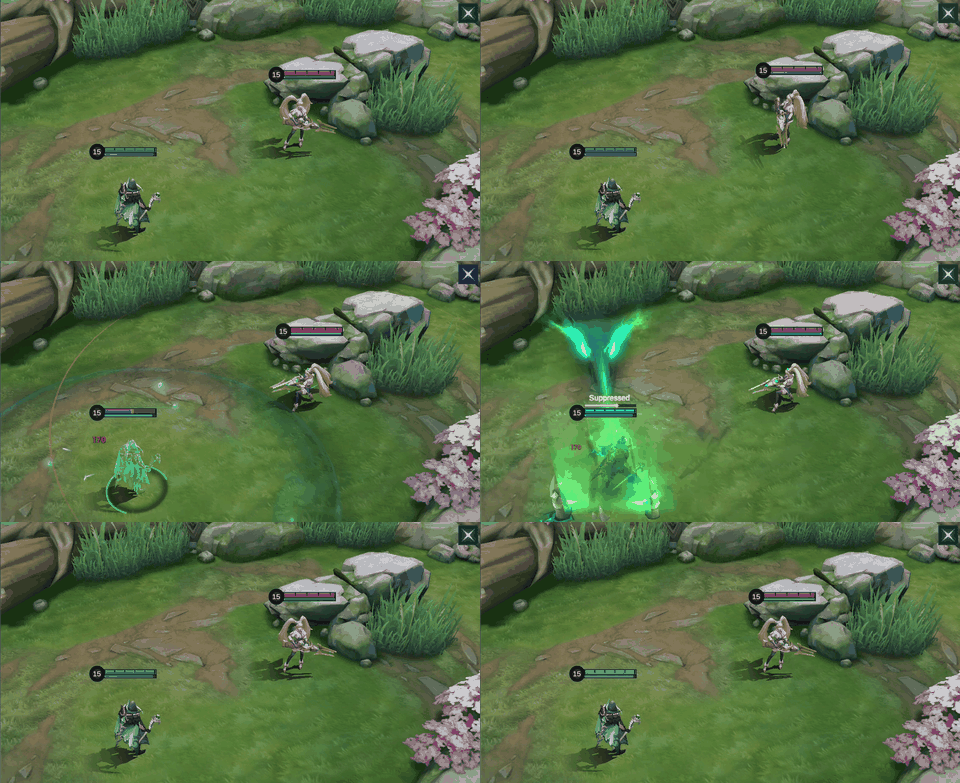
Nether Realm
Team Protection. Faramis creates a Nether Realm for 6 seconds. Allied heroes inside gain a Specter with extra HP and a 1-second 50% Movement Speed boost. When the Specter breaks, it clears debuffs and grants 1.3 seconds of brief Resurrection; the effect ends if the ally leaves the realm.
Best use: Cast before the enemy burst lands so allies receive the Specter while they are still inside the objective area.
Avoid: Do not place the realm behind the team's movement path; allies who leave it lose the protection.
Skill Priority and Faramis Combos
Take Ghost Bursters at level one and prioritize it for wave clear and repeated team-fight damage. Shadow Stampede is the supporting upgrade, while Nether Realm should be leveled whenever it becomes available. The passive improves naturally as fragments are collected; do not delay lane tempo merely to chase one unsafe fragment.
Teamfight sequence




Nether Realm → Shadow Stampede → Shadow Stampede recast → Ghost Bursters. Put the realm under allies before the first heavy damage lands, move through the front line to apply Nether Marks, then end the state where the pull brings enemies into allied damage. Cast Ghost Bursters as the targets regroup so its bounces have several nearby options.
Laning catch



Shadow Stampede → Ghost Bursters → Shadow Stampede recast. Enter from a side wall, touch the opponent to apply the mark, use Ghost Bursters while minions or another hero can accept bounces, and recast after moving to the side that creates the safer pull. The direction matters more than maximum travel distance.
How to Play Faramis by Game Phase
Early game
Use Ghost Bursters through the minion wave so a hero standing nearby can be hit by a split. Secure the wave before taking fragments or moving to the river. Shadow Stampede is both an initiation tool and an escape, so avoid spending it simply for speed when the enemy jungler is missing. A clean first rotation should create vision or numbers at the river without giving up the next Mid Lane wave.
Mid game
Move with the jungler or EXP Laner and approach Turtle or Lord through terrain. Let a durable ally make first contact, then place Nether Realm over the area where the team must continue fighting. Pulling one damage dealer is often better than touching the whole enemy team. If the realm has expired, disengage rather than pretending Faramis still has the same protective advantage.
Late game
Track displacement, long-range poke, and Purify before committing. Place Nether Realm where allies can remain for its duration, not at the edge of their retreat. Divine Glaive becomes more important as Magic Defense appears. In the final Lord fight, preserving the ultimate for a committed five-player exchange is usually stronger than using it to rescue a single ally who was caught far from the objective.
Five Common Faramis Mistakes
- Casting Nether Realm after allies have already taken lethal burst instead of before the damage arrives.
- Placing the realm behind the team, forcing allies to leave it when they advance.
- Touching every visible enemy with Shadow Stampede and pulling an entire formation onto the back line.
- Using Ghost Bursters on an isolated target when a short wait would create extra bounces.
- Chasing a Soul Fragment through unsafe vision and losing the wave or the next objective setup.
Best Emblem and Battle Spell
Custom Mage Emblem suits the Mid Lane damage build. Rupture adds early penetration, Weapons Master amplifies the offensive stats gained from equipment, and Impure Rage adds damage while returning Mana during repeated spell rotations. This setup lets Faramis clear quickly without giving up the power needed to punish enemies pulled into a cluster.
Purify is the dependable battle spell when crowd control could prevent Shadow Stampede movement or delay Nether Realm at the critical moment. Flicker is the alternative when reaching a back-line angle matters more: it extends a pull threat and helps Faramis reposition after enemies react. Choose Purify into reliable control and Flicker into drafts where access is the main obstacle.
Best Faramis Build Logic
Lightning Truncheon is the most consistent first damage core because Mana and Cooldown Reduction support lane clear while its echo rewards high Total Magic Power. Arcane Boots and Genius Wand improve early penetration. Holy Crystal supplies the large raw-power spike, while Divine Glaive should move forward as soon as important targets build Magic Defense.
Blood Wings adds late Magic Power and a shield that helps Faramis remain close enough to protect allies. Sky Piercer is a snowball choice when finishes are frequent and the stacks can be protected. Glowing Wand belongs in matches where healing, shielding, or high-HP frontliners survive the first rotation. Build order should respond to the enemy defenses instead of treating slot six as fixed.
Current In-Game Builds
These five current in-game builds were observed on August 14, 2026. Compare the six-item order and adjust utility or defensive slots for the match.
Build 1
| Item 1 | Item 2 | Item 3 | Item 4 | Item 5 | Item 6 |
|---|---|---|---|---|---|
 Lightning Truncheon Lightning Truncheon |  Arcane Boots Arcane Boots |  Genius Wand Genius Wand |  Holy Crystal Holy Crystal |  Divine Glaive Divine Glaive |  Blood Wings Blood Wings |
Build 2
| Item 1 | Item 2 | Item 3 | Item 4 | Item 5 | Item 6 |
|---|---|---|---|---|---|
| Arcane Boots | Lightning Truncheon | Holy Crystal | Blood Wings | Divine Glaive | Genius Wand |
Build 3
| Item 1 | Item 2 | Item 3 | Item 4 | Item 5 | Item 6 |
|---|---|---|---|---|---|
| Arcane Boots |  Sky Piercer Sky Piercer |  Glowing Wand Glowing Wand | Lightning Truncheon | Holy Crystal | Divine Glaive |
Build 4
| Item 1 | Item 2 | Item 3 | Item 4 | Item 5 | Item 6 |
|---|---|---|---|---|---|
| Arcane Boots | Lightning Truncheon | Holy Crystal | Blood Wings | Divine Glaive | Genius Wand |
Build 5
| Item 1 | Item 2 | Item 3 | Item 4 | Item 5 | Item 6 |
|---|---|---|---|---|---|
| Lightning Truncheon | Arcane Boots | Genius Wand | Holy Crystal | Divine Glaive | Blood Wings |
Equipment Guide
Use the item notes below to decide what each slot contributes. The table describes each item independently of the numbered builds.
| Item | What it adds | When to consider it |
|---|---|---|
| Lightning Truncheon | Magic Power, Mana, Cooldown Reduction, and a periodic echo burst that scales with Total Magic Power. | Use as the dependable wave-clear and burst core; its Mana and Cooldown Reduction support repeated rotations. |
| Arcane Boots | Movement Speed, Magic Power, and flat Magic Penetration for stronger early spell damage. | Choose when early penetration matters; delay only if a defensive boot is essential for survival. |
| Genius Wand | Magic Power, Movement Speed, flat Magic Penetration, and stacking Magic Defense reduction after magic damage. | Buy early when repeated magic hits can stack the defense reduction across clustered targets. |
| Holy Crystal | Very high Magic Power plus a level-scaling percentage increase to total Magic Power. | Finish when raw Magic Power gives the best increase; delay it if anti-heal or percentage penetration is urgent. |
| Divine Glaive | Magic Power and percentage Magic Penetration that improves against higher enemy Magic Defense. | Move earlier as soon as priority targets buy meaningful Magic Defense. |
| Blood Wings | High Magic Power and a regenerating shield that also improves Movement Speed while active. | Finish for a large late damage spike and a shield that helps Faramis stay near the team fight. |
| Sky Piercer | Adaptive Attack and Movement Speed, plus an execute threshold that grows through kills and falls on death. | Buy when Faramis can reliably finish low-health targets; replace it in slow games where stacks are hard to protect. |
| Glowing Wand | Magic Power, HP, Movement Speed, a max-HP burn, and reduced enemy healing and shielding. | Choose against healing, shields, or high-HP frontliners who survive the first burst. |
Best Teammates and Matchups
Dive partners



Alice is an excellent partner, while Leomord and Martis also benefit from protection during a committed dive. Let them force the enemy formation to turn, then place Nether Realm across their fighting area and pull a priority target into the follow-up.
Burst threats Faramis answers



Saber and Eudora depend on an all-in burst window, which Nether Realm can blunt when cast early. Faramis also pressures Gloo because clustered targets and a prolonged fight create more value for bounces, fragments, and team protection.
Range and mobility problems



Novaria, Pharsa, and Yve can damage or zone from positions that are difficult to mark with Shadow Stampede. Approach through fog, preserve Flicker when selected, and do not drag the team through repeated poke before the ultimate fight begins.
Awkward spacing

Luo Yi can pull formations into dangerous positions and punish teammates who stand tightly together. Spread before the engagement, then regroup inside Nether Realm only after her displacement threat has been tracked.
Faramis Base Stats
| Stat | Level 1 |
|---|---|
| HP | 2500 |
| HP Regen | 6.8 |
| Physical Attack | 118 |
| Physical Defense | 20 |
| Attack Speed | 0.98 |
| Attack Speed Ratio | 100% |
| Mana | 500 |
| Mana Regen | 4 |
| Magic Power | 0 |
| Magic Defense | 15 |
| Movement Speed | 240 |
These values exclude equipment, Emblems, skins, and match modifiers.
Faramis Skins and Availability
Summer Sparks and Dark Necro show direct Diamond prices. Royal Magus is tied to the Season 26 First Recharge, Infernal Magister to the Season 28–31 Mythic Rank reward, and Enigmatic Wayfarer to Season 37.

Summer Sparks
749 Diamonds shown in-game

Dark Necro
269 Diamonds shown in-game

Royal Magus
Season 26 First Recharge

Infernal Magister
Season 28–31 Mythic Rank Skin

Enigmatic Wayfarer
Season 37 reward
Faramis Story
Born into a family of physicians, Faramis became obsessed with diseases that ordinary medicine could not solve and with the possibility of overcoming death. He eventually reunited with Vexana, entered the Mist around Necrokeep, and used himself as a test subject while searching for a cure that could save her and break the kingdom's curse.
Related MLBB Guides
- Browse the MLBB guide hub for more current hero guides.
- Kadita Mid Lane guide covers another terrain-crossing mage with a very different burst-and-escape pattern.
- Leomord EXP Lane guide explains a diver who benefits from Faramis protecting a committed entry.
Faramis FAQ
Which Faramis skill should be upgraded first?
Take Ghost Bursters at level one and prioritize it, keep Shadow Stampede as the supporting upgrade, and level Nether Realm whenever available.
What is Faramis's best battle spell?
Purify is the safe default into reliable crowd control. Flicker is better when the main challenge is reaching the correct pull angle.
When should Nether Realm be cast?
Cast it just before committed enemy burst and place it where allies can continue fighting for the duration.
Why is Lightning Truncheon core?
It combines Magic Power, Mana, Cooldown Reduction, wave clear, and a burst trigger that scales with Faramis's later power items.
When should Divine Glaive move earlier?
Buy it earlier when the targets that matter begin building Magic Defense; otherwise finish the stronger raw-power curve first.
Final Verdict
Faramis rewards preparation more than reaction. Clear the wave, arrive through terrain, place Nether Realm before the enemy burst, and use Shadow Stampede to pull only the targets the team can punish. Ghost Bursters becomes stronger as formations tighten, while the equipment path should shift from raw Magic Power toward anti-heal or percentage penetration when the enemy draft demands it. Played with disciplined timing, Faramis can protect a dive, reverse an all-in, and still supply the damage expected from Mid Lane.





Copyright © FUTURE OUTLOOK TECHNOLOGY LIMITED.Company Registration No.: 77374965 All rights reserved.UNIT 135,1/F.,143 WAI YIP STREET,KWUN TONG HK