
Alice MLBB Tank Mage Guide: Best Build, Emblem, Skills, Combos, and Counters

Alice is a Tank/Mage who wins crowded fights by activating Crimson Blood Banquet, staying close enough to refresh it, and moving a charged Throne of Ruin onto several enemies with Scarlet Shadow. Her safest EXP plan is durability first: start Doom Waltz, use Crimson Gleam as both poke and an escape marker, and enter only after two Crimson stacks are realistic. She is strongest when tanks, fighters, and objective terrain keep enemies inside her aura. She is much weaker when ranged damage, anti-heal, true damage, or repeated disengage prevents a second skill cycle.
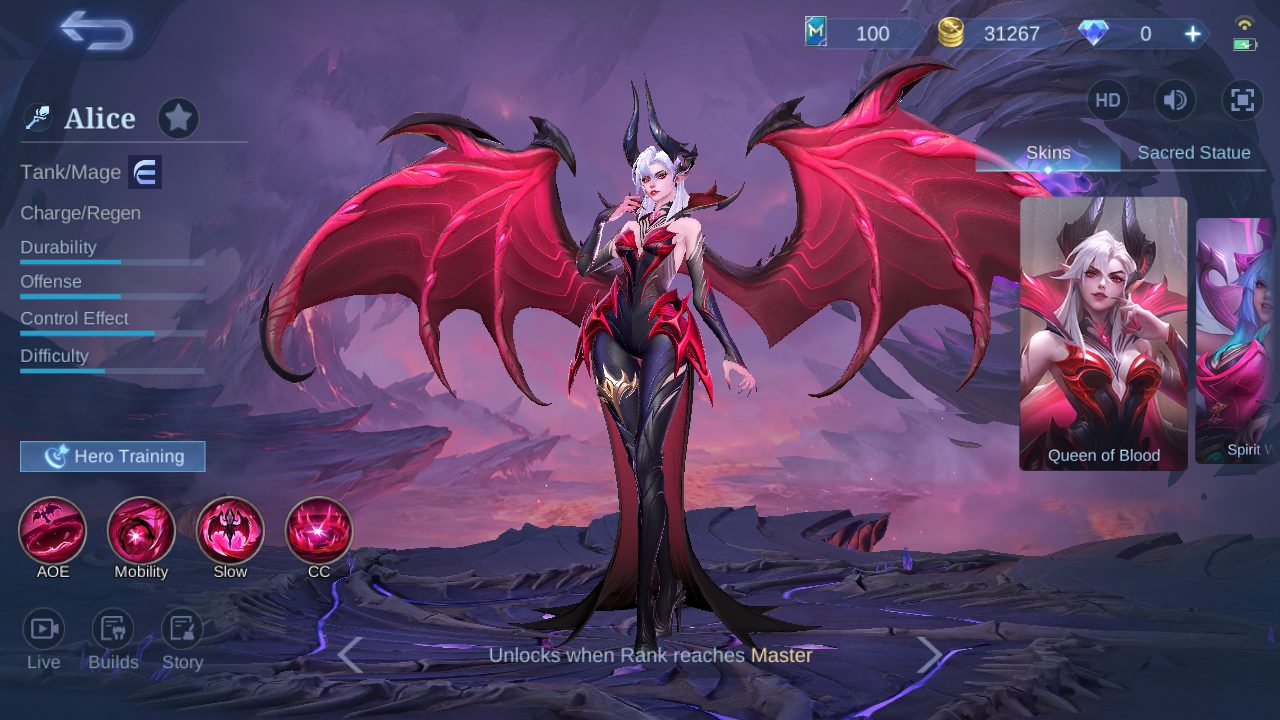
Alice role, specialty, and attribute bars.
Alice at a Glance
Role and jobs
Alice is listed in-game as Tank/Mage with Charge/Regen specialties. EXP lane lets her scale into a durable second-wave engager, while jungle variants trade Vengeance for Retribution and use early area damage to clear. Do not force jungle Alice when the draft needs a faster early objective controller.
Pick Alice when
Choose her into short-range front lines, grouped objective fights, and teams that must walk into a choke. Multiple nearby bodies feed Crimson stacks and give Doom Waltz a reliable amplified hit after Blood Banquet starts.
Avoid Alice when
Be careful into Baxia-style healing reduction, Karrie-like HP shredding, long-range kiting, and layered displacement. Alice cannot drain targets that never stay in her circle, and extra HP does not solve percentage or true damage by itself.
Alice Skills: When, Why, and What Not to Do

1. Crimson Blood Banquet
Skill hits grant Crimson for 4 seconds. At two stacks, Blood Banquet activates around Alice, dealing Magic Damage that scales with Magic Power and the target's Max HP while restoring Alice every 0.5 seconds. Hero hits refresh the duration and the active aura grants 8% Movement Speed.
Decision rule: Build two stacks before committing to close range, then keep touching heroes with skills so the aura does not expire. Do not enter a full team without Blood Banquet ready or a clear second skill hit to start it.
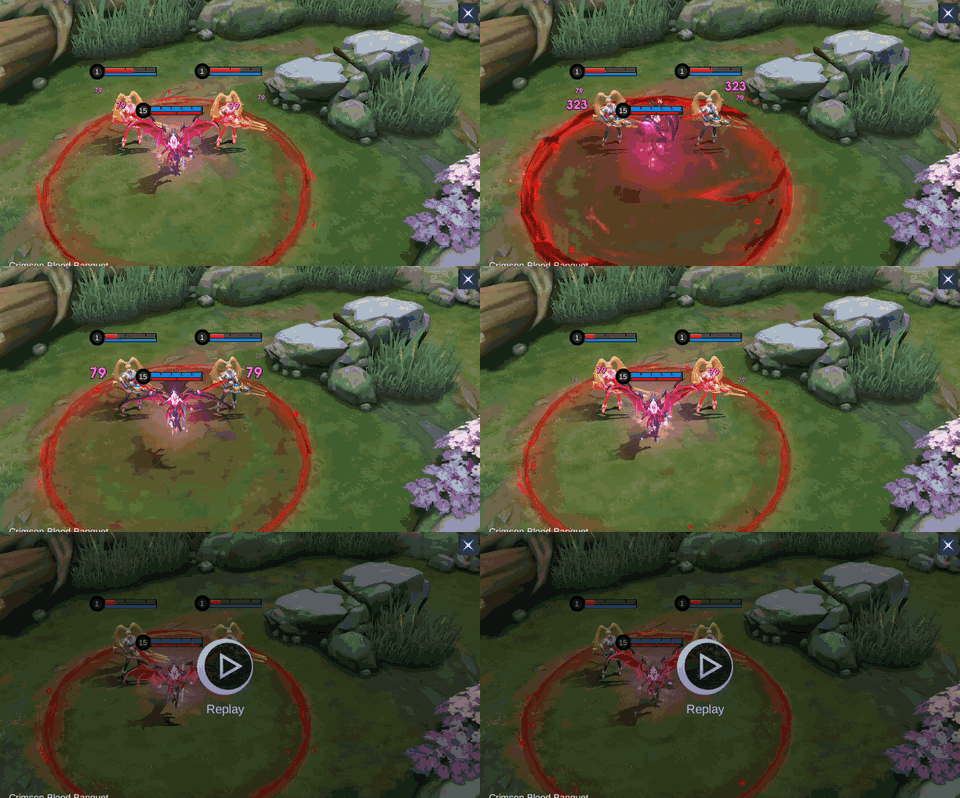
Crimson Blood Banquet demonstrated in-game.

2. Crimson Gleam
Alice fires blood energy forward for Magic Damage. Before it disappears, recast the skill as Scarlet Shadow to blink to the blood energy's location.
Decision rule: Use the first cast to poke, seed a Crimson stack, or prepare an exit. Recast only when the landing point starts Doom Waltz or avoids danger; do not blink automatically into every orb.
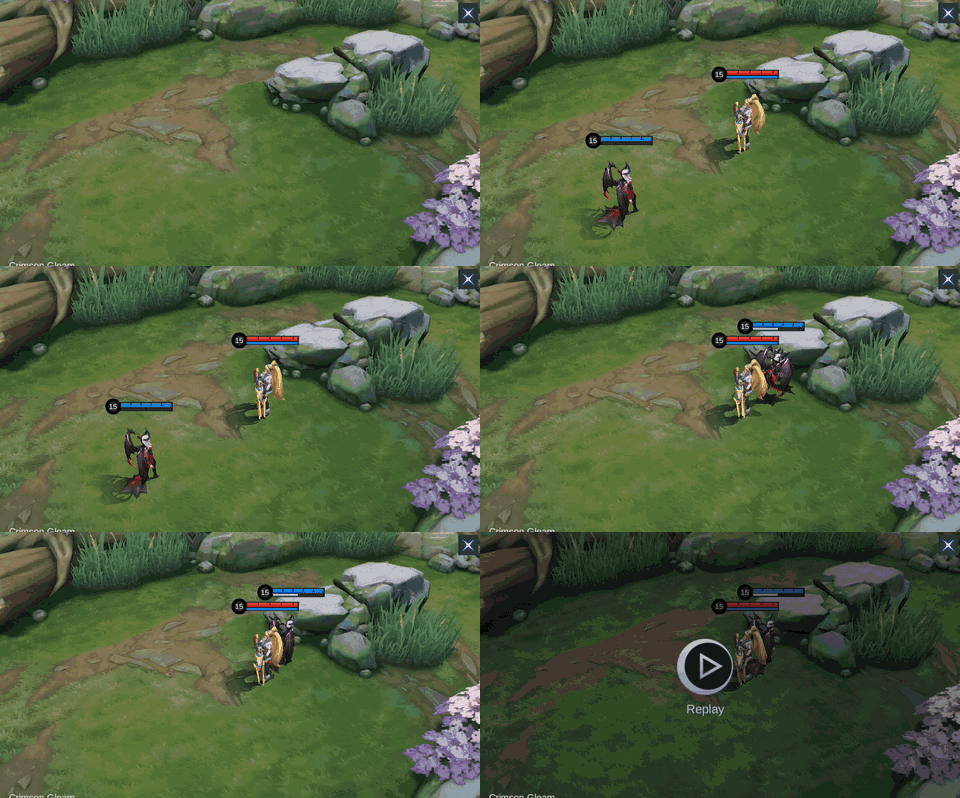
Crimson Gleam demonstrated in-game.

3. Doom Waltz
Alice damages nearby enemies and slows them by 70% for 1 second. When Blood Banquet is active, the skill also scorches enemies for 300% of the aura's damage and heals Alice for the same amount.
Decision rule: Take Doom Waltz at level one and use it to activate or cash in the passive around heroes and minions. Do not waste the amplified cast before Blood Banquet is active when a longer trade is about to begin.
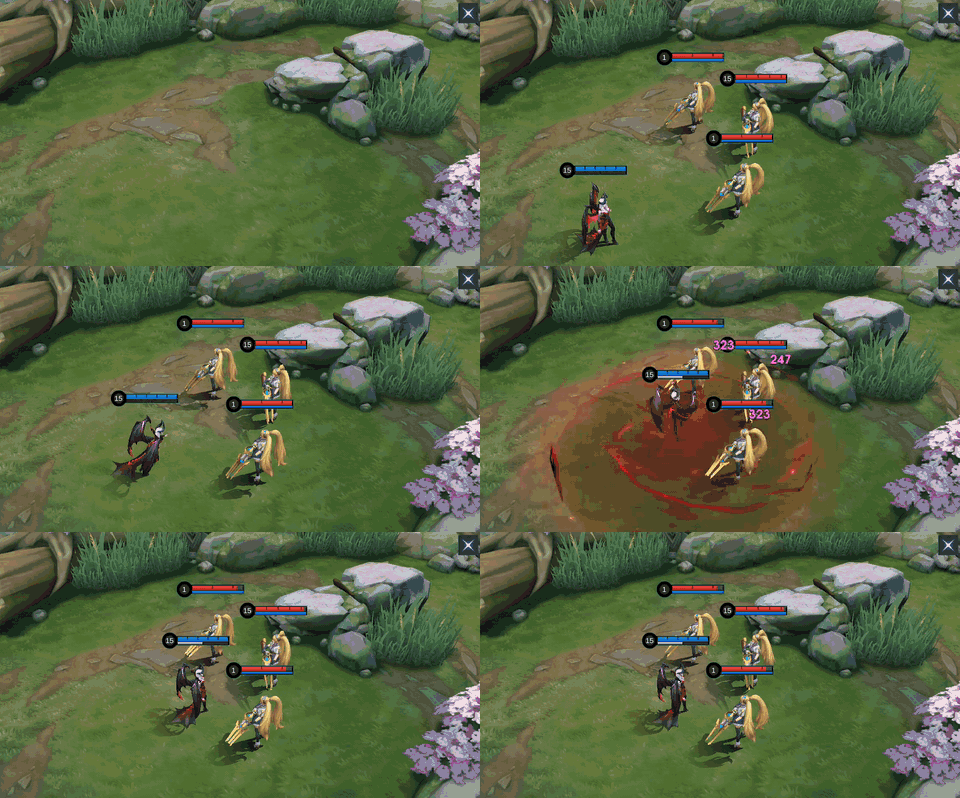
Doom Waltz demonstrated in-game.

4. Throne of Ruin
Alice channels for 1.5 seconds with Control Immunity and 50% Damage Reduction while self-slowed, then descends for heavy Magic Damage and a 1-second immobilize. Scarlet Shadow remains available during the charge.
Decision rule: Start the channel before the enemy commits, then use Scarlet Shadow during the charge to move the landing circle onto priority targets. Do not treat the ultimate as a last-frame heal after your HP has already collapsed.
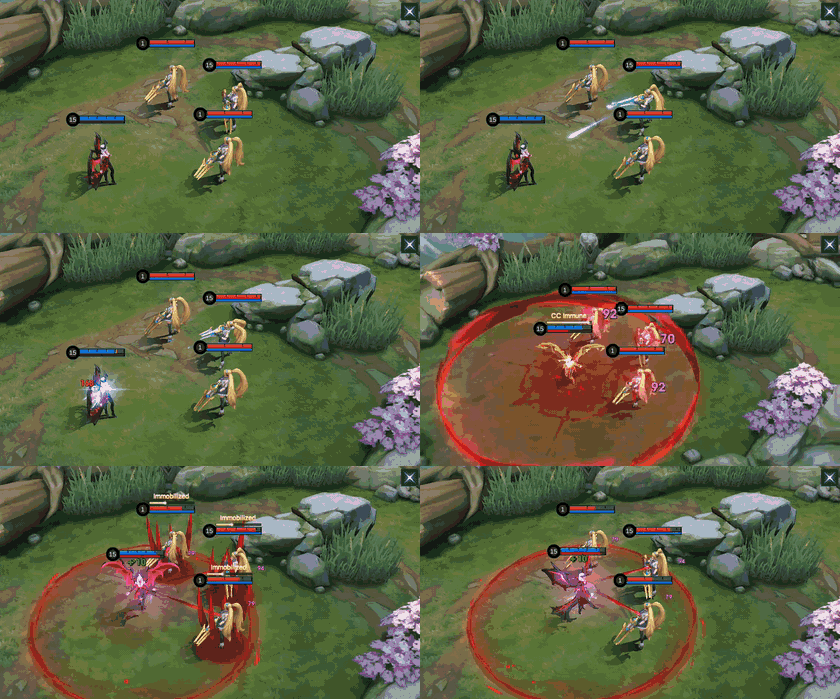
Throne of Ruin demonstrated in-game.
Alice Skill Priority and Combos
Teamfight Combos
 Crimson Gleam
 Scarlet Shadow
 Doom Waltz
 Throne of Ruin
Send Crimson Gleam through the target area, recast Scarlet Shadow to arrive, use Doom Waltz to slow and refresh Crimson, then land Throne of Ruin after movement becomes predictable. The in-game combo order uses the same four icons for lane and teamfights; the difference is whether the first orb is poke, an escape marker, or a committed entry.
Do not: recast Crimson Gleam when the orb lands beyond your team, under an untouched turret, or inside anti-heal and burst that can erase you before Blood Banquet activates.
Laning Combos
 Crimson Gleam
 Scarlet Shadow
 Doom Waltz
 Throne of Ruin
Send Crimson Gleam through the target area, recast Scarlet Shadow to arrive, use Doom Waltz to slow and refresh Crimson, then land Throne of Ruin after movement becomes predictable. The in-game combo order uses the same four icons for lane and teamfights; the difference is whether the first orb is poke, an escape marker, or a committed entry.
Do not: recast Crimson Gleam when the orb lands beyond your team, under an untouched turret, or inside anti-heal and burst that can erase you before Blood Banquet activates.
How to Play Alice by Phase
Early game
Take Doom Waltz and use minions as safe bodies for the first Crimson cycle. Your level-one goal is wave control and HP-efficient trades, not a forced solo kill. At level two, cast Crimson Gleam through the wave but keep Scarlet Shadow available when the enemy jungler is missing. Rush the resistance that matches the lane, then complete Oracle when repeated healing is the plan.
Mid game
Arrive before Turtle or the first Lord setup and place a Crimson Gleam route across the choke. Let the main setter absorb the first control, start Throne of Ruin from a safe edge, then blink the landing circle onto grouped targets. Vengeance belongs at the start of incoming focus, not after the damage has already pushed you below a safe threshold.
Late game
Alice becomes a space controller, not a carry chaser. Drain the tank or fighter who must hold the entrance, force the back line to leave, and protect the objective zone. Winter Crown can buy one critical pause, while Radiant Armor, Dominance Ice, or Chastise Pauldron should answer the enemy damage pattern rather than follow one fixed six-item list.
Five Alice Mistakes to Avoid
1. Blinking on every Crimson Gleam
The second cast is also an exit and a reposition during Throne of Ruin. Poke is already useful; do not turn every orb into a blind dive.
2. Entering before Blood Banquet is ready
Alice needs two Crimson stacks and continued skill contact. If the aura cannot start quickly, she is only a slow target with unfinished sustain.
3. Pressing Throne of Ruin at critical HP
The ultimate provides damage reduction and control during a channel, but it is not an instant rescue heal. Begin before the enemy burst lands.
4. Chasing outside the circle
Forcing a marksman to retreat already wins space. Stay on the objective or front line instead of following one dash into unsupported ground.
5. Copying one ranked row blindly
The five observed rows rotate several defenses, a jungle variant, and two active-item plans. Match Magic Defense, Physical Defense, anti-heal, and stasis to the draft.
Best Alice Emblem and Battle Spell
Default: Tank Emblem
Vitality adds HP to a passive and ultimate that reward Extra Max HP. Tenacity is the safer middle talent when burst threatens the first rotation; Festival of Blood is the sustain alternative when fights reliably extend.
Core talent choice
Impure Rage adds repeatable damage and resource support, while Brave Smite adds a Max HP recovery trigger after skill damage. Choose Impure Rage for a steadier lane and Brave Smite when survival during repeated close-range casts matters more.
Basic Common alternative
Thrill, Wilderness Blessing, and Impure Rage provide an aggressive roaming route with movement and damage. Use it when the team already has a primary front line; do not trade away Tank Emblem durability when Alice must absorb the first collapse.
Vengeance, Retribution, or Flicker
Vengeance is the EXP default because enemies must damage Alice while her aura works. Retribution is mandatory only for jungle duty. Flicker is an alternative when one unexpected landing angle matters more than sustained damage reduction.
Top 5 Alice Pro Setups
This current in-game build sample was observed on August 6, 2026. Oracle appears in all five rows, Magic Boots appears as the common base boot, and Brute Force Breastplate appears in four. Rank 3 is the visible Jungle variant; the other rows lean into Burst or defensive front-line labels.
Build 1
| Item 1 | Item 2 | Item 3 | Item 4 | Item 5 | Item 6 |
|---|---|---|---|---|---|
 Magic Boots Magic Boots |  Oracle Oracle |  Dominance Ice Dominance Ice |  Radiant Armor Radiant Armor |  Chastise Pauldron Chastise Pauldron |  Brute Force Breastplate Brute Force Breastplate |
Build 2
| Item 1 | Item 2 | Item 3 | Item 4 | Item 5 | Item 6 |
|---|---|---|---|---|---|
| Magic Boots | Brute Force Breastplate | Oracle |  Clock of Destiny Clock of Destiny | Chastise Pauldron |  Winter Crown Winter Crown |
Build 3
| Item 1 | Item 2 | Item 3 | Item 4 | Item 5 | Item 6 |
|---|---|---|---|---|---|
| Magic Boots | Oracle | Brute Force Breastplate |  Concentrated Energy Concentrated Energy | Radiant Armor | Chastise Pauldron |
Build 4
| Item 1 | Item 2 | Item 3 | Item 4 | Item 5 | Item 6 |
|---|---|---|---|---|---|
| Magic Boots |  Cursed Helmet Cursed Helmet | Oracle | Brute Force Breastplate | Concentrated Energy | Chastise Pauldron |
Build 5
| Item 1 | Item 2 | Item 3 | Item 4 | Item 5 | Item 6 |
|---|---|---|---|---|---|
| Magic Boots | Brute Force Breastplate | Oracle | Chastise Pauldron | Radiant Armor | Winter Crown |
Five ranked in-game build snapshots in displayed order.
Alice Equipment Matrix
| Item | Why it appears | Buy when | Do not buy when |
|---|---|---|---|
| Magic Boots | Movement Speed, Cooldown Reduction, and HP accelerate Crimson Gleam and Doom Waltz cycles. Jungle blessings are merged into this base row. | the draft has limited control and more casts create the safest sustain | Tough or Warrior Boots resistance is more important than cooldown tempo |
| Oracle | HP, both defenses, Cooldown Reduction, and stronger received shields and HP regeneration directly reinforce Alice's drain plan. | the fight lasts long enough for Blood Banquet and Doom Waltz healing to repeat | percentage damage or anti-heal is ending the fight before regeneration matters |
| Dominance Ice | Hybrid defense, Movement Speed, nearby anti-heal, and attack-speed pressure punish carries who must stand inside Alice's aura. | the enemy relies on healing, shields, or repeated Basic Attacks at close range | the relevant healer or marksman never enters its nearby effect |
| Radiant Armor | HP, Magic Defense, HP Regen, and stacking Magic Defense answer repeated Magic Damage. | rapid magic ticks keep hitting during the same front-line exchange | one large magic burst requires a different resistance profile |
| Chastise Pauldron | HP and Physical Defense reduce sustained attack pressure, while its low-HP recovery can buy time for another Blood Banquet tick. | a fast Physical attacker remains on Alice through the whole engage | true damage or magic burst is the actual reason she falls |
| Brute Force Breastplate | HP, Physical Defense, Cooldown Reduction, movement, Adaptive Attack, and Control Duration Reduction build during repeated damage. | Alice can keep casting and moving inside a long objective fight | the enemy removes her in one burst before stacks matter |
| Clock of Destiny | HP, Mana, Magic Power, Cooldown Reduction, stacking Hybrid Defense, and emergency HP/Mana restoration reward constant Magic Damage. | Alice needs a mixed scaling item before the second objective cycle | an urgent resistance item is required immediately |
| Winter Crown | Adaptive Attack, HP, Cooldown Reduction, and a two-second Frozen active create a late emergency pause. | one stasis lets teammates arrive or key cooldowns return | the enemy can simply wait and surround the exit position |
| Concentrated Energy | Magic Power, HP, Hybrid Lifesteal, and rechargeable damage stacks raise the aggressive drain ceiling. | Alice already survives the entry and needs more pressure during the second rotation | defense is missing or anti-heal makes extra sustain inefficient |
| Cursed Helmet | Large HP, Magic Defense, and nearby burn improve jungle clear and prolonged front-line contact. | the jungle variant needs faster area clear and stays beside targets | lane tempo or a specific counter-defense is more urgent |
Thirty in-game item tooltips verified these effects.
Best Teammates, Threats, and Matchups
Early pressure partners


Balmond and Dyrroth compensate for Alice's slower early curve and force opponents to fight instead of freely kiting. Let them start the first contact, then place Crimson Gleam across the escape path.
Hard healing and execute threats


Baxia attacks Alice's regeneration directly, while Martis can finish her before the next healing cycle. Shorten the engage, keep an exit orb, and do not assume another HP item solves the matchup.
Favorable low-mobility targets


Cecilion and Chang'e dislike a durable hero arriving inside their preferred range. Approach from fog, preserve Scarlet Shadow for the final gap, and stop chasing once they leave the objective zone.
Draft warning


Current relationship data highlights Angela as a difficult statistical opponent and Gloo as a favorable one. Treat those icons as draft context, then decide from mechanics: shields, healing, range, anti-heal, and whether enemies can escape the aura.
Alice Base Stats
| HP | 2452 | HP Regen | 7.2 | Physical ATK | 114 |
|---|---|---|---|---|---|
| Physical DEF | 25 | Attack Speed | 1 | Attack Speed Ratio | 100% |
| Mana | 0 | Mana Regen | 0 | Magic DEF | 15 |
| Magic Power | 0 | Movement SPD | 240 | Role | Tank / Mage |
Level-one stats without equipment, Emblem, skin, or match modifiers.
Alice Skins and Availability
Seven exact Alice Shop cards were accepted. Divine Owl and Spirit Woman showed direct Diamond prices. Wizardry Teacher and Dreaming Monarch were labeled Limited-time Event, Steam Glider showed a historical StarLight membership note, Jade Empress showed S29, and Darknet Temptress showed Collection System. These are dated availability observations, not permanent sale promises.
| Preview | Skin | Tag | Observed availability |
|---|---|---|---|
 | Divine Owl | SPECIAL | 749 Diamonds; Purchase shown |
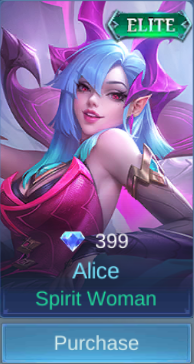 | Spirit Woman | ELITE | 399 Diamonds; Purchase shown |
 | Wizardry Teacher | LUCKYBOX | Limited-time Event |
 | Steam Glider | STAR | 02/2019 StarLight Member |
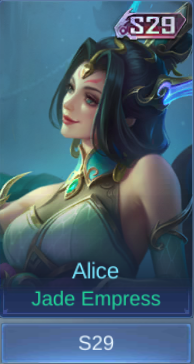 | Jade Empress | S29 | S29 |
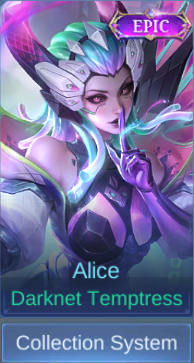 | Darknet Temptress | EPIC | Collection System |
 | Dreaming Monarch | COLLECTOR | Limited-time Event |
Current in-game Shop snapshot.
Alice Story
Love once defined Alice: her maiden dreams, her sense of worth, and the faith that made her protect her family even while imprisoned by the Monastery of Light. When the lies around her were exposed, she decided power and authority were the only truths she could trust. She carved a path to become the Abyss's Queen of Blood and swore never to serve as another person's pawn. From her throne, Alice intends to move the pieces herself.
Alice FAQ
What is the best Alice build?
Use Oracle as the shared sustain checkpoint, then combine Magic Boots or a resistance boot with Brute Force Breastplate and the defense that matches enemy damage. Clock of Destiny, Concentrated Energy, Cursed Helmet, and Winter Crown are role- and draft-specific choices.
What is the best Alice Emblem?
Tank Emblem with Vitality is the safest default. Add Tenacity or Festival of Blood, then Impure Rage or Brave Smite. Basic Common Emblem is an aggressive alternative when another ally already handles the first front-line contact.
Which Battle Spell should Alice use?
Use Vengeance for EXP lane sustain, Retribution only in the jungle, and Flicker when one unexpected entry or escape angle is more important than sustained damage reduction.
What is Alice's main combo?
Cast Crimson Gleam, begin Throne of Ruin, recast Scarlet Shadow to move the landing circle, then use Doom Waltz and keep landing skills so Crimson Blood Banquet remains active.
Who counters Alice?
Healing reduction, percentage or true damage, ranged kiting, and repeated displacement are the main problems. Baxia is a direct sustain warning, while Martis can punish a channel started too late.
Should Alice chase the enemy back line?
Only when the path is controlled and an exit orb remains. Forcing a carry out of the objective already creates value; chasing beyond Blood Banquet range usually trades away Alice's best advantage.
Final Verdict
Alice succeeds when every button supports the same loop: create Crimson safely, activate Blood Banquet, enter with a planned escape, and keep opponents inside the circle long enough for Doom Waltz and Throne of Ruin to matter. Build Oracle and defenses for the actual enemy draft, use Vengeance before the burst arrives, and let objective space matter more than a low-percentage chase. For adjacent Mage and teamfight context, compare the Vexana guide, Odette guide, and Belerick guide.
Top up Mobile Legends: Bang Bang safely on ManaBuy



Copyright © FUTURE OUTLOOK TECHNOLOGY LIMITED.Company Registration No.: 77374965 All rights reserved.UNIT 135,1/F.,143 WAI YIP STREET,KWUN TONG HK