
Dyrroth Guide: Best Build, Skills, Emblem, Combos, Counters and Skins

Dyrroth is an EXP Lane or Jungle Fighter who wins by forcing an early melee advantage. Spectre Step is the hinge: its second cast reduces Physical Defense before Burst Strike, Basic Attacks, and Abysm Strike land. He can sustain through extended contact, but he becomes predictable when he dashes without enough Rage, misses the second cast, or throws his ultimate before the target is slowed.
Quick Answer: How Should You Build and Play Dyrroth?
Take Burst Strike at level 1 and prioritize it, while upgrading Abysm Strike whenever available. For EXP lane, use Spectre Step twice to apply the defense shred, follow with Basic Attacks and Burst Strike, then reserve Abysm Strike for low-HP targets. Choose a burst route with Blade of the Heptaseas and Hunter Strike when you can snowball; choose War Axe, Brute Force Breastplate, Rose Gold Meteor, and Queen's Wings when the fight will last longer.
- Pick Dyrroth when: your team needs early dueling and a way to break high Physical Defense.
- Avoid or adapt when: slows, summons, or repeated kiting prevent the second Spectre Step from connecting.
- Default rule: defense shred first, damage second, lost-HP ultimate last.
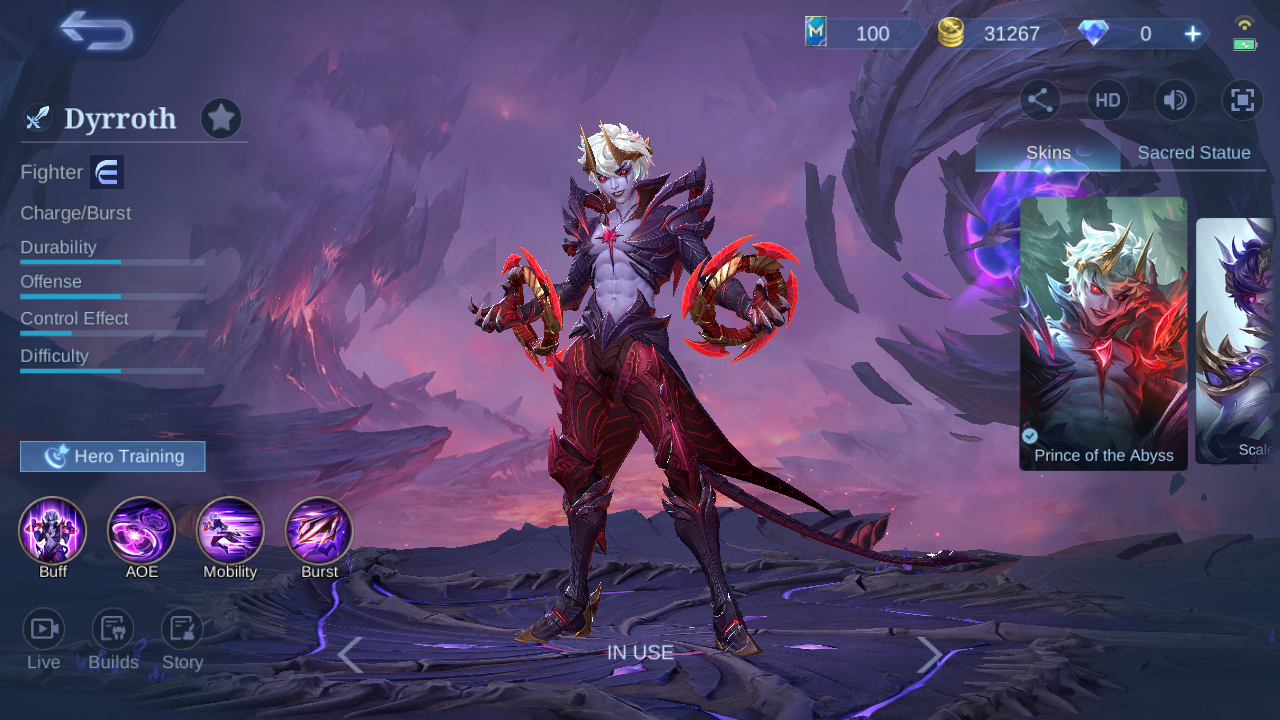
Dyrroth at a Glance
| Role | Specialty | Best job | Main risk |
|---|---|---|---|
| Fighter | Charge / Burst | Early duels, defense shred, low-HP finishes | Kiting and missed second-cast Spectre Step |
| Durability | Offense | Control | Difficulty |
| Approx. 55% | Approx. 55% | Approx. 28% | Approx. 55% |
Attribute bars are approximate visual measurements.
Dyrroth Skills: Mechanics and Decisions
 Wrath of the Abyss
At 50% Rage, Dyrroth enhances Burst Strike and Spectre Step. Every two Basic Attacks trigger a Circle Strike that damages nearby enemies, restores Max HP, and reduces the cooldown of both basic skills when he deals damage.
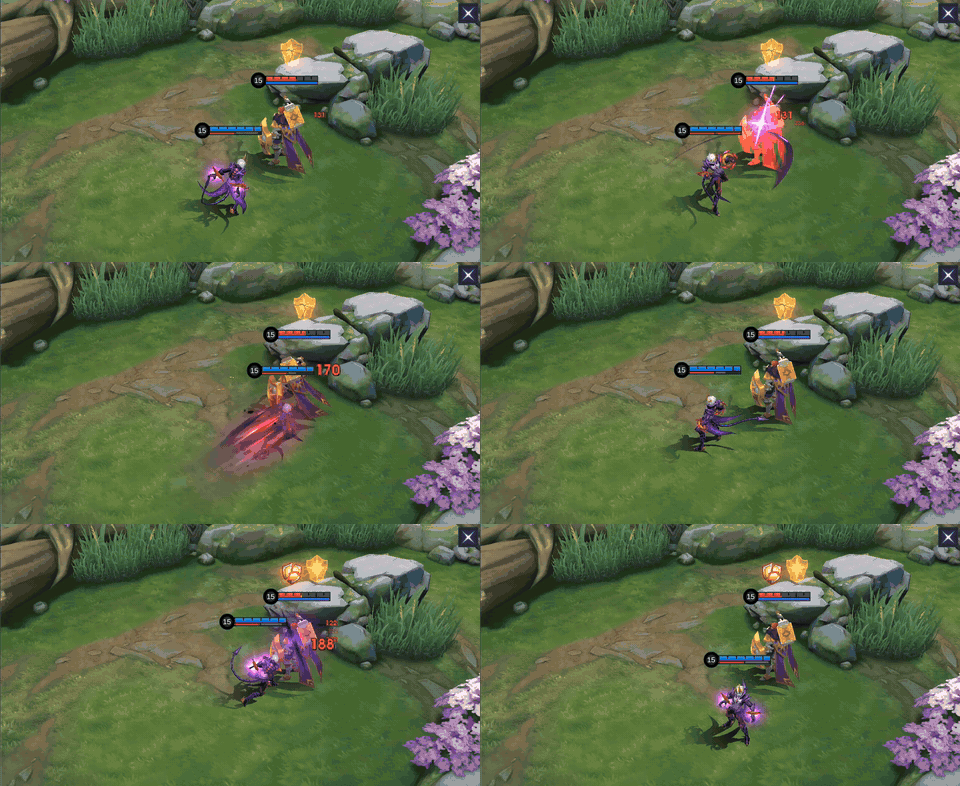
you can stay in melee range long enough to trigger the Circle Strike
the heal and cooldown reduction turn repeated contact into another enhanced skill cycle
Do not enter a long trade with empty Rage and no route out
 Burst Strike
A directional multi-hit attack that slows for 1.5 seconds. The enhanced version reaches farther, deals 140% of the original damage, and doubles the slow.

a target is retreating in a straight line or Spectre Step has already reduced its defense
the slow keeps the target inside Basic-Attack and ultimate range
Do not spend enhanced Rage on blind wave clear when a duel is about to start
 Spectre Step
The first cast dashes until Dyrroth reaches a hero or Creep. The second cast locks on for a Fatal Strike that reduces Physical Defense by 40% for four seconds; the enhanced version reaches farther, slows harder, and cuts defense by 60%.

you can land both casts and still survive the return damage
the defense reduction is the setup that makes every later Physical hit more valuable
Do not stop after the first dash unless disengaging is safer than committing
 Abysm Strike
After a short delay, Dyrroth strikes in a line for heavy Physical Damage plus 25% of the target's lost HP, then slows. Only Suppression can interrupt the cast.

the target is already damaged, slowed, crowd-controlled, or committed to a narrow route
lost-HP scaling makes it a finisher instead of an opener
Do not aim it before using movement, slow, or allied control to reduce the target's escape options
Dyrroth Skill Priority and Combos
Skill upgrade priority
Take Burst Strike at level 1 and prioritize it, keep Spectre Step as the backup upgrade, and level Abysm Strike whenever available. Burst Strike supplies repeatable lane damage and slow. The priority does not make Spectre Step disposable: its second cast is still the setup that makes the rest of the combo hit harder.
Teamfight combo
 Spectre Step→
 Spectre Step→
 Basic Attack→
 Burst Strike→
 Abysm Strike
Order: Spectre Step → second Spectre Step → Basic Attack → Burst Strike → Abysm Strike. Why: the second dash cuts Physical Defense, the Basic Attack advances passive value, Burst Strike slows, and the ultimate converts missing HP into finishing damage. Do not: open with Abysm Strike against a healthy mobile target.
Laning combo
 Spectre Step→
 Spectre Step→
 Basic Attack→
 Burst Strike
Order: Spectre Step → second Spectre Step → Basic Attack → Burst Strike. When: the enemy spends its escape or walks close enough that both dashes can connect. Do not: continue the trade if the second cast misses; the defense shred is the reason the exchange favors Dyrroth.
How to Play Dyrroth by Game Phase
Early game
Build Rage on minions, threaten the second Spectre Step, and fight around level and wave advantages. Why: short trades become strong after the defense shred. Do not stand inside a stacked enemy wave only to force the dash.
Mid game
Use side-lane pressure or jungle tempo to enter objectives first. Hide the first dash angle, mark a target with the second cast, and let allies add control before Abysm Strike. Why: objective entrances create predictable movement for the ultimate. Do not chase through fog after spending both dashes.
Late game
Stop treating every fight like an early duel. Shred the safest priority target, threaten a flank, or punish a frontliner that oversteps. Why: Abysm Strike's lost-HP scaling matters more after allies deal damage. Do not dive the back line if kiting tools are still available.
Five Dyrroth Mistakes That Waste His Early Power
- Starting with the ultimate. Abysm Strike is strongest after damage has already removed HP.
- Using only one Spectre Step. The second cast applies the defense reduction that powers the combo.
- Entering with low Rage. Enhanced skills extend range, slow harder, and increase defense shred.
- Copying a jungle boot route into EXP lane. Ice Hunter's Tough Boots and Retribution are role-specific, not a universal build.
- Chasing mobile targets after both dashes. Dyrroth has damage but no safe third movement tool; reset when the target still has an escape.
Best Dyrroth Emblem and Battle Spell
EXP lane: Assassin Emblem + Flicker
Talents: Thrill, Master Assassin, Lethal Ignition. When: isolated EXP duels and angle-changing ultimate finishes. Why: Adaptive Attack and single-target pressure match Dyrroth's early lane window, while Flicker can extend or redirect Abysm Strike and provide a retreat. Do not: spend Flicker to begin a low-information chase.
Jungle: Assassin Emblem + Retribution
Talents: Rupture, Seasoned Hunter, Killing Spree. When: Dyrroth is the jungler and must secure Turtle or Lord. Why: penetration, objective tempo, and reset healing fit the five in-game-observed jungle rows. Do not: carry Seasoned Hunter or Retribution into an EXP-lane setup.
Emblem and spell sources accessed July 31, 2026.
Current Dyrroth Pro Setups
Five Build snapshots were available. Ranks 1 and 2 use the same sustain shell: Tough Boots, War Axe, Brute Force Breastplate, Rose Gold Meteor, Radiant Armor, and Queen's Wings. Ranks 3-5 shift toward penetration and finishing power. Why: the first shell survives repeated contact, while the later rows shorten the time between defense shred and the finish. Copy the shell that matches the job, then change boots, anti-heal, and defense for the enemy draft instead of copying all six slots blindly.
Build 1
| Item 1 | Item 2 | Item 3 | Item 4 | Item 5 | Item 6 |
|---|---|---|---|---|---|
 Tough Boots Tough Boots |  War Axe War Axe |  Brute Force Breastplate Brute Force Breastplate |  Rose Gold Meteor Rose Gold Meteor |  Radiant Armor Radiant Armor |  Queen's Wings Queen's Wings |
Build 2
| Item 1 | Item 2 | Item 3 | Item 4 | Item 5 | Item 6 |
|---|---|---|---|---|---|
| Ice Hunter's Tough Boots | War Axe | Brute Force Breastplate | Rose Gold Meteor | Radiant Armor | Queen's Wings |
Build 3
| Item 1 | Item 2 | Item 3 | Item 4 | Item 5 | Item 6 |
|---|---|---|---|---|---|
| Tough Boots |  Blade of the Heptaseas Blade of the Heptaseas |  Sky Piercer Sky Piercer |  Sea Halberd Sea Halberd | Rose Gold Meteor | Queen's Wings |
Build 4
| Item 1 | Item 2 | Item 3 | Item 4 | Item 5 | Item 6 |
|---|---|---|---|---|---|
 Warrior Boots Warrior Boots | Blade of the Heptaseas | Sky Piercer |  Hunter Strike Hunter Strike | Rose Gold Meteor | Queen's Wings |
Build 5
| Item 1 | Item 2 | Item 3 | Item 4 | Item 5 | Item 6 |
|---|---|---|---|---|---|
| Tough Boots | Sea Halberd | Rose Gold Meteor | Queen's Wings | Blade of the Heptaseas |  Malefic Roar Malefic Roar |
Ranked builds as of July 31, 2026.
Dyrroth Equipment Matrix
Why this matrix matters: Dyrroth already supplies heavy Physical Defense reduction, so each slot should solve access, sustain, anti-heal, armor, or survival instead of merely adding the largest damage number.
| Item | Decision role | Buy when | Do not buy when |
|---|---|---|---|
| Tough Boots | Magic Defense and shorter crowd-control/slow duration; the Ice Hunter variant adds jungle Retribution behavior. | magic damage or control is the main access problem | Do not buy when Warrior Boots better answers repeated Physical hits. |
| Warrior Boots | Physical Defense and stacking Valor protection against repeated Physical Damage. | the enemy lane or diver deals sustained Physical Damage | Do not buy when crowd control and magic burst are the real threats. |
| War Axe | HP, cooldown reduction, Hybrid Lifesteal, and Fighting Spirit reward extended combat. | you expect repeated skill cycles rather than one short combo | Do not buy when you need immediate penetration for a fragile target. |
| Brute Force Breastplate | HP, Physical Defense, cooldown reduction, movement, and full-stack control-duration reduction. | you are front-lining through mixed skirmishes | Do not buy when the match requires a dedicated magic-defense answer. |
| Blade of the Heptaseas | Physical Attack, HP, penetration, and an Ambush hit after leaving combat. | you can enter from fog or after a reset | Do not buy when you are forced into uninterrupted front-line combat. |
| Sky Piercer | Adaptive Attack, movement, and a low-HP execute threshold that grows with successful kills. | you are ahead and can protect stacks | Do not buy when deaths are likely to erase the item's value. |
| Hunter Strike | Physical Attack, cooldown reduction, penetration, and a movement burst after repeated hits. | you need to stay attached after Spectre Step | Do not buy when anti-heal or defense is more urgent. |
| Sea Halberd | Physical Attack, Attack Speed, anti-heal, and bonus damage into higher-extra-HP targets. | healing, shields, or high-HP fighters block your finish | Do not buy when the enemy has no meaningful sustain. |
| Rose Gold Meteor | Attack stats, Lifesteal, Hybrid Defense, and a low-HP shield with decaying movement speed. | burst threatens to remove you before passive healing stabilizes the fight | Do not buy when a dedicated armor item answers the damage more efficiently. |
| Radiant Armor | High HP, Magic Defense, regeneration, and stacking Magic Defense after taking magic damage. | rapid repeated magic hits are the main threat | Do not buy when the enemy mage relies on one isolated burst instance. |
| Queen's Wings | HP, Adaptive Attack, cooldown reduction, Spell Vamp, low-HP damage reduction, and increasing damage as HP falls. | you can continue fighting after the first burst | Do not buy when the enemy can execute or kite you before the low-HP window matters. |
| Malefic Roar | Physical Attack and scaling Physical Penetration against armored targets. | late-game armor prevents Abysm Strike from finishing | Do not buy when targets are still fragile and a survival item is needed. |
Dyrroth Counters and Team Synergy
| Draft read | Heroes | Mechanism and action |
|---|---|---|
| Dyrroth pressures |   | Low-mobility damage dealers struggle once both Spectre Step casts connect. Approach from fog, apply the shred, and finish before their team peels. |
| Dyrroth struggles into |   | Slows, control, and summons make straight-line access unreliable. Clear the summon or bait control before committing the second dash. |
| Best control partners |   | Single-target control removes the dodge window for Spectre Step and Abysm Strike. Let the control land first, then apply defense shred. |
| Strong direct target |  | Physical-defense reduction and anti-heal item access help Dyrroth punish durable regeneration. Bring Sea Halberd when healing prevents the finish. |
| Reliable protection partner |  | Lolita can cover the approach and hold enemies in a predictable area. Fight inside her protection instead of dashing beyond it. |
| Mobility warning |  | Repeated movement can dodge the second dash or ultimate line. Wait for her mobility sequence, then commit. |
| Team-shape caution |  | Both Fighters want close-range time and may leave the team short on back-line access. Draft enough control or ranged follow-up. |
Dyrroth Base Stats
| HP | 2,580 | Mana | 0 |
|---|---|---|---|
| HP Regen | 8.2 | Mana Regen | 0 |
| Physical ATK | 117 | Magic Power | 0 |
| Physical DEF | 22 | Magic DEF | 15 |
| Attack Speed | 1.14 | Movement SPD | 265 |
| Attack Speed Ratio | 100% | Resource | Rage |
Level-one stats as of July 31, 2026.
Dyrroth Skins and Availability
The in-game Shop displayed seven Dyrroth cards. Direct-sale prices, StarLight dates, collaboration labels, and limited-event availability are dated observations; check the current Shop before spending because rotations can change.
| Preview | Skin | Series | Observed availability |
|---|---|---|---|
 | V.E.N.O.M. Cobra | V.E.N.O.M. | 899 Diamonds / Purchase |
 | Scalebore | Standard | 269 Diamonds / Purchase |
 | Orochi Chris | The King of Fighters | Limited-time Event |
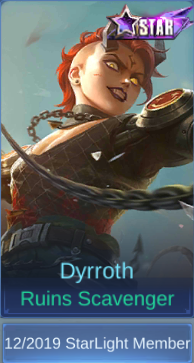 | Ruins Scavenger | STAR | 12/2019 StarLight Member |
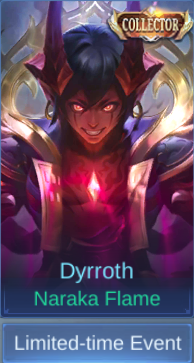 | Naraka Flame | COLLECTOR | Limited-time Event |
 | Gon | Hunter x Hunter | Limited-time Event |
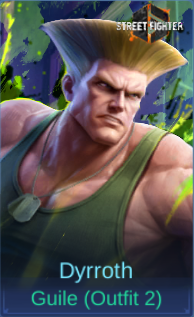 | Guile (Outfit 2) | Street Fighter | Limited-time Event |
Dyrroth Story
Born as Prince Aurelius of the Moniyan Empire, Dyrroth was abducted and shaped by Alice into the Abyss's fiercest champion. He embraces the power that remade him, while Silvanna refuses to abandon the bond with her lost brother. That conflict explains both his royal identity and his savage, strength-first style.
Dyrroth FAQ
What is Dyrroth's best teamfight combo?
Use Spectre Step twice, Basic Attack, Burst Strike, then Abysm Strike. The second dash applies Physical Defense reduction, Burst Strike slows, and the ultimate gains value from the HP already removed.
Which Dyrroth skill should I level first?
Take Burst Strike at level 1 and prioritize it, keep Spectre Step as the backup upgrade, and level Abysm Strike whenever available.
What is the best Emblem for EXP Dyrroth?
Assassin Emblem with Thrill, Master Assassin, and Lethal Ignition supports early isolated duels. Flicker is the flexible EXP spell for changing the ultimate angle or escaping after a commit.
What should Jungle Dyrroth use?
Use Assassin Emblem with Rupture, Seasoned Hunter, and Killing Spree plus Retribution. This route is tied to the jungle role and objective control.
Should Dyrroth build full damage?
Only when he can reach targets and keep the lead. The Build snapshots also support a sustain shell with War Axe, Brute Force Breastplate, Rose Gold Meteor, Radiant Armor, and Queen's Wings.
Are Dyrroth skin prices permanent?
No. The table records the in-game on July 31, 2026; direct-sale prices and event or collaboration availability can change.
Verdict: Is Dyrroth Worth Learning?
Yes if you want an aggressive Fighter with a clear early-win condition. His execution is not about pressing every skill quickly; it is about entering with Rage, landing the second Spectre Step, and saving Abysm Strike for a damaged target. Players who learn that order can dominate lane and objectives. Players who dash first and plan later will be kited.
Related MLBB Guides
Compare sustained Fighter decisions in the Alpha Guide, study close-range carry pressure in the Freya Guide, or review single-target control setup in the Franco Guide.





Copyright © FUTURE OUTLOOK TECHNOLOGY LIMITED.Company Registration No.: 77374965 All rights reserved.UNIT 135,1/F.,143 WAI YIP STREET,KWUN TONG HK