
Kadita MLBB Mid Lane Guide: Best Build, Emblem, Combos, and Counters

Kadita is a Mid Lane Mage/Assassin who turns terrain and brief control windows into point-blank burst. Ocean Ode carries her through walls with damage reduction and control immunity, Breath of the Ocean provides the knock-up, and Rough Waves becomes lethal when several waves overlap the same target. Her best fights begin from fog, end quickly, and leave a safe underground path back toward her team.

When to Pick Kadita
Pick Kadita when your team needs a magic burst threat who can approach from unusual angles. She is especially dangerous around river walls, jungle entrances, and narrow objective paths where Ocean Ode hides the direction of her entry. Atlas and Tigreal are excellent partners because their area control keeps several enemies close enough for Breath of the Ocean and Rough Waves to overlap.
Kadita also pressures low-mobility back-line mages such as Aurora and Eudora. They are vulnerable once the wave reaches them and have difficulty escaping the faster eruption created during Ocean Ode. Be more cautious into long-range physical carries such as Clint and Beatrix. Their spacing and mobility can punish a visible approach, so use side vision and wait until their displacement or escape tool is committed.
Kadita Skills and Practical Uses

Thalassophobia
Kadita gains Blessing of the Ocean every 30 seconds. Hero damage triggers it for 4 seconds, then restores 65% of the HP she lost during that window; minions and creeps do not trigger it.
Use: Trade decisively when the blessing is ready, then disengage long enough for the delayed recovery to arrive. Avoid: Do not mistake the recovery for instant protection; lethal burst can finish Kadita before the four-second window ends.
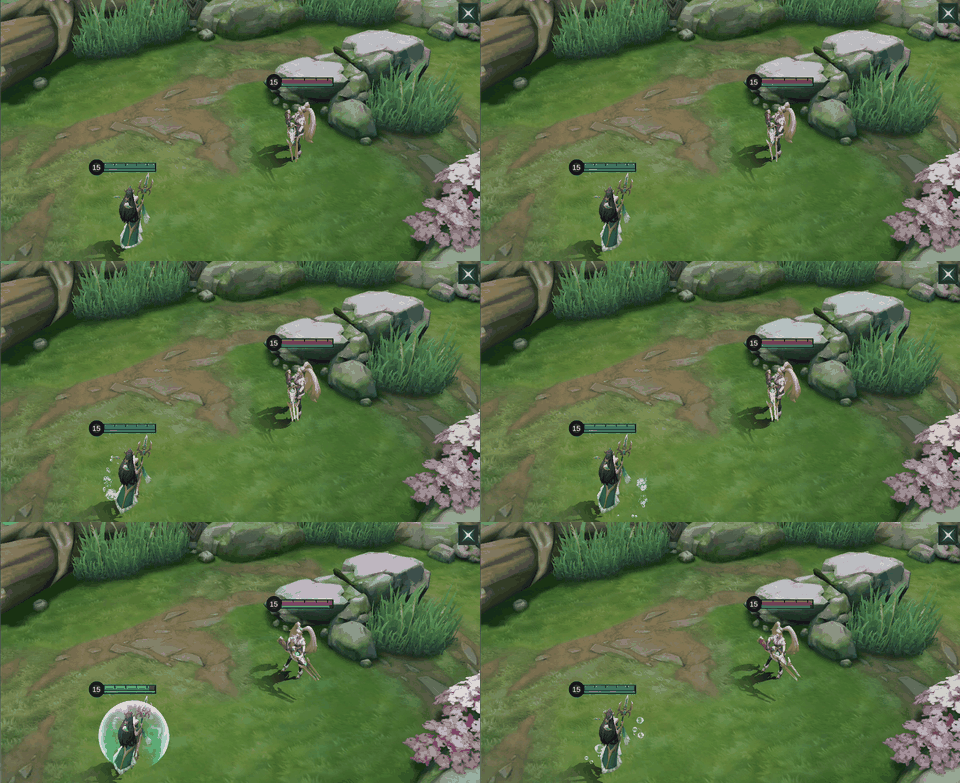

Ocean Ode
Kadita rides a wave, dealing 250 plus 90% Total Magic Power Magic Damage and slowing enemies by 30%. She is control immune, takes 50% less damage, can cross terrain, and may recast to leave the wave early.
Use: Approach from fog or through terrain, then leave the wave where Breath of the Ocean can catch the target. Avoid: Control immunity does not stop Suppression, so do not ride directly into a suppression hero with their ultimate ready.
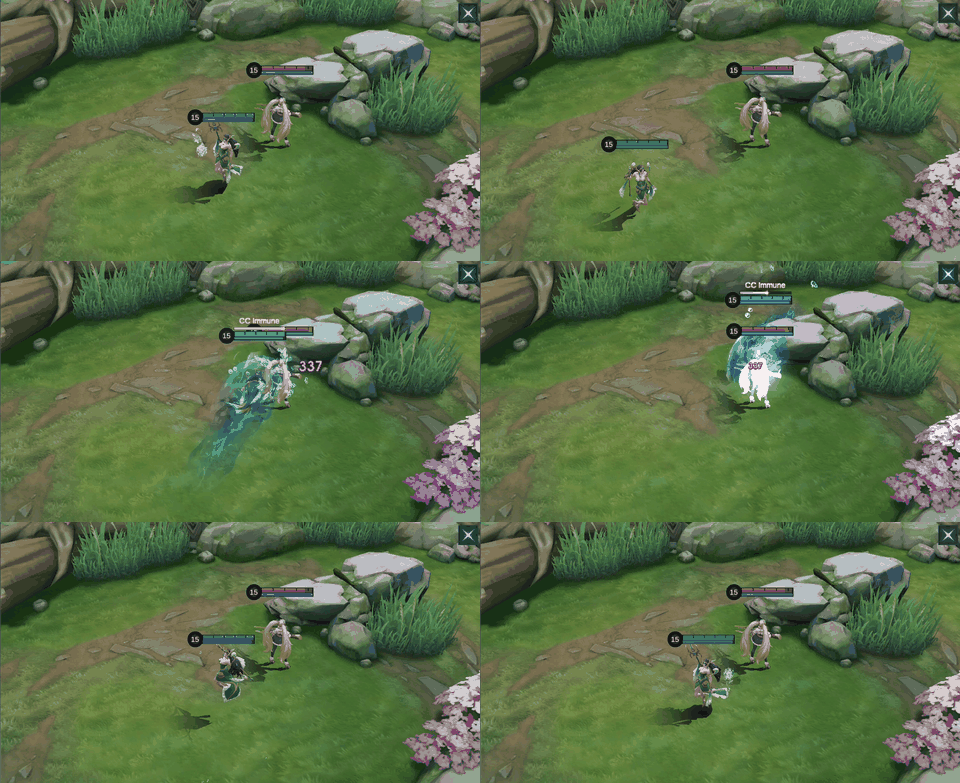

Breath of the Ocean
Kadita marks an area that erupts for 350 plus 140% Total Magic Power Magic Damage and knocks enemies airborne for 1 second. Casting during Ocean Ode shortens the delay.
Use: Place it during Ocean Ode so the faster eruption lands as Kadita exits the wave. Avoid: From neutral range, the longer warning lets mobile targets step away; set it from cover or after allied control.
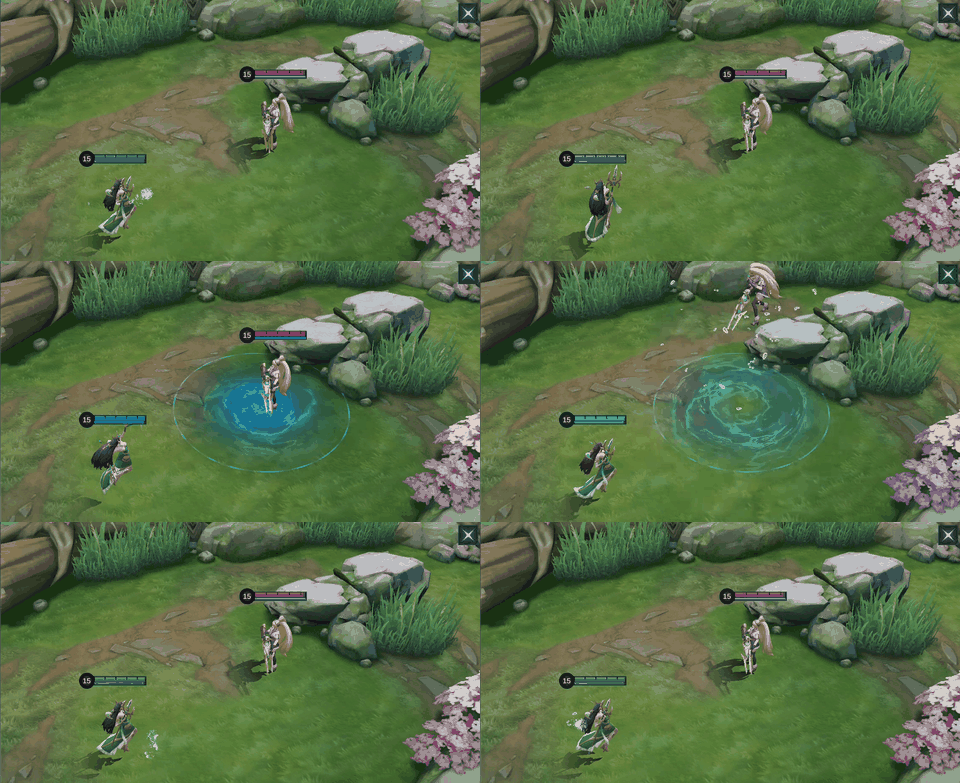

Rough Waves
Kadita sends waves outward for 270 plus 60% Total Magic Power Magic Damage each and slows by 30%, then the waves return for 180 plus 40% Total Magic Power each. She becomes untargetable and gains 60% Movement Speed while underground; only Suppression interrupts the cast.
Use: Cast at point-blank range after the knock-up so several outward and returning waves overlap the same target. Avoid: Do not surface along the most obvious escape line; use the underground Movement Speed to reposition before the returning damage ends.
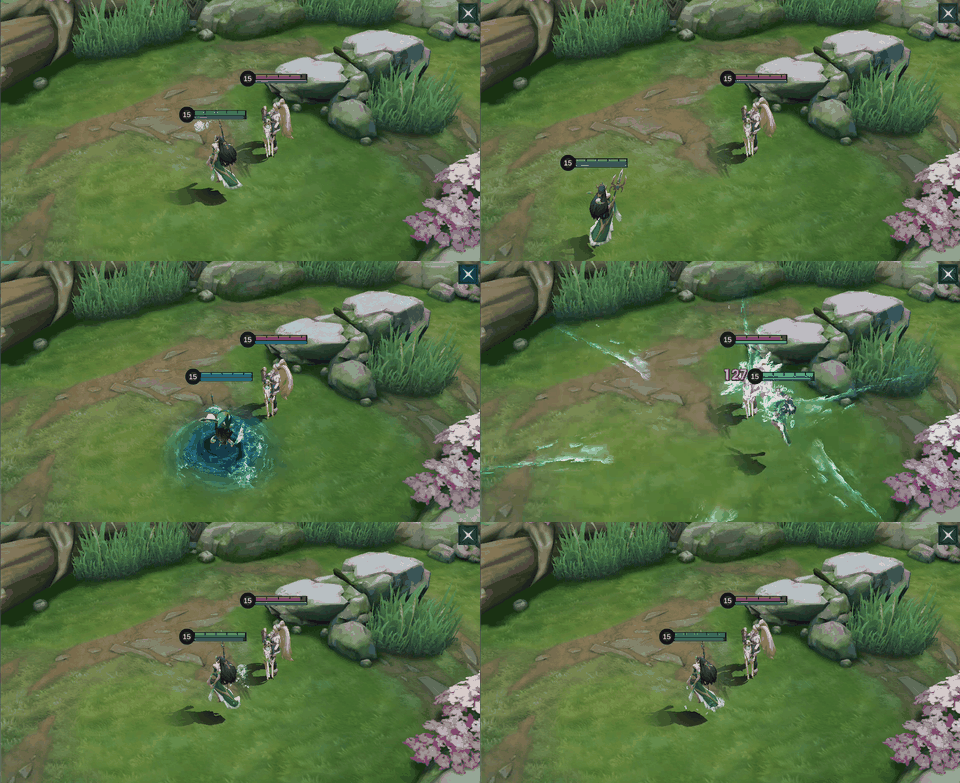
Skill Priority and Kadita Combos
Take Ocean Ode at level one and prioritize it, with Breath of the Ocean as the supporting upgrade. Level Rough Waves whenever it is available. Ocean Ode improves wave clear, rotation speed, entry safety, and the shortened Breath of the Ocean eruption, so it influences nearly every part of Kadita's game.
Teamfight burst



Ocean Ode → Breath of the Ocean → Rough Waves. Cast Breath during the wave, exit beside the priority target, and release Rough Waves as the knock-up begins. Petrify can bridge any timing gap or hold nearby targets for more wave hits. Move underground toward the safer side of the fight instead of resurfacing deeper behind the enemy.
Laning catch



Ocean Ode → Ocean Ode recast → Breath of the Ocean. Ride through the wave or a side wall, recast to leave at the correct distance, then place the eruption where the opponent must retreat. This lighter sequence preserves Rough Waves when the target is too healthy or the river is unsafe.
How to Play Kadita by Game Phase
Early game
Use Ocean Ode to clear while clipping the enemy only when the return path is safe. The passive encourages short, deliberate trades, but its heal arrives after four seconds and cannot rescue Kadita from immediate lethal damage. Push the wave before rotating, then enter the river through terrain rather than walking through the center of vision.
Mid game
Fight around bushes and walls near Turtle or the first Lord. Let a tank show first, then approach from a second angle. A clean knock-up into Rough Waves can remove a damage dealer before the objective fight develops. If the target survives, travel underground toward allies and wait for Ocean Ode instead of chasing with Basic Attacks.
Late game
Patience matters more than speed. Track enemy suppression, displacement, and defensive items, then choose a target without immediate backup. Divine Glaive rises in value as Magic Defense appears. Blood Wings helps with the first contact, while Glowing Wand or Wishing Lantern is better when high-HP targets consistently survive the initial overlap.
Five Common Kadita Mistakes
- Riding Ocean Ode through open vision and giving the back line time to spread.
- Placing Breath of the Ocean after leaving the wave, which restores the longer warning and makes it easier to dodge.
- Using Rough Waves at the edge of its reach instead of point-blank, losing the multi-wave overlap that creates Kadita's burst.
- Treating control immunity as protection from Suppression.
- Surfacing behind the enemy after the ultimate when the safer underground route leads back toward allies.
Best Emblem and Battle Spell
Custom Mage Emblem fits Kadita's one-rotation damage pattern. Rupture adds early penetration, Pull Yourself Together shortens the cooldown of her battle spell and active equipment, and Lethal Ignition rewards a fast sequence of separate damage hits. Together they improve the first successful entry instead of asking Kadita to remain exposed for a long trade.
Petrify is the default because it can keep a target in the danger zone between Ocean Ode, Breath of the Ocean, and Rough Waves. Flicker is the alternative when access is the larger problem: it creates a longer initiation line and lets Kadita change her final position after opponents react to the wave. Choose Petrify for reliable control and Flicker for angle creation.
Best Kadita Build Logic
Arcane Boots and Genius Wand create strong early penetration, while Lightning Truncheon supplies Mana, Cooldown Reduction, wave clear, and a dependable burst trigger. Holy Crystal is the main raw-power multiplier. Divine Glaive should move forward as soon as important targets buy Magic Defense instead of waiting for a fixed final slot.
Sky Piercer is valuable when Kadita is already securing finishes and can protect its execute progress. Blood Wings adds a large power spike plus a shield for dangerous entries. Glowing Wand brings burn and healing reduction into sustain-heavy games. Magic Boots trade early penetration for more frequent rotations, and Wishing Lantern adds current-HP pressure when a front line survives the first combo.
Current In-Game Builds
These five current in-game builds were observed on August 14, 2026. Compare the six-item order and adjust utility or defensive slots for the match.
Build 1
| Item 1 | Item 2 | Item 3 | Item 4 | Item 5 | Item 6 |
|---|---|---|---|---|---|
 Arcane Boots Arcane Boots |  Sky Piercer Sky Piercer |  Genius Wand Genius Wand |  Lightning Truncheon Lightning Truncheon |  Blood Wings Blood Wings |  Holy Crystal Holy Crystal |
Build 2
| Item 1 | Item 2 | Item 3 | Item 4 | Item 5 | Item 6 |
|---|---|---|---|---|---|
| Arcane Boots | Genius Wand | Lightning Truncheon | Blood Wings |  Divine Glaive Divine Glaive | Holy Crystal |
Build 3
| Item 1 | Item 2 | Item 3 | Item 4 | Item 5 | Item 6 |
|---|---|---|---|---|---|
| Genius Wand | Arcane Boots | Lightning Truncheon | Divine Glaive | Holy Crystal |  Glowing Wand Glowing Wand |
Build 4
| Item 1 | Item 2 | Item 3 | Item 4 | Item 5 | Item 6 |
|---|---|---|---|---|---|
| Arcane Boots | Genius Wand | Lightning Truncheon | Blood Wings | Divine Glaive | Holy Crystal |
Build 5
| Item 1 | Item 2 | Item 3 | Item 4 | Item 5 | Item 6 |
|---|---|---|---|---|---|
| Genius Wand |  Magic Boots Magic Boots | Lightning Truncheon | Divine Glaive | Holy Crystal |  Wishing Lantern Wishing Lantern |
Equipment Guide
Use the item notes below to decide what each slot contributes. The table describes each item independently of the numbered builds.
| Item | What it adds | When to consider it |
|---|---|---|
| Arcane Boots | Movement Speed, Magic Power, and flat Magic Penetration for early burst. | Choose for the strongest early penetration; switch to Magic Boots only when faster rotations matter more than immediate burst. |
| Sky Piercer | Adaptive Attack and Movement Speed, plus an execute threshold that grows through successful kills and falls on death. | Buy when Kadita can reliably finish low-health targets; replace it in slow games where execute stacks are difficult to protect. |
| Genius Wand | Magic Power, Movement Speed, Magic Penetration, and stacking Magic Defense reduction after magic damage. | Complete early against low-to-medium Magic Defense and when several hits can stack the reduction. |
| Lightning Truncheon | Magic Power, Mana, Cooldown Reduction, and a periodic echo burst that scales with Total Magic Power. | Use as the dependable wave-clear and burst core once Mana and Cooldown Reduction improve every rotation. |
| Blood Wings | High Magic Power and a regenerating shield that also improves Movement Speed while active. | Buy for a large late burst spike and a shield that helps Kadita reach or leave the center of a fight. |
| Holy Crystal | Very high Magic Power plus a level-scaling percentage increase to total Magic Power. | Finish when raw Magic Power gives the best damage increase; delay it if percentage penetration is urgently needed. |
| Divine Glaive | Magic Power and percentage Magic Penetration that improves against higher enemy Magic Defense. | Move earlier when opponents build Magic Defense; keep it later against teams that remain fragile and unprotected. |
| Glowing Wand | Magic Power, HP, Movement Speed, a max-HP burn, and reduced enemy healing and shielding. | Choose against healing, shields, or high-HP targets that survive the first burst. |
| Magic Boots | Movement Speed, Cooldown Reduction, and HP for more frequent skill rotations. | Take when lower cooldowns create more pick attempts; Arcane Boots remain better for early penetration. |
| Wishing Lantern | Magic Power, Mana, Cooldown Reduction, and current-HP butterfly damage after enough magic damage is dealt. | Use against high-current-HP frontliners after Kadita can reliably accumulate its damage trigger. |
Best Teammates and Matchups
Reliable setup partners



Atlas and Tigreal gather targets for multi-wave damage, while Valentina can add flexible control or burst. Enter a moment after their first contact so enemy escape skills are already under pressure.
Back-line targets


Aurora and Eudora have limited mobility once Kadita reaches their position. Approach through terrain and respect their control before committing; Ocean Ode reduces risk, but a badly timed exit can still be punished.
Spacing threats


Clint and Beatrix can pressure from outside a comfortable entry line and reposition when Breath of the Ocean becomes visible. Attack from fog, wait for mobility to be spent, or let allied control define the approach.
Kadita Base Stats
| Stat | Level 1 |
|---|---|
| HP | 2440 |
| HP Regen | 7.2 |
| Physical Attack | 105 |
| Physical Defense | 18 |
| Attack Speed | 1 |
| Attack Speed Ratio | 100% |
| Mana | 500 |
| Mana Regen | 4 |
| Magic Power | 0 |
| Magic Defense | 15 |
| Movement Speed | 250 |
These values exclude equipment, Emblems, skins, and match modifiers.
Kadita Skins and Availability
Heart of the Sea, White Robin, Hydromancer, and Atlantean Princess show direct Diamond prices. Maiden of the Tide is associated with the August 2025 StarLight membership, while Anthem of Tides is tied to a limited-time event.

Heart of the Sea
899 Diamonds shown in-game

White Robin
749 Diamonds shown in-game

Hydromancer
749 Diamonds shown in-game

Atlantean Princess
269 Diamonds shown in-game

Maiden of the Tide
August 2025 StarLight Member

Anthem of Tides
Limited-time Event
Kadita Story
Kadita was a princess from a southern island until a jealous member of the royal family and a dark mage cursed her. Cast into the sea after her illness worsened, she survived through the power of the ocean, became a mermaid queen, and returned as the legendary guardian of the Southern Seas.
Related MLBB Guides
- Browse the MLBB guide hub for more current hero guides.
- Tigreal Roam guide covers a tank whose area control creates excellent Rough Waves targets.
- Eudora Mid Lane guide explains one of the low-mobility burst matchups Kadita can pressure.
Kadita FAQ
Which Kadita skill should be upgraded first?
Take Ocean Ode at level one and prioritize it, keep Breath of the Ocean as the supporting upgrade, and level Rough Waves whenever it is available.
What is Kadita's best battle spell?
Petrify is the dependable default for holding targets through the combo. Flicker is stronger when reaching the back line from an unexpected angle is the main challenge.
Why is Genius Wand core on Kadita?
It combines Magic Power, movement, penetration, and stacking Magic Defense reduction, all of which fit her multi-hit burst.
Can Ocean Ode ignore every control effect?
No. Kadita is control immune in the wave, but Suppression still affects her.
When should Kadita buy Divine Glaive?
Move it earlier when important targets start building Magic Defense. Keep raw Magic Power ahead of it only while those targets remain lightly protected.
Final Verdict
Kadita rewards hidden approach angles and exact timing. Clear first, move through terrain, place Breath of the Ocean during Ocean Ode, and cast Rough Waves at point-blank range as the knock-up lands. Then use the underground movement to leave toward safety. With penetration timed to enemy defenses and situational items chosen for the actual draft, she can erase a priority target without donating herself after the burst.





Copyright © FUTURE OUTLOOK TECHNOLOGY LIMITED.Company Registration No.: 77374965 All rights reserved.UNIT 135,1/F.,143 WAI YIP STREET,KWUN TONG HK