
Tigreal Guide: Best Build, Emblem, Combos, Counters and Skins

Tigreal is a roaming Tank who wins fights by changing where enemies stand. His strongest play is not walking straight at the first target he sees; it is hiding the entry angle, using Sacred Hammer to push a key enemy toward his team, then holding Implosion until multiple targets or an important rescue hero are inside the pull. Current Pro Setup rows favor Conceal roaming, Fleeting Time, and layered defenses rather than damage.
Quick Answer: How Should You Build and Play Tigreal?
Take Attack Wave at level 1, prioritize it, keep Sacred Hammer as the backup upgrade, and level Implosion whenever available. Start from Conceal boots, then choose Dominance Ice, Antique Cuirass, Radiant Armor, or Chastise Pauldron according to the enemy damage. Fleeting Time is valuable when your team consistently converts engages. Use Flicker for the standard surprise engage.
- Pick Tigreal when: your team needs reliable initiation and has area damage ready to follow a pull.
- Avoid or adapt when: enemies can interrupt the early Implosion channel, disengage repeatedly, or punish a slow front entry.
- Default rule: enter from fog, move enemies toward allies, and save your second Sacred Hammer cast to extend control.
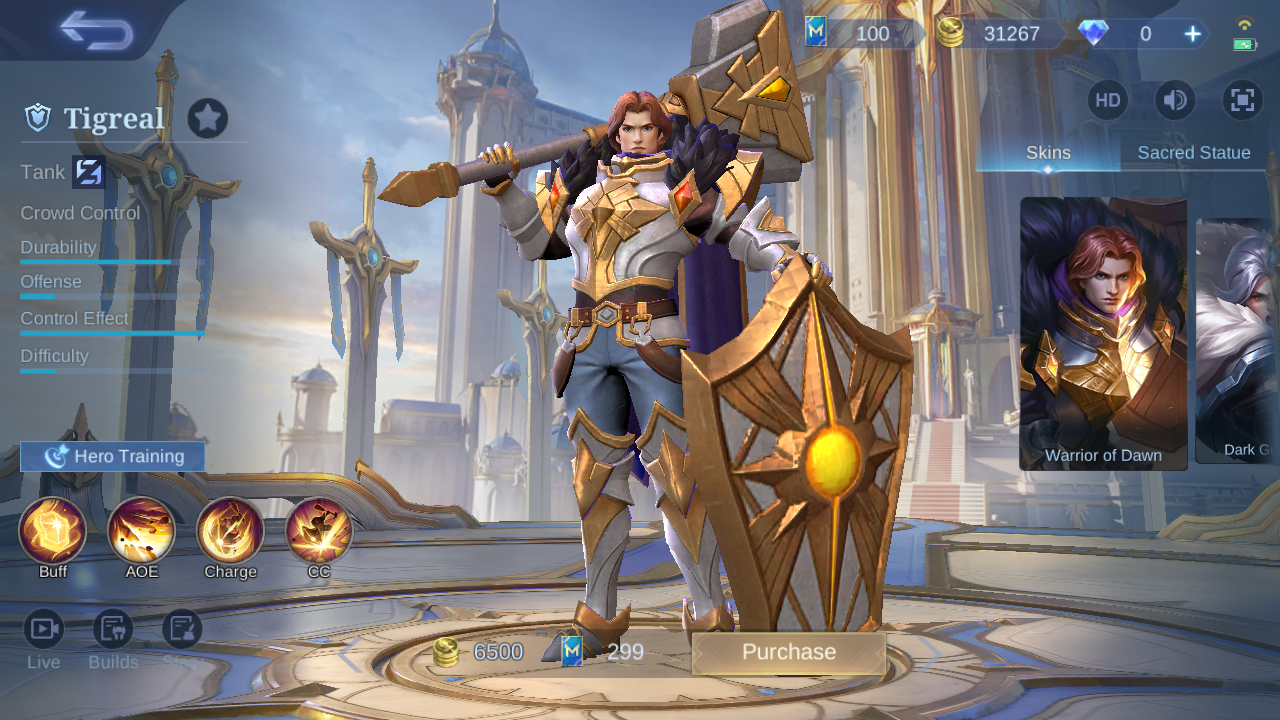
Tigreal at a Glance
| Role | Specialty | Best job | Main risk |
|---|---|---|---|
| Tank / Roamer | Crowd Control | Displace a carry and compress several enemies for allied area damage | Telegraphed entry, interrupted Implosion, or pushing a target away from follow-up |
| Durability | Offense | Control | Difficulty |
| Approx. 82% | Approx. 18% | Approx. 100% | Approx. 18% |
Attribute bars are approximate visual measurements.
Tigreal Skills: Mechanics and Decisions
 Fearless
Tigreal gains a stack whenever he casts a skill or takes a Basic Attack. At four stacks, he consumes them to block the next Basic Attack, including a turret shot; minion attacks neither add stacks nor trigger the block.
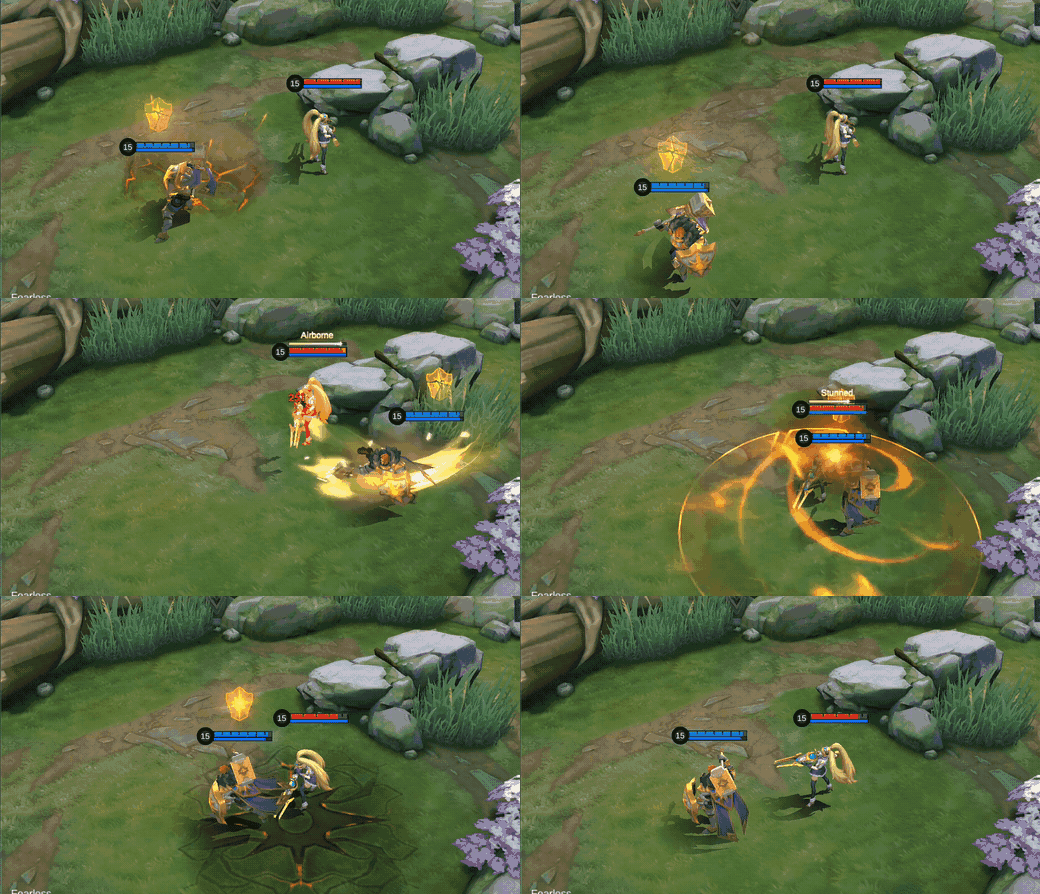
you are preparing to walk into a marksman lane, tank a turret shot, or absorb the first Basic Attack after engaging
the stored block buys time for Sacred Hammer or Implosion without spending an item cooldown
Do not count minion hits as preparation or assume Fearless blocks a spell
 Attack Wave
The hammer sends three eruptions through a fan-shaped area. Each eruption deals Physical Damage, while the slow ramps from 20% to 40% to 60% for 1.5 seconds.
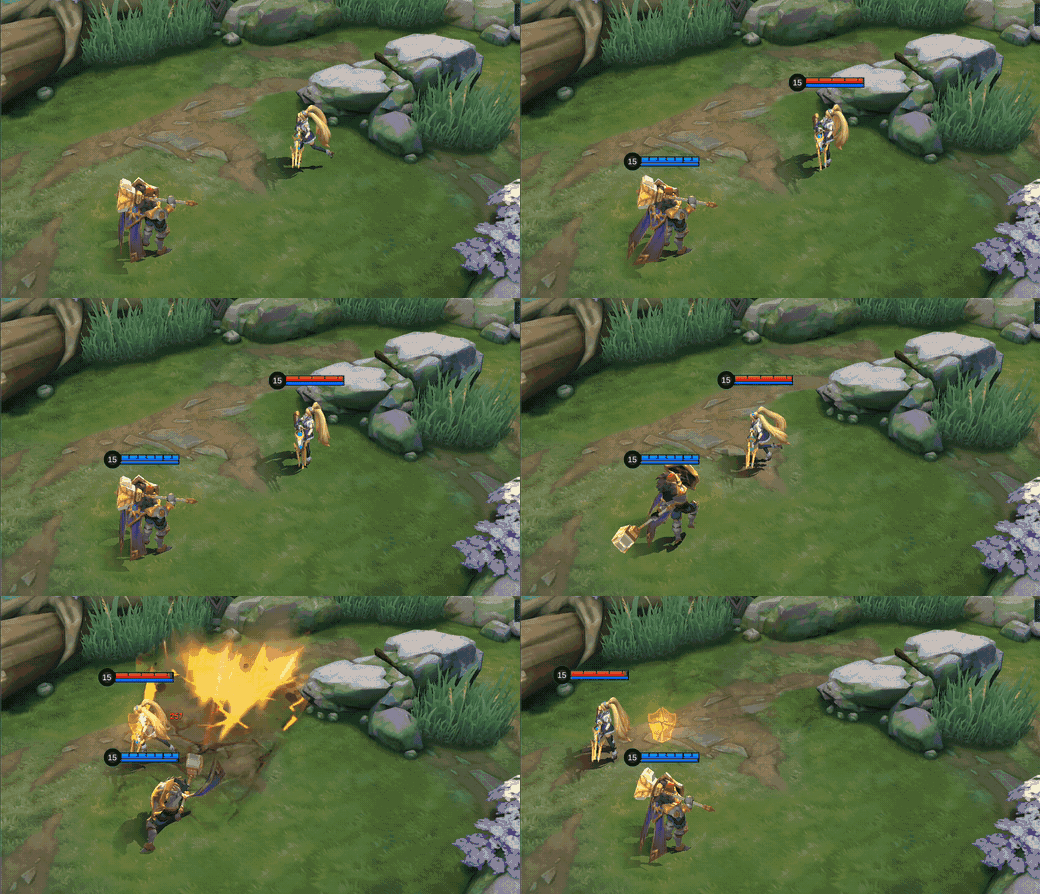
you need to slow a retreat, check a bush, or add damage after displacement
the three-stage slow keeps enemies inside allied follow-up and makes the next body-block easier
Do not open with it from obvious vision if holding Sacred Hammer would create a better angle
 Sacred Hammer
Tigreal charges forward, pushes enemies to the end of the path, then can cast again within four seconds to deal Physical Damage and knock them airborne for 0.6 seconds.
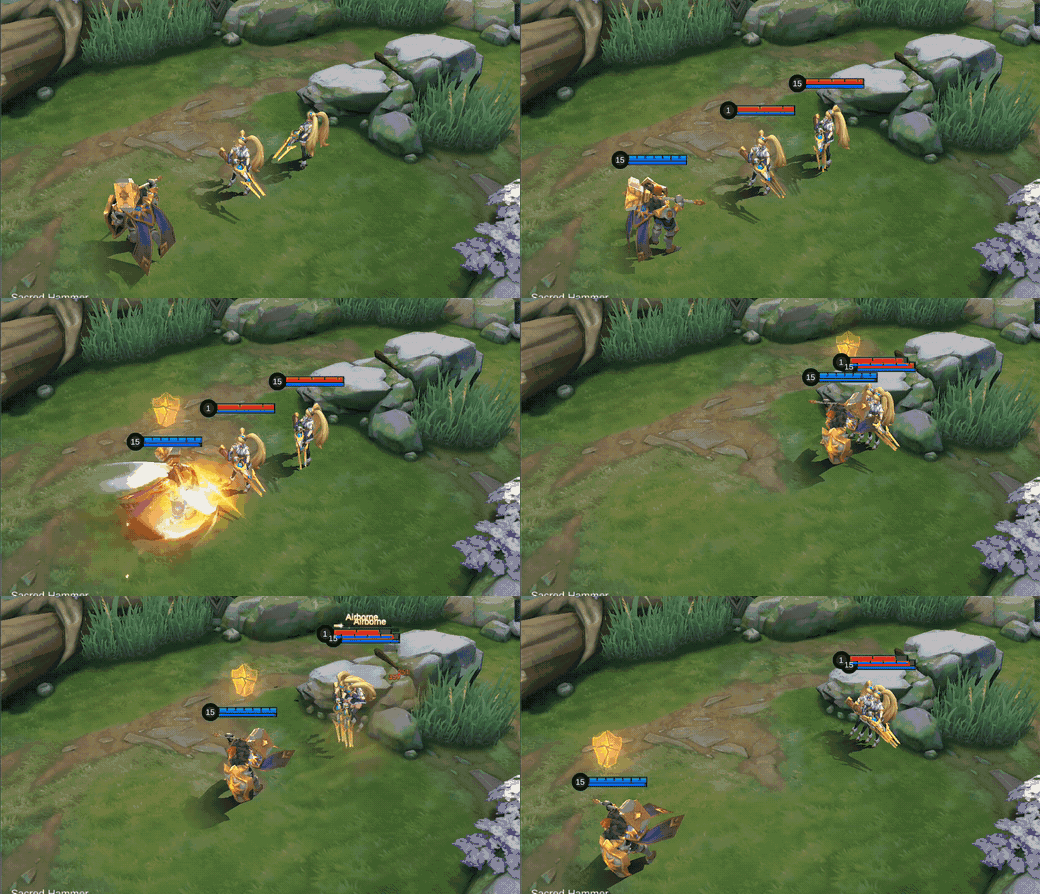
a target can be pushed toward allies, away from safety, or out of position before Implosion
the first cast changes position and the second extends crowd control without waiting for the ultimate
Do not push an enemy out of an ally's skill area or enter beyond your team's follow-up range
 Implosion
Tigreal pulls nearby enemies inward, stuns them for 1.8 seconds, and deals Physical Damage. Normal control can interrupt the first half of the channel; only Suppression can interrupt the second half.
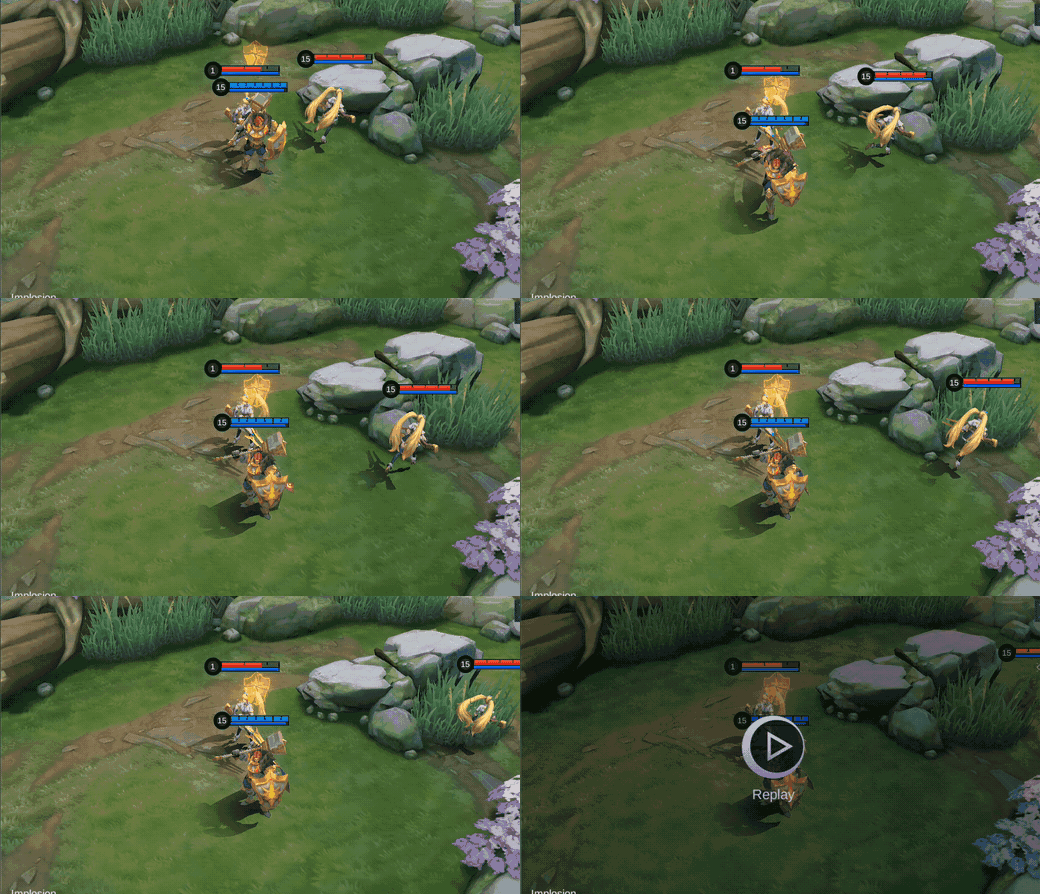
multiple enemies are inside the pull radius and allied burst is ready
the pull compresses targets for area damage and creates Tigreal's highest-value fight start
Do not channel in full enemy vision while interrupting control is still available
Tigreal Skill Priority and Combos
Skill upgrade priority
Take Attack Wave at level 1 and prioritize Skill 1, use Sacred Hammer as the backup upgrade, and level Implosion whenever available. Attack Wave gives Tigreal dependable lane pressure and a stronger slow while Sacred Hammer keeps its displacement value even before every rank is added.
Teamfight combo
 Sacred Hammer→
 Implosion→
 Sacred Hammer→
 Attack Wave
Order: Sacred Hammer → Implosion → Sacred Hammer again → Attack Wave. Why: the first dash changes enemy position, Implosion gathers the group, the second cast extends control with airborne time, and Attack Wave slows the exit. Do not: complete the first push if it moves the target beyond allied damage.
Laning and pick combo
 Sacred Hammer→
 Sacred Hammer→
 Attack Wave
Order: Sacred Hammer → Sacred Hammer again → Attack Wave. Use the first cast to drive the target toward your side, the second to knock them airborne, then layer the fan slow. Do not: spend Implosion on one low-value target when an objective fight is about to start.
Flicker engage variation
Channel Implosion only after the approach is hidden or after key interruption is spent. Flicker can change the final position and pull radius, but the exact sequence should match enemy reactions: sometimes Flicker starts the angle; sometimes it corrects the channel after enemies commit. Do not burn Flicker for a single frontliner when the enemy damage dealers remain outside the pull.
How to Play Tigreal by Game Phase
Early game
Protect the first jungle route, check river bushes with Attack Wave, and look for a Sacred Hammer push toward an allied damage dealer. Fearless makes Basic Attack trades safer once four stacks are ready. Do not remain in one lane when a faster rotation can create a numbers advantage.
Mid game
Move ahead of the team before Turtle, Lord, or turret pressure begins. Establish vision, then disappear from the most obvious path. When the enemy support checks alone, decide whether that pick is valuable or whether keeping the angle for two damage dealers is better.
Late game
Track Purify-like escapes, crowd-control immunity, resurrection effects, and the enemy's interruption skills. One failed Implosion can decide the objective. Do not face-check a five-player formation without information; use allied vision and Attack Wave first.
Five Tigreal Mistakes That Ruin Engages
- Pushing enemies away from allied damage. Sacred Hammer is displacement, not just mobility. Aim its end point before committing.
- Channeling Implosion in full vision. Hide the wind-up or wait for interruption to be spent. Why: the first half can be stopped by normal control.
- Using both Sacred Hammer casts too early. Keep the second cast for airborne extension after Implosion or to stop an escape.
- Building the same armor every match. Radiant Armor answers repeated magic hits, while Antique Cuirass and Chastise Pauldron solve different physical threats.
- Starting with no allied follow-up. Tigreal can hold several enemies, but he rarely wins the damage race alone. Check teammate distance before pulling.
Best Tigreal Emblem and Battle Spell
Default roam route
Support Emblem: Agility, Pull Yourself Together, Focusing Mark. Battle Spell: Flicker.
you need faster rotations, more frequent engage tools, and team damage after marking a target
movement improves hidden angles, shorter spell cycles preserve more engage windows, and Focusing Mark rewards coordinated follow-up
Do not take the route as permission to engage before allies are in range
Defensive roaming alternative
Tank Emblem: Firmness, Wilderness Blessing, Brave Smite. Battle Spell: Flicker.
the first counterturn is dangerous and jungle-path movement creates the best approach
Firmness adds early defenses, Wilderness Blessing helps rotations through jungle and river, and Brave Smite adds recovery after control
Do not lock the alternative when another talent route better answers the match
Petrify alternative
Battle Spell: Petrify.
you already have entry help and need another close-range control layer
Petrify extends the stop after arriving and does not depend on damage scaling
Do not choose it when Flicker is required to reach the enemy back line
The current account did not expose readable talent names, so the visible roam setup pattern was combined with current Tigreal recommendations checked on August 2, 2026.
Current In-Game Builds
These five current in-game builds were observed on August 11, 2026. Compare the six-item order and adjust defensive or utility slots for the match.
Build 1
| Item 1 | Item 2 | Item 3 | Item 4 | Item 5 | Item 6 |
|---|---|---|---|---|---|
 Rapid Boots Rapid Boots |  Dominance Ice Dominance Ice |  Antique Cuirass Antique Cuirass |  Fleeting Time Fleeting Time |  Radiant Armor Radiant Armor |  Immortality Immortality |
Build 2
| Item 1 | Item 2 | Item 3 | Item 4 | Item 5 | Item 6 |
|---|---|---|---|---|---|
 Tough Boots Tough Boots | Dominance Ice | Fleeting Time | Immortality |  Chastise Pauldron Chastise Pauldron | Radiant Armor |
Build 3
| Item 1 | Item 2 | Item 3 | Item 4 | Item 5 | Item 6 |
|---|---|---|---|---|---|
| Rapid Boots |  Guardian Helmet Guardian Helmet | Fleeting Time | Chastise Pauldron |  Athena's Shield Athena's Shield | Immortality |
Build 4
| Item 1 | Item 2 | Item 3 | Item 4 | Item 5 | Item 6 |
|---|---|---|---|---|---|
| Tough Boots | Fleeting Time | Chastise Pauldron | Radiant Armor | Dominance Ice | Immortality |
Build 5
| Item 1 | Item 2 | Item 3 | Item 4 | Item 5 | Item 6 |
|---|---|---|---|---|---|
| Tough Boots | Radiant Armor | Fleeting Time | Dominance Ice | Antique Cuirass | Chastise Pauldron |
Equipment Guide
Use the item notes below to decide what each slot contributes. The table describes the equipment itself, independent of any numbered build.
| Item | What it adds | When to consider it |
|---|---|---|
| Rapid Boots | Rotation speed | Helps reach lanes, bushes, and engage angles earlier. |
| Dominance Ice | Armor, cooldown utility, and anti-heal | A frontline answer to attack speed and recovery. |
| Antique Cuirass | Physical skill damage reduction | Use against repeated physical skill damage. |
| Fleeting Time | Ultimate cooldown support | Rewards successful team actions with more frequent engage windows. |
| Radiant Armor | Sustained magic defense | Best against repeated magic ticks rather than one isolated hit. |
| Immortality | Revive safety | A late defensive slot for high-risk engages and objective fights. |
| Tough Boots | Magic defense and control reduction | Choose into heavy magic damage or disruptive control. |
| Chastise Pauldron | Frontline physical defense | Use when sustained physical pressure is the main threat. |
| Guardian Helmet | High HP and out-of-combat recovery | Supports repeated map movement without recalling after every trade. |
| Athena's Shield | Magic burst protection | Use against concentrated magic damage in a short window. |
Tigreal Counters and Team Synergy
Targets Tigreal displaces well



Zilong and Freya want committed melee space, while Estes needs stable positioning to sustain a group. When they step forward, Sacred Hammer can separate them or Implosion can pull the formation together. Do not engage if their strongest follow-up is already aimed at your back line.
Long-range pressure to respect



Chang'e can pressure from outside a direct walk-in angle, Zhask controls space around his summon, and Alice can survive inside a crowded fight while punishing grouped enemies. Approach from fog and force key zones before committing.
Area-damage partners



Vexana and Odette benefit when Tigreal compresses enemies into one area; Alucard can enter after control begins. When their ultimates are ready, keep targets inside the damage field. Do not scatter the group with a late push.
Awkward pairing

Two defensive initiators can overlap protection while leaving the team short on damage or lane pressure. If both are drafted, divide responsibilities: one controls vision and entry, while the other protects the damage dealer.
Tigreal Base Stats
| HP | 2700 | HP Regen | 8.4 | Physical Attack | 112 |
|---|---|---|---|---|---|
| Physical Defense | 25 | Attack Speed | 1.03 | Attack Speed Ratio | 100% |
| Mana | 500 | Mana Regen | 4 | Magic Defense | 15 |
| Magic Power | 0 | Movement Speed | 260 | Role | Tank |
Level-one stats as of August 2, 2026.
Tigreal Skins and Availability
Nine Tigreal skin cards were visible in the Shop search. Direct Diamond prices are listed only where the in-game view showed a Purchase label. Season, StarLight, Collector, and limited-event labels describe the observed acquisition route; they are not permanent sale promises.
| Skin preview | Skin | Tag | Observed availability |
|---|---|---|---|
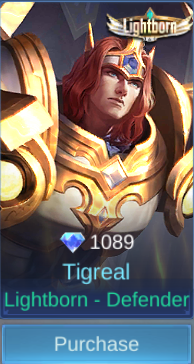 | Lightborn - Defender | LIGHTBORN | 1089 Diamonds / Purchase |
 | Gold Baron | SPECIAL | 749 Diamonds / Purchase |
 | Pasha of Justice | SPECIAL | 749 Diamonds / Purchase |
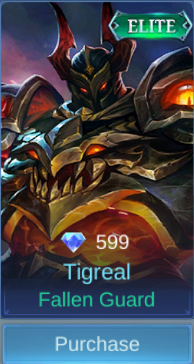 | Fallen Guard | ELITE | 599 Diamonds / Purchase |
 | Dark Guardian | ELITE | 399 Diamonds / Purchase |
 | Wyrmslayer | S10 | Season 10 |
 | Galactic Marshal | STAR | 06/2022 StarLight Member |
 | Celestial General | COLLECTOR | Limited-time Event |
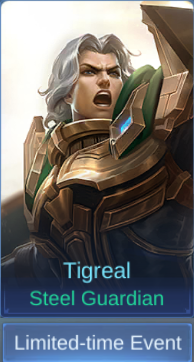 | Steel Guardian | Standard | Limited-time Event |
Tigreal Story
Tigreal was born into House Wertz, a family responsible for Moniyan's military defense. During a disastrous campaign, senior commanders withdrew while the Second Regiment absorbed heavy losses. Nobles later blamed the fallen soldiers and tried to buy Tigreal's silence. He left for the Northern Vale, where he learned that protecting companions matters more than medals, then returned to the Light's Order and eventually led the Knights with that lesson at the center of his duty.
Tigreal FAQ
What is Tigreal's best build?
Start with Conceal boots, then choose Dominance Ice, Antique Cuirass, Radiant Armor, or Chastise Pauldron for the enemy draft. Add Fleeting Time when your team converts engages reliably, and keep Immortality for late objective commitments.
What is Tigreal's best Emblem?
Support Emblem with Agility, Pull Yourself Together, and Focusing Mark is the default roaming route. Tank Emblem with Firmness, Wilderness Blessing, and Brave Smite is a defensive alternative.
What Battle Spell should Tigreal use?
Flicker is the standard choice because it changes the reach and final position of Implosion. Petrify is an alternative when entry is already secured and another close-range control layer matters more.
What is Tigreal's combo?
For a full fight, use Sacred Hammer, Implosion, Sacred Hammer again, then Attack Wave. In lane, use both Sacred Hammer casts to push and knock airborne before adding Attack Wave's slow.
Who counters Tigreal?
Long-range pressure, strong zoning, interruption during the early Implosion channel, and heroes that thrive inside grouped fights all reduce his engage value. Chang'e, Zhask, and Alice illustrate those problems.
Is Tigreal good for beginners?
His controls are understandable, but good results still require vision, angle selection, ally-distance checks, and knowing which enemy can interrupt Implosion.
Verdict: Is Tigreal Worth Learning?
Yes. Tigreal is one of the clearest heroes for learning how a roamer controls space instead of chasing damage. He rewards players who prepare vision, choose the right target, and understand where each displacement will leave the enemy. For adjacent tank and fighter decisions,
Top up Mobile Legends: Bang Bang safely on ManaBuy




Copyright © FUTURE OUTLOOK TECHNOLOGY LIMITED.Company Registration No.: 77374965 All rights reserved.UNIT 135,1/F.,143 WAI YIP STREET,KWUN TONG HK