
Chang'e MLBB Mid Lane Guide: Build, Skills, Emblem and Combos

Chang'e is a long-range Mage who turns a straight lane into a stream of slows, enhanced attacks, and meteors. Crescent Moon is the engine of her kit: protect the shield, use its extra projectiles to stack Trouble Maker, and start Meteor Shower only when the target cannot easily leave the firing line.

Chang'e Skills and How to Use Them

Trouble Maker
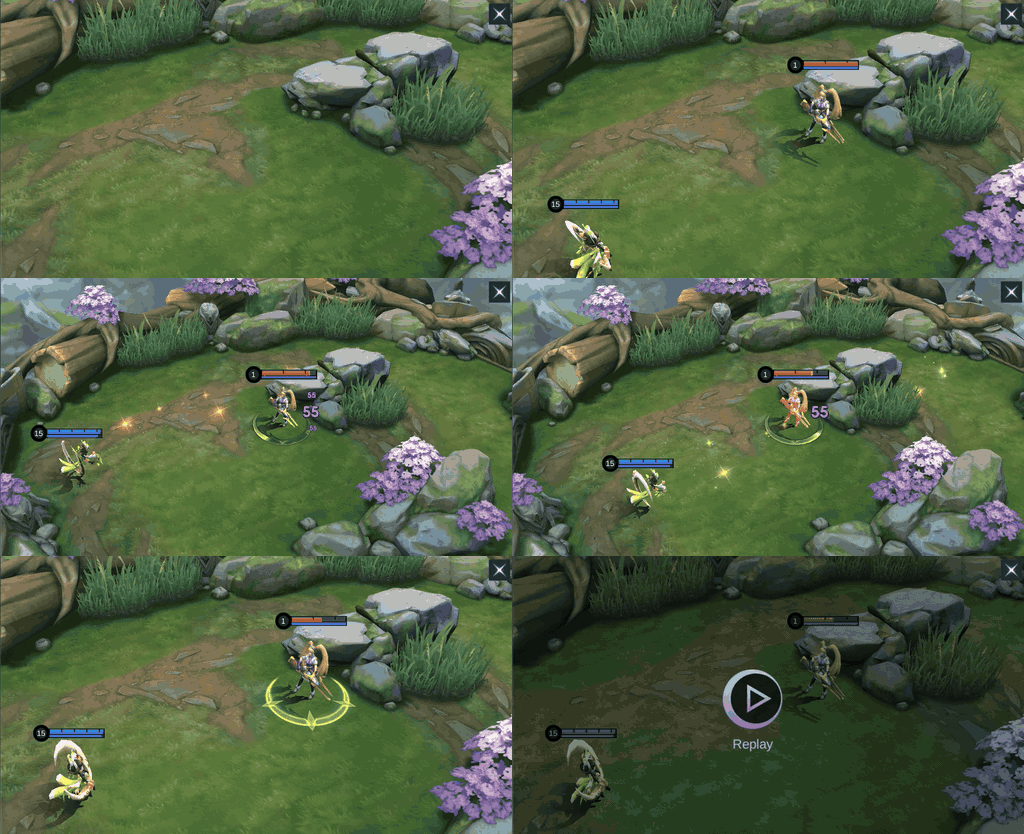
Each time Chang'e deals damage to an enemy, she leaves a mark on them that reduces their Movement Speed by 1% (up to 20%).
Use: Keep hitting the same target during a trade so the stacking slow makes the next spell easier to land. Why: Every damage instance adds a short movement-speed reduction, up to 20%. Avoid: Do not spread light poke across several heroes when one priority target is already in Meteor Shower range.

Starmoon Shockwave
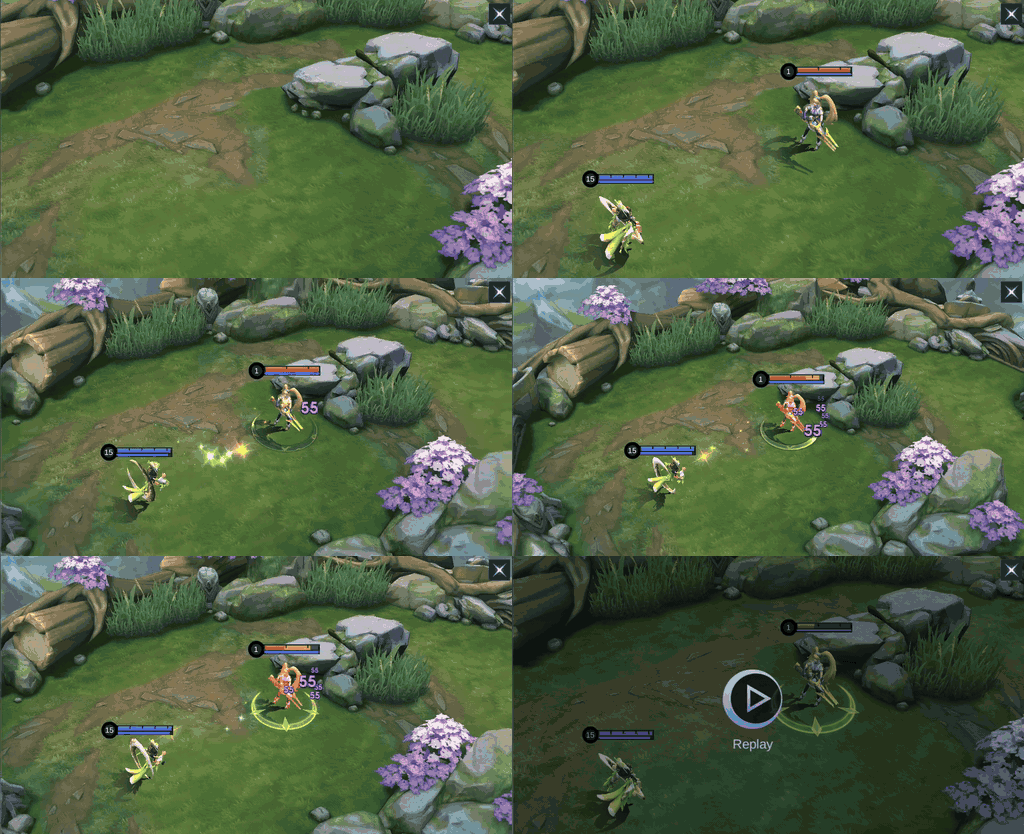
Chang'e sends an energy sphere in the target direction, dealing 350 (+130% Total Magic Power) Magic Damage to enemies in its path and slowing them by 10% for 1.5s. Crescent Moon: The Crescent Moon sends 4 extra energy spheres along with Chang'e's, each dealing 20% damage and slowing enemies hit. The slow effect can stack (up to 20%).
Use: Cast after Crescent Moon when you need the wider five-sphere pattern to clear a wave or start a chase. Why: The extra spheres widen the hit area and stack the slow that holds enemies in the ultimate. Avoid: Do not throw it blindly through a thick wave if you need the slow on a hero behind the minions.

Crescent Moon
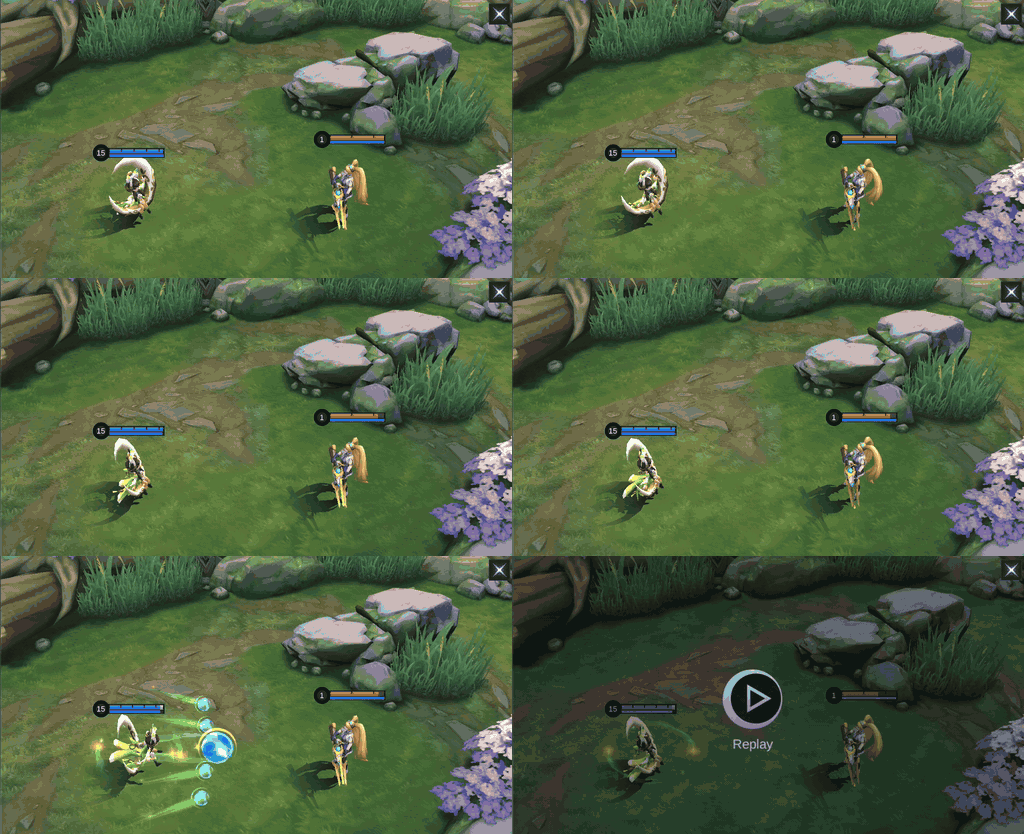
Chang'e summons the Crescent Moon, gaining a permanent 300 (+150% Total Magic Power) shield and 10% Movement Speed until the shield is broken. Each time she casts a skill, she gains an extra 50% Movement Speed that decays over 2.5s. Crescent Moon: Enhances her Basic Attacks to deal 20 (+35% Total Magic Power) extra Magic Damage 2 times. Each time Chang'e deals Magic Damage with her Basic Attacks or skills, this skill's cooldown is reduced by 0.2s.
Use: Refresh the shield before a rotation or fight, then use the speed burst from each cast to adjust your angle. Why: The shield unlocks enhanced Basic Attacks and extra projectiles while giving Chang'e room to kite. Avoid: Do not walk into engage range just because the shield is active; once it breaks, much of the damage pattern disappears.

Meteor Shower
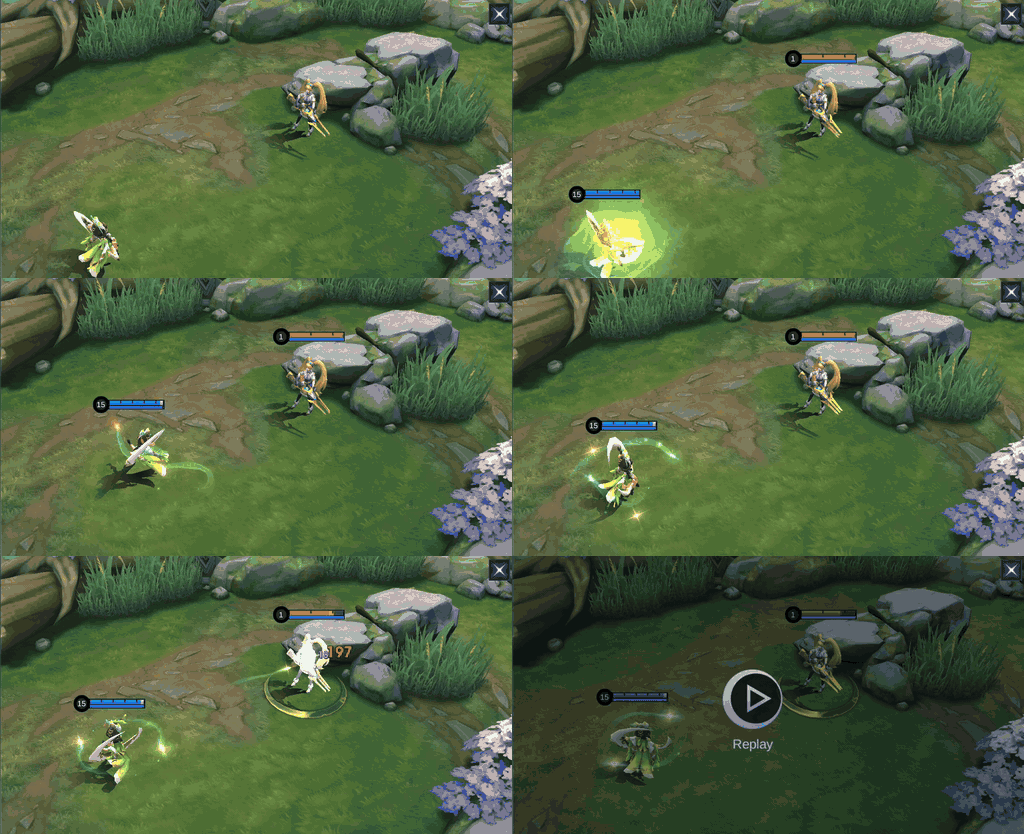
Chang'e gains 10% Movement Speed for 4s. During this time, she fires 30 meteors in the target direction, each dealing 60 (+21% Total Magic Power) Magic Damage to the first enemy hit. This skill deals 100% extra damage to minions and creeps. Crescent Moon: Fires meteors alongside Chang'e, each dealing 33% damage.
Use: Start from maximum safe range after Starmoon Shockwave slows the target, and steer sideways as enemies reposition. Why: Thirty meteors punish a fixed corridor, clear waves quickly, and deal double damage to minions and creeps. Avoid: Do not channel in front of hard control or into a projectile blocker that can absorb the entire line.
Skill priority
Upgrade Skill 2 at Level 1 and prioritize upgrading Skill 1 with Skill 2 as backup. Upgrade the Ultimate whenever it is available. In practical terms, take Crescent Moon at level one, invest in Starmoon Shockwave for lane pressure, and level Meteor Shower whenever it is available.
Teamfight Combos



In teamfights, get the shield from Chang'e's 2nd Skill, then use her 1st Skill to poke enemies, and follow up with her Ultimate if the 1st Skill was on target. Chang'e needs to move around during her Ultimate to keep herself safe and make sure the meteors can hit the target.
Laning Combos




In the laning phase, get the buff from Chang'e's 2nd Skill first, then mark the enemy with her Basic Attacks. Cast her 1st Skill to slow down low HP enemy, and finish them off with her Ultimate.
How to Play Chang'e by Game Phase
Early game
Activate Crescent Moon first and use enhanced Basic Attacks to pressure without spending all your mana. Starmoon Shockwave should hit the wave and threaten the opposing Mage whenever the angle allows. Clear before rotating, because Chang'e contributes more when she arrives with her shield and enough mana for a full sequence.
Mid game
Play behind vision and aim along narrow jungle entrances. A slowed target has a much harder time leaving Meteor Shower, while tanks can stand in front and absorb the stream. Keep moving sideways during the channel so the line follows the escape path and a diver cannot predict one fixed landing point.
Late game
Protect Crescent Moon above everything else. One safe rotation of enhanced spells is more valuable than stepping forward for a risky Basic Attack. Wait for the frontline to draw control, use Flicker if an Assassin crosses the gap, and bring Divine Glaive forward when Magic Defense starts reducing the meteor damage.
Five Common Chang'e Mistakes
- Starting Meteor Shower before Starmoon Shockwave slows the target.
- Walking into enemy control range to use enhanced Basic Attacks.
- Ignoring the Crescent Moon shield and continuing to fight after the enhancement breaks.
- Channeling through a tank or blocker when the priority target stands behind them.
- Using the ultimate for a single low-value target just before an objective fight.
Best Emblem and Battle Spell
Use Mage Emblem with Thrill, Weapons Master, and Impure Rage. Thrill adds early adaptive damage, Weapons Master raises the Magic Power gained from equipment and other sources, and Impure Rage adds adaptive skill damage while restoring mana. Flicker is the safest default because it instantly repairs positioning before or during a dangerous fight. Purify is the better alternative when one removable control effect is the main reason Meteor Shower gets interrupted.
Five Current Chang'e Builds
Every route begins with Arcane Boots. Builds 1, 3, and 5 use Sky Piercer early for matches where Chang'e can reliably help finish targets. Builds 2 and 4 use the steadier Genius Wand, Lightning Truncheon, Holy Crystal, Divine Glaive, and Wishing Lantern path. Build 5 moves Holy Crystal to the last slot and reaches Lightning Truncheon earlier for mana, cooldown access, and wave pressure.
Current In-Game Builds
These five current in-game builds were observed on August 13, 2026. Compare the six-item order and adjust utility or defensive slots for the match.
Build 1
| Item 1 | Item 2 | Item 3 | Item 4 | Item 5 | Item 6 |
|---|---|---|---|---|---|
 Arcane Boots Arcane Boots |  Sky Piercer Sky Piercer |  Holy Crystal Holy Crystal |  Divine Glaive Divine Glaive |  Lightning Truncheon Lightning Truncheon |  Wishing Lantern Wishing Lantern |
Build 2
| Item 1 | Item 2 | Item 3 | Item 4 | Item 5 | Item 6 |
|---|---|---|---|---|---|
| Arcane Boots |  Genius Wand Genius Wand | Lightning Truncheon | Holy Crystal | Divine Glaive | Wishing Lantern |
Build 3
| Item 1 | Item 2 | Item 3 | Item 4 | Item 5 | Item 6 |
|---|---|---|---|---|---|
| Arcane Boots | Genius Wand | Sky Piercer | Holy Crystal | Lightning Truncheon | Divine Glaive |
Build 4
| Item 1 | Item 2 | Item 3 | Item 4 | Item 5 | Item 6 |
|---|---|---|---|---|---|
| Arcane Boots | Genius Wand | Lightning Truncheon | Holy Crystal | Divine Glaive | Wishing Lantern |
Build 5
| Item 1 | Item 2 | Item 3 | Item 4 | Item 5 | Item 6 |
|---|---|---|---|---|---|
| Arcane Boots | Genius Wand | Sky Piercer | Lightning Truncheon | Divine Glaive | Holy Crystal |
Equipment Guide
Use the item notes below to decide what each slot contributes. The table describes each item independently of the numbered builds.
| Item | What it adds | When to consider it |
|---|---|---|
| Arcane Boots | Movement speed, Magic Power, and flat Magic Penetration for stronger early poke. | Use when early Magic Penetration helps pressure the lane; change boots only when survival or cooldown needs clearly matter more. |
| Sky Piercer | Adaptive Attack, movement speed, and an execute against very low-HP targets that improves with successful finishes. | Buy early only when Chang'e can safely help finish targets; skip or sell it if the match offers too few reliable takedowns. |
| Holy Crystal | A large Magic Power increase plus percentage-based extra Magic Power that scales with hero level. | Take for the largest raw damage spike once the first penetration or utility pieces are online. |
| Divine Glaive | Magic Power and percentage Magic Penetration, with more penetration against targets that stack Magic Defense. | Move it earlier when frontliners or priority targets begin buying meaningful Magic Defense. |
| Lightning Truncheon | Magic Power, mana, cooldown reduction, and a periodic area echo on the next damaging skill. | Choose when mana, cooldown access, wave clear, and burst from the opening spell all matter. |
| Wishing Lantern | Magic Power, mana, cooldown reduction, and extra current-HP damage after enough magic damage lands on a hero. | Add when repeated meteors can trigger it against healthy frontliners; replace it when fights end before the threshold is reached. |
| Genius Wand | Magic Power, movement speed, flat Magic Penetration, and stacking Magic Defense reduction from repeated hits. | Prioritize against low-to-medium Magic Defense when Chang'e can apply many hits before the target escapes. |
Best Teammates and Difficult Matchups
Reliable setup


Gatotkaca and Tigreal group enemies and hold them inside Chang'e's firing line. Stay far enough behind their initiation that the opposing counter-engage cannot reach both layers at once.
Fast backline access


Hanzo and Harley can approach from angles that bypass the front line. Keep Flicker ready, avoid isolated paths, and do not begin a long channel until their entry tools are visible.
Short-range targets


Eudora and Odette have dangerous damage but must work closer to Chang'e's range. Poke from the edge, preserve the shield, and never trade that range advantage for one extra enhanced attack.
Projectile denial

Lolita can deny the projectile stream and remove Chang'e's clearest team-fight angle. Force out the shield from another direction or wait until it expires before committing Meteor Shower.
Chang'e Base Stats
| Stat | Level 1 |
|---|---|
| HP | 2320 |
| HP Regen | 6.8 |
| Physical Attack | 115 |
| Physical Defense | 17 |
| Attack Speed | 1.01 |
| Attack Speed Ratio | 100% |
| Mana | 500 |
| Mana Regen | 4 |
| Magic Power | 0 |
| Magic Defense | 15 |
| Movement Speed | 240 |
These level-one values exclude equipment, Emblem, skins, and match modifiers.
Chang'e Skins and Availability
The in-game skin page showed four direct Diamond prices, one recharge reward, one Starlight skin, and several event-limited skins. Check the in-game listing before spending because event rotations and purchase options can change.
| Skin | Availability note |
|---|---|
| Vine Cradle | Epic; 899 Diamonds shown in-game |
| Floral Elfo | Special; 749 Diamonds shown in-game |
| Crimson Moon | Elite; 599 Diamonds shown in-game |
| Moonstruck | 269 Diamonds shown in-game |
| New Moon | Lunar Fest; limited-time event |
| Lunar Magic | Luckybox; limited-time event |
| Strawberry Parfait | November 2020 Starlight Member |
| Moon Artist | Sanrio Characters; limited-time event |
| Tech Tensai | The Aspirants; limited-time event |
| Moonglow Troupe | Special; S37 First Recharge |
Chang'e Story
Chang'e is the Great Dragon's youngest disciple, a gifted but mischievous student who quickly mastered Sacred Satellite. The Great Dragon entrusted her to Zilong, and the two became as close as siblings while training and playing together. After Zilong left to help protect the Land of Dawn, Chang'e fell back into trouble. Her Moon Rabbit swallowed the Great Dragon's sacred pill and was cast out, but Chang'e protected it and chose to leave the Dragon Altar to help Zilong. The Great Dragon gave her the precious Crescent Moon for protection on the journey.
Chang'e FAQ
Which skill should Chang'e take first?
Take Crescent Moon at level one for the shield and enhanced attacks, then prioritize Starmoon Shockwave and level Meteor Shower whenever possible.
Can Chang'e move during Meteor Shower?
Yes. Steer while channeling to follow the target's escape path, avoid retaliation, and keep the meteor line on the most valuable corridor.
Why does Crescent Moon matter so much?
Its shield grants movement speed, enhanced Basic Attacks, and extra projectiles for the active skills. When the shield breaks, Chang'e loses much of that pressure until she restores it.
When should Chang'e buy Divine Glaive?
Move it earlier when important targets buy Magic Defense. Holy Crystal is usually the larger raw-power choice when defenses are still low.
What stops Chang'e's ultimate?
Hard control, fast dives, and projectile denial can ruin the firing line. Track those tools and channel only after they are committed or from a safer angle.
Final Verdict
Chang'e rewards patience more than reckless damage chasing. Maintain Crescent Moon, stack the slow, choose a clean corridor, and move with the target while the meteors fall. If the enemy must cross open ground to reach her, she can control a fight before anyone reaches casting range.




Copyright © FUTURE OUTLOOK TECHNOLOGY LIMITED.Company Registration No.: 77374965 All rights reserved.UNIT 135,1/F.,143 WAI YIP STREET,KWUN TONG HK