
Guinevere MLBB Guide: Best Build, Emblem, Combos, and Counters

In-game context: This guide matches verified MLBB game version 2.1.88.12027 and an in-game observation on August 14, 2026. Guinevere is listed as a Fighter with Burst and Magic Damage specialties.

Why Play Guinevere in EXP Lane?
Guinevere can turn one clean leap into a long control-and-burst sequence. Spatial Migration supplies the launch, Super Magic gives her another way to prepare Violet Requiem, and the Ultimate becomes much harder to interrupt because she is control immune during its cast. Energy Wave keeps the rotation moving by reducing every skill cooldown when it connects.
Her weakness is commitment. A missed leap places her close to the enemy without the knockup that makes the rest of the combo safe. Strong Guinevere play therefore depends on vision, patient angles, and disciplined use of Spatial Migration's recast. Pick her when your team can follow a dive or add reliable control; avoid blind entries into heroes that can deny the leap or protect a carry through the Ultimate.
Guinevere Skills and Practical Uses

Super Magic
Buff / Damage. Guinevere deals 25% extra damage to airborne enemies and deals (+80% Total Physical Attack) (+60% Total Magic Power) Magic Damage with her Basic Attacks. Guinevere builds Super Magic each time she deals damage. Once fully charged, her next Basic Attack becomes guided, dealing 80 (+100% Total Physical Attack) (+90% Total Magic Power) Magic damage on hit and restoring 80 plus 8% of her lost HP. Enemies hit by Guinevere's skills or enhanced Basic Attack will be marked for 5s. Those with 3 marks will be knocked airborne when hit by her Violet Requiem.
Best use: Charge the enhanced Basic Attack while farming, then spend it on a hero for guided damage and healing. Build marks before Violet Requiem so the Ultimate can lift a grounded target.
Avoid: Do not waste the charged strike on a low-value target just before an engage, and do not expect a raw Ultimate to knock up an unmarked enemy.
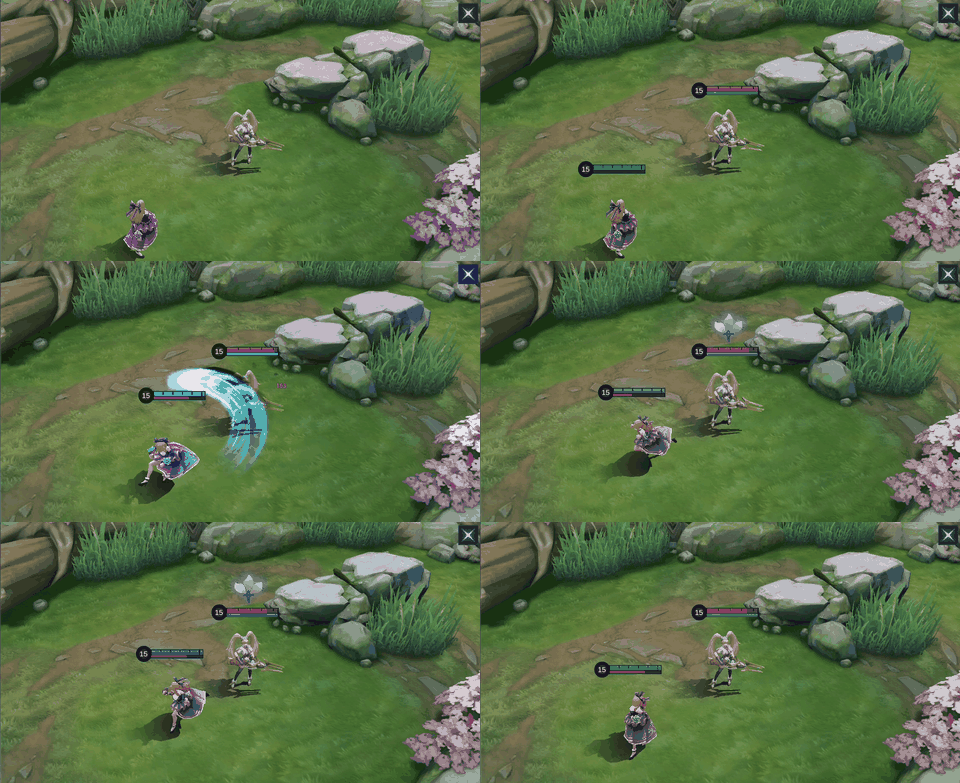

Energy Wave
Damage / Buff. Guinevere releases an energy orb in the target direction, dealing 300 (+125% Total Magic Power) Magic Damage and slowing enemies by 25% for 1.2s. Successfully hitting an enemy reduces all her skill cooldowns by 1s.
Best use: Use the orb to poke, slow, and shorten every skill cooldown when it connects. Aim through the wave when the same cast can pressure the lane opponent.
Avoid: Do not throw it carelessly when a fight is about to start; a missed orb gives up both the slow and the cooldown refund.
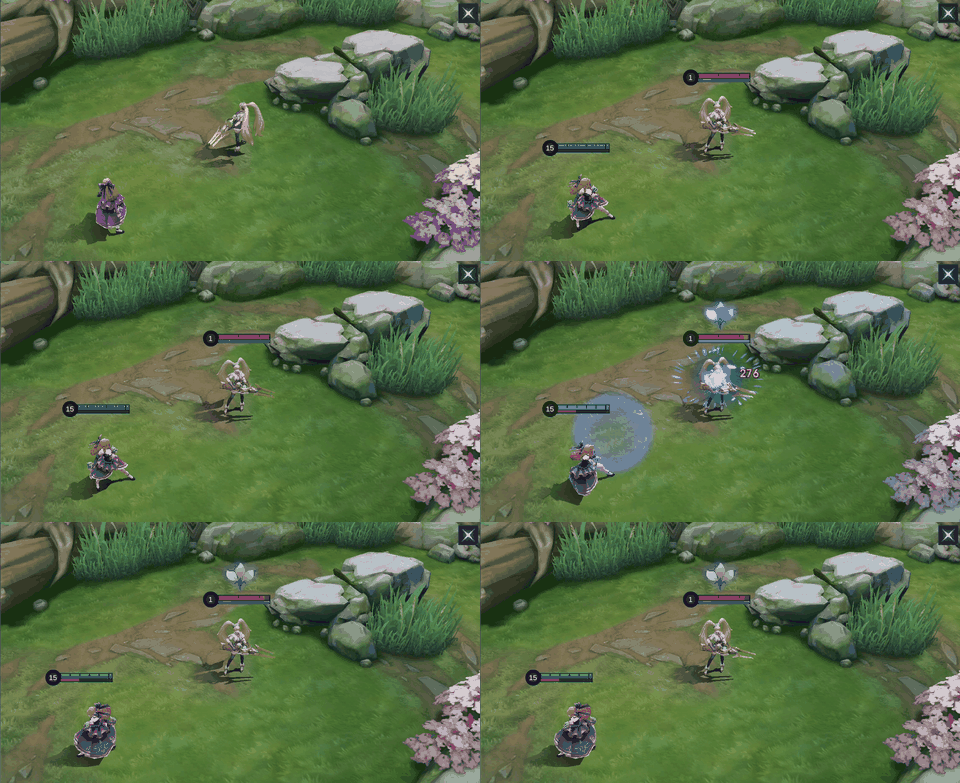

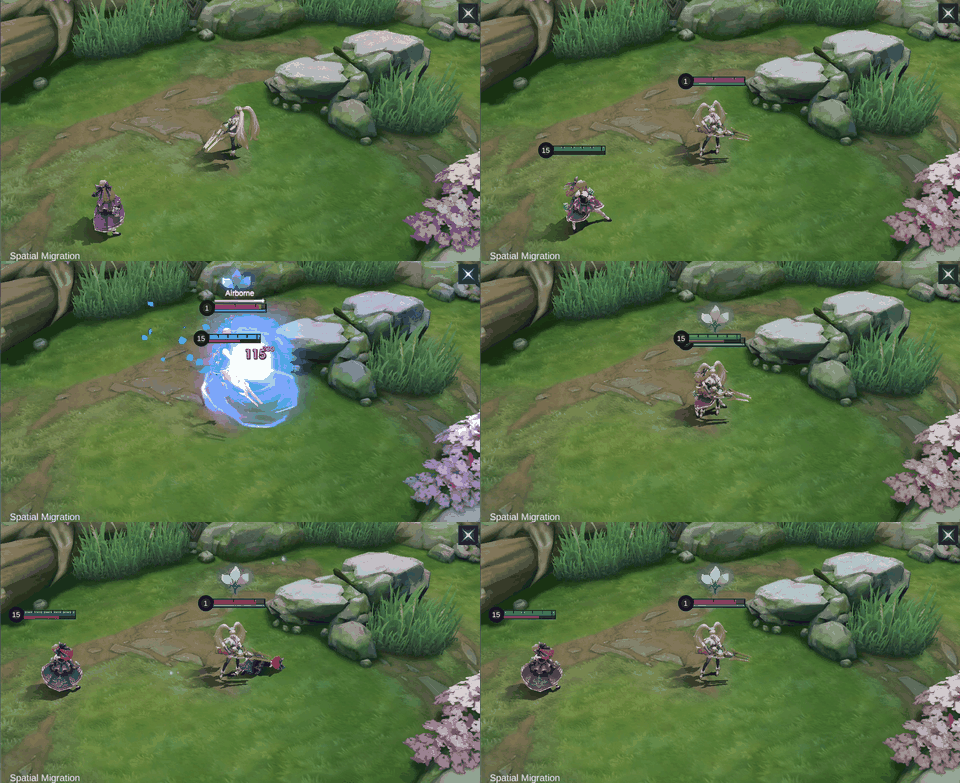
Spatial Migration
Mobility / CC. Guinevere leaps to the target location, dealing 250 (+80% Total Magic Power) Magic Damage. Enemy heroes and Creeps hit will be knocked airborne for 1s and take 125 (+50% Total Magic Power) additional Magic Damage. Use Again: Guinevere blinks toward the target direction and leaves an illusion behind. If the illusion takes damage by hero, it restores Super Magic for Guinevere and explodes after 1.5s, dealing 100 (+30% Total Magic Power) Magic Damage to nearby enemies.
Best use: Use the first leap to knock up a priority target, then hold the recast blink for repositioning. Let the illusion absorb attention while you choose a safer landing angle.
Avoid: Do not jump blind into fog or spend the recast immediately when enemy control and escape tools are still available.

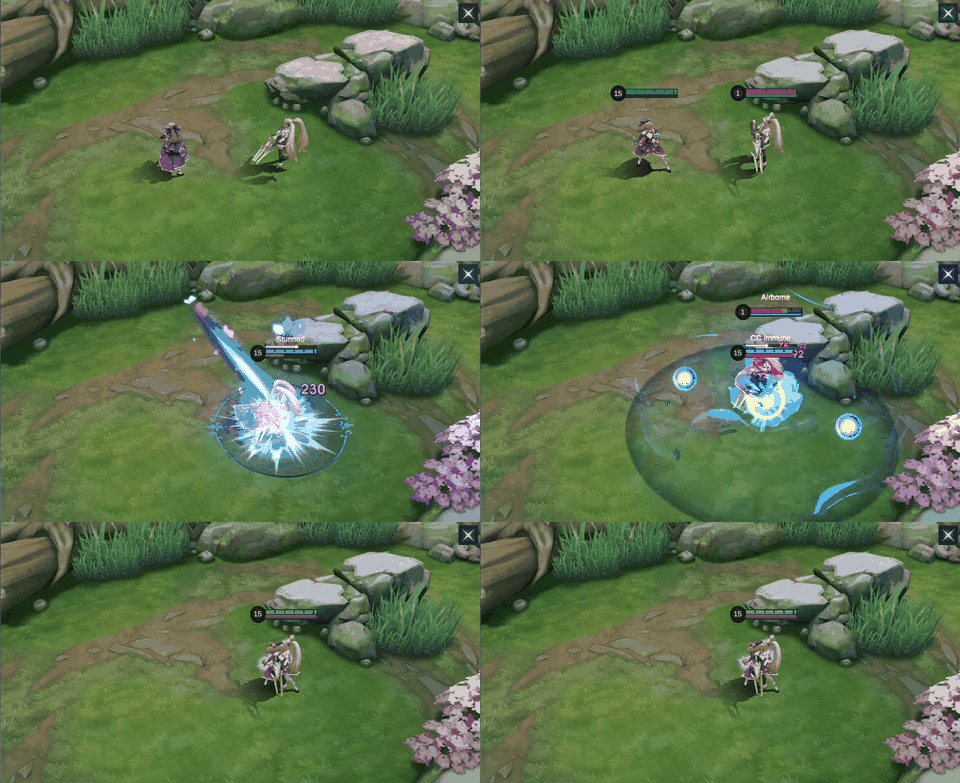
Violet Requiem
Burst / CC. Guinevere creates a force field around her, gaining Control Immunity while attacking nearby enemies 11 times within 2s, dealing 880 (+385% Total Magic Power) Magic Damage in total. Airborne enemies hit will be knocked airborne again, up to 8 additional times.
Best use: Cast after Spatial Migration launches the target or after Super Magic has placed enough marks. Its control immunity helps Guinevere finish the channel through enemy disruption.
Avoid: Do not open with the Ultimate against a grounded, unmarked target; without airborne setup, much of its control value disappears.
Skill Priority and Best Combos
Take Energy Wave at level 1 and prioritize it, with Spatial Migration as the supporting upgrade. Level Violet Requiem whenever it is available. Energy Wave is Guinevere's safest lane tool and every hit shortens the cooldown of the full kit, so accurate poke also prepares the next engage.
Teamfight combo



Spatial Migration → Violet Requiem → reposition or Energy Wave. Enter from fog or after allied control, launch the priority target, and cast the Ultimate before the airborne window ends. Use Spatial Migration's recast to dodge or exit; if the angle remains safe, add Energy Wave for damage and cooldown reduction.
Laning combo




Energy Wave → enhanced Basic Attack → Spatial Migration → Violet Requiem. Poke first, spend the charged guided strike, then leap only when the target's movement is predictable. This sequence adds Super Magic marks and makes the Ultimate less dependent on a single knockup.
How to Play Guinevere by Game Phase
Early game
Start Energy Wave and use it through the minion wave when it can also touch the opposing EXP laner. Charge Super Magic between trades and keep the enhanced Basic Attack for healing or a mark before your level-four engage. Do not reveal Spatial Migration from maximum range unless the target has already spent its escape.
Mid game
Push the side wave, then approach Turtle or Lord entrances from fog. Guinevere is strongest when the enemy sees the knockup too late. Concentrated Energy supports repeated skirmishes, while Divine Glaive or Genius Wand should move earlier when Magic Defense begins to blunt the combo. Keep the leap recast available until the enemy control is committed.
Late game
Stop treating the first visible target as the correct target. Look for a flank on the backline or wait for a teammate such as Franco or Hylos to create a guaranteed entry. Winter Crown, Queen's Wings, or Immortality can preserve a decisive engage, but they do not fix a leap taken without vision.
Five Common Guinevere Mistakes
- Opening with Violet Requiem before the target is airborne or fully marked.
- Leaping from open vision and giving the target time to sidestep Spatial Migration.
- Using Spatial Migration's recast immediately instead of saving it for the enemy response.
- Missing Energy Wave and losing both the slow and the cooldown reduction.
- Building only Magic Power when penetration or a defensive active would decide the fight.
Best Emblem and Battle Spell
Custom Mage Emblem is the dependable damage page. Rupture improves early penetration, Weapons Master increases the value of Magic Power from equipment, and Lethal Ignition adds finishing pressure after Guinevere lands multiple hits. This setup matches her burst pattern without asking her to stay in basic-attack range after the combo.
Flicker is the default battle spell because it can correct an engage angle, extend reach, or create an escape after the leap. Execute is an EXP Lane alternative when extra finishing damage matters more than mobility. Retribution belongs only to a deliberate jungle role and should not replace Flicker in a standard EXP Lane setup.
How to Read the Build Choices
All five in-game paths center on Concentrated Energy and Divine Glaive. Concentrated Energy gives Guinevere sustain and scaling damage during repeated trades; Divine Glaive keeps her burst relevant as enemies buy Magic Defense. Magic Boots appears in four paths for faster skill cycles, while the fifth uses Arcane Boots for stronger early penetration.
The remaining slots answer the match. Queen's Wings, Brute Force Breastplate, Winter Crown, and Immortality protect an engage. Holy Crystal and Blood Wings add large Magic Power spikes. Genius Wand works best into low-to-moderate Magic Defense, Starlium Scythe rewards a Basic Attack between skills, and Wishing Lantern adds value against high-HP targets.
Current In-Game Builds
These five current in-game builds were observed on August 14, 2026. Compare the six-item order and adjust utility or defensive slots for the match.
Build 1
| Item 1 | Item 2 | Item 3 | Item 4 | Item 5 | Item 6 |
|---|---|---|---|---|---|
 Magic Boots Magic Boots |  Concentrated Energy Concentrated Energy |  Queen's Wings Queen's Wings |  Divine Glaive Divine Glaive |  Holy Crystal Holy Crystal |  Wishing Lantern Wishing Lantern |
Build 2
| Item 1 | Item 2 | Item 3 | Item 4 | Item 5 | Item 6 |
|---|---|---|---|---|---|
| Magic Boots | Concentrated Energy |  Starlium Scythe Starlium Scythe | Divine Glaive |  Blood Wings Blood Wings | Holy Crystal |
Build 3
| Item 1 | Item 2 | Item 3 | Item 4 | Item 5 | Item 6 |
|---|---|---|---|---|---|
| Magic Boots | Concentrated Energy |  Brute Force Breastplate Brute Force Breastplate | Queen's Wings | Divine Glaive |  Immortality Immortality |
Build 4
| Item 1 | Item 2 | Item 3 | Item 4 | Item 5 | Item 6 |
|---|---|---|---|---|---|
| Magic Boots | Concentrated Energy | Divine Glaive | Queen's Wings |  Genius Wand Genius Wand |  Winter Crown Winter Crown |
Build 5
| Item 1 | Item 2 | Item 3 | Item 4 | Item 5 | Item 6 |
|---|---|---|---|---|---|
| Concentrated Energy |  Arcane Boots Arcane Boots | Holy Crystal | Divine Glaive | Winter Crown | Wishing Lantern |
Equipment Guide
Use the item notes below to decide what each slot contributes. The table describes each item independently of the numbered builds.
| Item | What it adds | When to consider it |
|---|---|---|
| Magic Boots | Movement Speed, cooldown reduction, and HP for more frequent skill rotations with a small durability boost. | Choose when faster cooldown cycles matter more than early penetration; replace them if defensive footwear is required to survive lane pressure. |
| Concentrated Energy | Magic Power, HP, and hybrid lifesteal, plus stacking Magic Power and bonus magic damage during extended combat. | Buy early for sustain in repeated trades and longer fights; it is the common core when Guinevere must heal through her magic damage. |
| Queen's Wings | HP, adaptive attack, cooldown reduction, and spell vamp, with damage reduction and shorter skill cooldowns at low HP. | Move it earlier when dives leave you at low HP before the combo finishes; delay it when the enemy cannot threaten your channel. |
| Divine Glaive | Magic Power and percentage Magic Penetration that scales further against enemies with higher Magic Defense. | Buy earlier against stacked Magic Defense, and later when enemies remain fragile enough for flat penetration and raw Magic Power. |
| Holy Crystal | A large Magic Power increase plus a level-scaling percentage boost to total Magic Power. | Add when you can safely convert a large Magic Power spike into stronger burst; delay it if survival or penetration is the immediate need. |
| Wishing Lantern | Magic Power, Mana, and cooldown reduction, with an extra current-HP magic damage proc after enough magic damage is dealt. | Choose against high-HP targets and long fights where repeated magic damage can trigger its extra current-HP damage. |
| Starlium Scythe | Magic Power, cooldown reduction, hybrid lifesteal, and Mana Regen, followed by a slowing true-damage Basic Attack after casting a skill. | Choose when you can weave an enhanced Basic Attack between skills; replace it if the fight rarely allows that follow-up hit. |
| Blood Wings | Magic Power and a regenerating shield; Movement Speed rises while the shield is active and briefly after it breaks. | Buy for a high-damage shield and extra mobility after your core items, especially when you need one more layer against burst. |
| Brute Force Breastplate | HP, Physical Defense, and cooldown reduction, with stacking adaptive attack, Movement Speed, and control-duration reduction. | Use against physical pressure when repeated skill hits can maintain its movement and adaptive-attack stacks. |
| Immortality | HP and Physical Defense plus a delayed resurrection with restored HP and a temporary shield. | Take late when one resurrection can protect a decisive engage; switch it after the revive is unavailable and another defense has more value. |
| Genius Wand | Magic Power, Movement Speed, and Magic Penetration, with repeated magic damage reducing the target's Magic Defense. | Buy earlier against low-to-moderate Magic Defense when repeated hits can stack the reduction; prefer Divine Glaive against heavy resistance. |
| Winter Crown | Adaptive Attack, HP, and cooldown reduction, with a short untargetable and damage-immune active that lets already-cast skills continue. | Choose when the active can protect Guinevere while Violet Requiem or another already-cast skill continues; time it after committing, not before entering. |
| Arcane Boots | Movement Speed, Magic Power, and flat Magic Penetration for stronger early burst against low-defense targets. | Choose for stronger early burst when cooldown access is sufficient; switch away if the matchup demands defense or more frequent skill cycles. |
Best Teammates and Matchups
Reliable partners


Franco and Hylos can hold enemies in place long enough for Spatial Migration to land. Let their control begin the fight, then chain Guinevere's knockup and Ultimate instead of competing for the opening.
Targets Guinevere pressures



Zilong and Silvanna are vulnerable when their movement becomes predictable, while Karrie is the priority backline target when Guinevere finds a flank. Track defensive spells before committing the full combo.
Dangerous opponents



Badang and Chou can interrupt or punish Guinevere's entry, and Diggie can remove the control that keeps targets inside Violet Requiem. Against them, enter later, identify the defensive cooldown first, and preserve the leap recast.
Awkward pairing
Silvanna overlaps with Guinevere's magic-damage dive pattern and may leave the team short on safer ranged pressure. If both are drafted, the rest of the lineup should supply a durable frontline and dependable backline damage.
Guinevere Base Stats
| Stat | Level 1 |
|---|---|
| HP | 2350 |
| HP Regen | 7.8 |
| Physical Attack | 126 |
| Physical Defense | 18 |
| Attack Speed | 1.14 |
| Attack Speed Ratio | 100% |
| Mana | 0 |
| Mana Regen | 0 |
| Magic Power | 0 |
| Magic Defense | 15 |
| Movement Speed | 260 |
These level-one values exclude equipment, Emblems, skins, and match modifiers. Guinevere begins with 2350 HP, 126 Physical Attack, and 260 Movement Speed; her zero Mana values reflect a kit that does not use the standard Mana resource.
Guinevere Skins and Availability
Summer Breeze, Sakura Wishes, and Amethyst Dance showed 749 Diamonds in-game on August 14, 2026, while Fleur de Bleau showed 269 Diamonds. Athena Asamiya, Lady Crane, Psion of Tomorrow, Elegant Butterfly, Daybreak Halo, and Chun-Li (Outfit 2) were marked as limited-time events. Lotus retained its September 2019 StarLight label. Availability can rotate, so confirm the active shop or event before planning a purchase.

Summer Breeze
749 Diamonds shown in-game

Sakura Wishes
749 Diamonds shown in-game

Amethyst Dance
749 Diamonds shown in-game

Fleur de Bleau
269 Diamonds shown in-game

Athena Asamiya
Limited-time Event

Lotus
09/2019 StarLight Member

Lady Crane
Limited-time Event

Psion of Tomorrow
Limited-time Event

Elegant Butterfly
Limited-time Event

Daybreak Halo
Limited-time Event

Chun-Li (Outfit 2)
Limited-time Event
Planning a Guinevere skin purchase?
Check the active in-game shop or event first. If you need Diamonds after confirming availability, use ManaBuy's MLBB top-up page.
Guinevere Story
Born into the Baroque family, Guinevere preferred magic to the fencing traditions expected of her. At the Magic Academy she developed superpower and anti-gravity magic at a remarkably young age, often testing it through pranks on her brother Lancelot. When her family pressed her toward a political marriage with the Paxleys, she left to find Lancelot and take control of her own future.
Related MLBB Guides
- Browse the MLBB guide hub for more hero guides.
- Khufra Roam guide covers another knockup-heavy initiator who rewards patient angles.
- Harith Gold Lane guide explains a mobile magic-damage alternative built around repeated dashes.
Guinevere FAQ
Which skill should Guinevere upgrade first?
Take Energy Wave at level 1 and prioritize it, upgrade Spatial Migration as the backup skill, and level Violet Requiem whenever available.
What is Guinevere's best battle spell?
Flicker is the default for EXP Lane because it adds a second engage or escape angle. Execute is a finishing alternative, while Retribution is reserved for jungle play.
What is Guinevere's laning combo?
Use Energy Wave, spend the enhanced Basic Attack, land Spatial Migration, then cast Violet Requiem while the target is airborne or fully marked.
When should Guinevere use Winter Crown?
Activate it after committing when incoming damage would otherwise stop the play. Already-cast skills can continue while Guinevere is protected, making it especially useful around her Ultimate.
Should Guinevere buy Divine Glaive or Genius Wand?
Use Genius Wand earlier against low-to-moderate Magic Defense and repeated-hit targets. Move Divine Glaive earlier when enemies stack heavy Magic Defense.
Final Verdict
Guinevere rewards patience before commitment. Poke with Energy Wave, charge Super Magic, approach from an unseen angle, and land Spatial Migration before Violet Requiem. Her five in-game builds agree on sustain and Magic Penetration, while the remaining slots let her trade raw burst for safer entry. With reliable setup in front of her and a recast held for the enemy response, one clean leap can decide the fight.





Copyright © FUTURE OUTLOOK TECHNOLOGY LIMITED.Company Registration No.: 77374965 All rights reserved.UNIT 135,1/F.,143 WAI YIP STREET,KWUN TONG HK