
Khufra MLBB Roam Guide: Best Build, Emblem, Combos, and Counters

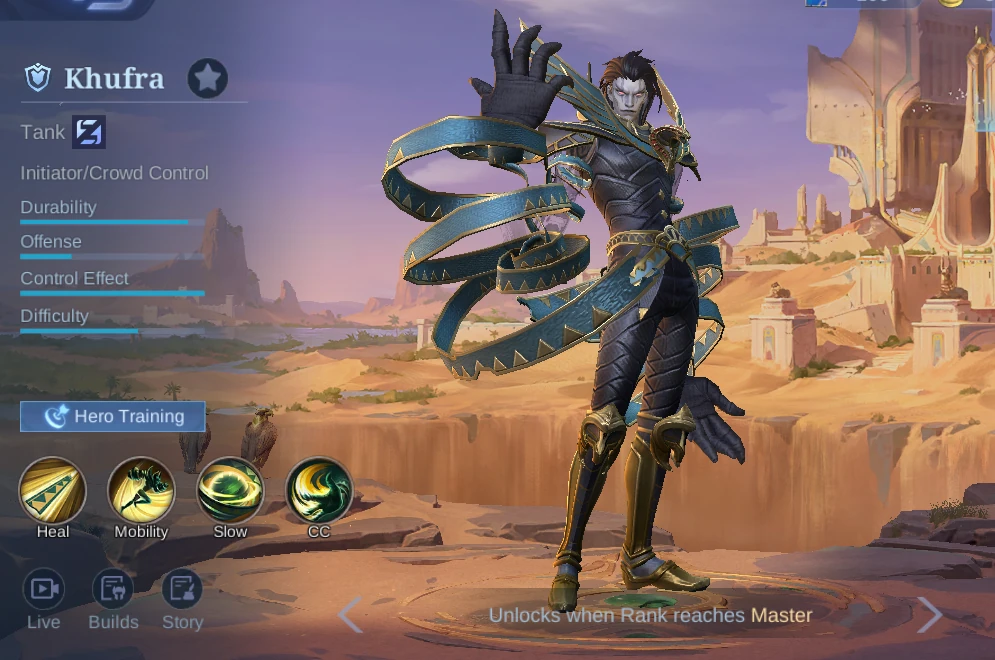
In-game context: MLBB game version 2.1.88.12027, observed in-game on August 14, 2026. Khufra is listed as a Tank with Initiator and Crowd Control specialties.
Why Play Khufra as a Roamer?
Khufra is most valuable when the enemy draft depends on dashes, blink skills, or narrow approaches. Tyrant's Revenge lets him charge from a bush or behind terrain, Bouncing Ball turns the escape route into a danger zone, and Tyrant's Rage can convert a normal displacement into a wall stun. That gives his team several seconds to burst a carry or secure an objective entrance.
He is not a tank that should absorb damage without a plan. His strongest engage begins before the enemy sees him, and his defense is most useful while Bouncing Ball is denying movement. If allies are too far away, even a perfect knock-up produces little value. Keep checking the minimap, wait for a damage dealer to enter range, and treat vision as part of the combo.
Khufra Skills and Practical Uses

Spell Curse
Heal / Damage / Passive. Every 8 seconds, Khufra's next Basic Attack gains range, deals Magic Damage equal to 100 plus 120% Total Physical Attack and 6% of the target's Max HP, slows by 30% for 1.5 seconds, and heals 8% of Khufra's Max HP. Each control effect applied to an enemy hero cuts the cooldown by 4 seconds.
Best use: Weave the enhanced Basic Attack between crowd-control skills to add a slow, sustain the engage, and accelerate the next proc.
Avoid: Do not spend the enhanced attack on a low-value target when a catch is about to start.
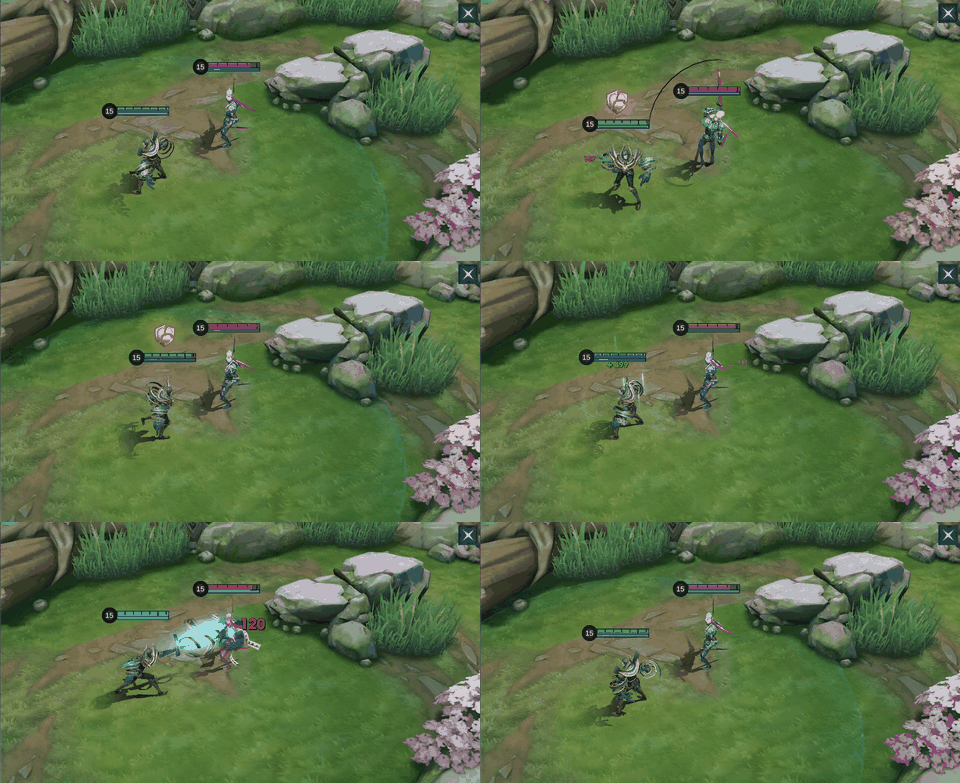

Tyrant's Revenge
Mobility / CC. Khufra charges and launches in the chosen direction, damaging enemies on the path. At maximum range or on the first enemy hero, he stops, deals a second area hit, and knocks nearby enemies airborne for up to 1 second.
Best use: Charge from fog or behind terrain, release when allies are close enough to convert the airborne, and aim beyond the target rather than at their feet.
Avoid: Do not reveal the charge in open vision or launch through a minion line that lets the target sidestep the endpoint.
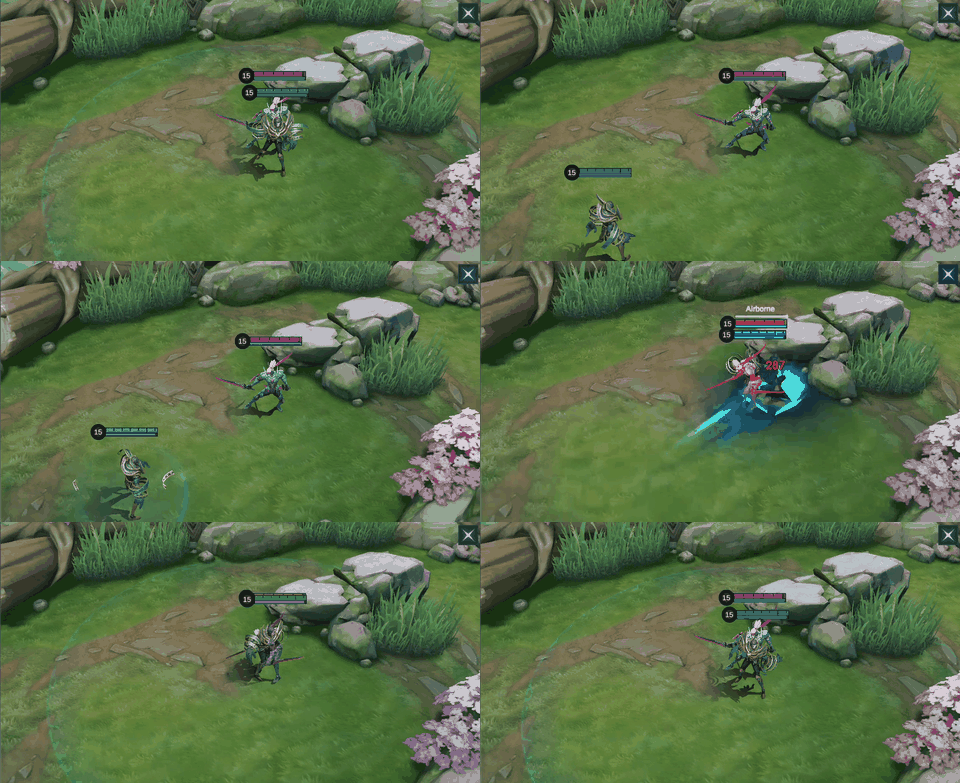

Bouncing Ball
Slow / Buff. Khufra becomes a bouncing ball and gains 30% Physical and Magic Defense. Enemies who try to blink across him are knocked airborne. Each bounce deals nearby Magic Damage based on Khufra's Max HP and slows by 80% for 0.2 seconds.
Best use: Land after the opener and stay on the escape path so dash-dependent enemies must either wait or risk the airborne.
Avoid: Do not activate too early while the target can simply walk around the zone.
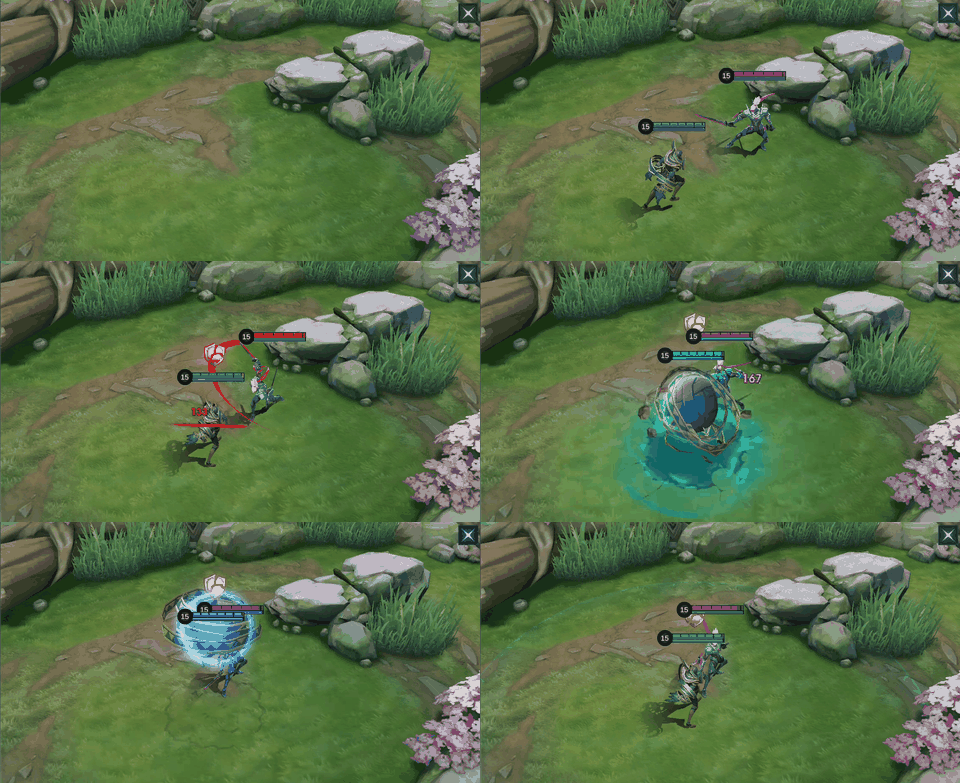

Tyrant's Rage
CC / AOE. Khufra pushes nearby enemies toward his front, deals 300 plus 100% Total Physical Attack Physical Damage, and slows them for 1.25 seconds. Enemies pushed into a wall take 150% of the skill's damage and are stunned instead.
Best use: Turn so the pull ends against a wall, turret edge, or terrain corner, then cast after the initial knock-up lands.
Avoid: Do not face away from the wall; the push follows Khufra's front and can move targets out of ally damage.
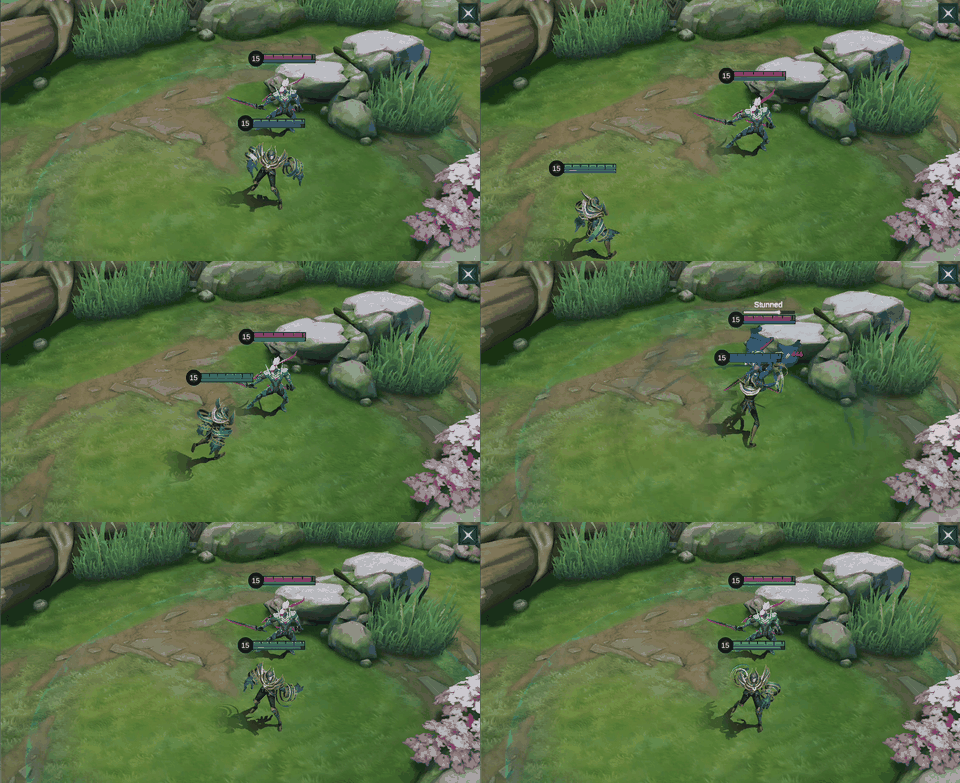
Skill Priority and Best Combos
Take Bouncing Ball at level 1 and prioritize it, with Tyrant's Revenge as the supporting upgrade. Level Tyrant's Rage whenever it is available. Bouncing Ball improves Khufra's normal frontline pattern, while Tyrant's Revenge supplies the range needed to begin a catch.
Teamfight combo



Tyrant's Revenge → Tyrant's Rage → Bouncing Ball. Charge from an unseen angle, knock up the first target, turn toward nearby terrain, and push the group into the wall. Enter Bouncing Ball immediately afterward to deny escape skills and stay durable while allies deal damage.
Laning catch



Tyrant's Revenge → enhanced Basic Attack → Bouncing Ball. Land the knock-up, use Spell Curse for its slow and healing, then occupy the target's retreat line with Bouncing Ball. This is the safer early pattern when the ultimate is unavailable.
How to Play Khufra by Game Phase
Early game
Start Bouncing Ball, help protect the first jungle path, then reach level 2 before forcing a lane catch. Rotate between the river and Gold Lane without showing in every wave. A missing Khufra creates pressure even before Tyrant's Revenge is released. Check bushes with the edge of your vision and keep enough HP to contest the first Turtle.
Mid game
Move ahead of the team into objective entrances and charge from terrain rather than from the center of the lane. Your ideal target is a mobile damage dealer who has limited room to sidestep. If the enemy keeps a cleanse or immunity ready, hold Tyrant's Rage and use Bouncing Ball as denial until that answer is spent.
Late game
One missed launch can expose the whole team, so value counter-engage more highly. Stand near your carry when assassins must dash in, or hide beside a wall when the enemy back line has to cross a narrow entrance. Do not chase beyond allied damage range after the first control chain ends.
Five Common Khufra Mistakes
- Charging Tyrant's Revenge in open vision, giving the target time to step aside.
- Activating Bouncing Ball before enemies commit their movement skills.
- Casting Tyrant's Rage while facing away from the wall and pushing targets to safety.
- Starting a fight while the team's main damage dealer is clearing a distant wave.
- Using every control skill on the frontline when the enemy carry still has a clear escape path.
Best Emblem and Battle Spell
Custom Tank Emblem is the dependable choice because Khufra needs HP and defenses to survive after the first knock-up. For a movement-focused setup, Agility helps normal rotations, Wilderness Blessing improves travel through the jungle and river, and Quantum Charge turns a Basic Attack into brief movement speed and healing. That sequence fits Spell Curse naturally after a successful launch.
Flicker is the default battle spell. It adds reach to an initiation, fixes a Tyrant's Rage angle, and gives Khufra a way out when the enemy avoids the first control. Concussive Blast is a reasonable third-talent alternative when extra area damage matters more than Quantum Charge's movement and sustain.
How to Read the Build Choices
The current item paths agree on a simple core: Rapid Boots for rotation speed, Thunder Belt for a durable enhanced Basic Attack, and Dominance Ice for physical defense and anti-sustain pressure. Cursed Helmet supports HP and close-range damage, while Chastise Pauldron is aimed at fast basic attackers. Athena's Shield answers magic burst.
Build 3 shows the main alternative. Radiant Armor is better into repeated Magic Damage, and Guardian Helmet helps Khufra recover between vision checks. Do not copy the final two slots blindly: choose Athena's Shield for a sharp magic combo, Radiant Armor for continuous magic hits, Chastise Pauldron for attack-speed pressure, or Guardian Helmet when repeated map rotations matter most.
Current In-Game Builds
These five current in-game builds were observed on August 14, 2026. Compare the six-item order and adjust utility or defensive slots for the match.
Build 1
| Item 1 | Item 2 | Item 3 | Item 4 | Item 5 | Item 6 |
|---|---|---|---|---|---|
 Rapid Boots Rapid Boots |  Thunder Belt Thunder Belt |  Dominance Ice Dominance Ice |  Cursed Helmet Cursed Helmet |  Chastise Pauldron Chastise Pauldron |  Athena's Shield Athena's Shield |
Build 2
| Item 1 | Item 2 | Item 3 | Item 4 | Item 5 | Item 6 |
|---|---|---|---|---|---|
| Rapid Boots | Thunder Belt | Cursed Helmet | Dominance Ice | Chastise Pauldron | Athena's Shield |
Build 3
| Item 1 | Item 2 | Item 3 | Item 4 | Item 5 | Item 6 |
|---|---|---|---|---|---|
| Rapid Boots | Thunder Belt | Dominance Ice |  Radiant Armor Radiant Armor | Cursed Helmet |  Guardian Helmet Guardian Helmet |
Build 4
| Item 1 | Item 2 | Item 3 | Item 4 | Item 5 | Item 6 |
|---|---|---|---|---|---|
| Rapid Boots | Thunder Belt | Dominance Ice | Cursed Helmet | Chastise Pauldron | Athena's Shield |
Build 5
| Item 1 | Item 2 | Item 3 | Item 4 | Item 5 | Item 6 |
|---|---|---|---|---|---|
| Rapid Boots | Thunder Belt | Dominance Ice | Cursed Helmet | Chastise Pauldron | Athena's Shield |
Equipment Guide
Use the item notes below to decide what each slot contributes. The table describes each item independently of the numbered builds.
| Item | What it adds | When to consider it |
|---|---|---|
| Rapid Boots | High Movement Speed and slow reduction for faster bush-to-bush rotations; its movement bonus drops briefly after taking or dealing damage. | Buy for early map tempo when the enemy cannot constantly tag you; switch to defensive boots if control or lane damage repeatedly breaks your rotations. |
| Thunder Belt | HP, hybrid defense, Movement Speed, and a periodic enhanced Basic Attack that deals True Damage, slows, and can add permanent Hybrid Defense. | Finish early when you can safely weave Spell Curse Basic Attacks into fights and begin stacking defense before late objectives. |
| Dominance Ice | Physical Defense and Mana, with nearby anti-heal and attack-speed pressure for sustained frontline fights. | Prioritize against strong healing, shields, or fast basic attackers; delay only when burst Magic Damage is the immediate threat. |
| Cursed Helmet | A large HP pool, Magic Defense, and an area burn that helps Khufra clear waves and punish enemies who stay close. | Buy when extra HP and close-range burn improve wave control and extended frontlining. |
| Chastise Pauldron | HP and Physical Defense, with attack-speed suppression and a low-HP recovery effect for surviving basic-attack carries. | Choose against attack-speed carries or when the low-HP recovery can buy enough time for your team to follow the engage. |
| Athena's Shield | HP, Magic Defense, HP Regen, and temporary magic-damage reduction after enemy magic damage begins. | Choose against one-combo magic burst; replace with Radiant Armor when the damage arrives as repeated ticks. |
| Radiant Armor | HP, Magic Defense, HP Regen, and stacking reduction against repeated Magic Damage. | Use against continuous magic poke or burn that keeps hitting through a long fight. |
| Guardian Helmet | A very large HP increase and strong out-of-combat regeneration for repeated rotations and objective setups. | Finish when you need to reset HP between vision checks without recalling; replace it if anti-burst defense is more urgent. |
Best Teammates and Matchups
Targets Khufra punishes


Joy and Lancelot depend on movement skills to enter, escape, or reset. Place Bouncing Ball on the path they must cross instead of chasing their current position. The threat of an airborne can be enough to delay their combo.
Harder frontlines

Fredrinn and Gloo can absorb the first control chain without giving Khufra a valuable conversion. Avoid spending the full combo on them unless the team has enough damage or the control secures an objective.
Reliable follow-up



Eudora and Pharsa can punish enemies held by Khufra's control, while Chip helps the team arrive quickly after an engage begins. Signal the target before charging so burst and displacement land in the same window.
Khufra Base Stats
| Stat | Level 1 |
|---|---|
| HP | 2670 |
| HP Regen | 9.4 |
| Physical Attack | 117 |
| Physical Defense | 19 |
| Attack Speed | 0.98 |
| Attack Speed Ratio | 100% |
| Mana | 500 |
| Mana Regen | 4 |
| Magic Power | 0 |
| Magic Defense | 15 |
| Movement Speed | 255 |
These level-one values exclude equipment, Emblems, skins, and match modifiers. The 2670 base HP and 255 Movement Speed support early roaming, but Khufra still needs allies nearby before committing deep.
Khufra Skins and Availability
Gentleman Thief, Apophis, and Desert Owl showed direct Diamond prices on August 14, 2026. Volcanic Overlord and Cursed Scroll were marked as limited-time events, Dreadful Clown as a March 2021 StarLight skin, and Iron Hook as the Season 28 First Recharge skin. Event availability can rotate, so confirm the active shop before planning a purchase.
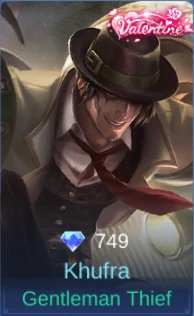
Gentleman Thief
749 Diamonds shown in-game
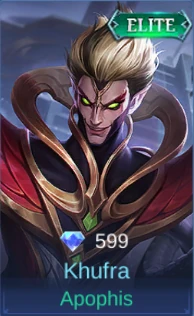
Apophis
599 Diamonds shown in-game
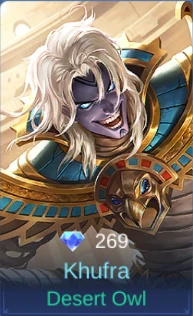
Desert Owl
269 Diamonds shown in-game

Volcanic Overlord
Limited-time Event
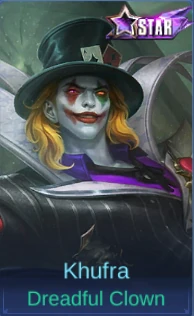
Dreadful Clown
03/2021 StarLight Member
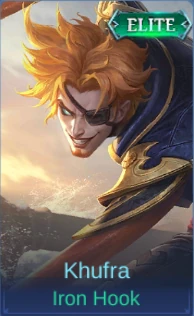
Iron Hook
S28 First Recharge
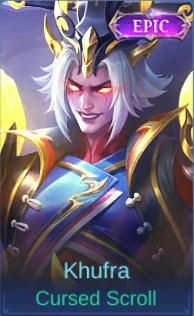
Cursed Scroll
Limited-time Event
Planning a Khufra skin purchase?
Check the active in-game shop or event first. If you need Diamonds after confirming availability, use ManaBuy's MLBB top-up page.
Khufra Story
Khufra ruled the ancient Western Desert city of Arnak through conquest and limitless ambition. He sought an astrologer who could expand his power, and Esmeralda's love led her to help him until she realized he intended to destroy the Minoan clan and rule without challenge. She sealed him with a curse, but energy from the Twilight Orb awakened him centuries later. Enraged by her betrayal, Khufra returned determined to find Esmeralda and resume his conquest of the Land of Dawn.
Related MLBB Guides
- Browse the MLBB guide hub for more hero guides.
- Faramis Mid Lane guide explains how a protective mage follows a hard engage.
- Leomord EXP Lane guide covers a diver who benefits from Khufra locking down an escape route.
Khufra FAQ
Which skill should Khufra upgrade first?
Take and prioritize Bouncing Ball, upgrade Tyrant's Revenge as the backup skill, and level Tyrant's Rage whenever available.
What is Khufra's best battle spell?
Flicker is the default because it creates surprise initiation range and helps correct the ultimate angle.
What is Khufra's main combo?
Use Tyrant's Revenge, turn and cast Tyrant's Rage toward a wall, then enter Bouncing Ball to deny escape skills.
When should Khufra use Bouncing Ball?
Use it after mobile enemies commit or directly on the route they must cross. Activating too early lets them walk around it.
Which magic-defense item should Khufra buy?
Choose Athena's Shield against burst Magic Damage and Radiant Armor against repeated magic hits.
Final Verdict
Khufra is strongest when patience creates the engage. Hide the charge, confirm allied follow-up, aim Tyrant's Rage into terrain, and place Bouncing Ball where the enemy wants to escape. His five current build paths emphasize movement, HP, and flexible defense because control only matters if he survives long enough for the team to convert it. Against dash-heavy drafts, few roamers can deny space as directly.




Copyright © FUTURE OUTLOOK TECHNOLOGY LIMITED.Company Registration No.: 77374965 All rights reserved.UNIT 135,1/F.,143 WAI YIP STREET,KWUN TONG HK