
Aamon MLBB Jungle Guide: Best Build, Emblem, Skills, Combos, and Counters

Aamon is a magic Assassin who wins by entering second, stacking shards safely, and finishing a damaged carry before the enemy frontline can turn. His Camouflage gives movement, recovery, and target protection, but it is not permission to begin every fight. Farm quickly, approach from fog, force the backline to spend movement, then convert scattered shards into an Endless Shards execute.
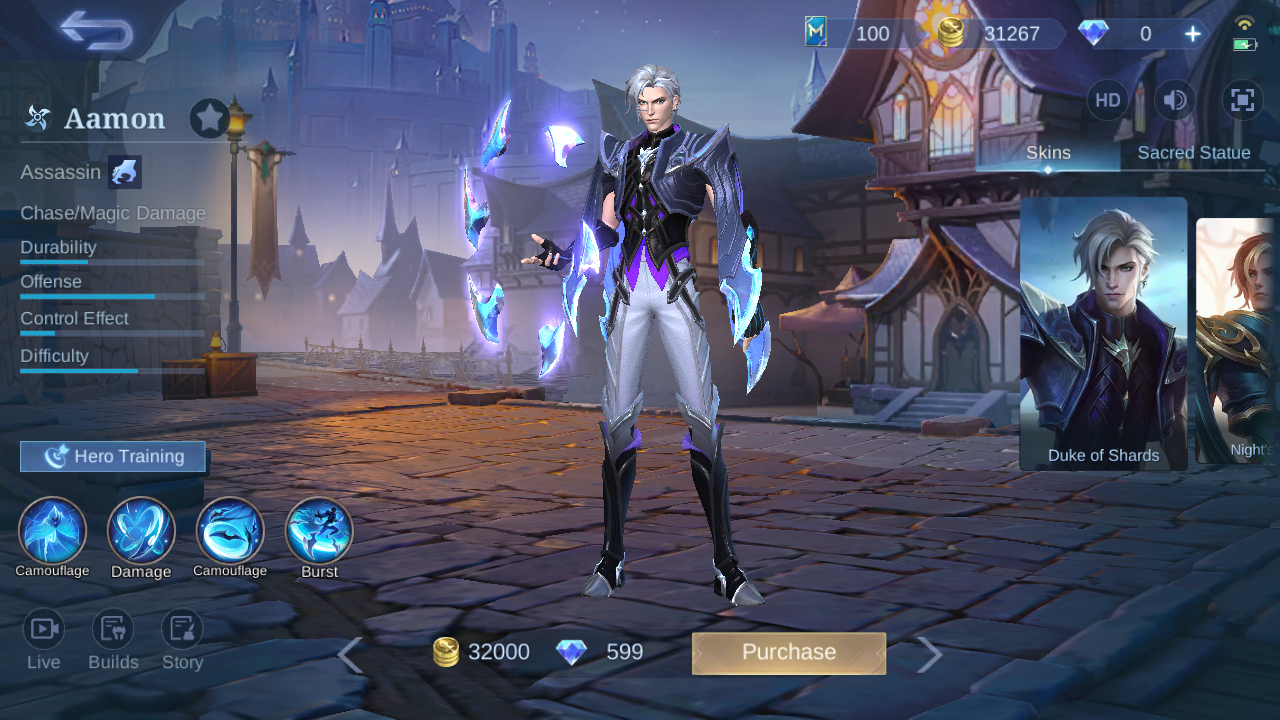
Aamon hero overview and attribute bars.
Aamon at a Glance
Role and identity
Aamon is an Assassin with Chase and Magic Damage specialties. He creates short windows of untargetability through Camouflage, uses enhanced Basic Attacks to reset tempo, and turns the number of available shards into a stronger ultimate.
Pick him when
Choose Aamon when another teammate can start the fight and when the enemy backline depends on positioning more than instant immunity. Rafaela and Floryn help him reach the second entry with speed, sustain, or protection.
Avoid him when
Balmond, Fredrinn, and Gloo can survive the first burst and keep damaging the area where Aamon wants to reset. A durable frontline also makes it harder to reach a carry with enough shards intact.
Win condition
Reach the first major item curve without feeding, create numbers advantages around Turtle and Lord, and arrive at team fights from a side angle after the first control exchange.
Aamon Skills: When, Why, and What Not to Do

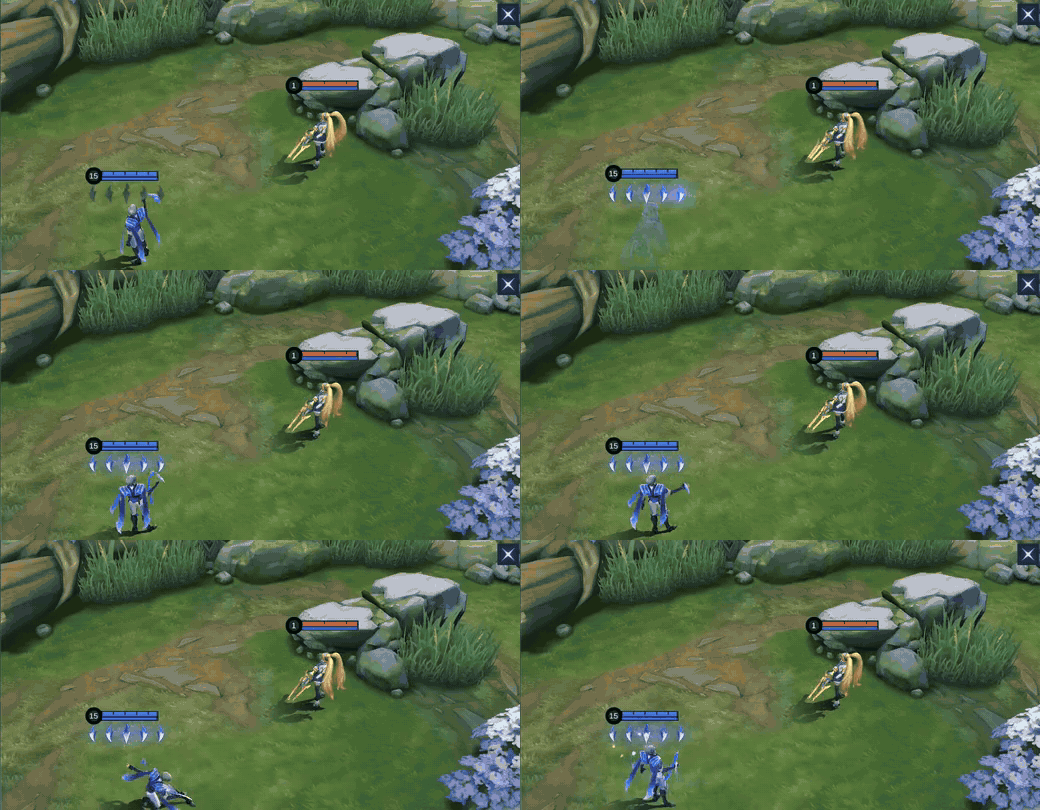
Invisible Armor — Passive / Camouflage / Buff
Aamon enters the Camouflage state each time he hits an enemy with a skill, during which he cannot be targeted, recovers 25 (+15% Total Magic Power) plus 3% of his lost HP every 0.5s, and gains 80% extra Movement Speed that rapidly decays over 3s. Upon leaving Camouflage, he resets his Basic Attack cooldown and enhances Basic Attacks within the next 3s.
When / why / do not: Trigger Camouflage with skill contact, then use the movement and recovery to change angle before the enhanced Basic Attack. Leave Camouflage actively when the reset and larger first hit will matter. Do not stand on top of a target during the hidden window; untargetable does not make Aamon immune to every area effect.
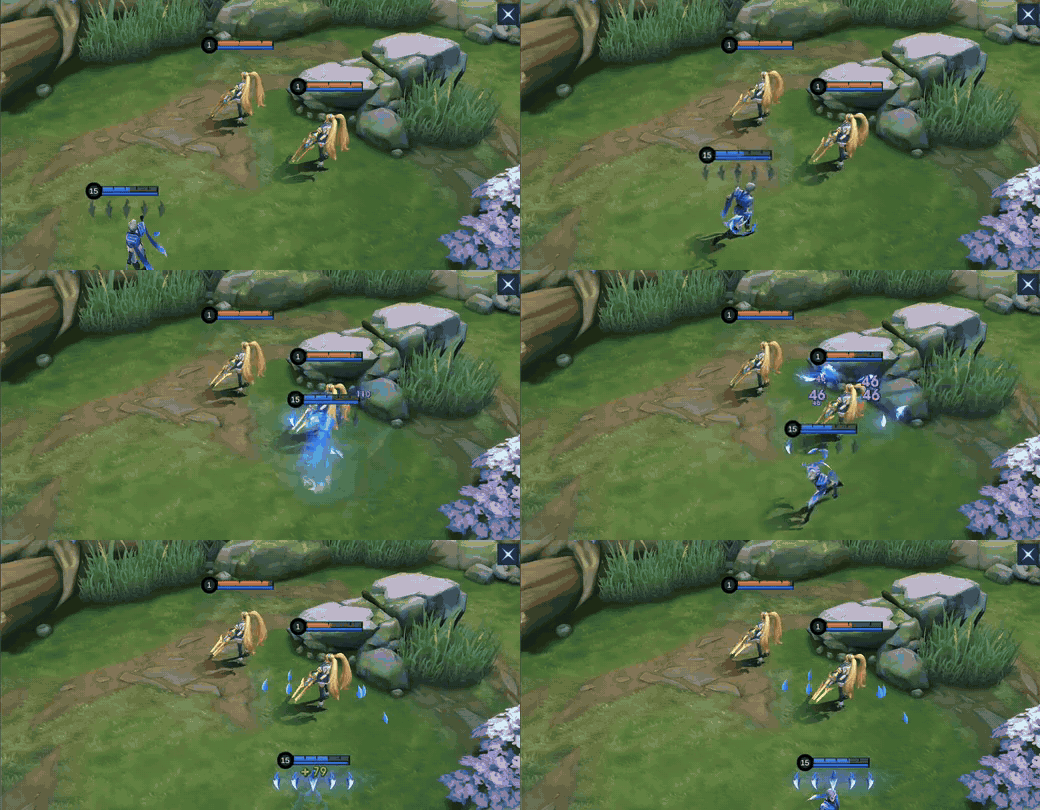

Soul Shards — Damage / Buff
Passive: Aamon charges his armor through enhanced Basic Attacks or while camouflaged. At 5 charges, his next attack throws 6 shards, each dealing 50 (+15% Total Magic Power) Magic Damage. Active: Aamon throws a shard at a nearby enemy, dealing 175 (+60% Total Magic Power) Magic Damage.
When / why / do not: Build five armor charges through Camouflage and enhanced Basic Attacks so the next attack releases six shards. Use the active hit for clear speed or a close target. Do not spend it automatically if preserving charges and a shard field will create a stronger ultimate window.
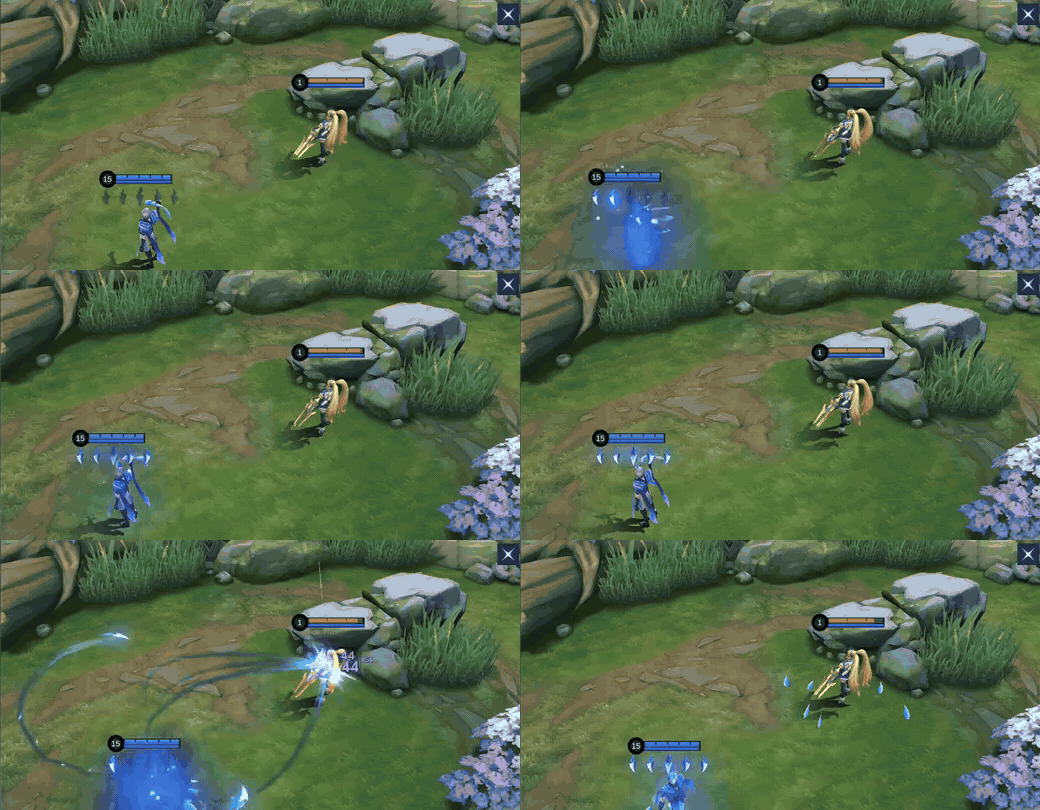

Slayer Shards — Camouflage / Damage
Aamon throws a shard forward, dealing 120 (+50% Total Magic Power) Magic Damage and slowing enemies hit by 50% for 2s. The shard returns after a short delay and grants Camouflage; if it hits a non-minion enemy, it returns immediately.
When / why / do not: Throw Slayer Shards through the approach lane. A hit on a non-minion returns immediately; a miss returns after a short delay and still grants Camouflage. Use that return timing to enter or leave. Do not throw it where a minion intercepts the intended line.

Endless Shards — Burst
Aamon throws all shards at a designated enemy and slows them by 30% for 1.5s. After a short delay, the shards fly to the enemy's location again, each dealing 35 (+10% Total Magic Power)-70 (+20% Total Magic Power) Magic Damage. The shard count is 8-25 and damage increases with lost HP, reaching its maximum below 30% HP.
When / why / do not: Cast when the target has already lost health and several shards are available on Aamon or the ground. The repeated shard hits gain value against low HP. Do not open a full-health fight with an empty field unless the slow itself secures a guaranteed team follow-up.
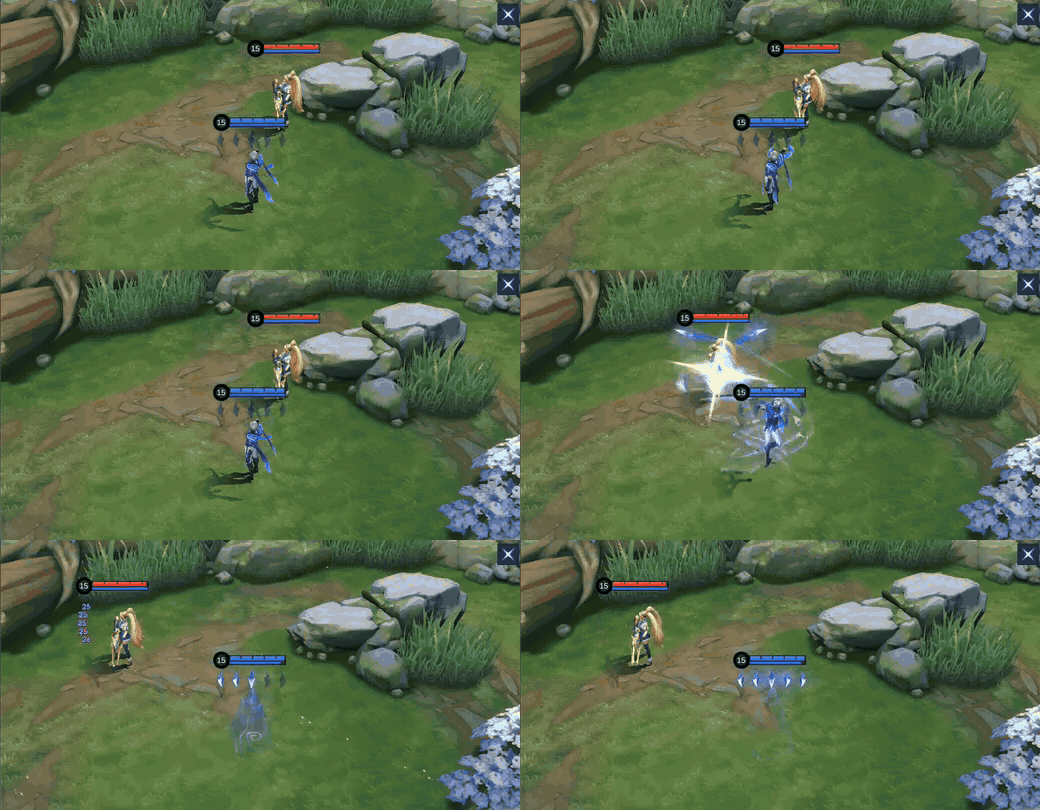
Skill Priority and Aamon Combos
Teamfight Combos
 Slayer Shards
 Basic Attack
 Soul Shards
 Basic Attack
 Endless Shards
Slayer Shards → enhanced Basic Attack → Soul Shards → enhanced Basic Attack → Endless Shards
Use 2nd Skill to Camouflage and flank the enemy. Deal damage with his 1st Skill and Basic Attacks, and Ultimate to take out backline heroes.
Use the full sequence against a separated backliner after the approach is safe. Stop after the short sequence when the target survives, allies cannot follow, or a durable frontliner turns toward you.
Laning Combos
 Slayer Shards
 Basic Attack
 Soul Shards
 Basic Attack
Slayer Shards → enhanced Basic Attack → Soul Shards → enhanced Basic Attack
Use his skills and Enhanced Basic Attacks for very high jungling efficiency.
Use the full sequence against a separated backliner after the approach is safe. Stop after the short sequence when the target survives, allies cannot follow, or a durable frontliner turns toward you.
How to Play Aamon by Phase
Early game
Clear toward the first objective with Soul Shards and enhanced Basic Attacks. Use Slayer Shards for faster movement between camps and preserve Retribution for the contested monster or a secure level timing. Do not force a lane gank with no crowd control when a full clear keeps the level lead.
Mid game
Approach Turtle, Lord, and side-lane fights from fog. Let the frontline reveal defensive skills, enter Camouflage, and attack the exposed damage dealer. Genius Wand and Holy Crystal turn small positioning errors into kill pressure.
Late game
One failed dive can decide the match. Track Winter Crown, Wind of Nature, crowd control, and enemy Flicker before committing. Divine Glaive handles higher Magic Defense; Blood Wings or a defensive swap can buy the time needed for one more Camouflage reset.
Five Aamon Mistakes to Avoid
1. Starting the fight
Aamon is the second entry. Walking through the frontline first exposes him before Camouflage and shard count can create a clean execute.
2. Casting the ultimate with no setup
Endless Shards scales with available shards and missing HP. Use earlier skills and enhanced attacks before spending the finisher.
3. Ignoring minions on Slayer Shards
The travel and return behavior changes when the shard hits a non-minion. Choose an angle that reaches the intended hero instead of the wave.
4. Staying visible after the burst
Camouflage creates a reset window. Change direction, recover, and wait for cooldowns rather than trading Basic Attacks into a tank.
5. Copying one leaderboard order blindly
The five observed builds agreed on a burst core but varied Feather of Heaven, Lightning Truncheon, and Blood Wings. Buy for the target and match state.
Best Emblem and Battle Spell for Aamon
Default jungle: Assassin Emblem + Retribution
Use Agility, Seasoned Hunter, and War Cry. Agility improves rotations and flank angles, Seasoned Hunter strengthens jungle and objective tempo, and War Cry rewards a multi-hit burst cycle. Use Ice Retribution when stealing movement speed helps Aamon remain in range. Do not take this route outside the jungle because Seasoned Hunter and Retribution lose their main purpose.
Alternative: Mage Emblem + Execute
Mage Emblem supports a steadier magic-damage route, while Execute adds a direct finisher when Aamon is not assigned to secure objectives. Choose it only if another teammate owns the jungle role. Do not trade away Retribution when the team expects Aamon to contest Turtle and Lord.
Aggressive alternative
Rupture, Master Assassin, and Killing Spree is a separate burst-and-reset route for isolated targets. Use it when the draft offers repeated solo picks. Avoid it when coordinated objective damage and team-fight uptime matter more.
Top 5 Aamon Pro Setups
This in-game build sample was observed on August 6, 2026. Every row used Arcane Boots, Genius Wand, Holy Crystal, and Divine Glaive. Feather of Heaven appeared in all five rows, Blood Wings in three, and Lightning Truncheon in two. Flame Hunter and Ice Hunter are jungle blessing variants of the same Arcane Boots row, not separate base items.
Build 1
| Item 1 | Item 2 | Item 3 | Item 4 | Item 5 | Item 6 |
|---|---|---|---|---|---|
 Arcane Boots Arcane Boots |  Genius Wand Genius Wand |  Holy Crystal Holy Crystal |  Divine Glaive Divine Glaive |  Feather of Heaven Feather of Heaven |  Lightning Truncheon Lightning Truncheon |
Build 2
| Item 1 | Item 2 | Item 3 | Item 4 | Item 5 | Item 6 |
|---|---|---|---|---|---|
| Arcane Boots | Genius Wand | Feather of Heaven | Holy Crystal | Divine Glaive |  Blood Wings Blood Wings |
Build 3
| Item 1 | Item 2 | Item 3 | Item 4 | Item 5 | Item 6 |
|---|---|---|---|---|---|
| Arcane Boots | Feather of Heaven | Genius Wand | Holy Crystal | Divine Glaive | Blood Wings |
Build 4
| Item 1 | Item 2 | Item 3 | Item 4 | Item 5 | Item 6 |
|---|---|---|---|---|---|
| Arcane Boots | Genius Wand | Holy Crystal | Feather of Heaven | Divine Glaive | Blood Wings |
Build 5
| Item 1 | Item 2 | Item 3 | Item 4 | Item 5 | Item 6 |
|---|---|---|---|---|---|
| Arcane Boots | Genius Wand | Holy Crystal | Feather of Heaven | Divine Glaive | Lightning Truncheon |
Five ranked build snapshots in displayed order.
Aamon Equipment Matrix
| Item | Why it appears | Buy when | Do not buy when |
|---|---|---|---|
| Arcane Boots | Movement Speed, Magic Power, Magic Penetration, and a jungle blessing accelerate Aamon's first clear and early burst. | jungle tempo and early Magic Penetration matter | enemy control or magic burst requires defensive boots |
| Genius Wand | Magic Power, movement, flat Magic Penetration, and repeated Magic Defense reduction fit Aamon's multi-hit cycle. | targets begin with low or moderate Magic Defense | one heavily armored target makes percentage penetration more urgent |
| Holy Crystal | Its large Magic Power increase multiplies every shard and enhanced attack in the burst window. | Aamon has enough tempo to buy a pure damage spike | survival or anti-heal must be solved first |
| Divine Glaive | Percentage Magic Penetration keeps the combo relevant against growing Magic Defense. | frontliners and carries start buying Magic Defense | the enemy remains fragile and utility gives more value |
| Feather of Heaven | Magic Power, Attack Speed, Lifesteal, cooldown reduction, and empowered Basic Attacks support repeated Camouflage exits. | Aamon can weave several enhanced attacks | the match only allows one short spell burst |
| Lightning Truncheon | Magic Power, Mana, cooldown reduction, and a periodic extra hit improve burst and wave clear. | one additional proc can finish grouped or escaping targets | defense or sustained attack speed is more valuable |
| Blood Wings | Magic Power and a regenerating shield protect a high-value late-game burst cycle. | Aamon needs damage without becoming too easy to punish | a cheaper immediate counter item is required |
Best Teammates, Threats, and Favorable Matchups
Speed and sustain partners


Rafaela and Floryn help Aamon reach the second entry with movement, healing, and protection. Wait for their resources before diving instead of assuming they can rescue a blind flank.
Durable threats



These frontliners survive short magic burst and keep pressure on the reset area. Avoid wasting Endless Shards on them unless the kill secures an objective or opens the backline.
Favorable backline targets



Aamon can punish exposed ranged damage dealers and mobile targets after their escape tools are spent. Approach from fog and save the ultimate for the point where their remaining HP makes the shard return decisive.
Tempo conflict

Ling competes for jungle economy and often wants the same side-lane resources. Draft clear farm ownership so Aamon does not reach the first objective under-leveled.
Aamon Base Stats
| HP | 2455 | HP Regen | 8 | Physical ATK | 115 |
|---|---|---|---|---|---|
| Physical DEF | 19 | Attack Speed | 1.09 | Attack Speed Ratio | 100% |
| Mana | 500 | Mana Regen | 4 | Magic DEF | 15 |
| Magic Power | 0 | Movement SPD | 250 | Role | Assassin |
Level-one stats without equipment, Emblem, skin, or match modifiers.
Aamon Skins and Availability
Five exact Aamon Shop cards were accepted. Diamond prices appear only where Purchase was visible. M4 Pass, season, and StarLight labels describe the observed Shop state, not permanent availability.
| Preview | Skin | Tag | Observed availability |
|---|---|---|---|
 | Noble Crest | Elite | 599 Diamonds; Purchase shown |
 | Night's Edge | — | 269 Diamonds; Purchase shown |
 | Cyber Assassin | Star | 01/2023 StarLight Member |
 | Vessel of Deceit | Soul Vessels | Limited-time Event |
 | Soul Reaver | Collector | Limited-time Event |
Aamon Story
Born as House Paxley's eldest son and heir, Aamon was raised under stricter discipline than his younger brother Gusion. He learned to carry the family's public duties while quietly protecting his siblings. When Gusion challenged the family's traditions and disappeared, Aamon pursued the truth behind the Paxley curse and the mysteries surrounding Castle Aberleen.
Aamon FAQ
What is the best Aamon build?
Use Arcane Boots, Genius Wand, Holy Crystal, and Divine Glaive as the main jungle burst core. Add Feather of Heaven for enhanced-attack uptime, Blood Wings for late damage and shielding, or Lightning Truncheon for an extra burst proc.
What is the best Aamon Emblem?
Assassin Emblem with Agility, Seasoned Hunter, and War Cry is the default jungle route. Rupture, Master Assassin, and Killing Spree is a more isolated-pick alternative.
Which Battle Spell should Aamon use?
Use Retribution or Ice Retribution when jungling. Execute is only an alternative when another teammate controls the jungle and objective secure.
What is Aamon's skill priority?
Take Soul Shards at level 1, prioritize it, use Slayer Shards as the backup upgrade, and level Endless Shards whenever available.
Who counters Aamon?
Balmond, Fredrinn, and Gloo can survive his first burst and keep pressure on his reset location. Aamon should bypass them rather than spending every shard on the frontline.
When should I cast Endless Shards?
Cast after building a meaningful shard field and after the target has lost HP. The skill gains value from both shard count and missing health, so it is usually a finisher rather than an opener.
Final Verdict
Aamon is strongest when he treats Camouflage as a route-planning tool, not a panic button. Farm the burst core, enter after the first control exchange, and attack the backline from a side angle. Build shards before Endless Shards, change the final slots for the target, and leave the fight when the reset is safer than one more Basic Attack. For nearby jungle and Assassin decisions, compare the Aulus guide, Karrie guide, and Martis guide.
Top up Mobile Legends: Bang Bang safely on ManaBuy




Copyright © FUTURE OUTLOOK TECHNOLOGY LIMITED.Company Registration No.: 77374965 All rights reserved.UNIT 135,1/F.,143 WAI YIP STREET,KWUN TONG HK