
EN / $ USD
Atlas MLBB Roam Guide: Best Build, Emblem, Skills, and Combos

by Hannah Price
Published Jun 16 2026 · Updated Oct 12 2026
Share:
Table of Contents
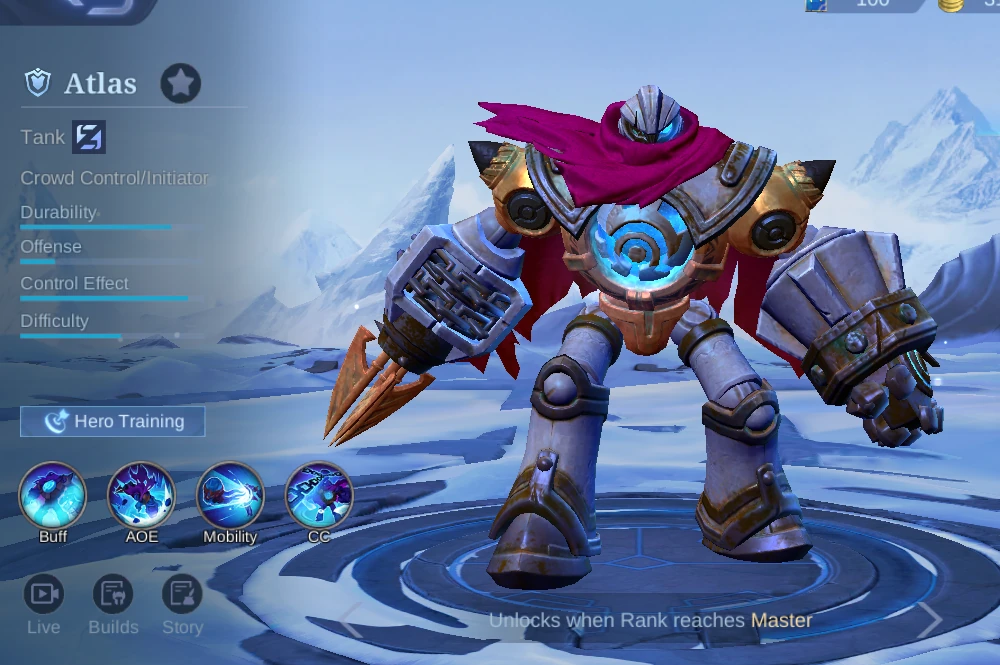
Atlas is a Roam Tank who turns one flank into a full-team displacement. His best fights begin before Fatal Links is visible: he approaches from fog, uses Perfect Match to gain speed and resist slows, chains several enemies, then places them where allied area damage can land immediately.
In-game context: Verified MLBB game version 2.1.88.12027, observed in-game on August 16, 2026. The five builds, item effects, battle spells, and Shop availability reflect that date.
Quick Answer: Best Atlas Setup
Core plan
Enter Ejected State, chain two or more enemies with Fatal Links, use Flicker only when it improves the final landing point, then cast Annihilate through the reunion.Recommended emblem
Support Emblem with Agility, Pull Yourself Together, and Focusing Mark for faster rotations, shorter spell timing, and more allied damage after Atlas hits.Battle spell
Flicker is the default because it extends and redirects Fatal Links. Revitalize is the alternative when the team needs a defensive objective fight and the chosen build supports that sustain.Atlas Role, Specialty, and Base Stats
Atlas is a Tank with Crowd Control/Initiator and is best used as the roamer. His 2,819 level-one HP and 21 Physical Defense give him a strong starting body, while Frigid Breath adds both Physical and Magic Defense after he casts. His 240 base Movement Speed is modest, so Perfect Match, Rapid Boots, pathing, and early arrival are central to his engage.
The values below exclude equipment, emblem, skin, and match modifiers. They are a baseline for understanding why Atlas can absorb the opening response but still needs allies nearby: his kit delays retaliation; it does not make him safe after every enemy cooldown returns.
| HP | 2819 |
|---|---|
| HP Regen | 3 |
| Mana | 500 |
| Mana Regen | 4 |
| Physical Attack | 135 |
| Physical Defense | 21 |
| Magic Defense | 15 |
| Attack Speed | 0.98 |
| Movement Speed | 240 |
Atlas Skills and Practical Use

Frigid Breath
Passive / Buff / Debuff
Each skill cast surrounds Atlas with Frigid Breath for five seconds. An enemy who remains nearby is progressively slowed and then frozen for 0.5 seconds, while Atlas gains 20 plus 0.5% of his extra Max HP as Physical and Magic Defense.
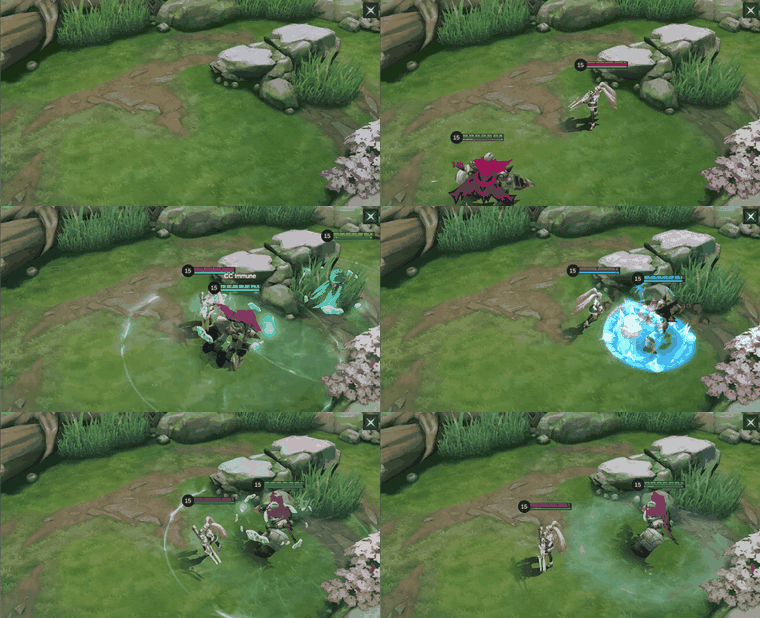
Use it well: Cast before walking into contact so the aura is already active. Stay close long enough to finish the freeze, then use that brief stop to line up the rest of the engage.
Avoid: Do not drift out of range just before the freeze completes. The passive rewards controlled proximity, not a quick touch followed by an immediate retreat.

Annihilate
Skill 1 / AOE
Atlas smashes the ground in three explosions, each dealing Magic Damage. During Ejected State, both Atlas and the Mecha Sentry cast Annihilate, so overlapping the two zones can multiply its pressure.
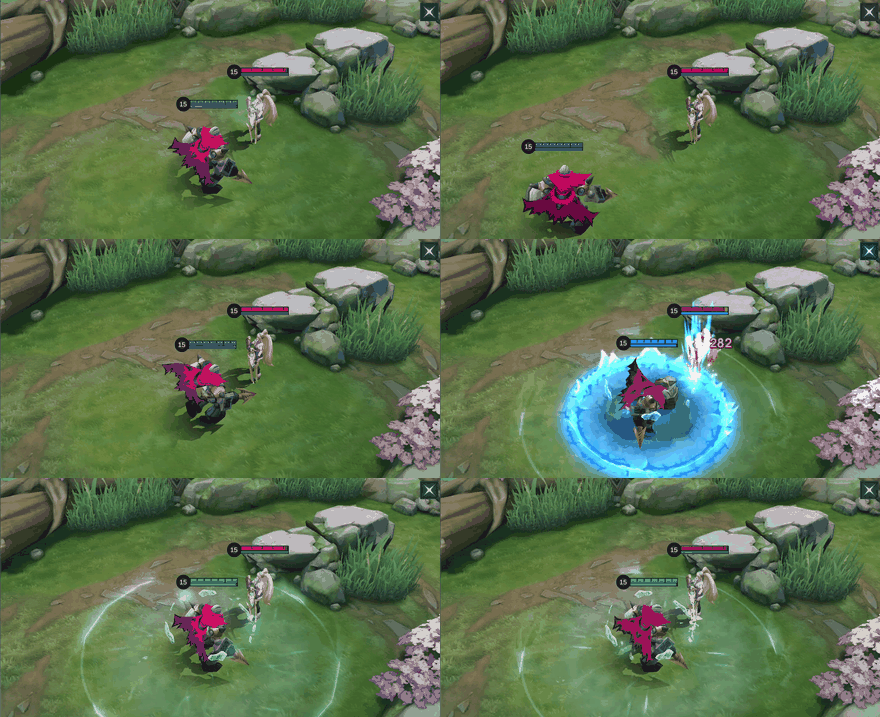
Use it well: Use it after Perfect Match has placed Atlas and the Mecha around the target. The reunion control makes the repeated explosions easier to keep on an enemy.
Avoid: Do not spend it at the edge of range while approaching. Holding it for the reunion or a linked group creates far more reliable damage.

Perfect Match
Skill 2 / Speed Up / CC
Atlas ejects from the Mecha Sentry, gains 40% Movement Speed and slow immunity, and shares one HP bar with 50% damage reduction. When Atlas and the Mecha reunite, nearby enemies take Magic Damage and are stunned for 0.8 seconds.
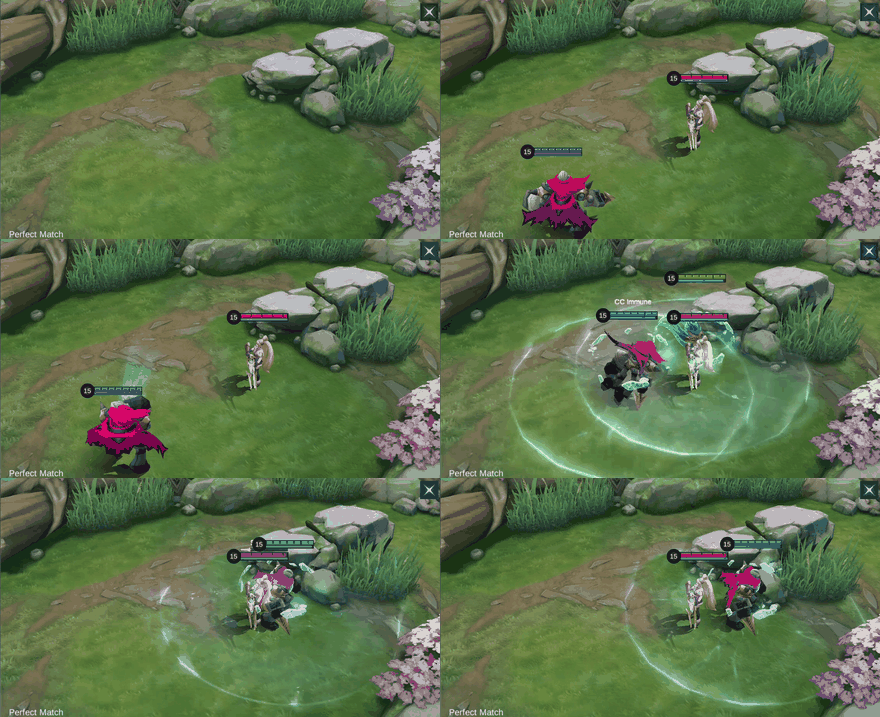
Use it well: Use the speed and slow immunity to find a flank or extend Fatal Links with Flicker. Reunite on top of the targets so the stun creates the next control window.
Avoid: Do not eject without a route back to the Mecha or the team. The skill is strongest as planned entry and control, not as a blind sprint through enemy vision.

Fatal Links
Ultimate / CC / AOE
Atlas chains nearby enemy heroes, deals Magic Damage, and slows them by 40% for three seconds. Recasting drags the chained targets and slams them at the chosen location for heavy Magic Damage. Casting in Ejected State returns the Mecha immediately, but the usual reunion stun becomes a slow.
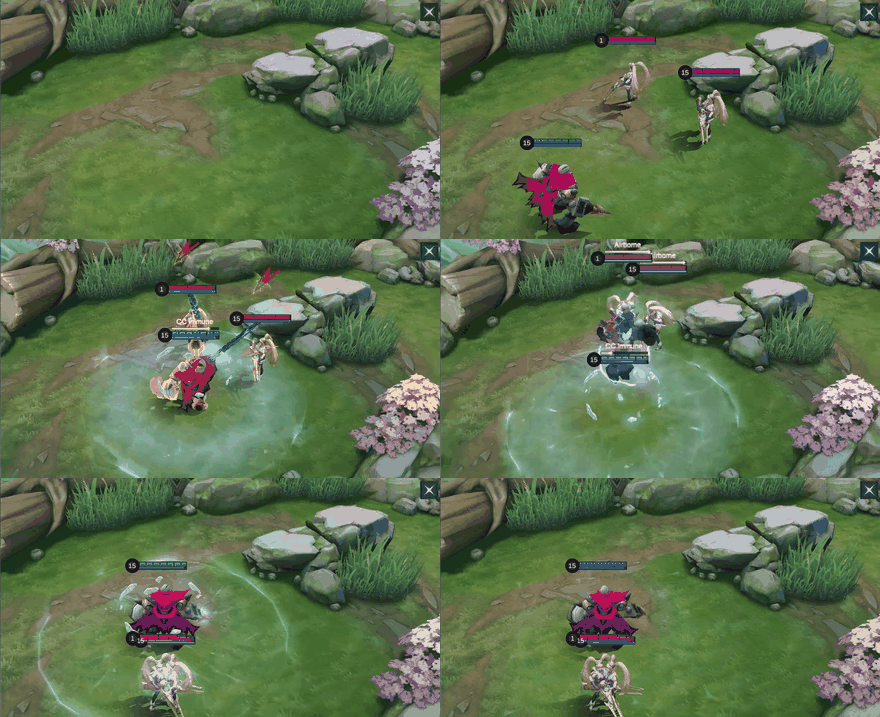
Use it well: Chain several enemies, use Flicker when needed to reposition the attached group, then slam them toward allied area damage. The first safe multi-target angle is often better than waiting for every enemy.
Avoid: Do not channel in open vision against knockback or suppression that can break the setup. Approach from fog and track the enemy tools that can interrupt or displace Atlas.
Atlas Skill Priority
Learn and prioritize Annihilate, level Perfect Match second, and upgrade Fatal Links whenever it is available. Annihilate improves Atlas's repeatable lane and fight presence. Perfect Match is the movement and reunion tool that makes the ultimate practical, while every ultimate rank improves the fight-defining control window.
Best Atlas Emblem and Battle Spell
Use the Support Emblem for movement, cooldown reduction, and stronger team follow-up. Agility helps Atlas reach a side angle before enemies spread. Pull Yourself Together shortens battle-spell and active-equipment cooldowns, which matters because Flicker can completely change a Fatal Links landing point. Focusing Mark makes enemies hit by Atlas take more damage from allies, matching his job of preparing targets rather than finishing them alone. Firmness is a reasonable first-talent swap when immediate defense matters more than rotation speed.
Flicker is the general choice. Start Fatal Links in a safe multi-target range, then Flicker to pull the chained group away from safety or toward allied damage. Use Revitalize instead when the draft already has reliable initiation and needs sustain around Turtle, Lord, or a tower. Several observed builds combine Oracle and Flask of the Oasis with Revitalize; that route is situational and should be replaced when the team has no eligible sustain interaction.
Current In-Game Builds
These five current in-game builds were observed on August 16, 2026. Compare the six-item order and adjust utility or defensive slots for the match.
Build 1
| Item 1 | Item 2 | Item 3 | Item 4 | Item 5 | Item 6 |
|---|---|---|---|---|---|
 Rapid Boots Rapid Boots |  Oracle Oracle |  Flask of the Oasis Flask of the Oasis |  Chastise Pauldron Chastise Pauldron |  Athena's Shield Athena's Shield |  Guardian Helmet Guardian Helmet |
Build 2
| Item 1 | Item 2 | Item 3 | Item 4 | Item 5 | Item 6 |
|---|---|---|---|---|---|
 Dominance Ice Dominance Ice | Rapid Boots | Athena's Shield | Chastise Pauldron | Guardian Helmet |  Immortality Immortality |
Build 3
| Item 1 | Item 2 | Item 3 | Item 4 | Item 5 | Item 6 |
|---|---|---|---|---|---|
| Rapid Boots | Oracle | Flask of the Oasis | Chastise Pauldron | Athena's Shield | Guardian Helmet |
Build 4
| Item 1 | Item 2 | Item 3 | Item 4 | Item 5 | Item 6 |
|---|---|---|---|---|---|
| Rapid Boots | Dominance Ice | Athena's Shield |  Fleeting Time Fleeting Time |  Antique Cuirass Antique Cuirass | Immortality |
Build 5
| Item 1 | Item 2 | Item 3 | Item 4 | Item 5 | Item 6 |
|---|---|---|---|---|---|
| Rapid Boots | Dominance Ice |  Radiant Armor Radiant Armor | Chastise Pauldron | Immortality | Guardian Helmet |
Equipment Guide
Use the item notes below to decide what each slot contributes. The table describes each item independently of the numbered builds.
| Item | What it adds | When to consider it |
|---|---|---|
| Rapid Boots | Movement Speed, HP regeneration, and a fast roaming route for finding flank angles. | Use when early rotations and side-angle access matter most; replace only when a specialized boot defense is essential. |
| Oracle | HP, hybrid defense, cooldown reduction, and stronger healing or shielding received by Atlas. | Buy when Atlas repeatedly benefits from Revitalize, allied healing, or shields while needing mixed resistance and cooldowns. |
| Flask of the Oasis | Magic Power, HP, cooldown reduction, stronger healing effects, and a protective trigger for eligible allied healing or shielding such as Revitalize. | Keep with Revitalize or a team composition that can trigger its support value; replace when no eligible healing or shield interaction exists. |
| Chastise Pauldron | HP, hybrid defense, and extra durability after enemy control effects are applied. | Prioritize when chain control is what kills Atlas after he engages; choose direct resistance when enemy control is limited. |
| Athena's Shield | HP, Magic Defense, HP regeneration, and protection against concentrated Magic Damage. | Move earlier against a large Magic burst; use Radiant Armor instead when the damage arrives in many repeated hits. |
| Guardian Helmet | A very large HP increase and powerful recovery after leaving combat. | Buy when Atlas survives the first engagement but must recover before the next objective; delay it when immediate resistance is more urgent. |
| Dominance Ice | Hybrid defense, Movement Speed, cooldown reduction, and nearby anti-heal and attack-speed pressure. | Rush against strong healing or fast Basic Attacks; delay against a low-sustain composition dominated by burst damage. |
| Immortality | HP, Physical Defense, and one revival window after lethal damage. | Add before decisive Lord fights or when the first engage draws lethal focus and a revival can still be protected by teammates. |
| Fleeting Time | Adaptive Attack, HP, cooldown reduction, and a shorter current ultimate cooldown after kills or assists. | Choose when Fatal Links decides every fight and Atlas can reliably earn assists; skip when the team is behind and raw defense is required. |
| Antique Cuirass | HP, Physical Defense, HP regeneration, and reduced Physical Attack from enemies who deal skill damage. | Prioritize against repeated Physical skill damage; choose magic defense first into a Mage-heavy draft. |
| Radiant Armor | HP, Magic Defense, HP regeneration, and stacking resistance against repeated Magic Damage. | Buy into repeated Magic Damage and damage-over-time patterns; prefer Athena's Shield against one concentrated magic burst. |
How to Choose Between the Five Builds
Builds 1 and 3 are identical sustain-oriented routes: Rapid Boots, Oracle, Flask of the Oasis, Chastise Pauldron, Athena's Shield, and Guardian Helmet. They suit Revitalize and teams that expect several engagements around the same objective. Oracle improves the healing Atlas receives, while Flask contributes only when an eligible allied healing or shielding effect can trigger it. Do not buy the pair automatically with Flicker and no supporting interaction.
Build 2 starts Dominance Ice before Rapid Boots, then adds Athena's Shield, Chastise Pauldron, Guardian Helmet, and Immortality. Use it into healing, fast Basic Attacks, mixed control, and a late fight where revival can be protected. Build 4 adds Fleeting Time after early hybrid defense, then closes with Antique Cuirass and Immortality. It is the ultimate-uptime route for a team that can reliably earn assists. Build 5 uses Radiant Armor for repeated Magic Damage and combines Chastise Pauldron, Immortality, and Guardian Helmet for long, control-heavy fights.
Change the order early. Rush Dominance Ice against sustain or rapid Basic Attacks. Move Athena's Shield forward for one large magic burst, or Radiant Armor for repeated magic hits. Buy Antique Cuirass against Physical skill chains. Chastise Pauldron is strongest when crowd control, rather than raw damage, is what prevents Atlas from completing the engage.
Atlas Combos
Reliable engage



Perfect Match → Fatal Links → Annihilate. Eject from the Mecha and approach from the side. Chain the group, reposition only as far as needed, then slam them where Annihilate and allied area damage overlap. If Flicker is required, use it after the chains connect rather than exposing the approach.
Lane pressure


Perfect Match → Annihilate. Use the speed to close distance, place Atlas and the Mecha around the target, and cast Annihilate before reunion so both zones threaten the same space. The reunion stun then helps finish the repeated hits or creates a clean retreat.
How to Play Atlas by Game Phase
Early game
Help the first clear without taking lane resources, then move toward the lane with reliable damage. Frigid Breath can protect an invade, but do not start a deep fight before the team can follow.Mid game
Arrive before Turtle and tower fights. Hide the approach, identify the enemy displacement or suppression that can stop Atlas, and engage as soon as two valuable targets share a safe chain angle.Late game
Vision and restraint matter more than raw durability. Protect the carry until the enemy formation tightens, then use Flicker and Fatal Links to move the fight away from their preferred ground.Team fights
Atlas starts the decisive action but should not continue chasing alone. After the slam and Annihilate, stand between surviving threats and the allied damage dealer while Frigid Breath prepares another freeze.Engage and Positioning Decisions
- Arrive first. Atlas is far more threatening from an unseen side brush than from the center of the lane.
- Count the follow-up. A three-player slam is still bad if every teammate is clearing a wave. Ping and confirm distance before committing.
- Track displacement and suppression. Valir's knockback and similar tools can break the route; force or avoid them before Fatal Links.
- Use Flicker for placement. The spell is not valuable merely because it makes the combo longer. Move chained enemies into allied damage or away from their escape.
- Accept a good two-target catch. Waiting for all five enemies often exposes Atlas and lets the useful angle disappear.
- Peel when the flank closes. Perfect Match and Frigid Breath can also protect a carry from a diver; not every fight requires a forward slam.
Common Atlas Mistakes
- Starting in open vision. Enemies spread or hold a knockback as soon as they see the approach.
- Dragging enemies away from allied damage. The landing point matters more than the distance traveled.
- Buying Flask without a trigger. Its support effect needs eligible healing or shielding; replace it when the spell and team cannot use it.
- Holding Fatal Links for a perfect five-player catch. Two priority targets are enough to win many objective fights.
- Chasing after the slam. Atlas has already created the high-value moment. Return to the team if the surviving enemy can kite him.
Counters and Team Synergy
Best partners


Favorable targets


Vexana and Eudora have limited mobility once Atlas reaches them. Approach from the side so their control is not aimed directly at the entry path.
Hard matchups


Draft caution

Franco adds another setup-heavy roamer without supplying the area damage Atlas needs. Make sure the remaining draft can punish grouped targets.
Atlas Skins and Availability
The English in-game Shop showed seven Atlas skins on August 16, 2026. Direct-purchase, StarLight, tournament, Collector, and limited-event availability can change.
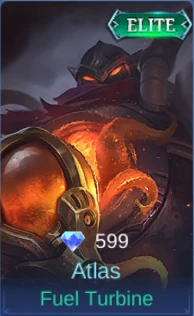
Fuel Turbine
Elite; 599 Diamonds
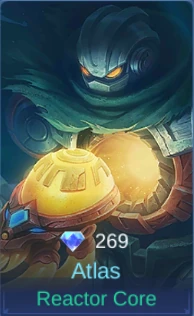
Reactor Core
269 Diamonds
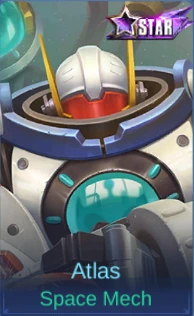
Space Mech
09/2022 StarLight Member
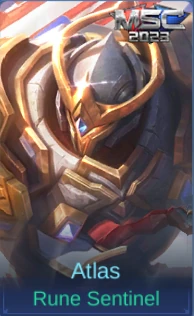
Rune Sentinel
MSC Tournament
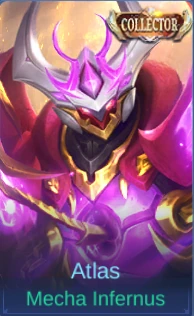
Mecha Infernus
Collector; Limited-time Event
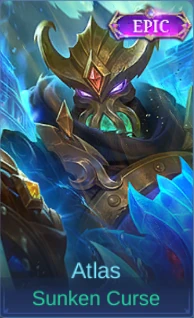
Sunken Curse
Epic; Limited-time Event
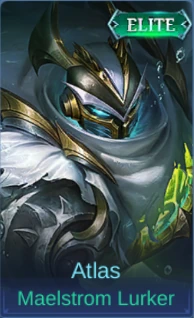
Maelstrom Lurker
Elite; Limited-time Event
Atlas Story
Atlas is an ancient creature from the Abysmal Sea, where crushing pressure and a powerful seal trapped his kind. He found an abandoned Mecha Sentry among the ruins on the sea floor, entered its empty core, and used the armor to break through the seal. After reaching the surface, he explored the oceans and gathered knowledge, but never forgot the creatures still imprisoned below. He now searches the Northern Vale seas for a regenerative treasure powerful enough to change the ocean and free his kind.
The Mecha Sentry explains Perfect Match: Atlas is the living pilot inside an ancient armored body. His search is not simply exploration; he wants enough power to break the prison that still holds the other creatures of the Abysmal Sea.
Related MLBB Guides
Atlas FAQ
What is the best Atlas build?
Use Rapid Boots with defense matched to the enemy draft. Dominance Ice handles sustain and fast Basic Attacks, Athena's Shield handles concentrated Magic Damage, Radiant Armor handles repeated Magic Damage, and Antique Cuirass handles Physical skill chains.
What is Atlas's best emblem?
Support Emblem with Agility, Pull Yourself Together, and Focusing Mark gives movement, more frequent Flicker access, and stronger allied damage after Atlas connects.
Which battle spell should Atlas use?
Flicker is the default because it changes Fatal Links range and landing position. Revitalize is an alternative for a sustain-oriented team and equipment route.
What is Atlas's main combo?
Use Perfect Match, connect Fatal Links on grouped enemies, reposition the chained targets when needed, slam them toward allied area damage, and cast Annihilate through the reunion.
Who works well with Atlas?
Area-damage heroes such as Vale and Ixia benefit from the grouped landing point. The important condition is that they are close enough to act immediately.
Who counters Atlas?
Valir and Moskov can disrupt or escape the engage. Atlas should track their displacement and mobility, approach from fog, and avoid committing through their prepared front.
Final Verdict
Atlas rewards preparation more than improvisation. Reach the objective first, hide the approach, confirm allied follow-up, and accept the first useful multi-target chain. Place enemies where the team can hit them, adapt defense to the actual damage pattern, and return to a protective position once the slam has created its value.
Hannah Price
Events Editor
Hannah Price is an events writer who turns schedules into priorities. She publishes weekly roundups, reward notes, and code updates for major live-service titles, linking key dates to official announcements and refreshing posts quickly when requirements or timelines change.


Table of Contents

Mobile Legends: Bang Bang
Up to 54% OFF
About ManaBuy


Copyright © FUTURE OUTLOOK TECHNOLOGY LIMITED.Company Registration No.: 77374965 All rights reserved.UNIT 135,1/F.,143 WAI YIP STREET,KWUN TONG HK