
EN / $ USD
Luo Yi MLBB Mid Lane Guide: Best Build, Emblem, Skills, and Combos

by Hannah Price
Published Aug 16 2026 · Updated Oct 12 2026
Share:
Table of Contents
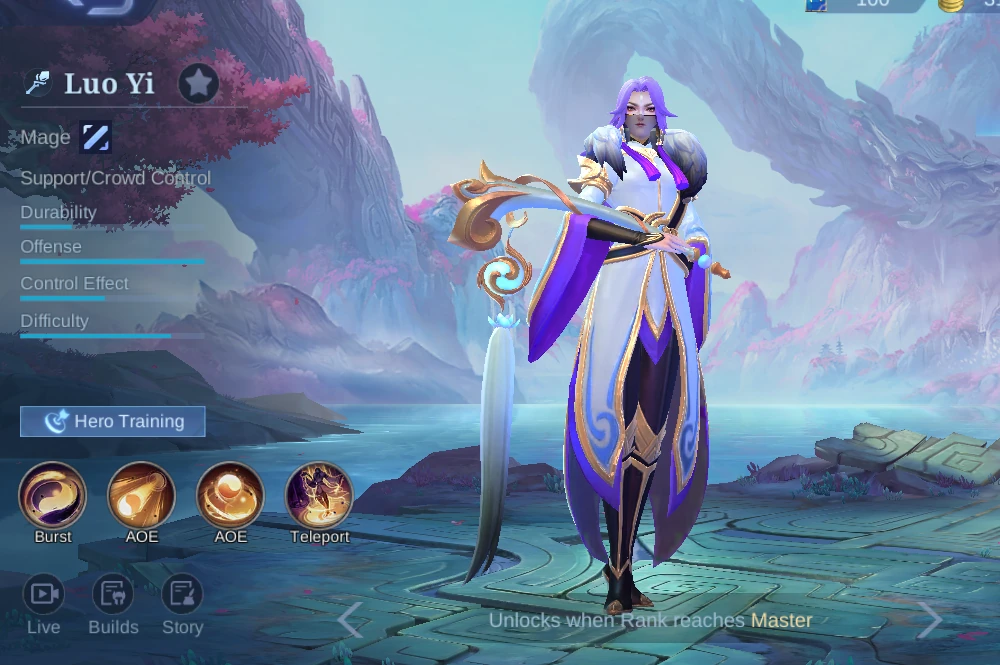
Luo Yi is a Mid Lane Mage who controls fights by alternating Yin and Yang marks, pulling grouped enemies into a reaction, and changing the angle of an objective fight with Diversion. Her damage is strongest when every cast has a purpose: mark with one attribute, place the opposite attribute where the target must move, then use the shield and Movement Speed from Duality to reset her position.
In-game context: Verified MLBB game version 2.1.88.12027, observed in-game on August 16, 2026. The five builds, item effects, battle-spell routes, and Shop availability reflect that date.
Quick Answer: Best Luo Yi Setup
Core plan
Apply one Sigil attribute with Dispersion or Rotation, land the opposite attribute to trigger Duality, then reposition during the shield and Movement Speed window.Recommended emblem
Mage Emblem with Inspire, Tenacity, and Lethal Ignition for cooldown access, safer low-HP exchanges, and burst after a complete skill sequence.Battle spell
Flicker is the default escape and angle correction. Flameshot is an alternative when long-range finish, knockback, and lane pressure matter more.Luo Yi Role, Specialty, and Base Stats
Luo Yi is a Mage with Support/Crowd Control. Her 500 Mana and 250 Movement Speed support standard mid rotations, while 2,601 HP and 20 Physical Defense leave little room for a blind frontline position. Duality supplies temporary protection only after an opposite-mark reaction, so spacing before the reaction is more important than the shield after it.
These level-one values exclude equipment, emblem, skin, and match modifiers.
| HP | 2601 |
|---|---|
| HP Regen | 7.2 |
| Mana | 500 |
| Mana Regen | 4 |
| Physical Attack | 107 |
| Physical Defense | 20 |
| Magic Defense | 15 |
| Attack Speed | 0.99 |
| Movement Speed | 250 |
Luo Yi Skills and Practical Use

Duality
Passive / Buff
Luo Yi's skills create four Sigil marks that last six seconds. Two Yin-Yang marks of opposite attributes trigger a Yin-Yang Reaction, pulling marked heroes together, stunning them for one second, and dealing Magic Damage. Each reaction also grants Luo Yi a shield and 30% Movement Speed for two seconds.

Use it well: Track the mark above each target and alternate attributes. Trigger the reaction when enemies stand near each other or when one marked hero is beside another unit that can carry the opposite mark.
Avoid: Do not repeat the same attribute into a marked target and expect control. The reaction needs opposite Yin and Yang marks.

Dispersion
Skill 1 / AOE
Luo Yi casts Yin or Yang energy in a straight line. It damages the first target and enemies in a fan behind it, applies a matching Sigil mark, and stores up to four charges. Each cast changes the skill's attribute.
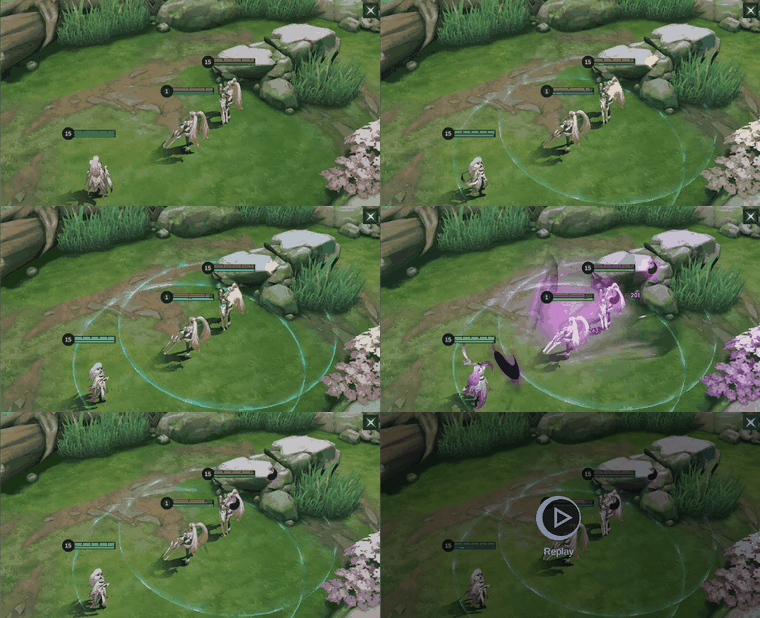
Use it well: Aim through a front unit to tag heroes in the fan, then use the next opposite-attribute charge to create a reaction. Preserve one charge for the fight rather than emptying all four into the wave.
Avoid: Do not fire only at the nearest minion when the fan cannot reach the hero. Change the angle so the first hit opens the spread behind it.

Rotation
Skill 2 / AOE / CC
Luo Yi creates a Yin or Yang circle that deals Magic Damage and slows enemies. The field then deals continuous damage, applies its Sigil attribute, and can trigger repeated reactions with opposite marks. Each cast changes the skill's attribute.
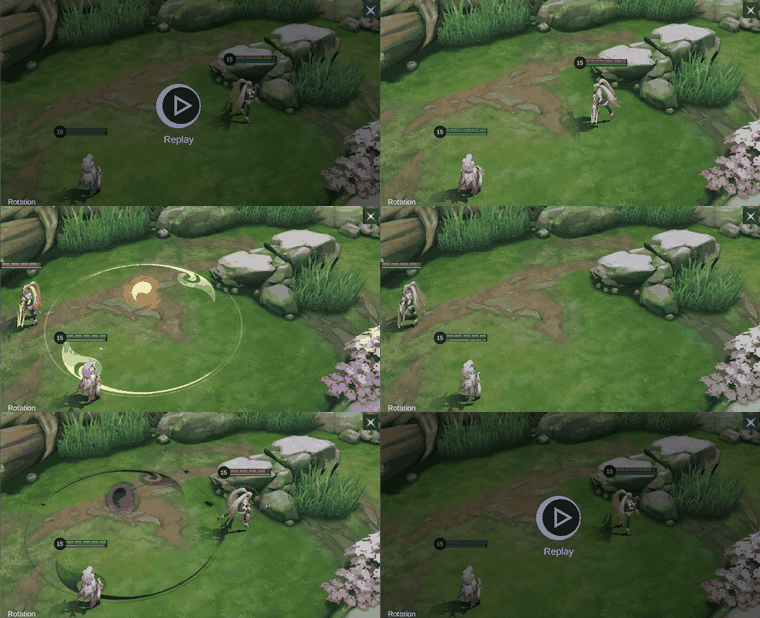
Use it well: Place the circle on the enemy's retreat route or under allied control, then send the opposite Dispersion mark through the field. The slow keeps targets near the reaction point.
Avoid: Do not center the circle where the enemy is standing if the exit is obvious. Put it where the target must move next.

Diversion
Ultimate / Mobility
Luo Yi creates a teleport circle around herself and selects a destination within range. After a three-second channel, allied heroes inside the circle teleport to the destination. The skill also passively reduces the cooldowns of Luo Yi's other skills.

Use it well: Use fog and terrain to move the team behind an objective, shorten a rotation, or create a flank once allies are inside the starting circle and the landing area is safe.
Avoid: Do not open a blind teleport onto missing enemies. The channel is visible and the team arrives together in one predictable area.
Luo Yi Skill Priority
Learn and prioritize Dispersion. Take Rotation as the secondary skill, and upgrade Diversion whenever it is available. Dispersion stores four charges and is Luo Yi's repeatable mark, clear, and reaction tool; Rotation is the field that makes the opposite attribute difficult to avoid.
Best Luo Yi Emblem and Battle Spell
Use the Mage Emblem with Inspire, Tenacity, and Lethal Ignition. Inspire supports more frequent mark cycles, Tenacity gives extra defense when Luo Yi is low, and Lethal Ignition adds pressure after several skill hits. Take Flicker in most games because Luo Yi has no normal dash and often needs one instant correction after placing Rotation.
Flameshot is a valid alternative when the team already protects Luo Yi and the match rewards long-range finishing or a knockback against direct divers. Several current in-game setups use this route, but Flicker remains the safer general choice.
Current In-Game Builds
These five current in-game builds were observed on August 16, 2026. Compare the six-item order and adjust utility or defensive slots for the match.
Build 1
| Item 1 | Item 2 | Item 3 | Item 4 | Item 5 | Item 6 |
|---|---|---|---|---|---|
 Magic Boots Magic Boots |  Enchanted Talisman Enchanted Talisman |  Glowing Wand Glowing Wand |  Divine Glaive Divine Glaive |  Wishing Lantern Wishing Lantern |  Holy Crystal Holy Crystal |
Build 2
| Item 1 | Item 2 | Item 3 | Item 4 | Item 5 | Item 6 |
|---|---|---|---|---|---|
| Magic Boots | Enchanted Talisman | Glowing Wand |  Lightning Truncheon Lightning Truncheon | Wishing Lantern | Holy Crystal |
Build 3
| Item 1 | Item 2 | Item 3 | Item 4 | Item 5 | Item 6 |
|---|---|---|---|---|---|
 Arcane Boots Arcane Boots |  Sky Piercer Sky Piercer |  Genius Wand Genius Wand | Lightning Truncheon | Holy Crystal | Divine Glaive |
Build 4
| Item 1 | Item 2 | Item 3 | Item 4 | Item 5 | Item 6 |
|---|---|---|---|---|---|
| Enchanted Talisman | Magic Boots | Glowing Wand | Genius Wand | Holy Crystal | Divine Glaive |
Build 5
| Item 1 | Item 2 | Item 3 | Item 4 | Item 5 | Item 6 |
|---|---|---|---|---|---|
| Magic Boots | Enchanted Talisman | Sky Piercer | Genius Wand | Divine Glaive | Holy Crystal |
Equipment Guide
Use the item notes below to decide what each slot contributes. The table describes each item independently of the numbered builds.
| Item | What it adds | When to consider it |
|---|---|---|
| Magic Boots | Movement Speed, Cooldown Reduction, and HP for more frequent Sigil cycles and a safer early lane. | Choose for the most reliable spell cycle and Mana-efficient control pattern; switch to Arcane Boots only when early penetration is worth losing Cooldown Reduction. |
| Enchanted Talisman | Magic Power, HP, Cooldown Reduction, strong Mana recovery, and a higher Cooldown Reduction cap. | Buy early when repeated Dispersion and Rotation casts decide lane and objective control; delay it only for a deliberate burst route. |
| Glowing Wand | Magic Power, HP, Movement Speed, a max-HP burn, and reduced enemy healing and shields. | Use into durable targets, healing, or shields; its HP and Movement Speed also help Luo Yi survive while setting a second reaction. |
| Divine Glaive | Magic Power and percentage Magic Penetration that increases against higher enemy Magic Defense. | Move earlier when enemies build Magic Defense; keep it later against fragile targets with little resistance. |
| Wishing Lantern | Magic Power, Mana, Cooldown Reduction, and a current-HP damage effect after enough Magic Damage is dealt. | Add against high-current-HP front liners after Luo Yi can reliably reach its damage trigger; replace it when immediate penetration is more urgent. |
| Holy Crystal | A large Magic Power increase plus percentage scaling that grows with hero level. | Finish when Luo Yi can cast safely and raw Magic Power scales the full rotation; buy penetration or utility first if enemies are already resisting the damage. |
| Lightning Truncheon | Magic Power, Mana, Cooldown Reduction, and a periodic echo of extra Magic Damage on the next skill hit. | Choose for stronger burst and wave pressure when skills can be spaced around its echo; the Talisman route is steadier when constant casting matters more. |
| Arcane Boots | Movement Speed, Magic Power, and flat Magic Penetration for an aggressive early damage route. | Use for an aggressive early spike against low Magic Defense; return to Magic Boots when more frequent control matters more than the first hit. |
| Sky Piercer | Adaptive Attack, Movement Speed, and a low-HP execute threshold that grows with successful takedowns. | Buy only when Luo Yi is participating in takedowns and can protect the execute stacks; replace it with stable damage when deaths keep resetting its value. |
| Genius Wand | Magic Power, Movement Speed, flat Magic Penetration, and stacking Magic Defense reduction on skill damage. | Use when repeated hits can stack Magic Defense reduction for Luo Yi and allied Magic Damage; Divine Glaive is stronger into heavier resistance. |
How to Choose Between the Five Builds
Build 1 uses Magic Boots, Enchanted Talisman, Glowing Wand, Divine Glaive, Wishing Lantern, and Holy Crystal. It is the steady control route: cooldowns and Mana first, anti-sustain and burn next, then penetration and high-HP damage. Build 2 replaces Divine Glaive with Lightning Truncheon in the fourth slot for earlier burst and wave pressure before Wishing Lantern and Holy Crystal.
Build 3 is the aggressive route: Arcane Boots, Sky Piercer, Genius Wand, Lightning Truncheon, Holy Crystal, and Divine Glaive. Choose it only when early penetration and takedown participation can be protected; Sky Piercer loses consistency when Luo Yi dies repeatedly. Build 4 buys Enchanted Talisman before Magic Boots, then Glowing Wand, Genius Wand, Holy Crystal, and Divine Glaive. That order is reasonable when the lane is safe enough to secure Mana and cooldowns before Movement Speed.
Build 5 uses Magic Boots, Enchanted Talisman, Sky Piercer, Genius Wand, Divine Glaive, and Holy Crystal. It combines a stable spell engine with an execute route. Move Divine Glaive earlier against Magic Defense, keep Glowing Wand against healing or shields, and prefer Wishing Lantern over a fragile execute plan when durable front liners are the main targets.
Luo Yi Combos
Teamfight combo



Dispersion → Dispersion with the opposite attribute → Rotation. Mark a priority hero, place the opposite mark on a nearby enemy to pull them together, then cast Rotation on the shared exit. If enemies are already grouped, Rotation can set the first attribute and the next Dispersion charge can trigger the reaction immediately.
Laning combo


Dispersion → Rotation with the opposite attribute. Aim the first skill through a minion so its fan reaches the hero, then put the opposite circle on the retreat route. Keep one Dispersion charge available in case the target leaves the field with a mark still active.
How to Play Luo Yi by Game Phase
Early game
Use Dispersion through the wave to pressure the hero without stepping forward. Preserve Mana and at least one charge before the first river contest.Mid game
Arrive before Turtle or tower fights and control narrow entrances with Rotation. Use Diversion from fog to shorten a rotation or create a flank after the destination is checked.Late game
Stay behind the first engager and track the assassin's entry. A single reaction on two grouped carries can decide the fight, but a blind teleport or exposed position can end it just as quickly.Team fights
Mark the formation, not automatically the tank. Pull two nearby enemies together, place the field on their shared escape, and move during Duality's shield window instead of standing to cast from the same angle.Sigil and Positioning Decisions
- Read the next attribute. Know whether the current Dispersion or Rotation cast is Yin or Yang before committing it.
- Use the fan. Hit a front unit so Dispersion spreads onto the hero behind it.
- Place Rotation on the exit. The slow and repeated damage matter most where the enemy must walk.
- Keep one charge. A saved Dispersion cast completes the reaction after an enemy changes direction.
- Move with the shield. Duality's Movement Speed is an invitation to change angle or retreat, not to remain in the same firing line.
- Check the landing area. Diversion moves the entire group into one visible destination after a three-second channel.
Common Luo Yi Mistakes
- Repeating the same attribute. Damage lands, but the pull, stun, shield, and Movement Speed never trigger.
- Emptying every Dispersion charge into the wave. Luo Yi reaches the river without a reliable reaction.
- Placing Rotation under the current position. The enemy walks out before the field creates its full control value.
- Teleporting without vision. Diversion can deliver the whole team into prepared damage and control.
- Building burst before survival and access. Cooldowns, Mana, and safe positioning usually create more reactions than one greedy item spike.
Counters and Team Synergy
Best partners



Favorable targets


Eudora and Gord have predictable positions and limited mobility. Pressure their casting line with opposite marks and do not stand inside their return control.
Hard matchups


Draft caution

Pharsa can contest Luo Yi from longer range and punish a visible channel. Approach from fog and preserve Flicker when her burst zone controls the objective entrance.
Luo Yi Skins and Availability
The English in-game Shop showed eight Luo Yi skins on August 16, 2026. Diamond, Lunar Fest, StarLight, Collector, and limited-event availability can change.

Lady Dragon
899 Diamonds

Starborne Matron
899 Diamonds

Oracle of Sol
899 Diamonds

Tenko
599 Diamonds

Yin-yang Mage
269 Diamonds

Dawning Fortune
Lunar Fest; Limited-time Event

Siren Priestess
08/2021 StarLight Member

Elysium Guardian
Collector; Limited-time Event
Luo Yi Story
As a child, Luo Yi became fascinated by Cadia Riverlands legends and the hidden history of the Black Dragon. Her search eventually led her to Yu Zhong. Convinced that his return could reshape the region, she became his devoted strategist and seeks to restore the balance and order she believes Cadia has lost.
Her role as a strategist is reflected in the kit. Luo Yi is strongest when she prepares the destination, controls the route, and makes the enemy formation collide on her terms.
Related MLBB Guides
Luo Yi FAQ
What is the best Luo Yi build?
Magic Boots and Enchanted Talisman give the safest spell engine. Add Glowing Wand against healing and durable targets, Divine Glaive against Magic Defense, Wishing Lantern against high-current-HP front liners, and Holy Crystal for the final Magic Power spike.
What is Luo Yi's best emblem?
Mage Emblem with Inspire, Tenacity, and Lethal Ignition supports cooldowns, low-HP safety, and burst after a complete skill sequence.
Which battle spell should Luo Yi use?
Flicker is the default because Luo Yi has no normal dash. Flameshot is an alternative for long-range finishing and knockback when the team already protects her.
How does Luo Yi trigger Duality?
Apply opposite Yin and Yang Sigil attributes to nearby enemy heroes. The reaction pulls them together, stuns them, deals damage, and grants Luo Yi a shield and Movement Speed.
Who works well with Luo Yi?
Chip adds map pressure, while Aamon and Karina can quickly finish enemies grouped or weakened by Luo Yi's reaction.
Who counters Luo Yi?
Durable front liners such as Uranus and Fredrinn can absorb repeated area pressure. Long-range mages such as Pharsa also punish exposed channels and predictable positions.
Final Verdict
Luo Yi rewards attribute awareness, prepared terrain, and disciplined positioning. Alternate Yin and Yang, place Rotation on the route rather than the current spot, keep one Dispersion charge for the reaction, and use Diversion only after the destination is checked. Her best fights begin before contact, when the enemy has already been guided into the angle she wants.
Hannah Price
Events Editor
Hannah Price is an events writer who turns schedules into priorities. She publishes weekly roundups, reward notes, and code updates for major live-service titles, linking key dates to official announcements and refreshing posts quickly when requirements or timelines change.

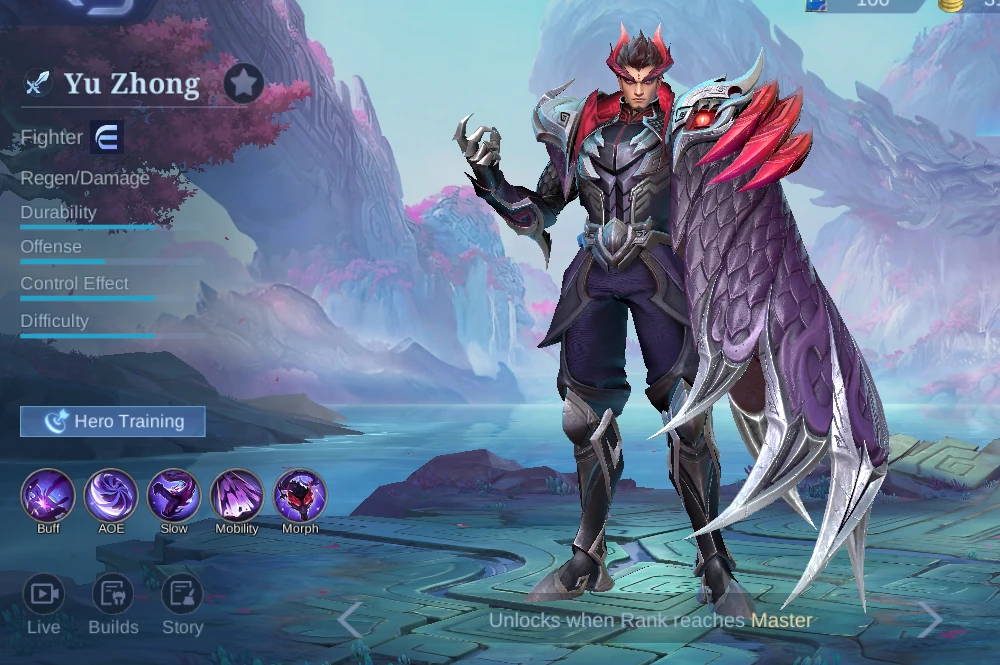
Table of Contents

Mobile Legends: Bang Bang
Up to 54% OFF
About ManaBuy


Copyright © FUTURE OUTLOOK TECHNOLOGY LIMITED.Company Registration No.: 77374965 All rights reserved.UNIT 135,1/F.,143 WAI YIP STREET,KWUN TONG HK