Role and lane
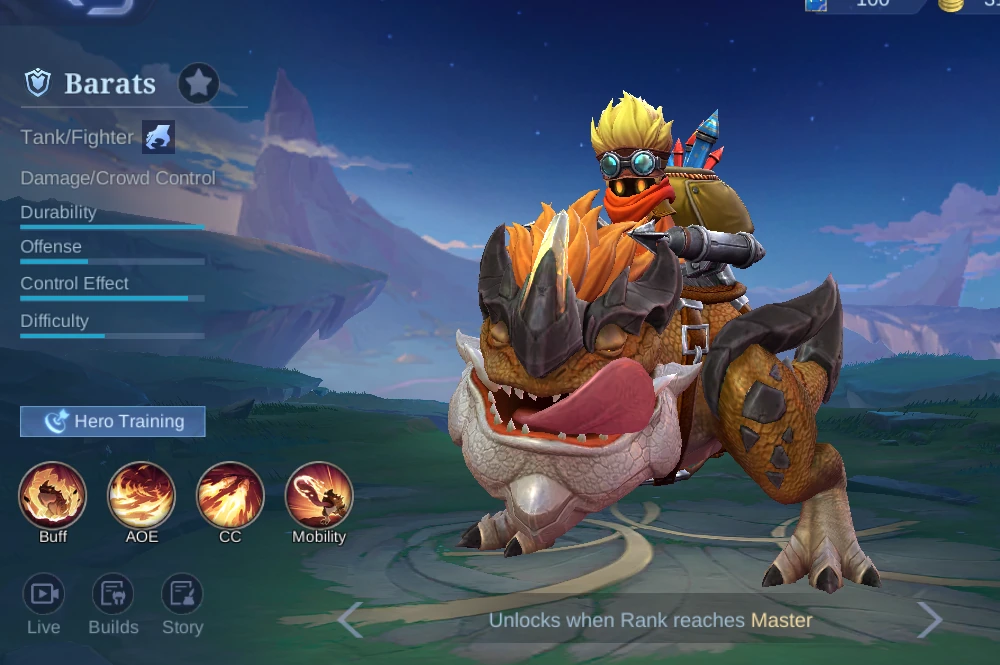
Tank/Fighter · Damage/Crowd Control. Jungle is the clearest route because camps maintain Big Guy stacks and Retribution secures objectives.

Quick answer: Play Barats as a stack-first tank jungler. Keep Big Guy active with Skill 1, use Skill 2 to pull a target into Trample range, then angle Detona's Welcome so the spit hits a wall or another hero. Retribution is the default spell. Build HP and Hybrid Defense around War Axe or Thunder Belt, then move the correct resistance item forward for the enemy damage pattern.
In-game context: MLBB game version 2.1.95.12053, observed on August 18, 2026. Skills, five equipment orders, item effects, and Shop availability can change with later patches.
Tank/Fighter · Damage/Crowd Control. Jungle is the clearest route because camps maintain Big Guy stacks and Retribution secures objectives.
Barats brings a durable front line, constant area slows, and suppression that can move one target into a wall or into allied damage.
He is slow before his stacks are active. Long-range kiting and HP-shredding damage can stop him before he reaches a clean ultimate angle.

Passive / Buff
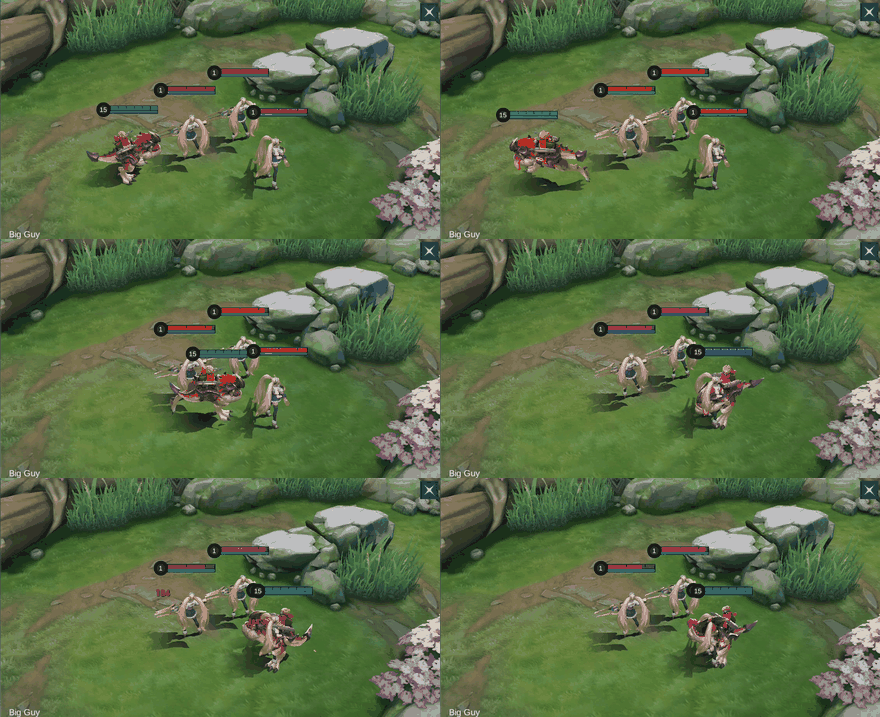
Skill damage gives Detona one Big Guy stack for 12 seconds, up to 10. Each stack increases Detona's size and grants 4–10 Hybrid Defense based on the ultimate's level. At 10 stacks, Detona gains 20% Resilience and Trample Basic Attacks that deal 140% Total Physical Attack plus 3.5% Total HP as area Physical Damage, slow by 40% for 0.2 seconds, and refresh the stack timer.
Use it when: Keep the timer alive on creeps or heroes before an objective, then enter at full size so every Trample pressures the whole front line.
Avoid: Do not arrive after the 12-second timer expires; Barats loses both defense and the empowered area attack.

Skill 1 / AOE
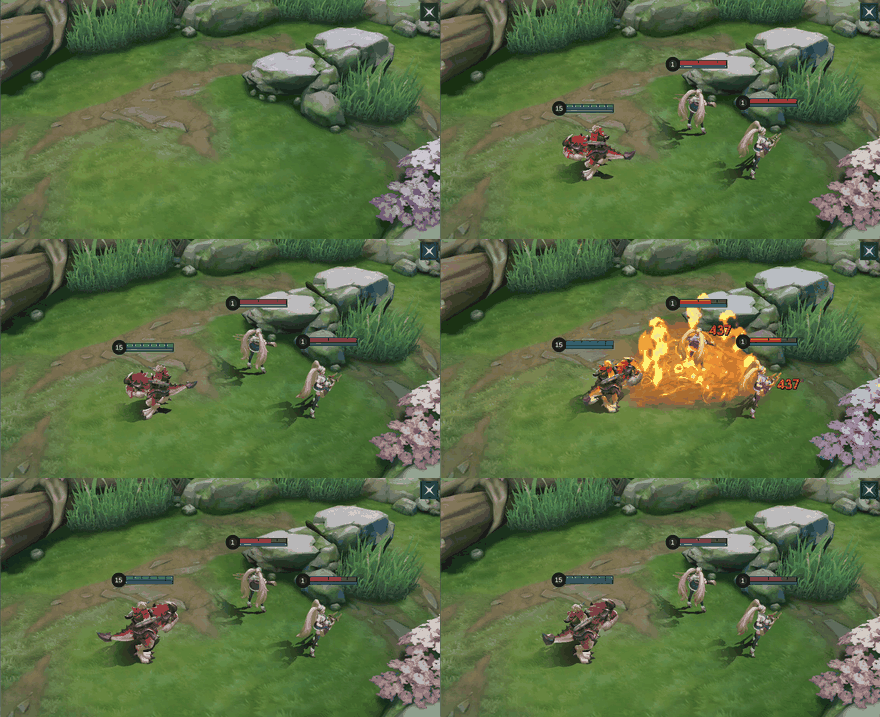
Detona sprays oil in a fan for 60 plus 7% Total HP Physical Damage, then Barats ignites it for another 120 plus 180% Total Physical Attack. It deals half damage to creeps. The area grows with Big Guy stacks.
Use it when: Tag a camp, minion, or hero before the stack timer ends. At high stacks, angle the wider fan through the target and its retreat path.
Avoid: Do not spend it from maximum range when you need the second hit to keep pressure; step close enough for both parts to connect.

Skill 2 / CC / AOE
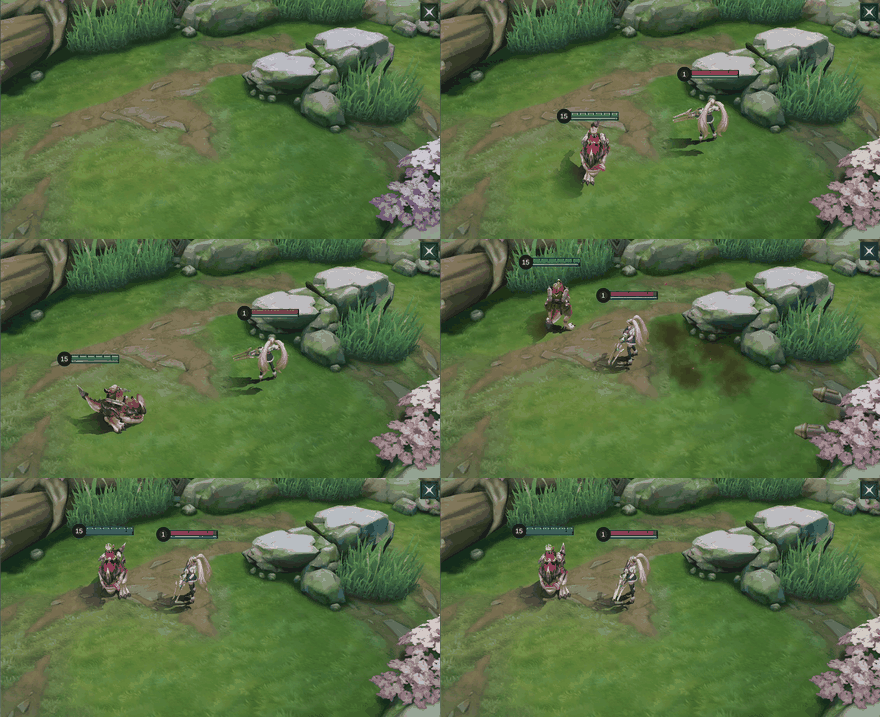
Barats fires two missiles for 100 plus 75% Total Physical Attack, slowing enemies by 40% for one second. The landing fumes deal the same damage in a rectangle and push enemies toward Barats.
Use it when: Place the landing zone behind the target so the fumes pull them into Trample range or toward the wall chosen for the ultimate.
Avoid: Do not center the rectangle on a fast target; lead the landing point so the delayed fumes affect the escape route.

Ultimate / Mobility / CC
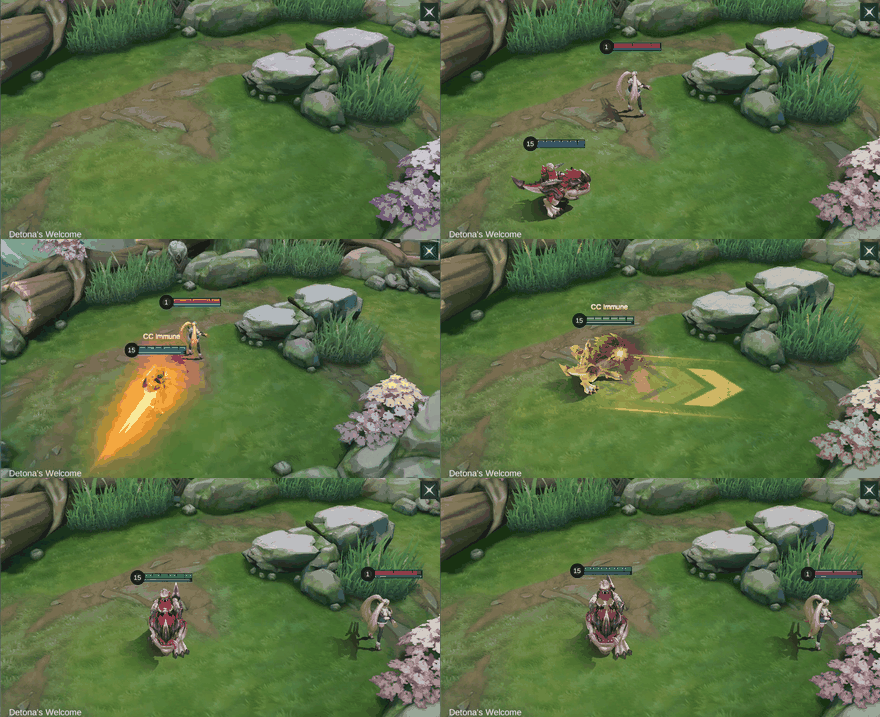
After a short delay, Detona charges into the first enemy, deals 120 plus 70% Total Physical Attack plus 1.2% Total HP, and suppresses the target for 1.2 seconds before spitting them out. A wall or enemy-hero collision adds 180 plus 105% Total Physical Attack plus 5% Total HP, then stuns for one second. Barats is control-immune during the skill, a miss refunds half the cooldown, and a successful devour grants maximum Big Guy stacks.
Use it when: Start from an angle that makes the spit hit a wall or a second enemy. Call the target first so allies can attack the landing point.
Avoid: Do not aim along open ground when a small sidestep can remove the collision and the one-second stun.
Unlock So-Called Teamwork at level one and prioritize it. Upgrade Missile "Expert" second, and level Detona's Welcome whenever available. Skill 1 is the shortest repeatable way to refresh Big Guy and its expanding area becomes easier to use at high stacks.
So-Called Teamwork → Missile "Expert" → Trample Basic Attacks. Use the oil to start or refresh Big Guy, place the fumes behind the target, then stay close enough for the area Basic Attacks to land.
So-Called Teamwork → Missile "Expert" → Detona's Welcome → Trample Basic Attacks. Build stacks before committing, pull the target toward the chosen collision line, suppress them, and attack the landing area while allies collapse.
Chain camps so the 12-second stack timer never falls off. Contest only when Big Guy is already growing; walking into the river at zero stacks gives away Barats's strongest defense.
Stand between the enemy and the objective. Skill 1 controls the entrance, while Skill 2 and the ultimate punish anyone who steps near a wall.
Do not chase the fastest target through open space. Hold a choke, protect the damage dealer, and use suppression on the first high-value enemy your team can actually reach.
Choose the collision before casting the ultimate. A wall or second hero adds damage and a stun, turning a single-target catch into space for the whole team.
Default jungle route: Tank Emblem with Firmness, Seasoned Hunter, and Concussive Blast. Firmness strengthens early contact, Seasoned Hunter accelerates jungle objectives, and Concussive Blast rewards Barats for staying beside enemies. Use Retribution; choose the movement-focused variant when sticking to a target is harder than surviving its first hit.
Bruiser alternative: Fighter Emblem with Thrill, Festival of Blood, and Brave Smite can support a War Axe route. Revitalize is a Roam alternative only when the team can fight inside the healing area and another hero covers objective security.
These five complete six-item orders were present in-game on August 18, 2026. Start from the route that matches your job, then change boots and defenses as soon as the enemy's damage pattern becomes clear.
These five current in-game builds were observed on August 18, 2026. Compare the six-item order and adjust utility or defensive slots for the match.
| Item 1 | Item 2 | Item 3 | Item 4 | Item 5 | Item 6 |
|---|---|---|---|---|---|
 Behemoth Hunter's Rapid Boots Behemoth Hunter's Rapid Boots |  Radiant Armor Radiant Armor |  Chastise Pauldron Chastise Pauldron |  Guardian Helmet Guardian Helmet |  Antique Cuirass Antique Cuirass |  Winter Crown Winter Crown |
| Item 1 | Item 2 | Item 3 | Item 4 | Item 5 | Item 6 |
|---|---|---|---|---|---|
 Warrior Boots Warrior Boots |  War Axe War Axe |  Thunder Belt Thunder Belt |  Queen's Wings Queen's Wings |  Endless Battle Endless Battle |  Brute Force Breastplate Brute Force Breastplate |
| Item 1 | Item 2 | Item 3 | Item 4 | Item 5 | Item 6 |
|---|---|---|---|---|---|
| War Axe |  Tough Boots Tough Boots | Queen's Wings | Brute Force Breastplate | Radiant Armor | Chastise Pauldron |
| Item 1 | Item 2 | Item 3 | Item 4 | Item 5 | Item 6 |
|---|---|---|---|---|---|
 Rapid Boots Rapid Boots | War Axe |  Sky Piercer Sky Piercer |  Oracle Oracle | Guardian Helmet |  Immortality Immortality |
| Item 1 | Item 2 | Item 3 | Item 4 | Item 5 | Item 6 |
|---|---|---|---|---|---|
| War Axe |  Magic Boots Magic Boots | Brute Force Breastplate | Queen's Wings | Chastise Pauldron | Guardian Helmet |
Use the item notes below to decide what each slot contributes. The table describes each item independently of the numbered builds.
| Item | What it adds | When to consider it |
|---|---|---|
| Behemoth Hunter's Rapid Boots | Movement Speed with the jungle blessing used for early clearing. | Use for the jungle route when fast movement between camps matters. Change the defensive boot base if control or Physical Damage becomes the greater early threat. |
| Radiant Armor | HP, Magic Defense, HP Regen, and stacking protection against repeated Magic Damage. | Move it forward against repeated or multi-hit Magic Damage. Choose a burst-oriented magic defense when damage arrives in one short window. |
| Chastise Pauldron | HP and Physical Defense; reduces an attacker's Attack Speed and provides emergency recovery. | Prioritize against fast Basic Attack heroes and when the low-HP recovery can keep Barats in Trample range. |
| Guardian Helmet | A large HP increase and recovery between fights. | Buy when a large HP pool and recovery between objectives are more valuable than immediate resistance to one damage type. |
| Antique Cuirass | HP and Physical Defense for repeated Physical skill damage. | Buy against Physical skill damage that lands repeatedly during the engage. It is weaker against teams whose damage comes mainly from Basic Attacks. |
| Winter Crown | Adaptive Attack plus temporary immunity through its active skill. | Use when surviving one decisive burst or waiting for allies will win the fight. Activate only after the important control or damage commitment begins. |
| Warrior Boots | Movement Speed and early Physical Defense. | Choose against repeated Physical Damage in the opening minutes. Swap to Tough Boots when magic pressure or control duration decides the fight. |
| War Axe | Physical Attack, HP, cooldown reduction, Hybrid Lifesteal, and ramping combat damage. | Buy early for a bruiser route that stays in combat long enough to reach full Fighting Spirit stacks. |
| Thunder Belt | HP, Hybrid Defense, Movement Speed, and a slowing True Damage Basic Attack after skills. | Use when Barats can weave Trample after skills and repeatedly hit heroes to grow Hybrid Defense. |
| Queen's Wings | HP, Adaptive Attack, cooldown reduction, Spell Vamp, and low-HP damage reduction. | Buy for extended fights where the low-HP damage reduction and cooldown refund create another skill cycle. |
| Endless Battle | Physical Attack, HP, cooldown reduction, Movement Speed, Mana Regen, and a True Damage follow-up. | Use only when the team needs a damage-heavy follow-up and Barats can safely weave Basic Attacks after skills. |
| Brute Force Breastplate | HP, Physical Defense, cooldown reduction, Adaptive Attack, Movement Speed, and control-duration reduction. | Buy when repeated damage lets Barats maintain its movement and Adaptive Attack stacks; it also helps against long control chains. |
| Tough Boots | Movement Speed, Magic Defense, and shorter crowd-control and slow duration. | Choose against Magic Damage, slows, and crowd control. Warrior Boots is better when repeated Physical Damage is the main early threat. |
| Rapid Boots | High out-of-combat Movement Speed for faster rotations. | Buy for map speed when opponents cannot repeatedly tag Barats during rotations. Replace them if fights start before the movement bonus can matter. |
| Sky Piercer | Adaptive Attack, Movement Speed, and a low-HP execute that grows with kills. | Buy only when the team needs Barats to convert early leads into finishes. Replace it with defense when he must be the primary front line. |
| Oracle | HP, Hybrid Defense, cooldown reduction, and stronger received shield and healing effects. | Choose when allied healing, shields, or other recovery effects can keep Barats active through a second rotation. |
| Immortality | HP, Physical Defense, and a late-fight resurrection. | Reserve for late objective fights where a resurrection changes the result. Do not treat it as a substitute for the correct resistance item. |
| Magic Boots | Movement Speed, Cooldown Reduction, and HP. | Buy when shorter cooldowns create more stack refreshes and control cycles. Choose defensive boots when early burst is the main danger. |
Build 1 is the durable jungle route: fast blessed boots, repeated-magic protection, anti-attack-speed defense, huge HP, Physical-skill defense, and a late immunity tool. Build 2 is the most aggressive bruiser order, combining War Axe, Thunder Belt, Queen's Wings, and Endless Battle before one defensive slot. Build 3 keeps the bruiser core but adds Tough Boots and two direct resistance items.
Build 4 emphasizes rotation speed and finishing power with Rapid Boots plus Sky Piercer, then stabilizes through Oracle, Guardian Helmet, and Immortality. Build 5 uses Magic Boots for faster cycles and layers Brute Force Breastplate, Queen's Wings, Chastise Pauldron, and Guardian Helmet for a sustained front line. Against repeated Magic Damage, move Radiant Armor forward; against Physical skills, move Antique Cuirass forward; against fast Basic Attacks, prioritize Chastise Pauldron.
Estes can sustain Barats through the long contact needed to maintain Trample and create a second control cycle.
Mathilda and Angela help compensate for Barats's limited movement and make it easier to carry a suppressed target toward allied damage.
Belerick and Lolita rely on crowd control that becomes shorter when Big Guy reaches maximum stacks and grants extra Resilience.
Karrie, Moskov, and X.Borg can kite or shred a large HP pool. Enter through terrain, keep defensive boots and armor flexible, and avoid long open-space chases.
These are level-one base values without equipment, emblem, skin, or match modifiers.
| HP | 2450 |
|---|---|
| HP Regen | 8.8 |
| Physical Attack | 135 |
| Physical Defense | 23 |
| Attack Speed | 1.01 |
| Attack Speed Ratio | 50% |
| Mana | 500 |
| Mana Regen | 4 |
| Magic Power | 0 |
| Magic Defense | 15 |
| Movement Speed | 268 |
The English in-game Shop showed five Barats skins on August 18, 2026. Diamond prices and seasonal routes can change; the Season 26 label describes its acquisition route rather than a permanent direct sale.
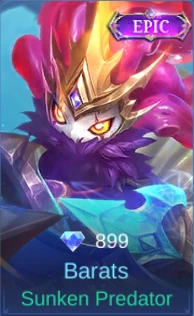
Epic; 899 Diamonds shown in-game
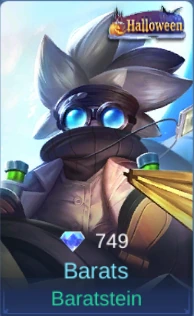
Halloween; 749 Diamonds shown in-game
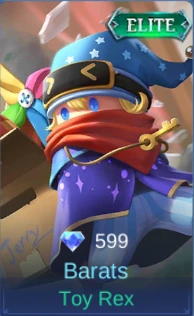
Elite; 599 Diamonds shown in-game
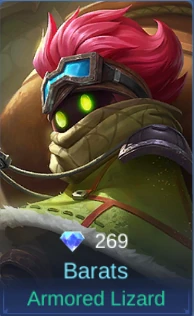
269 Diamonds shown in-game
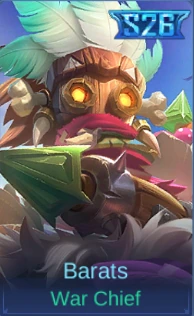
Season 26 reward; availability depends on the current game route
Barats grew up in a Politan village between Agelta and Moniyan. Restless and obsessed with finding riches, he stole a treasure map and crossed the desert toward Los Pecados. A small dragon lizard saved him from thirst; Barats named the creature Detona, and the pair became inseparable adventurers.
The partnership also explains his combat rhythm: Barats controls the target while Detona grows into the durable front line.
For jungle, start from Build 1 or a War Axe plus Thunder Belt route. Move Radiant Armor, Antique Cuirass, or Chastise Pauldron forward according to repeated Magic Damage, Physical skill damage, or fast Basic Attacks.
Tank Emblem with Firmness, Seasoned Hunter, and Concussive Blast is the durable jungle default. Fighter Emblem is an aggressive alternative when another hero can absorb the first engage.
Retribution is the jungle default because Barats needs reliable camp tempo and objective security. Revitalize is reserved for a coordinated Roam route.
Damage a camp, minion, or hero with a skill before the 12-second timer ends. Plan rotations through targets that let Skill 1 refresh the passive.
Refresh Big Guy with Skill 1, place Skill 2 behind the target, use the pull to create an ultimate collision line, then Trample the landing area.
Karrie, Moskov, and X.Borg are difficult because they can keep distance or punish Barats's large HP pool. Force fights in narrow terrain instead of chasing across open space.
Barats wins through preparation, not sudden speed. Keep Big Guy alive before every objective, lead Missile "Expert" into the escape route, and decide the wall or second hero for Detona's Welcome before committing. The five current build paths are starting points; the strongest Barats always moves the right defense forward.

Copyright © FUTURE OUTLOOK TECHNOLOGY LIMITED.Company Registration No.: 77374965 All rights reserved.UNIT 135,1/F.,143 WAI YIP STREET,KWUN TONG HK