
Julian MLBB Jungle Guide: Best Build, Emblem, Skills, Combos, and Counters

Julian is an Assassin/Fighter jungler who chooses his ultimate effect by deciding which skill to cast third. Scythe supplies reach and burst, Sword supplies movement and safety, and Chain supplies reliable setup or area control. His strongest games come from deliberate three-skill cycles followed by enhanced Basic Attacks; his weakest moments begin when the wrong third cast puts every skill on cooldown.
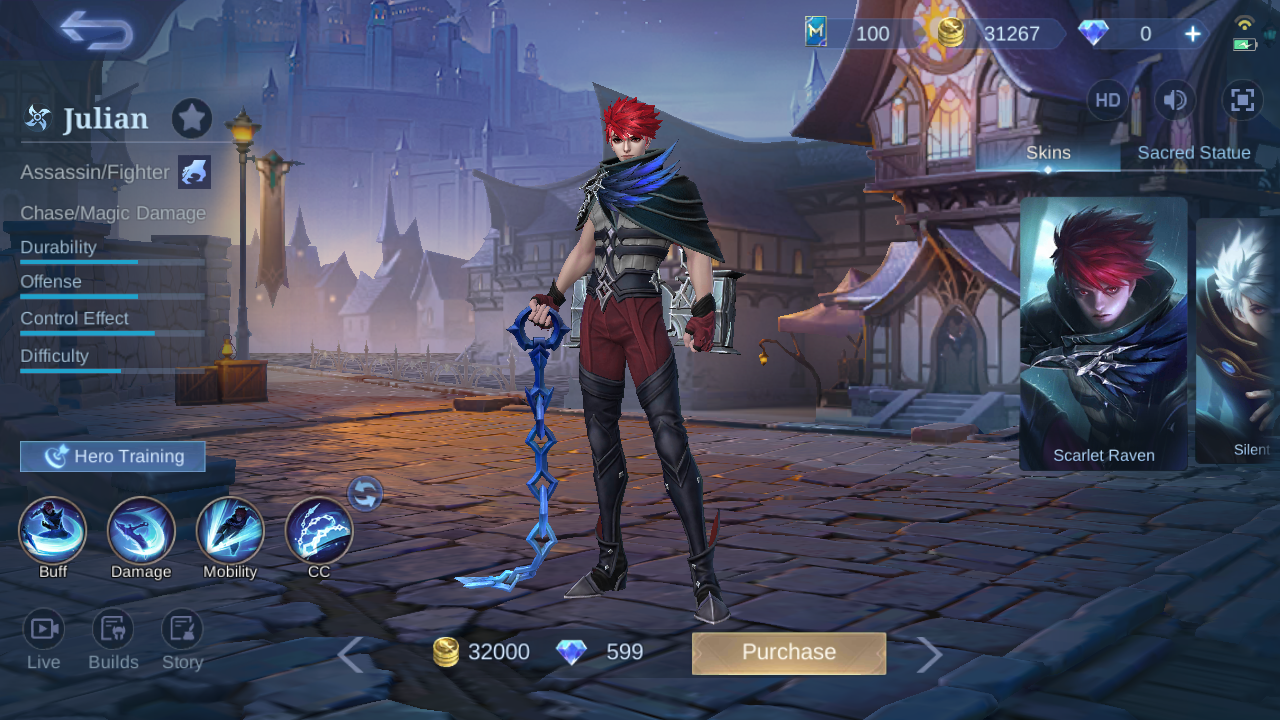
Current in-game build snapshot.
Julian at a Glance
Role and lane
Julian is an Assassin/Fighter with Chase and Magic Damage specialties. The current top-five sample is overwhelmingly jungle-oriented: every row carries a Retribution upgrade, and four rows use Flame Hunter's Arcane Boots.
Pick him when
Choose Julian when your team needs a flexible magic jungler who can change between burst, area crowd control, and an evasive entry. He is especially useful when allied control can guarantee Enhanced Scythe or hold several targets inside Enhanced Chain.
Avoid him when
Be cautious against highly mobile targets such as Harith, or against anti-sustain and anti-heal pressure such as Baxia. Julian also struggles when the draft needs a simple frontliner rather than a cooldown-dependent melee carry.
Win condition
Reach level three quickly, contest the first neutral objective with Retribution, and turn every rotation into a planned third-skill enhancement. Preserve tempo: one correct enhanced cast plus Basic Attacks is better than three random buttons and a long empty cooldown.
Julian Skills: When, Why, and What Not to Do

Smith's Legacy
After Julian casts two different skills, the third becomes enhanced. An enhanced cast puts every skill on a level-scaling 9–6 second cooldown. For 2 seconds after any skill, his Basic Attacks deal 100 (+100% Total Physical Attack) (+100% Total Magic Power) Magic Damage and pull the target; each hero hit by a skill also grants 15% extra Hybrid Lifesteal for 5 seconds, stacking three times.
Decision rule: Plan the enhanced third cast before entering. Use the Basic Attack pull and lifesteal window immediately, then disengage or keep attacking according to the next cooldown cycle. Do not press three skills in panic and discover that the wrong enhancement is now locked in.

Smith's Legacy demonstrated in-game.

Scythe
Julian throws a scythe that deals 420 (+140% Total Magic Power) Magic Damage, slows by 30% for 1 second, and disappears when it hits a non-minion enemy. The displayed level-one cooldown is 9.0 seconds, Mana cost is 30, and Spell Vamp ratio is 50%.
Decision rule: Use normal Scythe to check bushes, start a chase, or create the first mark in a combo. Use Enhanced Scythe as the finishing third cast when a single target is controlled and cannot sidestep the returning blades. Do not throw it through a frontliner if the intended target is behind them.

Scythe demonstrated in-game.

Sword
Julian summons a flying sword and dashes in the target direction, dealing 400 (+80% Total Magic Power) Magic Damage along the path. The displayed level-one cooldown is 9.0 seconds and Mana cost is 30.
Decision rule: Use normal Sword to cross terrain, dodge a committed skill, or place Julian for his third cast. Enhanced Sword is the safety enhancement: it covers distance while making the approach much harder to punish. Do not spend it forward when the enemy still has decisive crowd control and your third enhancement is not ready.

Sword demonstrated in-game.

Chain
Julian casts chains at a target location, dealing 300 (+100% Total Magic Power) Magic Damage after a short delay and immobilizing enemies for 1.2 seconds. The displayed level-one cooldown is 9.0 seconds, Mana cost is 30, and Spell Vamp ratio is 50%.
Decision rule: Use normal Chain to hold a target for Scythe or to stop a chase. Enhanced Chain is the teamfight enhancement because its repeated area damage ends with airborne control when enemies remain inside. Do not drop it where allies cannot follow or where mobility can escape before the final knock-up.

Chain demonstrated in-game.
Skill Priority and Combos
Teamfight Combos
 Scythe
 Sword
Sword Chain
ChainIn teamfights, Julian can slow the enemy with his 1st Skill before dashing into the enemy battle formation with his 2nd Skill. Then use his enhanced 3rd Skill for area CC.
Do not: begin the sequence without checking which enhanced skill will be third, or continue after the target escapes the control zone and the cooldown trade is already lost.
Laning Combos
 Sword
Sword Chain
Chain Scythe
 Basic Attack
In the laning phase, Julian can use his 2nd Skill to close in on the enemy, and his 3rd Skill to immobilize them. Then he can use his enhanced 1st Skill to deal damage. Follow up with his enhanced Basic Attacks to prevent the enemy from escaping.
Do not: begin the sequence without checking which enhanced skill will be third, or continue after the target escapes the control zone and the cooldown trade is already lost.
Three Enhancement Routes
Enhanced Scythe: finish one target
Use Sword → Chain → Enhanced Scythe when the target is immobilized and the returning blades can connect. Follow with enhanced Basic Attacks. Do not choose it into a target that still has an instant dash or immunity.
Enhanced Sword: survive the entry
Use Chain → Scythe → Enhanced Sword when you must cross danger, avoid a decisive hit, or exit after drawing cooldowns. Do not treat the defensive enhancement as a license to dive alone.
Enhanced Chain: control a teamfight
Use Scythe → Sword → Enhanced Chain when several enemies are committed to one area. Place the field where escape paths are narrow. Do not cast it on a single mobile target when Enhanced Scythe would end the fight faster.
How to Play Julian by Phase
Early game
Open with the active skill that reaches your first camp cleanly, unlock all three skills by level three, and plan the enhancement before the first river contest. Seasoned Hunter and Retribution are valuable only if the route stays efficient; do not abandon two camps for a low-percentage chase.
Mid game
Use Sword to cross terrain and arrive from an angle that makes Chain difficult to dodge. Fight around Turtle and the first Lord with Retribution available. If the enemy groups tightly, save Enhanced Chain; if a carry is isolated, convert the same approach into Enhanced Scythe.
Late game
Do not be the first visible body unless Enhanced Sword is the planned escape. Wait for key control, enter on a marked target, and use the Basic Attack pull to keep damage connected. Divine Glaive matters more as Magic Defense rises, while Holy Crystal keeps every route threatening.
Five Julian Mistakes to Avoid
1. Forgetting which skill will be enhanced
The third different skill defines the entire play. Call the route mentally before the first cast.
2. Using Sword only for damage
Sword is Julian's movement insurance. Spending it forward without tracking control often turns a winning burst into a trade death.
3. Skipping enhanced Basic Attacks
Smith's Legacy adds Magic Damage, pull, and lifesteal value after skills. Walking away immediately leaves a large part of the kit unused.
4. Forcing Enhanced Chain on one target
The area route is strongest when several enemies must stay inside. Use Enhanced Scythe for a controlled single target.
5. Copying the leaderboard without context
Four rows share Windtalker, but rank five uses Genius Wand. Choose the slot for tempo and Basic Attack frequency versus early Magic Defense reduction.
Best Julian Emblem and Battle Spell
Default: Mage Emblem
Mage Emblem supports the Magic Power, Cooldown Reduction, and Magic Penetration that every Julian route uses. Rupture adds Adaptive Penetration so the first rotation bites before expensive items are complete.
Seasoned Hunter
Seasoned Hunter improves jungle damage and objective tempo. Use it when Julian is assigned Retribution and owns the jungle route. Do not use a jungle-specific talent in a lane plan that cannot trigger its value.
Lethal Ignition
Lethal Ignition rewards the multi-hit pattern created by enhanced skills and follow-up attacks. Trigger it during a committed damage window; do not burn the whole cycle on a tank you cannot finish or safely disengage from.
Retribution and upgrades
Retribution is the default because Julian needs fast camps and secure Turtle or Lord control. ONE Esports recommends Ice Retribution for movement theft, while the current sample shows Flame Hunter boots in four rows. Use Ice when chase control matters; use Flame when the duel needs extra damage and stolen offensive stats.
Top 5 Julian Pro Setups
This current in-game build sample was observed on August 7, 2026. Every row uses Arcane Boots, Feather of Heaven, Concentrated Energy, Holy Crystal, and Divine Glaive. Windtalker appears in ranks 1–4, while rank 5 replaces it with Genius Wand. The shared shape favors jungle tempo, repeated Magic Damage, hybrid sustain, and high late penetration.
Build 1
| Item 1 | Item 2 | Item 3 | Item 4 | Item 5 | Item 6 |
|---|---|---|---|---|---|
 Flame Hunter's Arcane Boots Flame Hunter's Arcane Boots |  Feather of Heaven Feather of Heaven |  Concentrated Energy Concentrated Energy |  Windtalker Windtalker |  Holy Crystal Holy Crystal |  Divine Glaive Divine Glaive |
Build 2
| Item 1 | Item 2 | Item 3 | Item 4 | Item 5 | Item 6 |
|---|---|---|---|---|---|
| Flame Hunter's Arcane Boots | Feather of Heaven | Concentrated Energy | Windtalker | Holy Crystal | Divine Glaive |
Build 3
| Item 1 | Item 2 | Item 3 | Item 4 | Item 5 | Item 6 |
|---|---|---|---|---|---|
| Flame Hunter's Arcane Boots | Feather of Heaven | Concentrated Energy | Windtalker | Holy Crystal | Divine Glaive |
Build 4
| Item 1 | Item 2 | Item 3 | Item 4 | Item 5 | Item 6 |
|---|---|---|---|---|---|
| Flame Hunter's Arcane Boots | Feather of Heaven | Concentrated Energy | Windtalker | Holy Crystal | Divine Glaive |
Build 5
| Item 1 | Item 2 | Item 3 | Item 4 | Item 5 | Item 6 |
|---|---|---|---|---|---|
| Flame Hunter's Arcane Boots | Feather of Heaven | Concentrated Energy |  Genius Wand Genius Wand | Holy Crystal | Divine Glaive |
Five ranked in-game build snapshots in displayed order; none was applied.
Julian Equipment Matrix
| Item | Why it appears | Buy when | Do not buy when |
|---|---|---|---|
| Arcane Boots | The observed Flame Hunter version adds Movement Speed, Magic Power, Magic Penetration, and jungle true damage. | Julian is jungling and wants the fastest early Magic Damage curve | control, Physical burst, or repeated Magic burst requires defensive boots |
| Feather of Heaven | Magic Power, Attack Speed, lifesteal, Cooldown Reduction, and on-hit Magic Damage all reinforce enhanced Basic Attacks. | Julian can stay connected after the third skill | the match allows only one brief cast window before disengage |
| Concentrated Energy | HP, Magic Power, Hybrid Lifesteal, and stacking Magic Power help Julian survive a full rotation. | sustained fights let several skill hits build Recharge | anti-heal or instant burst prevents the sustain window |
| Windtalker | Attack Speed, movement, critical chance, and Typhoon support tempo and repeated attacks. | Julian is ahead and can repeatedly reach targets | Magic Defense reduction or a defensive item is needed first |
| Genius Wand | Magic Power, movement, penetration, and stacking Magic Defense reduction amplify multi-hit damage. | targets have enough Magic Defense for repeated reduction to matter | the team already over-supplies reduction and Julian needs sustain or safety |
| Holy Crystal | Its very high Magic Power and level-scaling multiplier increase every Magic Damage route. | the core is complete and Julian can convert raw power | survival is the immediate reason rotations fail |
| Divine Glaive | Percentage Magic Penetration and Spellbreaker scale into high Magic Defense. | frontliners or carries are buying Magic Defense | enemy Magic Defense is still low enough for Genius Wand to be more efficient |
Thirty in-game item tooltips verified these effects.
Best Teammates, Threats, and Matchups
Buff and control partners


Angela can extend Julian's dive with shielding and movement, while Diggie helps protect the third-cast plan from crowd control. Enter after their utility is available; do not assume either support can rescue an unplanned deep dive.
Mobility threats

Julian must hit skills to unlock lifesteal and enhancement value. Harith can dash away from Chain and move outside Enhanced Scythe paths. Hold the control until mobility is committed.
Early pressure targets


Cecilion and Aldous need time to scale. Julian can exploit his level-three spike, invade with lane priority, and force early objectives. Do not overstay after the first rotation if nearby lanes cannot support the invade.
Anti-sustain warning

Baxia is the clearest warning because anti-heal pressure compresses the value of Smith's Legacy and Concentrated Energy. Treat the first failed sustain trade as information, not an invitation to repeat the same engage.
Julian Base Stats
| HP | 2700 | HP Regen | 7.8 | Physical ATK | 128 |
|---|---|---|---|---|---|
| Physical DEF | 24 | Attack Speed | 1.1 | Attack Speed Ratio | 100% |
| Mana | 500 | Mana Regen | 4 | Magic DEF | 15 |
| Magic Power | 0 | Movement SPD | 262 | Role | Assassin/Fighter |
Level-one stats without equipment, Emblem, skin, or match modifiers.
Julian Skins and Availability
Five exact Julian Shop cards were accepted. Silent Edge showed a direct 269-Diamond purchase, while Megumi Fushiguro, Kurapika, Itachi Uchiha, and Meowkin Tracker were labeled Limited-time Event. Those labels describe this dated Shop snapshot, not a guarantee of future availability.
| Preview | Skin | Tag | Observed availability |
|---|---|---|---|
 | Silent Edge | — | 269 Diamonds; Purchase shown |
 | Megumi Fushiguro | Jujutsu Kaisen | Limited-time Event |
 | Kurapika | HUNTER×HUNTER | Limited-time Event |
 | Itachi Uchiha | NARUTO | Limited-time Event |
 | Meowkin Tracker | Mystic Meow | Limited-time Event |
Current in-game Shop snapshot.
Julian Story
Julian is the son of Terizla, leader of the Free Smiths' Guild. Ten years before the present story, the Church of Light destroyed the guild after accusing it of allegiance to the Abyss and spared only the leader's six-year-old son. The starving child was taken in by the Church, renamed Julian, and trained at Raven's Nest to become part of the Archbishop's secret force. His journey eventually turns from unquestioning service toward recovering the truth about his family, his home, and the people the Church taught him to condemn.
Julian FAQ
What is the best Julian build?
The current sample starts with Flame Hunter's Arcane Boots, Feather of Heaven, and Concentrated Energy. Use Windtalker for tempo and enhanced Basic Attacks or Genius Wand for Magic Defense reduction, then finish with Holy Crystal and Divine Glaive.
What is the best Julian Emblem?
Mage Emblem with Rupture, Seasoned Hunter, and Lethal Ignition is the default jungle setup. It supports penetration, farming speed, and multi-hit burst.
Which Battle Spell should Julian use?
Use Retribution in the jungle. Ice Retribution improves chase control; Flame Retribution appears in four observed rows and supports direct dueling damage.
What is Julian's best combo?
For a single target, use Sword → Chain → Enhanced Scythe, then enhanced Basic Attacks. For teamfight control, use Scythe → Sword → Enhanced Chain.
Who counters Julian?
Mobility such as Harith can avoid the skill hits Julian needs, while Baxia-style anti-sustain pressure reduces lifesteal value. Track movement and anti-heal before committing the third cast.
When should Julian use Enhanced Sword?
Choose Enhanced Sword when survival, terrain crossing, or avoiding a decisive hit matters more than maximum burst. It is the correct enhancement for many outnumbered entries and exits.
Final Verdict
Julian rewards a player who makes the third cast a decision rather than an accident. Farm efficiently with Retribution, choose the enhancement before entering, and convert the passive window with Basic Attacks. The observed builds strongly agree on Arcane Boots, Feather of Heaven, Concentrated Energy, Holy Crystal, and Divine Glaive, while the Windtalker-versus-Genius Wand slot gives a clear tempo or penetration choice. For nearby jungle and matchup context, compare the Aamon guide, Harith guide, and Baxia guide.
Top up Mobile Legends: Bang Bang safely on ManaBuy



Copyright © FUTURE OUTLOOK TECHNOLOGY LIMITED.Company Registration No.: 77374965 All rights reserved.UNIT 135,1/F.,143 WAI YIP STREET,KWUN TONG HK