
Beatrix MLBB Gold Lane Guide: Best Build, Skills, Counters, and Tips

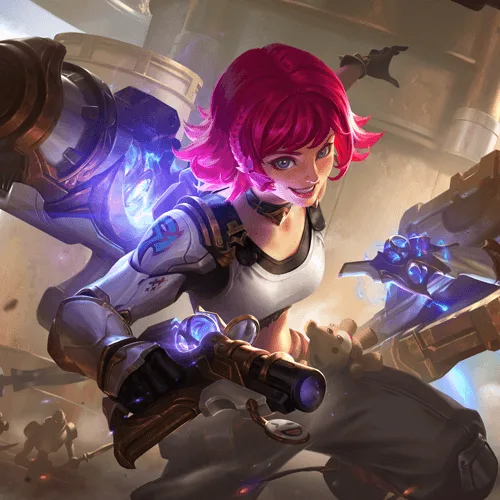
Beatrix is best treated as a Gold Lane Marksman pick built around Finisher, Damage. Recent match stats show 50.71% win rate, 0.83% pick rate, and 1.06% ban rate, so treat Beatrix as a draft-dependent pick rather than an automatic meta answer. The combo plan gives the clearest route: use the listed skill sequence to create the fight pattern, then respect bad matchups such as Eudora, Ling. If you collect Beatrix skins, check the in-game shop or event page before topping up, because Starlight and event skins are not always direct Diamond purchases.
Pick Beatrix when your team needs a marksman hero who can turn the main combo into a repeatable fight plan. Main skill priority: Start with Masterful Gunner at Level 1, max Masterful Gunner first, then level Tactical Reposition as the backup skill. Upgrade Renner's Apathy whenever it is available. The strongest use case is against heroes the matchup notes say Beatrix can punish, especially Hylos, Belerick. The biggest risk is drafting Beatrix into Eudora, Ling without a plan to survive their pressure.
Beatrix at a Glance
Hero icon: 
| Field | Detail |
|---|---|
| Role | Marksman |
| Specialty | Finisher, Damage |
| Recommended lane | Gold Lane |
| Damage type | Physical |
| Basic attack type | Ranged |
| Release date | 19 March 2021 |
| Price | 32,000 Battle Points or 599 Diamonds |
| Win / pick / ban snapshot | 50.71% / 0.83% / 1.06% |
| Story hook | A confident inventor girl. |
How Beatrix's Skills Work
Read Beatrix through real skill jobs: Mechanical Genius sets the baseline, Masterful Gunner and Tactical Reposition decide most trades, and Renner's Apathy is the major commit or conversion window. The details below explain when each button should be used, not just what it does.
| Icon | Skill | CD / Cost | Tags | What it means in play |
|---|---|---|---|---|
 |
Mechanical Genius | Passive | Buff | Mechanical Genius is the passive layer that rewards Beatrix for taking or using actions repeatedly, so track its stacks before committing. |
 |
Masterful Gunner | CD: 12 | Morph, Buff | Masterful Gunner changes Beatrix's durability or damage window. Time it before the trade becomes dangerous, not after the fight is already lost. |
 |
Tactical Reposition | Passive | Mobility, Buff | Tactical Reposition changes Beatrix's durability or damage window. Time it before the trade becomes dangerous, not after the fight is already lost. |
 |
Renner's Apathy | Passive | Burst | Renner's Apathy fills the rotation between Beatrix's main setup and finish. Use its cooldown to decide whether the next fight is worth taking. |
 |
Need Backup | Passive | Morph | Need Backup fills the rotation between Beatrix's main setup and finish. Use its cooldown to decide whether the next fight is worth taking. |
 |
Mechanical Genius | Passive | Buff | Mechanical Genius helps keep enemies inside Beatrix's threat area, which makes follow-up control and damage easier. |
|
Tactical Reposition | Passive | Mobility, Buff | Tactical Reposition is the movement or engage button. Save it for entry, chase, or escape instead of spending it only for poke. |
 |
Bennett's Rage | CD: 40 | AOE, Slow | Bennett's Rage helps keep enemies inside Beatrix's threat area, which makes follow-up control and damage easier. |
 |
Mechanical Genius | Passive | Buff | Mechanical Genius changes Beatrix's durability or damage window. Time it before the trade becomes dangerous, not after the fight is already lost. |
|
Tactical Reposition | Passive | Mobility, Buff | Tactical Reposition changes Beatrix's durability or damage window. Time it before the trade becomes dangerous, not after the fight is already lost. |
 |
Wesker's Elation | CD: 20 | Burst, AOE | Wesker's Elation is the area-pressure part of the kit. Aim it where enemies must walk during waves, objectives, or teamfight entrances. |
 |
Mechanical Genius | Passive | Buff | Mechanical Genius changes Beatrix's durability or damage window. Time it before the trade becomes dangerous, not after the fight is already lost. |
|
Tactical Reposition | Passive | Mobility, Buff | Tactical Reposition changes Beatrix's durability or damage window. Time it before the trade becomes dangerous, not after the fight is already lost. |
 |
Nibiru's Passion | CD: 40 | AOE | Nibiru's Passion is the area-pressure part of the kit. Aim it where enemies must walk during waves, objectives, or teamfight entrances. |
The practical pattern is simple: identify which skill starts the fight, which skill holds the target in place, and which skill finishes the trade. For Beatrix, the combo section should guide that decision more than old community habits or outdated patch memories.
Best Skill Priority
Skill priority: Start with Masterful Gunner at Level 1, max Masterful Gunner first, then level Tactical Reposition as the backup skill. Upgrade Renner's Apathy whenever it is available.
That priority matters because Beatrix's first few levels decide whether the hero can contest lane, protect an ally, or threaten a rotation. Do not treat the priority as a damage chart only. Read it as a tempo clue: the main skill should be available often enough to create the hero's normal play pattern, while the backup skill fills the control, mobility, or damage gap between major fights.
Best Combos for Lane and Teamfights
| Combo type | Icon sequence | Skill sequence | How to use it |
|---|---|---|---|
| Teamfight Combos | Bennett's RageMasterful GunnerNibiru's Passion Basic AttackTactical RepositionBasic Attack Basic AttackTactical RepositionBasic Attack |
Bennett's Rage -> Masterful Gunner -> Nibiru's Passion -> Basic Attack -> Tactical Reposition -> Basic Attack | For teamfights, we recommend using Bennett as Beatrix's primary weapon and Nibiru as her secondary weapon. During a teamfight, Beatrix can use Bennett's Ultimate to strike the enemy team. Then she can use her 1st Skill to switch to Nibiru, and cast Nibiru's Ultimate to attack the enemy. She can finish off the enemy heroes with her Basic Attacks and her 2nd Skill. |
| Laning Combos | Basic AttackTactical RepositionBasic AttackMasterful GunnerBasic Attack |
Basic Attack -> Tactical Reposition -> Basic Attack -> Masterful Gunner -> Basic Attack | In the laning phase, we recommend using Renner as Beatrix's primary weapon and Wesker as her secondary weapon. She can use Renner's ranged Basic Attack to poke the enemy, and her 2nd Skill to reload and fire again. She can then switch to Wesker to finish off the target enemy. |
The key is not to press the sequence mechanically. Start the combo only when the target cannot easily walk away, blink out, or punish the recovery window.
Teamfight Combos
| Timing cue | What to do |
|---|---|
| Start condition | Begin only when the target has used the movement or immunity tool that would break Beatrix's setup. |
| Clean sequence | Bennett's Rage -> Masterful Gunner -> Nibiru's Passion -> Basic Attack -> Tactical Reposition -> Basic Attack |
| Why it works | For teamfights, we recommend using Bennett as Beatrix's primary weapon and Nibiru as her secondary weapon. During a teamfight, Beatrix can use Bennett's Ultimate to strike the enemy team. Then she can use her 1st Skill to switch to Nibiru, and cast Nibiru's Ultimate to attack the enemy. She can finish off the enemy heroes with her Basic Attacks and her 2nd Skill. |
| Reset rule | If the opener misses, back out, wait for cooldowns, and look for the next wave, bush, or objective entrance. |
Laning Combos
| Timing cue | What to do |
|---|---|
| Start condition | Begin only when the target has used the movement or immunity tool that would break Beatrix's setup. |
| Clean sequence | Basic Attack -> Tactical Reposition -> Basic Attack -> Masterful Gunner -> Basic Attack |
| Why it works | In the laning phase, we recommend using Renner as Beatrix's primary weapon and Wesker as her secondary weapon. She can use Renner's ranged Basic Attack to poke the enemy, and her 2nd Skill to reload and fire again. She can then switch to Wesker to finish off the target enemy. |
| Reset rule | If the opener misses, back out, wait for cooldowns, and look for the next wave, bush, or objective entrance. |
How to Play Beatrix by Phase
| Phase | What to focus on | Common mistake |
|---|---|---|
| Early game | Secure farm, avoid risky trades before the first item spike, and track enemy roam movement. | Standing forward without the escape route planned. |
| Mid game | Rotate after pushing waves and join fights from a safe angle behind frontline control. | Entering river first instead of following vision. |
| Late game | Hit the nearest safe target and preserve the damage window for Lord or base fights. | Chasing a low-health enemy through fog. |
| Objectives | Arrive with lane priority and keep enough distance to keep attacking through the fight. | Stopping basic attacks to over-position for a kill. |
Best Counters and Hard Matchups
Use these matchups as a draft check before locking Beatrix. The important signal is not only the hero name, but whether the enemy can break Masterful Gunner timing, deny Renner's Apathy, or punish the recovery window.
| Matchup type | Hero icons | Why it matters | Draft cue |
|---|---|---|---|
| Good targets |  Hylos Hylos Belerick Belerick |
Beatrix is strong against heroes without movement abilities, as they can be easily hit by her skills, such as Hylos and Belerick. | Pick Beatrix when your team can force these targets through Masterful Gunner range, protect the first commit, or keep them from resetting before Renner's Apathy matters. |
| Hard matchups |  Eudora Eudora Ling Ling |
Beatrix is countered by high burst damage heroes with strong single-target CC, as they can catch her with a CC and burst her down. Such as Eudora and Ling. | Play slower: track their control, burst, or mobility cooldowns before spending Masterful Gunner and Renner's Apathy in the same window. |
How to Draft Around Those Matchups
Beatrix is strongest when the fight starts on your terms: vision is set, the target has already used an escape, and Tactical Reposition is still available if the first trade goes wrong.
Against Eudora, Ling, do not open blind from river or bush without backup. Let a teammate test the control cooldown first, then enter after the punish tool is gone.
Matchup Watchlist
| Question before locking | What to check |
|---|---|
| Can the enemy stop the first commit? | If yes, hold Masterful Gunner until the key interrupt or burst spell is visible. |
| Can Beatrix reach the target safely? | If the target outranges Beatrix, wait for wave pressure, flank vision, or allied crowd control. |
| Can your team follow up? | If allies cannot follow the engage, play for wave, objective entrance, or counter-engage instead of forcing a solo pick. |
Best Teammates and Team Comps
Beatrix works best with teammates who either start the first control window, protect the reset, or keep targets inside Masterful Gunner and Renner's Apathy timing.
| Best teammates | Hero icons | Teamfight reason | Draft cue |
|---|---|---|---|
| Khufra, Atlas |  Khufra Khufra Atlas Atlas |
Beatrix works best with tank heroes with good CC abilities, as they can help improve the accuracy of Beatrix's skills. Like Khufra and Atlas. | Pair Beatrix with these allies when your lineup needs a cleaner opener, safer follow-up, or a way to keep enemies inside the combo path. |
Teammate Watchlist
| Team need | Why it helps Beatrix |
|---|---|
| Reliable first control | Gives Beatrix time to land Masterful Gunner without starting the fight alone. |
| Peel or front line | Protects Beatrix after the first commit, especially when Tactical Reposition is on cooldown. |
| Objective setup | Turns the hero from a random skirmish pick into a clear Turtle, Lord, or turret-pressure tool. |
Build, Emblems, and Battle Spell Notes
Build for sustained damage and safe positioning. The kit points toward AOE, Buff, Burst, Mobility, Morph, Slow, so item choices should help the hero keep attacking through fights instead of forcing short, risky trades.
| Build question | Recommended direction | Why it matters |
|---|---|---|
| Core build direction | Prioritize damage uptime, attack scaling, and enough safety to keep hitting through Lord or Turtle fights. | This keeps Masterful Gunner useful instead of turning the guide into a fixed item list that breaks when the patch shifts. |
| When ahead | Lean into the stats that make Renner's Apathy or the main damage window easier to convert. | An ahead Beatrix should close fights quickly, then reset before counters can punish. |
| When behind | Add safer positioning, durability, or cooldown value before chasing greedier damage. | If Beatrix dies before Masterful Gunner and Tactical Reposition are used, the build is not doing its job. |
| Into Eudora, Ling | Build and play around survival, vision, and delayed entry. | The hard matchup usually wins by breaking the first commit, so do not spend every resource before their punish tool is gone. |
Use the embedded Hero Spotlight below when you want to check timing visually after reading the combo and matchup sections. Watch the skill and combo chapters first, then use the build, relations, and best-with chapters to confirm how the written plan fits real movement.
| Time | Chapter | Why it matters |
|---|---|---|
| 0:05 | HERO SKILLS | Use this section to check range, delay, and hit-confirm details. |
| 2:42 | COMBO TIPS | Use this section to compare the written sequence with real timing. |
| 3:41 | SKILL TIPS | Use this section to check range, delay, and hit-confirm details. |
| 5:04 | BUILDS | Use this section to verify setup choices after you understand the kit. |
| 5:22 | BATTLE SPELLS | Use this section to verify setup choices after you understand the kit. |
| 5:31 | RELATIONS | Use this section to review counters and teammate fit. |
| 5:55 | BEST WITH | Use this section to review counters and teammate fit. |
| 6:09 | TACTICS | Use this section as a quick visual check before playing. |
Current Play Notes
Beatrix guides can age quickly when skill timing, item value, or matchup pressure changes. Use the combo, counter, and teammate sections above as the current play plan, then test the timing in game before copying an older build habit.
Skins and Availability Notes
Use these skins as collection checks, not as proof that every skin is currently sold in the shop. Starlight and event skins can rotate, so confirm the active in-game shop or event page before topping up.
| Skin preview | Skin | Availability note |
|---|---|---|
 |
Space Agent | Starlight Member, 2022-03 |
 |
Blitz Attack | Check current in-game availability |
 |
Dawnbreak Soldier | Check current in-game availability |
Not every listed skin is a direct Diamond purchase. If the note says Starlight, event, collaboration, or check in game, treat it as an availability warning first and a top-up decision second.
Skin availability can change when rewards rotate into events, Starlight, seasonal shops, or collaboration reruns. Before topping up, check the current in-game shop or event page, then use the ManaBuy MLBB top-up page only if you still need Diamonds.

Check the current in-game shop or event page first. If you need Diamonds after confirming availability, use ManaBuy's MLBB top-up page.
Lore and Personality
A confident inventor girl. That flavor helps explain Beatrix's personality, while match decisions still depend on skill timing, combo windows, matchup pressure, and team setup.
Related ManaBuy Links
- Mobile Legends: Bang Bang blog hub
- Gold Lane hero ranking guide
- Mobile Legends: Bang Bang top-up page
FAQ
Is Beatrix still good in 2026?
Beatrix can still be useful in the right draft, but the current snapshot (50.71% win / 0.83% pick / 1.06% ban) means you should treat this as a matchup pick, not an automatic lock. Pick Beatrix when your team can support the Finisher, Damage game plan.
What lane should Beatrix play?
Use Gold Lane as the default lane unless your draft has a clear flex plan. The lane choice should support Masterful Gunner timing, safe farming, and the hero's main fight role as a Marksman.
What is the best Beatrix build direction?
The safest build direction is damage uptime, attack scaling, and enough safety to keep hitting through Lord or Turtle fights. Use the video build chapter as a visual check, then adjust for enemy burst, range, control, or front-line pressure.
Which skill should Beatrix max first?
Start with Masterful Gunner at Level 1, max Masterful Gunner first, then level Tactical Reposition as the backup skill. Upgrade Renner's Apathy whenever it is available. This keeps the guide tied to real skill names instead of generic Skill 1 or Skill 2 labels.
What is the best Beatrix combo?
For teamfights, use Bennett's Rage -> Masterful Gunner -> Nibiru's Passion -> Basic Attack -> Tactical Reposition -> Basic Attack. For lane trades, use Basic Attack -> Tactical Reposition -> Basic Attack -> Masterful Gunner -> Basic Attack. Stop if the opener misses or the target escapes before follow-up connects.
Who counters Beatrix?
The hardest listed matchups are Eudora, Ling. Play slower into those picks, track cooldowns, and do not spend Masterful Gunner and Renner's Apathy before the punish tool is gone.
Which teammates work well with Beatrix?
Khufra, Atlas work well because they make the first engage safer and keep targets inside the combo window. Beatrix also likes drafts where another hero can start vision or control before the commit.
Which Beatrix skins are worth checking?
Check the active in-game shop, Starlight, event, or collaboration notes first. Skin availability can rotate, so top up only after confirming that the skin you want currently needs Diamonds.





Copyright © FUTURE OUTLOOK TECHNOLOGY LIMITED.Company Registration No.: 77374965 All rights reserved.UNIT 135,1/F.,143 WAI YIP STREET,KWUN TONG HK