
EN / $ USD
Masha MLBB EXP Lane Guide: Best Build, Emblem, Skills, and Counters

by Hannah Price
Published Aug 16 2026 · Updated Oct 12 2026
Share:
Table of Contents
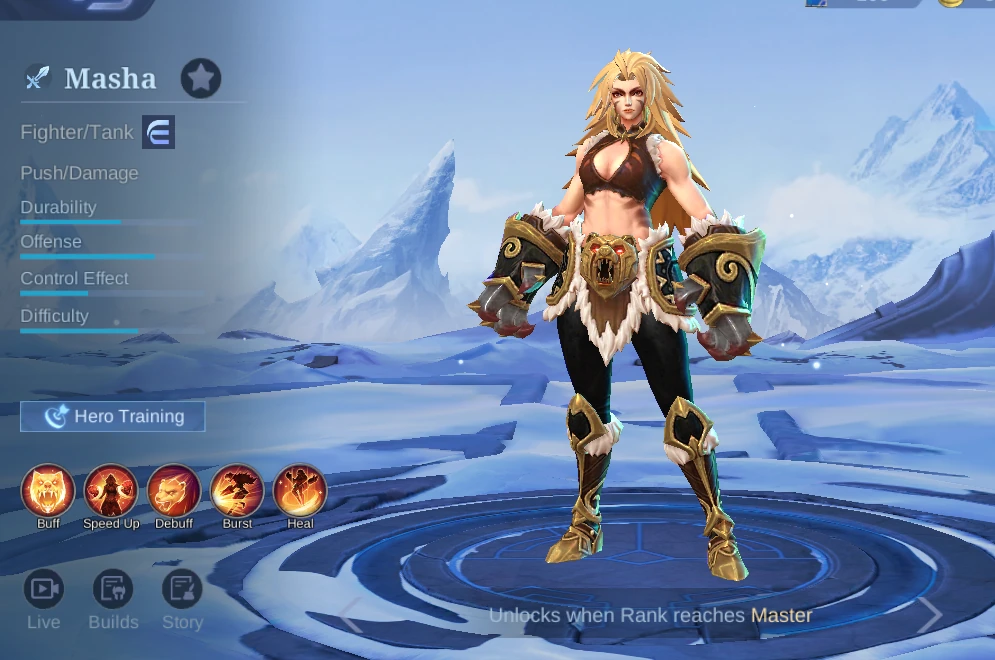
Masha is an EXP Lane Fighter/Tank who turns three HP bars into repeated burst windows, fast split pressure, and dangerous access to isolated carries. Pick her when your team can create side-lane space and help her reach the back line. Avoid spending HP on a long approach that never produces a clean hit.
In-game context: MLBB game version 2.1.88.12027, observed on August 16, 2026. The five builds and Shop availability reflect that in-game date; HP-bar management, target access, and split-push timing remain the core fundamentals.
Quick Answer: Masha's Winning Plan
Core sequence
Thunderclap into Wild Power and empowered Basic Attacks, then use a bar-reset Thunderclap or Howl Shock to finish or disengage.Recommended emblem
Custom Assassin Emblem with Thrill, Weapons Master, and Lethal Ignition for Adaptive Attack, stronger item-granted attack, and finishing damage.Battle spell
Sprint supports EXP Lane access and retreat. Use it to reach a priority target or escape after the burst window, not simply to cross empty map.Role, Specialty, and Level-One Stats
Masha is listed in-game as a Fighter/Tank with Push/Damage. Her durability is unusual: three separate HP bars provide multiple break points, but her own skills consume HP. That makes timing more important than standing in front of every incoming hit.
| HP | 2000 |
|---|---|
| HP Regen | 3.8 |
| Physical Attack | 90 |
| Physical Defense | 15 |
| Attack Speed | 0.96 |
| Attack Speed Ratio | 100% |
| Mana | 0 |
| Mana Regen | 0 |
| Magic Power | 0 |
| Magic Defense | 15 |
| Movement Speed | 250 |
Masha Skills and Practical Use

Ancient Strength
Passive / Buff
Masha has three HP bars. Losing a bar lets her ignore one instance of damage and remove control effects. Her skills cost half as much HP with two bars remaining and no HP with one bar remaining.
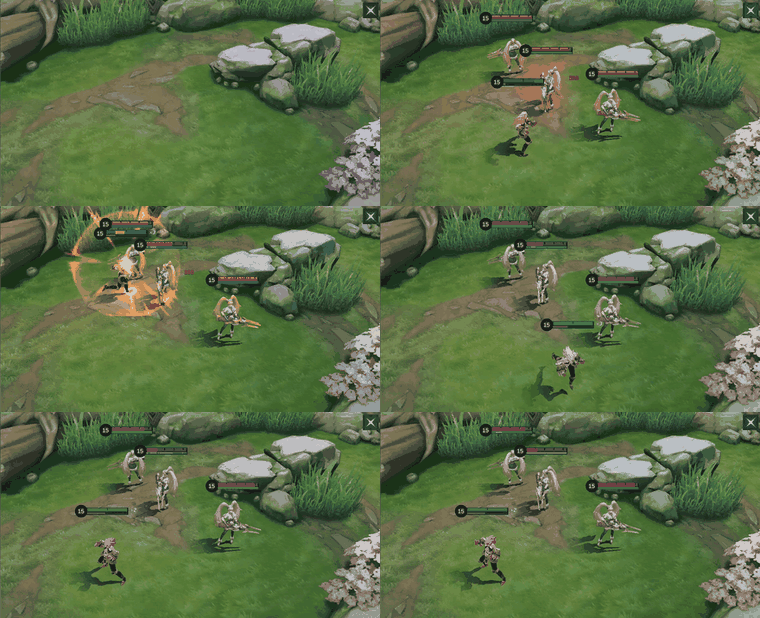
Use it well: Enter important fights with full bars, then track each bar break as a fresh window to cast and reposition.
Avoid: Do not spend bars for routine movement when a fight is about to start; her safety depends on having those break points available.

Wild Power
Skill 1 / Speed Up / Buff
Masha spends 24% HP to gain 50% Movement Speed that decays over two seconds. Her next two Basic Attacks gain 50% Attack Speed and deal stronger Max-HP-based Physical Damage.
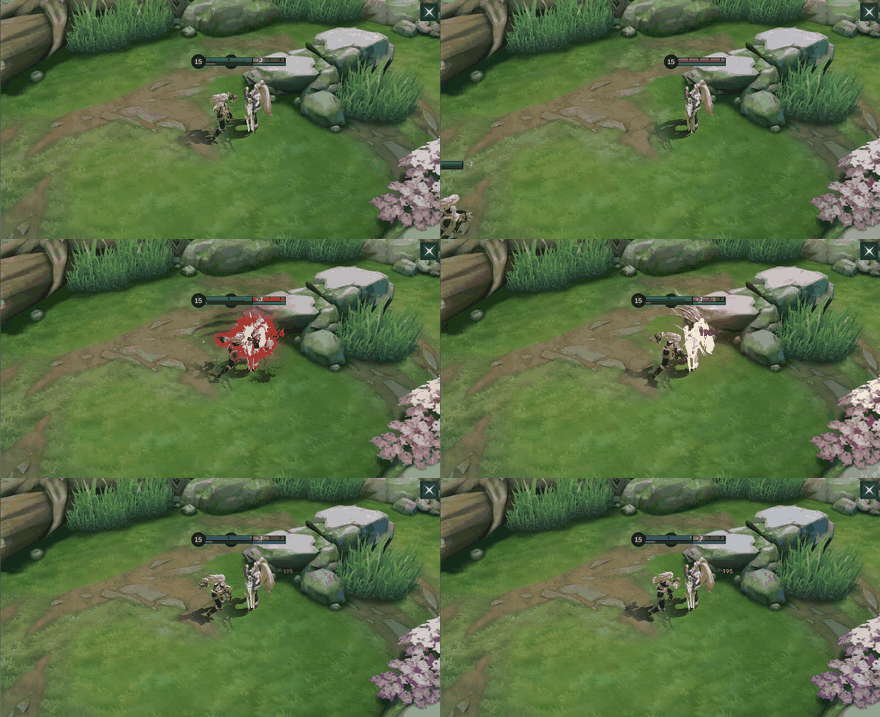
Use it well: Turn it on when you can immediately reach a hero, turret, or objective and deliver both empowered Basic Attacks.
Avoid: Do not activate too early during a long approach. The movement burst decays, while the HP cost is paid immediately.

Howl Shock
Skill 2 / Damage / Debuff
Masha spends 24% HP to deal 200 plus 100% Total Physical Attack as Physical Damage and reduce enemy Attack Speed by 50% for two seconds.
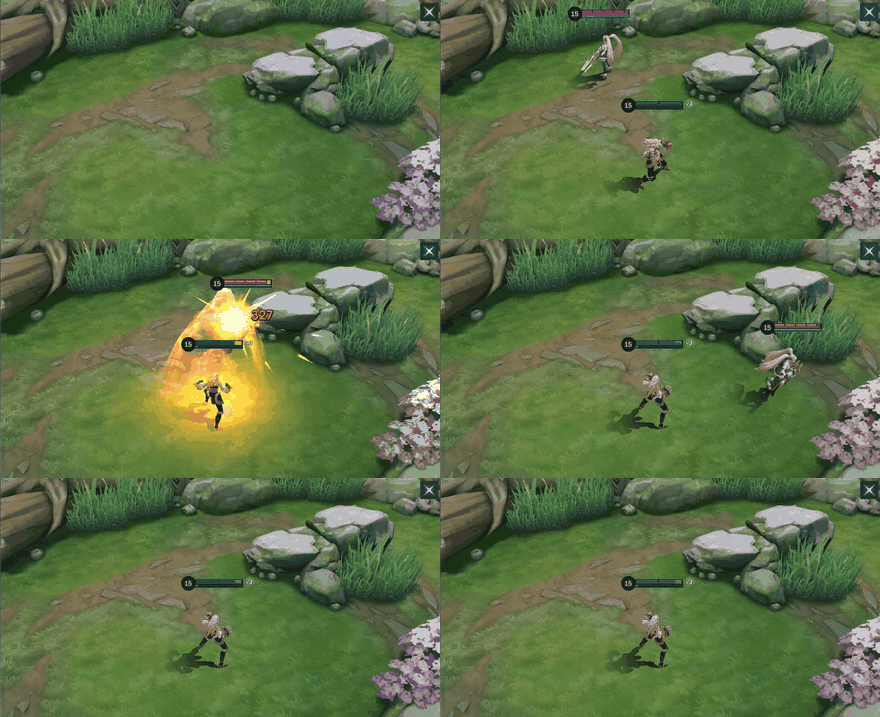
Use it well: Hit Basic Attack carries before trading so their return damage is weaker while Masha delivers her empowered attacks.
Avoid: Do not throw it after the target has left reliable range; a miss spends HP without applying damage or the Attack Speed reduction.

Thunderclap
Ultimate / Burst / Control
Masha spends 34% HP and lunges at an enemy hero while immune to control effects. She deals 400 plus 220% Extra Physical Attack as Physical Damage, slows the target, knocks nearby enemies back, and resets the skill whenever an HP bar is lost.
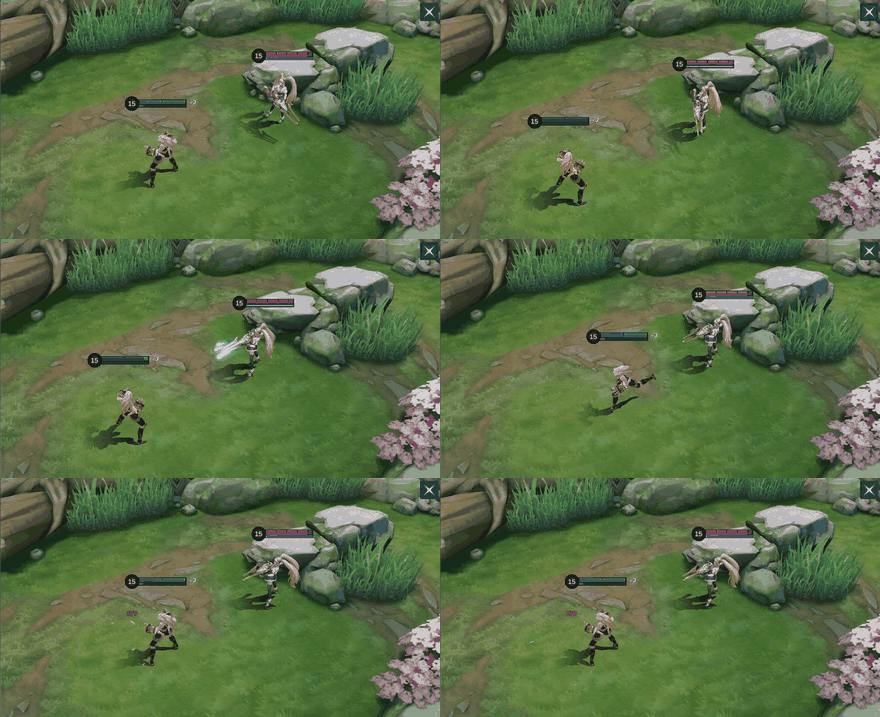
Use it well: Use the control immunity to cross a dangerous crowd-control window, then watch for each bar break so the reset is not wasted.
Avoid: Do not lunge into several enemies without an exit or a planned bar reset. The large HP cost can expose the final bar quickly.

Life Recovery
Special Skill / Heal
After staying out of combat for three seconds, Masha can spend half her energy to restore one full HP bar. She is invincible while casting.
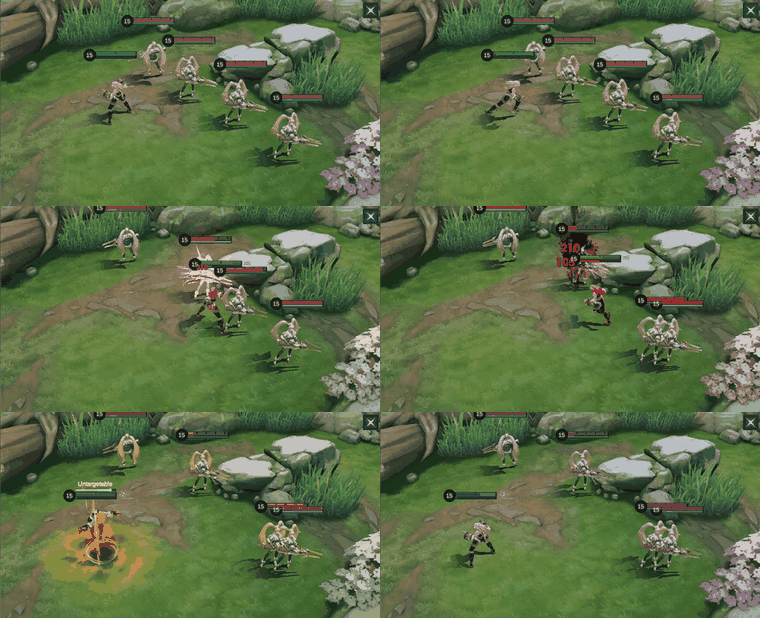
Use it well: Leave combat, create a safe three-second gap, and rebuild a bar before returning to a lane push or objective fight.
Avoid: Do not rely on it during continuous damage. The out-of-combat requirement means space and timing are part of the heal.
Skill Upgrade Priority
Learn Wild Power at level one and prioritize it, with Howl Shock as the secondary upgrade. Level Thunderclap whenever available. Wild Power supplies the movement and empowered Basic Attacks that drive both trades and structure pressure.
Best Emblem and Battle Spell
Use the Custom Assassin Emblem with Thrill, Weapons Master, and Lethal Ignition. Thrill gives 16 Adaptive Attack. Weapons Master increases Physical Attack and Magic Power granted by equipment, emblems, and skills by 8%. Lethal Ignition adds finishing damage after three qualifying hits.
Take Sprint for EXP Lane. It helps Masha cross the space before Wild Power's short movement burst fades and gives her a way out after an HP-heavy commitment. Retribution is the role-specific alternative only when she is assigned to Jungle.
Current In-Game Builds
These five current in-game builds were observed on August 16, 2026. Compare the six-item order and adjust utility or defensive slots for the match.
Build 1
| Item 1 | Item 2 | Item 3 | Item 4 | Item 5 | Item 6 |
|---|---|---|---|---|---|
 Sea Halberd Sea Halberd |  Rapid Boots Rapid Boots |  Blade of the Heptaseas Blade of the Heptaseas |  Malefic Roar Malefic Roar |  Blade of Despair Blade of Despair |  Windtalker Windtalker |
Build 2
| Item 1 | Item 2 | Item 3 | Item 4 | Item 5 | Item 6 |
|---|---|---|---|---|---|
| Blade of the Heptaseas | Rapid Boots |  Sky Piercer Sky Piercer | Sea Halberd | Malefic Roar | Blade of Despair |
Build 3
| Item 1 | Item 2 | Item 3 | Item 4 | Item 5 | Item 6 |
|---|---|---|---|---|---|
| Sea Halberd | Rapid Boots | Sky Piercer | Malefic Roar | Blade of Despair | Windtalker |
Build 4
| Item 1 | Item 2 | Item 3 | Item 4 | Item 5 | Item 6 |
|---|---|---|---|---|---|
| Sea Halberd | Rapid Boots | Blade of the Heptaseas | Malefic Roar | Blade of Despair | Windtalker |
Build 5
| Item 1 | Item 2 | Item 3 | Item 4 | Item 5 | Item 6 |
|---|---|---|---|---|---|
| Sea Halberd | Rapid Boots | Blade of the Heptaseas | Malefic Roar | Blade of Despair |  Endless Battle Endless Battle |
Equipment Guide
Use the item notes below to decide what each slot contributes. The table describes each item independently of the numbered builds.
| Item | What it adds | When to consider it |
|---|---|---|
| Sea Halberd | Physical Attack and Attack Speed, healing and shield reduction on damaged targets, plus extra damage against enemies with more extra HP. | Buy early when sustain, shields, or high-extra-HP targets matter. Its Attack Speed also helps Masha deliver Wild Power attacks quickly. |
| Rapid Boots | High Movement Speed, slow reduction, and HP Regen for faster rotations and better recovery between trades. | Choose when map speed and slow resistance are more valuable than defensive boots. Replace them if crowd control or concentrated damage repeatedly stops the engage. |
| Blade of the Heptaseas | Physical Attack, HP, Physical Penetration, and an empowered slowing Basic Attack after staying out of damage. | Use for burst from fog or after a clean disengage. It is weaker when constant poke prevents the Ambush passive from charging. |
| Malefic Roar | Physical Attack and percentage Physical Penetration that increases against targets with higher Physical Defense. | Prioritize once armor begins to blunt Masha’s Physical Damage. It is the direct penetration slot against durable front lines. |
| Blade of Despair | A very large Physical Attack increase, Movement Speed, and a temporary Physical Attack boost against low-HP enemies. | Buy when Masha can safely convert raw Physical Attack into a kill. Delay it if the match demands an earlier defensive or utility answer. |
| Windtalker | Attack Speed, Critical Chance, Movement Speed, and a bouncing Magic Damage proc that can crit. | Add when faster Basic Attacks, movement, and wave pressure help more than another pure burst item. |
| Sky Piercer | Adaptive Attack, Movement Speed, and an execute threshold that grows with kills and falls with deaths. | Consider when Masha is already finding clean finishes. Avoid forcing it from behind because deaths reduce its accumulated execute value. |
| Endless Battle | Physical Attack, HP, cooldown reduction, Movement Speed, Mana Regen, plus a skill-triggered True Damage Basic Attack and heal. | Choose when repeated skill-to-Basic-Attack trades and a small heal are useful. Masha does not use Mana, so that stat is not a reason to buy it. |
Masha Combos
Laning trade



Wild Power → Howl Shock → Basic Attacks. Use the movement burst to enter range, cut the target's Attack Speed, and spend both empowered attacks while the trade is favorable.
Teamfight burst





Thunderclap → Wild Power → Basic Attacks → Thunderclap → Howl Shock. Lunge through the dangerous control window, deliver the empowered attacks, and use the ultimate reset after a bar breaks. Stop if the second lunge would leave Masha trapped on her final bar.
How to Play Masha by Game Phase
Early game
Use Wild Power only when both empowered attacks can land. Clear without wasting HP, watch the enemy control spell, and keep enough bars to survive a jungle visit.Mid game
Pressure a side lane while tracking the next Turtle or Lord. Move first when defenders disappear, and flank rather than walking through the enemy front line.Late game
Choose between structure pressure and a carry flank before the fight starts. Sky Piercer rewards clean finishes, while Windtalker or Endless Battle support repeated attacks and movement.Team fights
Target access decides everything. Use Thunderclap control immunity at the critical moment, count bar breaks, and leave if the final bar cannot secure the kill safely.Five Masha Mistakes to Avoid
- Spending Wild Power too early. The movement boost decays quickly and the HP cost is immediate.
- Ignoring the next bar break. Thunderclap resets on each lost bar, so an unplanned break can waste the strongest part of her fight pattern.
- Taking a long front-to-back fight. Masha is more reliable from a flank or side lane than while crossing the entire enemy front line.
- Buying pure damage without checking access. Defensive boots or a safer utility slot can matter more when crowd control stops every engage.
- Trying to recover under continuous pressure. Life Recovery needs three seconds out of combat; create distance before depending on it.
Counters and Team Synergy
Favorable targets



Edith, Ixia, and Layla are vulnerable when Masha reaches them from an angle and commits empowered Basic Attacks before they create distance.
Hard matchups


Argus, Cici, and Thamuz punish an all-in that lasts too long. Track immortality, spacing, and sustain before spending multiple HP bars.
Best partners



Draft warning

Uranus adds another sustain-centered front liner without automatically supplying the control Masha needs. Make sure the remaining draft can start fights and lock targets down.
Masha Skins and Availability
Availability below reflects the English in-game Shop on August 16, 2026. Event, season, and membership entries can return under different schedules, so these notes describe the in-game state on that date rather than permanent sale promises.
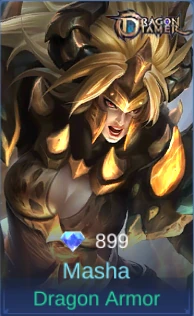
Dragon Armor
899 Diamonds shown in-game

Winter Guard
269 Diamonds shown in-game

Combat Maiden
02/2020 StarLight Member

Spirited Gauntlet
S23

Rogue Talon
Limited-time Event

Mai Shiranui
Limited-time Event
Masha Story
The Sarmi Tribe and the bears of Northern Vale lived in harmony until invaders hunted the bears for their Beast Power. Masha fought beside the Bear King to repel them. Mortally wounded, the Bear King entrusted his power to her, and Masha vowed to guard Northern Vale and its surviving bears.
Related MLBB Guides
Masha FAQ
What is the best Masha build?
The current builds center on Sea Halberd, Rapid Boots, Blade of the Heptaseas, Malefic Roar, and Blade of Despair. Add Sky Piercer when finishes are reliable, Windtalker for Attack Speed and movement, or Endless Battle for repeated skill-to-Basic-Attack trades.
What is Masha's best emblem?
Custom Assassin Emblem with Thrill, Weapons Master, and Lethal Ignition supports burst from Adaptive Attack, stronger attack granted by equipment, and extra finishing damage after a multi-hit engage.
Which battle spell should EXP Lane Masha use?
Use Sprint for target access and retreat. Save it for the point where Masha must cross space or leave after committing HP, rather than spending it on routine movement.
How does Masha's three-bar HP work?
Each lost bar provides a damage-ignore and control-removal moment. Skill HP costs are halved with two bars and removed on the final bar, while Thunderclap resets whenever a bar is lost.
Who counters Masha?
Argus, Cici, and Thamuz are dangerous because they can survive or extend her commitment. Track Argus's immortality, avoid chasing Cici through open space, and respect Thamuz's sustained fight.
Final Verdict
Play Masha as a timing hero, not an endless front liner. Preserve bars until the target is reachable, use Thunderclap through a key control window, deliver both Wild Power attacks, and recognize each reset. Split when the map gives safe structure pressure; flank when the enemy carry must be removed quickly.
Hannah Price
Events Editor
Hannah Price is an events writer who turns schedules into priorities. She publishes weekly roundups, reward notes, and code updates for major live-service titles, linking key dates to official announcements and refreshing posts quickly when requirements or timelines change.
Table of Contents

Mobile Legends: Bang Bang
Up to 54% OFF
About ManaBuy


Copyright © FUTURE OUTLOOK TECHNOLOGY LIMITED.Company Registration No.: 77374965 All rights reserved.UNIT 135,1/F.,143 WAI YIP STREET,KWUN TONG HK