
Lunox MLBB Mid Lane Guide: Best Build, Emblem, Combos, and Counters

Lunox is a Mid Lane Mage whose real resource is form control. Order gives her healing access and Brilliance for an invincible damage window; Chaos gives Darkening and repeated Chaos Assault casts for close-range burst. The best Lunox players decide which ultimate they need before the fight starts, then use Cosmic Fission to make that choice pay off.

Lunox Skills and Form Control

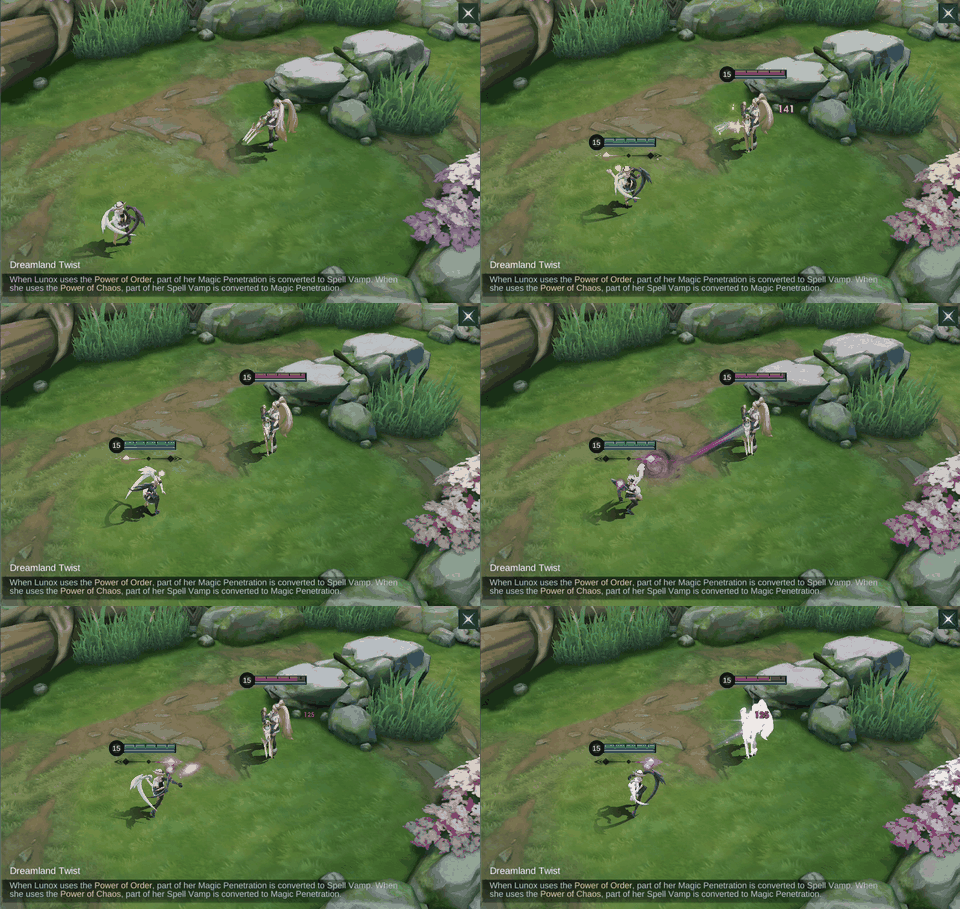
Dreamland Twist
Lunox converts her opposing powers instead of letting them cancel each other. Under Order, each 1% Magic Penetration gives 0.5% Spell Vamp; under Chaos, each 1% Spell Vamp gives 0.5% Magic Penetration.
Use: Prepare the form that fits the next exchange before walking into range. Avoid: Do not arrive at an objective in the wrong form and spend the opening seconds correcting it.

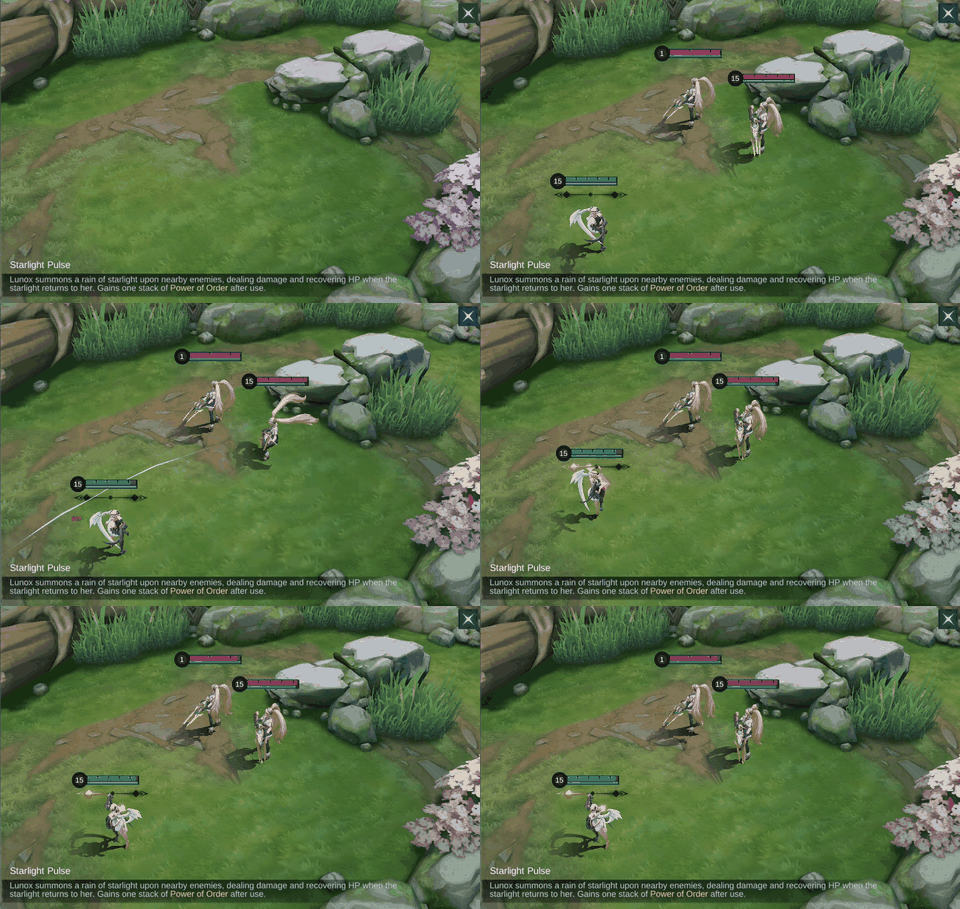
Starlight Pulse
Lunox rains starlight on nearby enemies for 200 (+110% Total Magic Power) Magic Damage. Returning starlight restores 75 (+30% Total Magic Power) HP per hit, doubled against enemy heroes. It shares a cooldown with Chaos Assault, grants Order, and ends Chaos.
Use: Trade through the wave or enemy hero when the returning light can recover meaningful HP. Avoid: Do not use it only for damage if doing so removes the Chaos form needed for a kill.

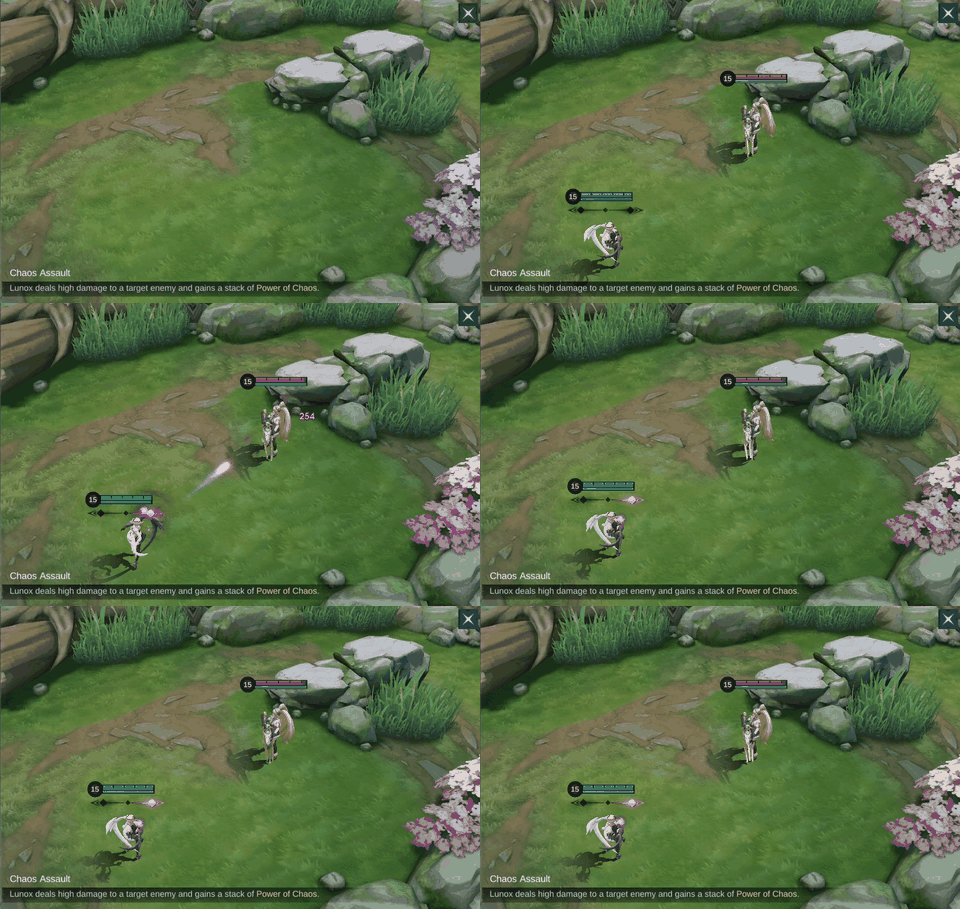
Chaos Assault
Lunox fires Chaos Energy for 250 (+120% Total Magic Power) plus 2.5% of the target's Max HP as Magic Damage, reduced to 1.5% Max HP against creeps. It shares a cooldown with Starlight Pulse and grants Chaos.
Use: Repeat it during Darkening after the target has been slowed or committed to a predictable path. Avoid: Do not blink into short range before the enemy's main control or burst has been shown.

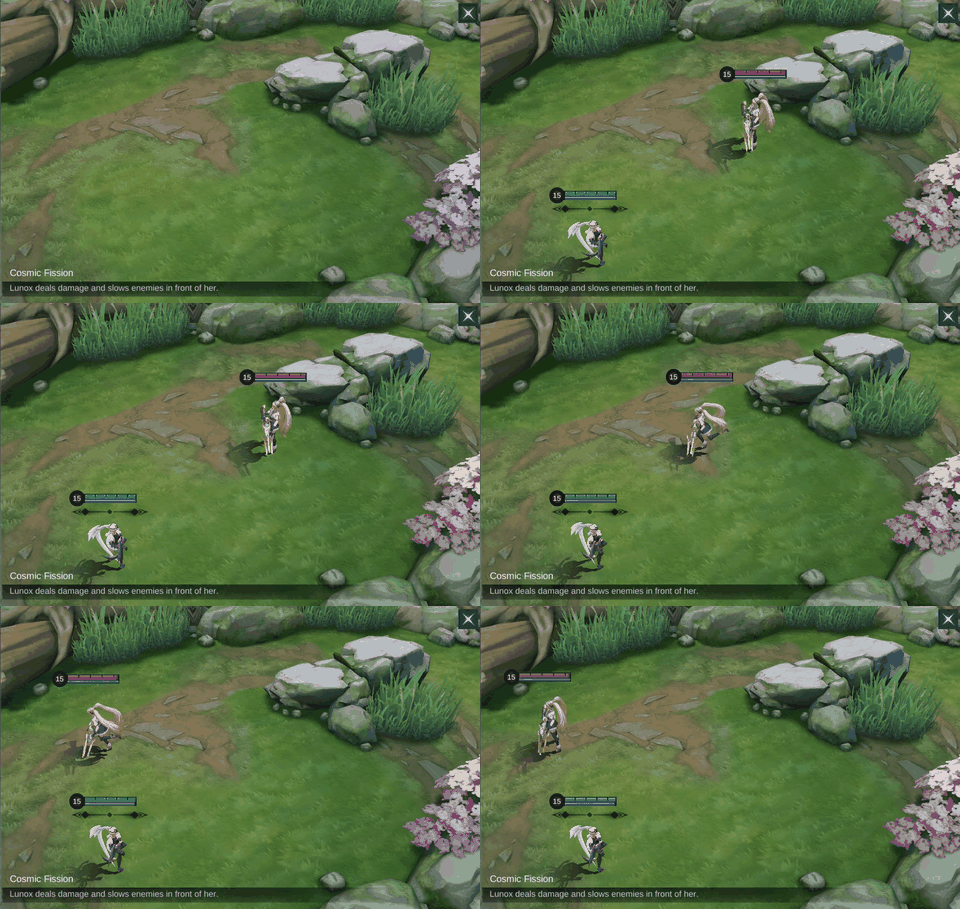
Cosmic Fission
Lunox sends Order and Chaos through a line, dealing 300 (+150% Total Magic Power) Magic Damage and slowing enemies by 40% for two seconds.
Use: Place the line across the route the target must take, then follow with the form-specific spell. Avoid: Do not spend the slow on harmless poke when it is the setup that makes Chaos Assault reliable.

Order & Chaos
Order unlocks Brilliance, making Lunox invincible while she deals continuous nearby damage. Chaos unlocks Darkening, blinking her forward and sharply reducing Chaos Assault's cooldown for a brief burst window.
Use: Use Brilliance after enemy commitment to absorb a punish, or Darkening after control is unavailable to start the damage chain. Avoid: Do not treat the two forms as interchangeable: one protects a position, while the other commits to short range.
Skill Priority and Lunox Combos
Take Starlight Pulse at level one for wave control and recovery, then prioritize Starlight Pulse with Chaos Assault and Cosmic Fission as the supporting upgrades. Upgrade Order & Chaos whenever available. The aim is not to alternate skills mechanically; it is to reach the next fight with the correct form already active.
Laning trade



Cosmic Fission → Chaos Assault → Starlight Pulse. Put the slow across the opponent's retreat, land Chaos Assault while they are predictable, then use Starlight Pulse through the wave or hero to recover and return to a safer Order state.
Chaos pick and safe reset






Cosmic Fission → Chaos Assault → Darkening → repeated Chaos Assault → Starlight Pulse → Brilliance. Begin only after the target's reliable control is unavailable. Darkening closes the distance, repeated Chaos Assault supplies the burst, and the Order switch prepares Brilliance if the enemy can still answer.
How to Play Lunox by Game Phase
Early game
Use Starlight Pulse to keep lane trades favorable without losing the wave. Cosmic Fission should cut the enemy's route to the river, not merely add small damage. Reach level four on time and prepare the needed form before moving to Turtle.
Mid game
Fight from the shoulder of your front line. Tag the first target safely, let allies force crowd control, then choose Darkening for a punish or Brilliance to occupy a dangerous space without giving the enemy an easy kill.
Late game
One wrong form can decide the match. Keep Flicker for a corrected angle or an exit, and avoid showing in the center before assassins reveal their route. Against tanks, repeated Chaos Assault and Wishing Lantern pressure are valuable only if Lunox survives long enough to continue casting.
Five Common Lunox Mistakes
- Walking into Turtle or Lord with the wrong form prepared.
- Using Darkening before the enemy shows the control that can stop the burst window.
- Spending Cosmic Fission on harmless poke instead of blocking the next movement path.
- Switching to Order automatically after every cast and losing a clear Chaos kill.
- Using Brilliance too early, allowing the enemy to wait out the invincibility and engage afterward.
Best Emblem and Battle Spell
Mage Emblem fits Lunox's current mid-lane setup. Rupture adds early adaptive penetration, Weapons Master increases the value of Magic Power from equipment and the Emblem, and Impure Rage adds damage while returning mana during repeated spell contact. This exact talent trio is visible in the current in-game setup.
Flicker is the default spell because it corrects Lunox's short range. Use it to change the Darkening entry angle, follow a target beyond the expected line, or leave after Brilliance ends. Retribution belongs to a dedicated jungle route, not the mid-lane setup described here.
Five Current Lunox Builds
Every route below contains six ordered items. Arcane Boots supplies early penetration; Sky Piercer rewards a clean snowball; Genius Wand amplifies repeated hits; Divine Glaive answers Magic Defense; Holy Crystal multiplies late damage. Glowing Wand, Lightning Truncheon, Wishing Lantern, and Blood Wings change the balance between sustained pressure, burst, high-HP damage, and survival.
Current In-Game Builds
These five current in-game builds were observed on August 14, 2026. Compare the six-item order and adjust utility or defensive slots for the match.
Build 1
| Item 1 | Item 2 | Item 3 | Item 4 | Item 5 | Item 6 |
|---|---|---|---|---|---|
 Arcane Boots Arcane Boots |  Sky Piercer Sky Piercer |  Genius Wand Genius Wand |  Lightning Truncheon Lightning Truncheon |  Holy Crystal Holy Crystal |  Divine Glaive Divine Glaive |
Build 2
| Item 1 | Item 2 | Item 3 | Item 4 | Item 5 | Item 6 |
|---|---|---|---|---|---|
 Glowing Wand Glowing Wand | Arcane Boots | Genius Wand | Divine Glaive | Lightning Truncheon | Holy Crystal |
Build 3
| Item 1 | Item 2 | Item 3 | Item 4 | Item 5 | Item 6 |
|---|---|---|---|---|---|
| Arcane Boots | Sky Piercer | Genius Wand | Glowing Wand | Holy Crystal | Divine Glaive |
Build 4
| Item 1 | Item 2 | Item 3 | Item 4 | Item 5 | Item 6 |
|---|---|---|---|---|---|
| Arcane Boots | Sky Piercer | Genius Wand | Divine Glaive | Holy Crystal | Lightning Truncheon |
Build 5
| Item 1 | Item 2 | Item 3 | Item 4 | Item 5 | Item 6 |
|---|---|---|---|---|---|
| Arcane Boots | Sky Piercer | Divine Glaive | Holy Crystal |  Wishing Lantern Wishing Lantern |  Blood Wings Blood Wings |
Equipment Guide
Use the item notes below to decide what each slot contributes. The table describes each item independently of the numbered builds.
| Item | What it adds | When to consider it |
|---|---|---|
| Arcane Boots | Movement Speed, Magic Power, and flat Magic Penetration for earlier spell pressure. | Buy for early pressure when enemy Magic Defense is still low; switch to defensive boots if control prevents Lunox from choosing a form. |
| Sky Piercer | Adaptive Attack and Movement Speed, with an execute threshold that grows through kills and falls after deaths. | Buy early only when Lunox can protect its kill stacks; replace it after repeated deaths or when reliable damage matters more than execution. |
| Genius Wand | Magic Power, Movement Speed, flat Magic Penetration, and repeated-hit Magic Defense reduction. | Buy when repeated Chaos casts can stack its shred; delay it if the enemy already has enough Magic Defense to demand Divine Glaive first. |
| Lightning Truncheon | Magic Power, mana, cooldown reduction, and periodic extra Magic Damage that scales with mana. | Buy when wave clear and burst into clustered targets matter; replace it with a sustained or defensive slot in long front-to-back fights. |
| Holy Crystal | A large Magic Power increase plus percentage Magic Power growth that scales with level. | Buy after the early utility and penetration slots to multiply Lunox's scaling; delay it when survival is the immediate problem. |
| Divine Glaive | Magic Power and percentage Magic Penetration that rises against higher enemy Magic Defense. | Buy earlier against growing Magic Defense; delay it against fragile targets that have not invested in resistance. |
| Glowing Wand | Magic Power, HP and Movement Speed, with sustained burn and Lifebane anti-heal and anti-shield pressure. | Buy into healing, shields, or extended front-line trades; skip it when a short burst window decides the fight before the burn matters. |
| Wishing Lantern | Magic Power, mana and cooldown reduction, plus Current-HP damage after enough pre-mitigation Magic Damage. | Buy against high-HP frontliners that Lunox can hit repeatedly; replace it when backline burst or immediate defense is more valuable. |
| Blood Wings | Magic Power and a regenerating Magic-Power-scaled shield that also grants Movement Speed while active. | Buy late for damage plus a shield and speed buffer; replace it with a direct defensive item if dive still kills Lunox through the shield. |
Best Teammates and Matchups
Control partners


Franco and Minotaur can hold targets inside Lunox's short-range damage. Let them establish the first control so Darkening is a damage decision rather than a desperate entry.
Favorable front-line trades


Yve and Lylia can be pressured when Lunox sustains through their damage and reaches them after their spacing tools are committed. Use the slow to close the route instead of chasing blindly.
Mobility threats


Nolan and Ling can cross Lunox's preferred range and leave before a full Chaos chain. Hold Order and Flicker until their entry route is clear, then punish after their movement is spent.
Lunox Base Stats
| Stat | Level 1 |
|---|---|
| HP | 2440 |
| HP Regen | 6.8 |
| Physical Attack | 115 |
| Physical Defense | 18 |
| Attack Speed | 1.01 |
| Attack Speed Ratio | 100% |
| Mana | 500 |
| Mana Regen | 4 |
| Magic Power | 0 |
| Magic Defense | 15 |
| Movement Speed | 240 |
These values exclude equipment, Emblems, skins, and match modifiers.
Lunox Skins and Availability
Five skins showed direct Diamond prices in-game. The rest use Starlight, Zodiac, event, or Magic Wheel access, so those labels describe the current shop state rather than permanent availability.

Eyes of Eternity
899 Diamonds shown in-game

Dawn Revelation
899 Diamonds shown in-game

Quantum Polarity
749 Diamonds shown in-game

Cosmic Harmony
599 Diamonds shown in-game

Bloody Mary
269 Diamonds shown in-game

Ash Blossom
May 2019 Starlight Member

Libra
Zodiac Summon

Butterfly Seraphim
Limited-time event

Divine Goddess
Magic Wheel

Nature's Harmony
Limited-time event
Lunox Story
Lunox was born as a miraculous vessel for the Twilight Orb, carrying both Order and Chaos. As the two forces fought within her, she fell into a long dream and learned to balance their opposing power. Her journey connects her to the ancient struggle around the Twilight Orbs, where she protects that balance while searching for the other Orbs lost to history.
Related MLBB Guides
- Browse the MLBB guide hub for more current hero guides.
- Kaja Roam guide covers single-target control that can give Lunox a safe Chaos window.
- Aurora Mid Lane guide explains the burst and control patterns Lunox must prepare Order against.
Lunox FAQ
Which Lunox skill should be upgraded first?
Take and prioritize Starlight Pulse for wave control and recovery, with Chaos Assault and Cosmic Fission supporting the damage and setup plan.
What is Lunox's best battle spell?
Flicker is the default mid-lane spell because it fixes short range, changes Darkening angles, and creates an exit after Brilliance.
When should Lunox use Darkening?
After the target is slowed or controlled and the enemy tool that can interrupt or instantly punish the short-range burst has been used.
When should Lunox use Brilliance?
When the enemy has committed damage or crowd control into her position, or when temporary invincibility lets her hold a critical zone while allies follow up.
When is Wishing Lantern good on Lunox?
Against high-HP frontliners that Lunox can hit repeatedly. Choose a faster burst or defensive slot when the fight does not last long enough for repeated triggers.
Final Verdict
Lunox rewards preparation more than improvisation. Set the form before the objective, use Cosmic Fission to control the path, and commit Darkening only after the enemy answer is gone. When danger reaches her first, Order and Brilliance turn that commitment into time for the team. Her damage is high, but the decision made before the first cast is what makes it reliable.




Copyright © FUTURE OUTLOOK TECHNOLOGY LIMITED.Company Registration No.: 77374965 All rights reserved.UNIT 135,1/F.,143 WAI YIP STREET,KWUN TONG HK