
Hayabusa MLBB Jungle Guide: Best Build, Emblem, Spells, Combos, and Counters

In-game context: MLBB game version 2.1.88.12027, observed on August 8, 2026. Four skill panels and demonstrations, five ranked build rows, 30 equipment tooltips, level-one stats, and ten Shop skin cards form the current in-game snapshot.
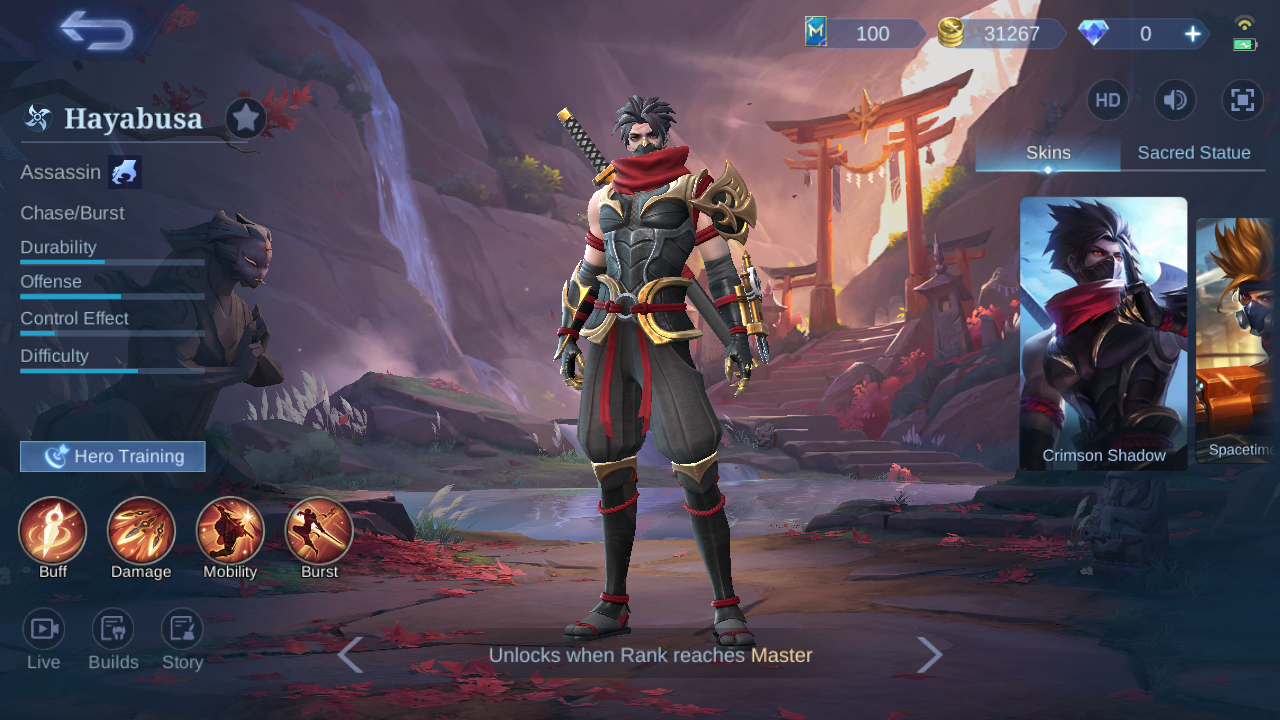
Hayabusa Skills: What Each One Does

Ninjutsu: Trace of Shadow — Buff
Hayabusa's attacks apply a stack of Shadow Mark on hit (up to 4 stacks). Each stack lasts 6s and increases Hayabusa's damage to the enemy by 5%.
When: Keep hitting the same target so four Shadow Marks amplify the whole sequence. Why: it improves mark, Energy, or escape efficiency. Do not: Do not switch targets immediately before Shadow Kill unless the original target is unreachable.
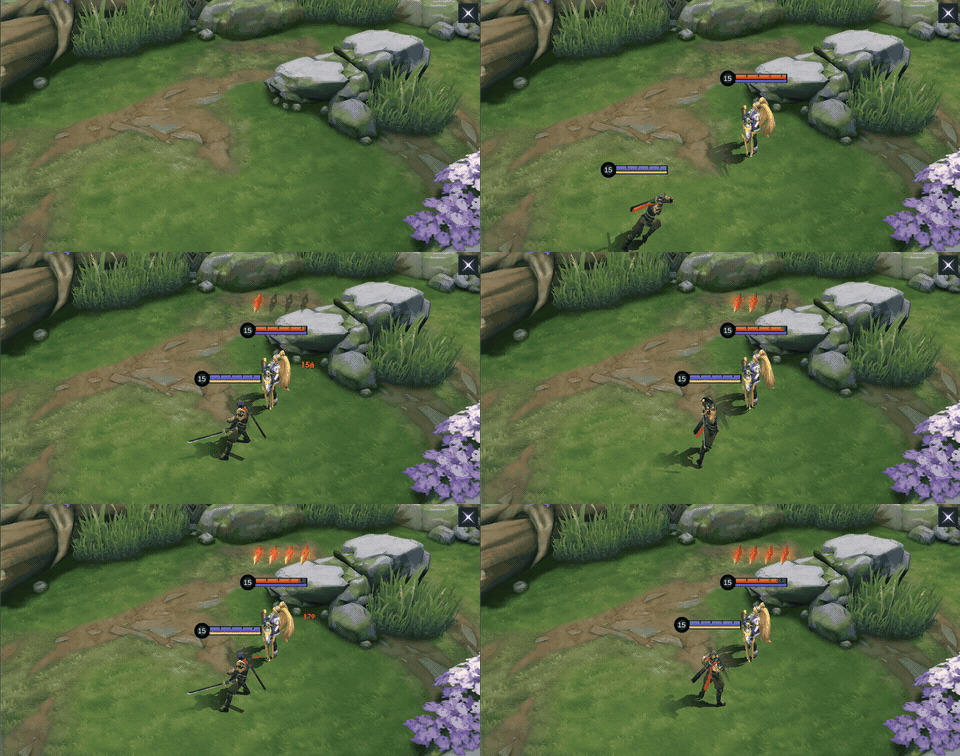
Ninjutsu: Trace of Shadow in-game action sequence.
Ninjutsu: Phantom Shuriken — Damage / Buff
Passive: Hayabusa permanently gains 3% Spell Vamp. Active: Hayabusa throws three returning shurikens in the target direction, each dealing 220 (+75% Extra Physical Attack) Physical Damage to enemies hit and slowing them by 35% for 2s. Subsequent hits on the same enemy deal 70% less damage (only 50% less to creeps). He also restores 10 Energy when hitting non-minion enemies.
When: Throw from an angle that lets both outward and returning shurikens connect; use it to restore Energy on heroes or creeps. Why: it improves mark, Energy, or escape efficiency. Do not: Do not spend it into empty space when Quad Shadow can first attach a phantom and shorten the cooldown.
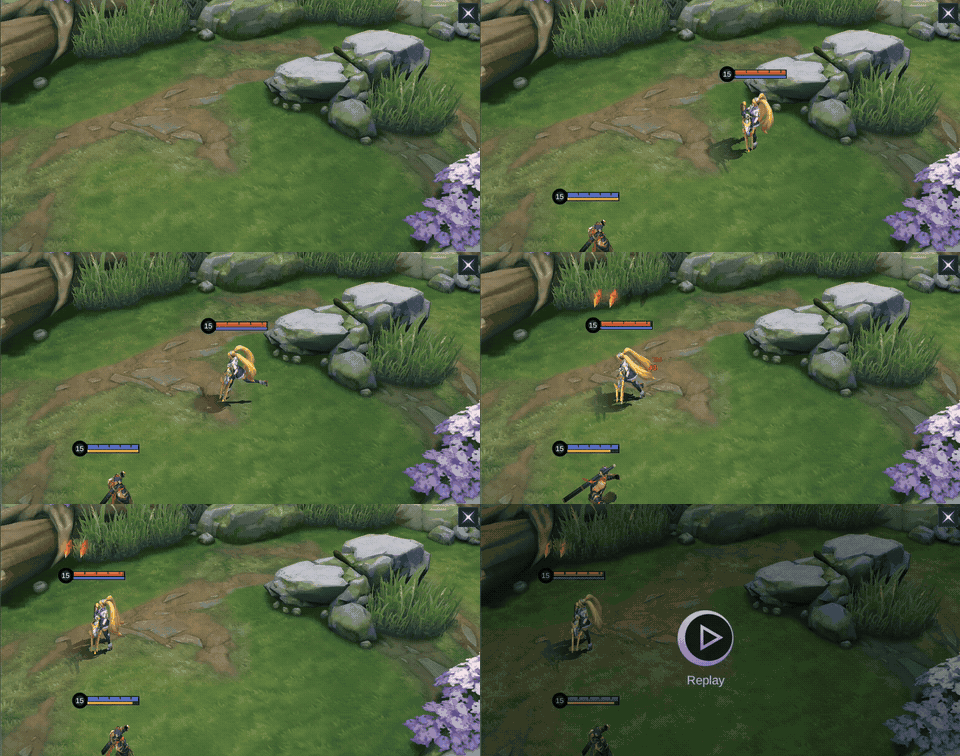
Ninjutsu: Phantom Shuriken in-game action sequence.
Ninjutsu: Quad Shadow — Mobility / Summon
Hayabusa dashes in the target direction and releases four phantoms that travel in separate directions. The phantoms will remain at the end of their paths or attach themselves to the first enemy hero hit, dealing 130 (+30% Extra Physical Attack) Physical Damage and slowing them by 40% for 2s. Hayabusa will immediately stop if he hits an enemy hero during the dash. Use Again: Hayabusa teleports to a phantom's location and reduces the cooldown of Ninjutsu: Phantom Shuriken by 1s. If the phantom is attached to an enemy hero, he also deals 130 (+30% Extra Physical Attack) Physical Damage to the enemy.
When: Attach a phantom to the intended target, then choose a second shadow as the escape route before committing. Why: it improves mark, Energy, or escape efficiency. Do not: Do not consume every shadow for damage while targeted control is still available.
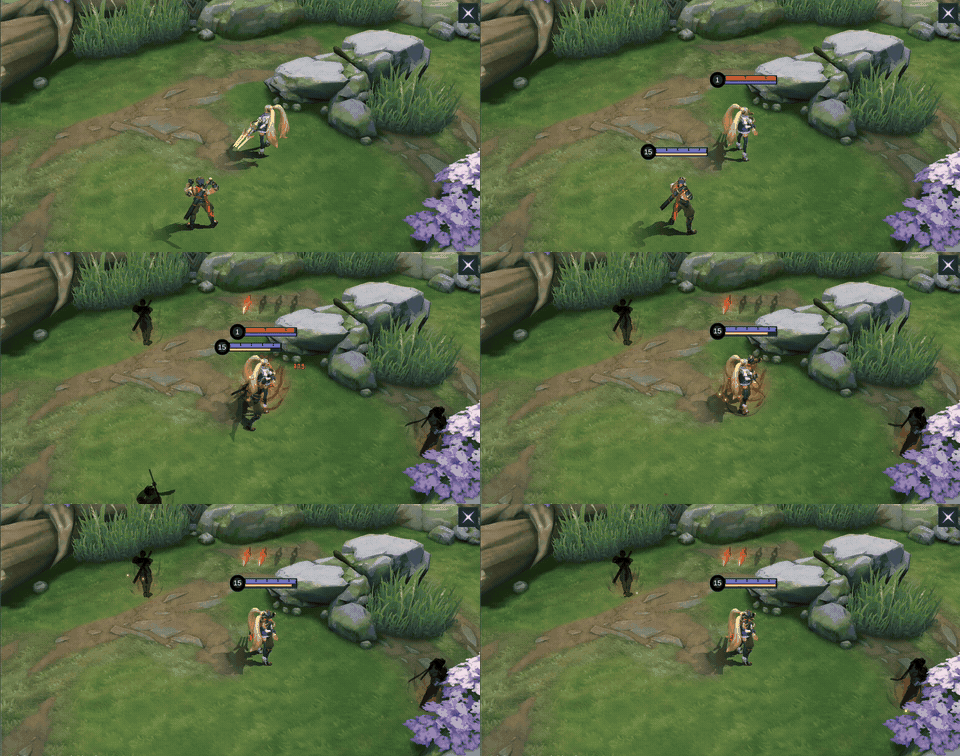
Ninjutsu: Quad Shadow in-game action sequence.

Ougi: Shadow Kill — Burst
Hayabusa blends into the shadows and launches 6 single-target attacks on enemies in the area, each dealing 140 (+32% Extra Physical Attack) Physical Damage. The attacks prioritize enemies with Shadow Mark and each will consume a mark to deal 90 (+40% Extra Physical Attack) extra Physical Damage. Shadow Kill does not apply Shadow Mark.
When: Cast on an isolated, marked target after nearby minions or heroes are cleared from the area. Why: it improves mark, Energy, or escape efficiency. Do not: Do not press it into a crowded wave that will split the six attacks or before applying marks.
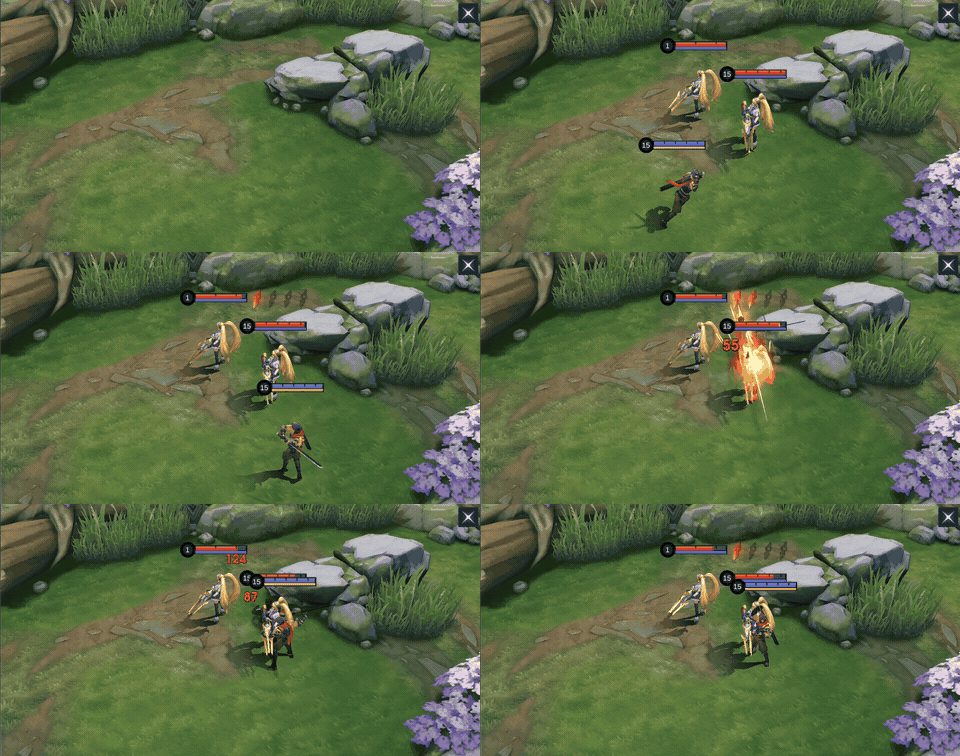
Ougi: Shadow Kill in-game action sequence.
Hayabusa Skill Priority
Hayabusa Combos and Execution Rules
Teamfight Combos
Quad Shadow
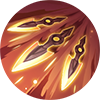
Phantom Shuriken
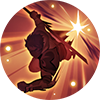
Quad Shadow

Shadow Kill
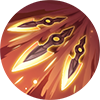
Phantom Shuriken
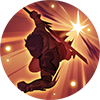
Quad Shadow
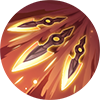
In teamfights, Hayabusa should use his 2nd Skill to hit an enemy with his phantom, then use his 1st and 2nd Skill on the target to apply Shadow Mark before unleashing his Ultimate. Afterwards, use his 1st Skill to finish off the enemy and escape with his 2nd Skill.
When: use this order after Quad Shadow connects with the intended target. Why: repeated shadow swaps reduce Phantom Shuriken cooldown and build marks before the finisher. Do not: force every step if targeted control removes the exit window.
Laning Combos
Quad Shadow
Phantom Shuriken
Quad Shadow
Quad Shadow
Phantom Shuriken

Shadow Kill
In the laning phase, use Hayabusa's 2nd Skill to hit the enemy with a phantom, then strike with his 1st Skill, and use his 2nd Skill to blink away. Wait until Hayabusa's 1st Skill is off cooldown, then blink back to the enemy with his 2nd Skill and strike again with his 1st Skill followed by his Ultimate to secure the kill.
When: use this order after Quad Shadow connects with the intended target. Why: repeated shadow swaps reduce Phantom Shuriken cooldown and build marks before the finisher. Do not: force every step if targeted control removes the exit window.
How to Play Hayabusa by Game Phase
Early game
Clear efficiently with Phantom Shuriken and the jungle blessing, preserve Energy, and use Quad Shadow only when the return path is safe. Contest the first objective with Retribution ready rather than chasing a low-value lane hit.
Mid game
Push a side lane, move through fog, and look for an isolated damage dealer. Count nearby minions before Shadow Kill so its attacks do not spread away from the marked target.
Late game
Wait for targeted crowd control to be committed. Enter from a side angle, burst one carry, and retreat through the reserved phantom instead of remaining for a second rotation without vision.
Five Hayabusa Mistakes That Lose Fights
- Ulting a crowded wave: extra bodies split Shadow Kill attacks away from the marked hero.
- Using every shadow forward: reserve one route before committing to the target.
- Skipping Shadow Marks: stack the passive with shurikens and shadow contact before the finisher.
- Copying six items blindly: choose anti-heal, armor penetration, or magic protection from the actual draft.
- Forcing a gank without Energy: a partial combo leaves no shuriken pressure and no clean reset.
Best Hayabusa Emblem and Battle Spell
Default jungle route
Assassin Emblem: Rupture → Seasoned Hunter → Killing Spree. Battle Spell: Retribution, with Ice for control or Flame for dueling pressure.
When: use this for reliable jungle tempo, penetration, and a post-kill recovery window. Do not: change Retribution when Hayabusa is responsible for jungle objectives.
Snowball or extended-fight alternative
Assassin Emblem: Rupture → Seasoned Hunter → Lethal Ignition for burst, or War Cry for repeated contact. Battle Spell: Flame Retribution.
When: choose Lethal Ignition for one decisive sequence and War Cry when the draft lets you sustain attacks. Do not: use a talent route whose trigger your combo cannot consistently meet.
All five observed in-game build rows used Retribution. Exact talent routes were cross-checked with dated Hayabusa references accessed August 8, 2026 because the account-level Emblem slots were locked or partially unavailable.
Current In-Game Pro Setup Snapshot
These five ranked rows are a dated in-game build sample, not a universal build order.
Build 1
| Item 1 | Item 2 | Item 3 | Item 4 | Item 5 | Item 6 |
|---|---|---|---|---|---|
 Flame Hunter's Magic Boots Flame Hunter's Magic Boots |  Hunter Strike Hunter Strike |  Sky Piercer Sky Piercer |  Endless Battle Endless Battle |  Blade of Despair Blade of Despair |  Rose Gold Meteor Rose Gold Meteor |
Build 2
| Item 1 | Item 2 | Item 3 | Item 4 | Item 5 | Item 6 |
|---|---|---|---|---|---|
| Flame Hunter's Magic Boots | Hunter Strike |  War Axe War Axe |  Malefic Roar Malefic Roar | Blade of Despair | Endless Battle |
Build 3
| Item 1 | Item 2 | Item 3 | Item 4 | Item 5 | Item 6 |
|---|---|---|---|---|---|
| Flame Hunter's Magic Boots | Hunter Strike | War Axe | Malefic Roar | Blade of Despair | Rose Gold Meteor |
Build 4
| Item 1 | Item 2 | Item 3 | Item 4 | Item 5 | Item 6 |
|---|---|---|---|---|---|
| Flame Hunter's Magic Boots | Hunter Strike | War Axe | Blade of Despair | Endless Battle | Malefic Roar |
Build 5
| Item 1 | Item 2 | Item 3 | Item 4 | Item 5 | Item 6 |
|---|---|---|---|---|---|
| Flame Hunter's Magic Boots | Hunter Strike | War Axe | Malefic Roar | Blade of Despair |  Sea Halberd Sea Halberd |
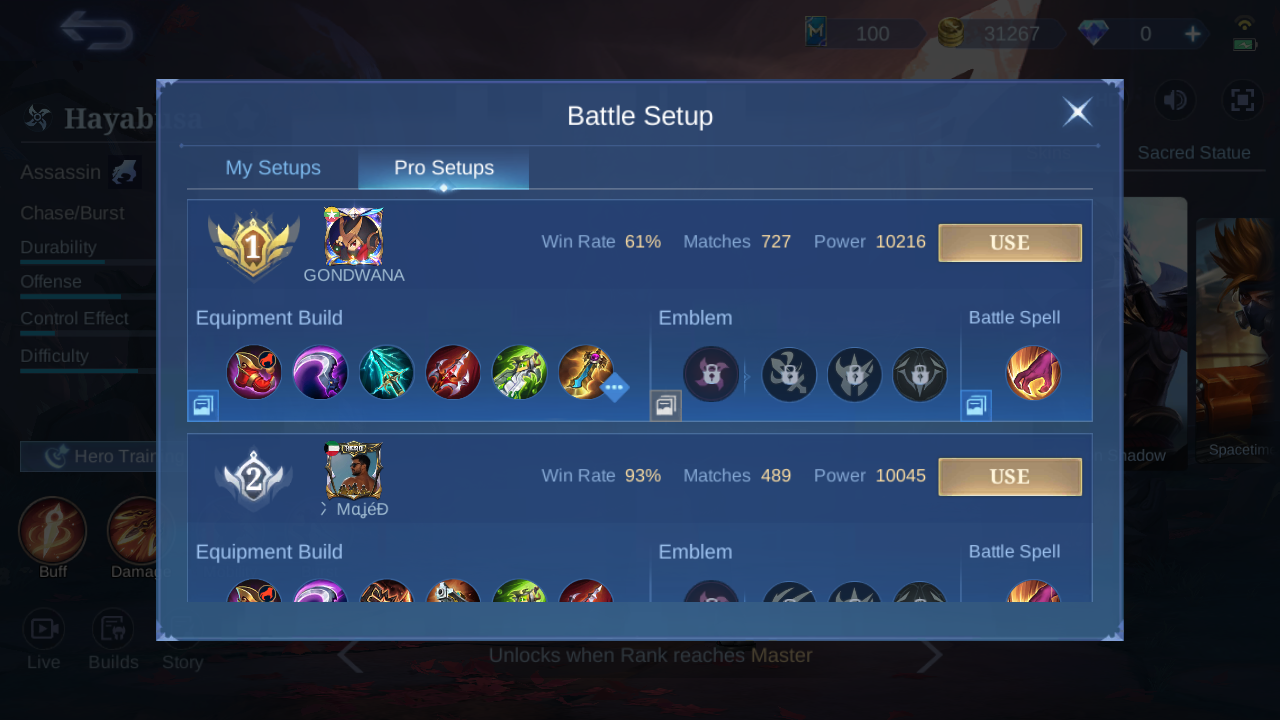
Rank 1 in-game build sample.
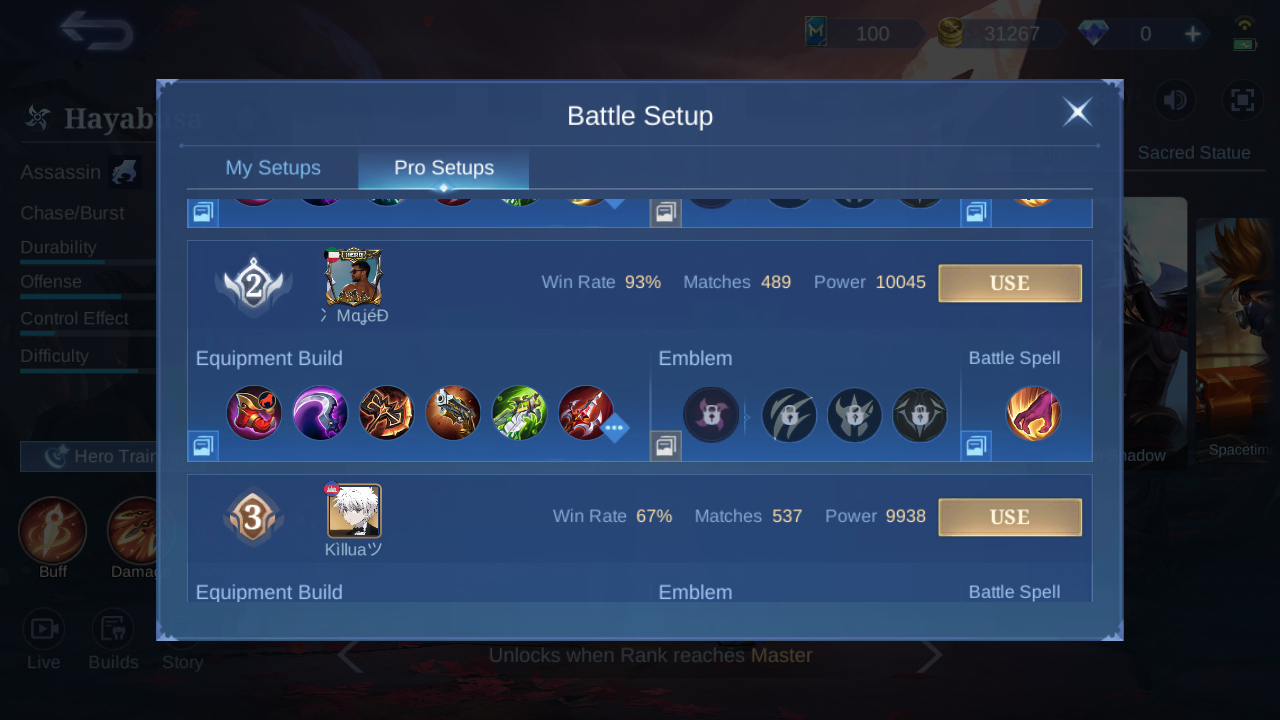
Rank 2 in-game build sample.
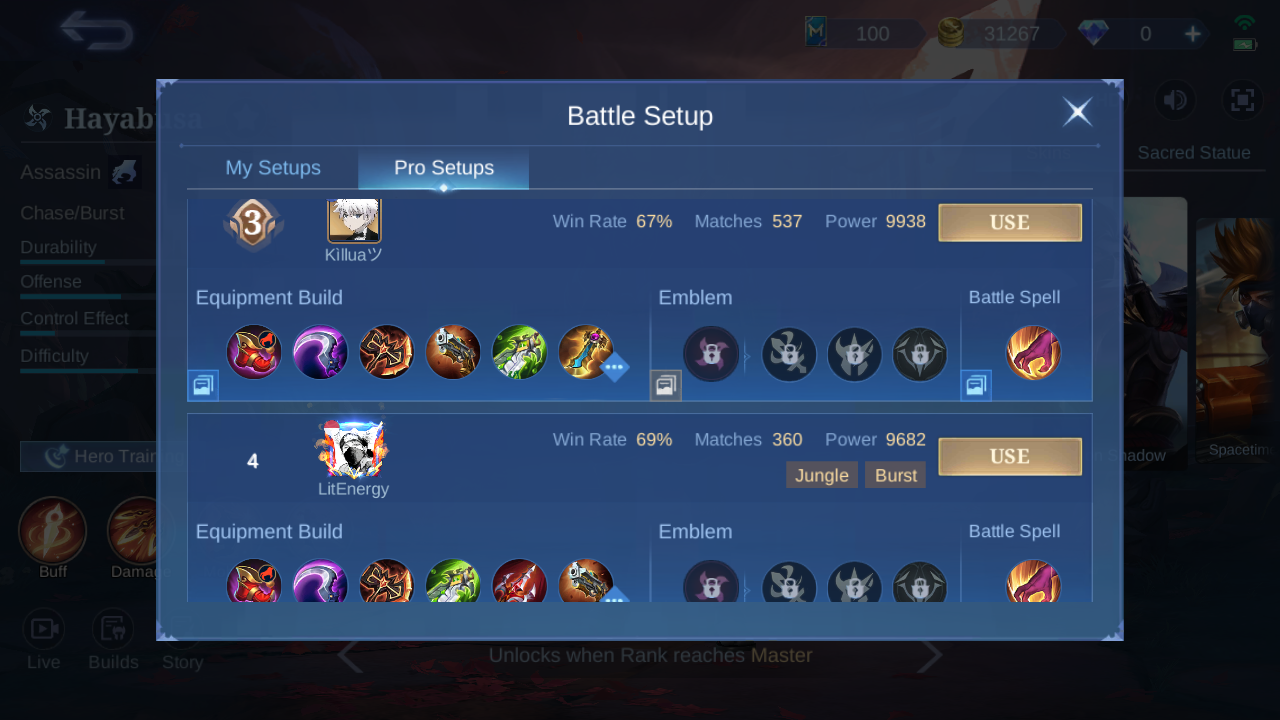
Rank 3 in-game build sample.
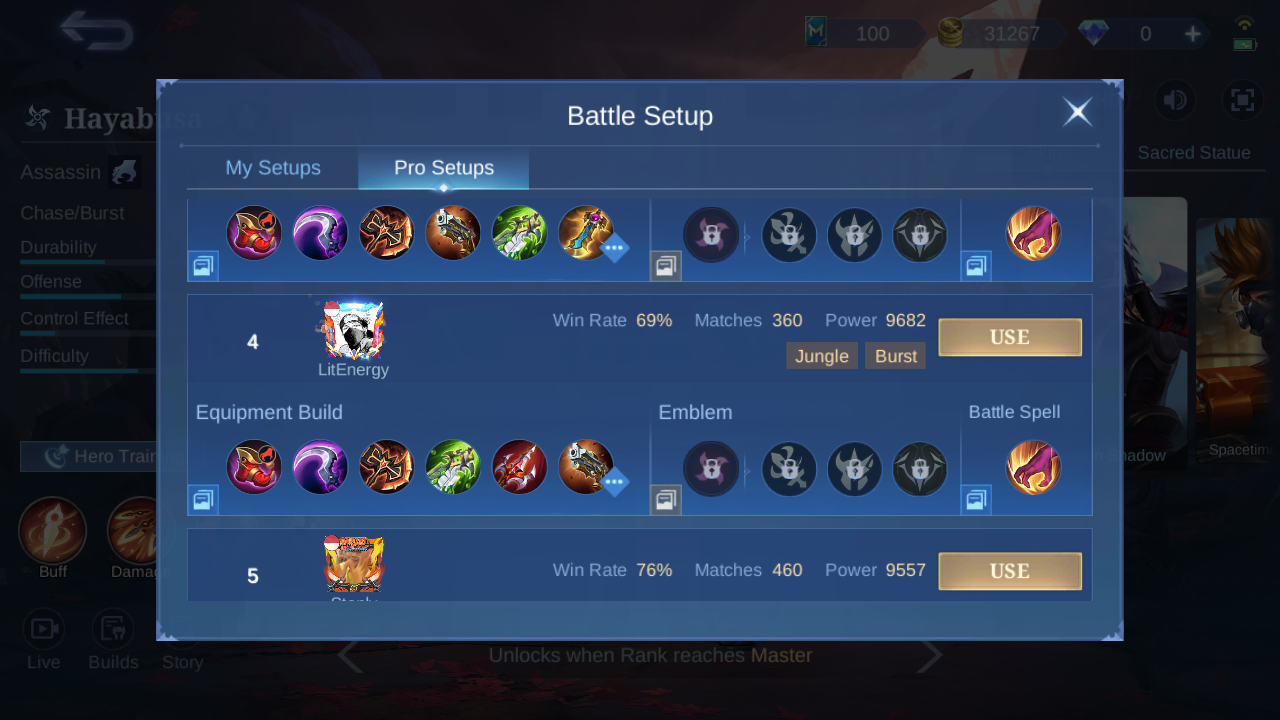
Rank 4 in-game build sample.
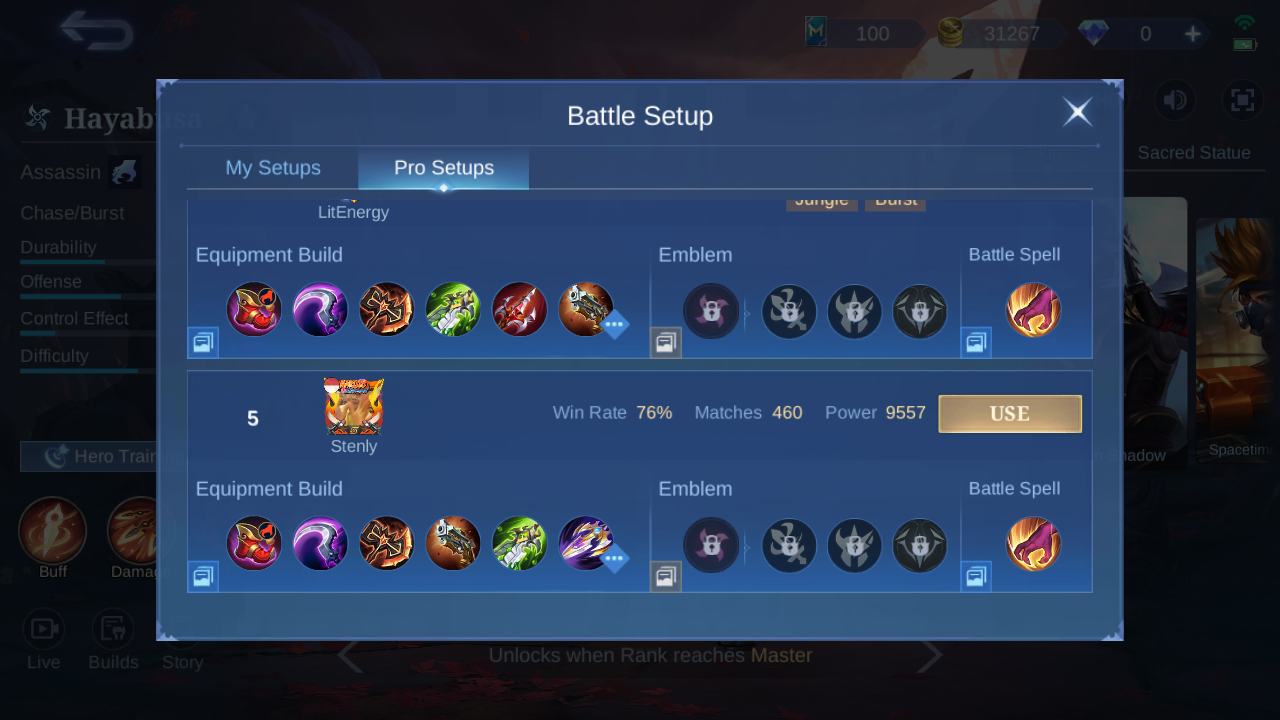
Rank 5 in-game build sample.
Hayabusa Equipment Decision Matrix
| Item and current tooltip | When to buy | When to skip |
|---|---|---|
| Flame Hunter's Magic Boots +40 Movement Speed, +10% Cooldown Reduction, +150 HP. Hunter deals 400 + 3×Hero Level + 1% Total HP True Damage to a creep over 3s; non-Marksmen deal 100% more. | Default jungle boot when faster shuriken and shadow cycles matter. | Do not treat the creep passive as hero burst; change the Retribution blessing only for a defined matchup need. |
| Hunter Strike +80 Physical Attack, +10% Cooldown Reduction, +15 Physical Penetration. Five consecutive hits grant 50% decaying Movement Speed for 3s; 8s cooldown. | Buy early for penetration, cooldown reduction, and exit speed after a full sequence. | Skip or delay when immediate anti-heal or high-defense penetration is more urgent. |
| Sky Piercer +60 Adaptive Attack, +15 Movement Speed. Executes a damaged hero below 4% HP; kills add 10 Lethality stacks, deaths remove 30%, and each stack adds 0.1% to the threshold up to 80 stacks. | Buy while snowballing and reliably converting isolated targets. | Do not buy from behind when repeated deaths will erase stacks and a stable damage item is safer. |
| Endless Battle +60 Physical Attack, +250 HP, +10% Cooldown Reduction, +5% Movement Speed, +5 Mana Regen. After a skill, the next Basic Attack within 3s deals 60% Total Physical Attack as True Damage and restores 80 + 40% Total Physical Attack HP; 1.5s cooldown. | Buy when you can weave a Basic Attack between skill casts and value sustain. | Skip when the fight ends before a Basic Attack can be inserted or armor penetration is mandatory. |
| Blade of Despair +160 Physical Attack, +5% Movement Speed. Damaging a non-Minion below 50% HP increases Physical Attack by 25% for 2s, before damage is dealt. | Buy for maximum finishing damage once the core and penetration needs are covered. | Do not rush it when the enemy already stacks Physical Defense or survival is the limiting factor. |
| Rose Gold Meteor +30 Physical Attack, +20% Attack Speed, +10% Lifesteal. Every 4 extra Physical Attack adds 1 Hybrid Defense, up to 50; falling below 30% HP grants a level-scaling shield and 50% decaying Movement Speed for 3s; 60s cooldown. | Buy against magic burst when one shield can preserve a shadow escape. | Skip after the Lifeline cooldown is spent or when anti-heal or armor penetration matters more. |
| War Axe +35 Physical Attack, +400 HP, +10% Cooldown Reduction, +8% Hybrid Lifesteal. Attacks add 12 Physical Attack per second for 4s, up to 6 stacks, then add 10% True Damage at full stacks. | Buy for extended fights, HP, cooldown reduction, and repeated spell contact. | Skip when Hayabusa must burst one target immediately and cannot maintain stacks. |
| Malefic Roar +60 Physical Attack. Armor Buster gives 30% Physical Penetration; Breaker adds 0.1% penetration per point of the target's Physical Defense, capped at 30%. | Buy into high Physical Defense or when front-line armor blocks access to targets. | Do not rush it into low-defense teams when flat penetration and tempo provide more value. |
| Sea Halberd +80 Physical Attack, +20% Attack Speed. Lifebane reduces Shield and HP Regen to 60% for 3s; Punish adds 8% damage against enemy heroes with higher extra HP. | Buy when healing, shields, or bonus-HP stacking decide the matchup. | Skip if another ally applies reliable Lifebane and Hayabusa needs penetration or safety instead. |
Hayabusa Counters, Targets, and Teammates
Dive with Lapu-Lapu and Alpha


Their initiation creates a target window while Hayabusa enters from another angle.
When: act on the crowd-control and isolation mechanic. Do not: ignore items, levels, Purify effects, or cooldowns.
Pressure Chang'e, Cecilion, and Yve


Squishy backliners without immediate targeted control are vulnerable after Quad Shadow reaches them.
When: act on the crowd-control and isolation mechanic. Do not: ignore items, levels, Purify effects, or cooldowns.
Respect Franco, Kaja, and Saber


Targeted suppression or burst can remove Hayabusa before he returns to a phantom.
When: act on the crowd-control and isolation mechanic. Do not: ignore items, levels, Purify effects, or cooldowns.
Coordinate with Chip

Chip can create cross-map arrival pressure while Hayabusa manages a side lane.
When: act on the crowd-control and isolation mechanic. Do not: ignore items, levels, Purify effects, or cooldowns.
Avoid redundant side-lane plans with Ling

Two resource-hungry mobile assassins can compete for jungle tempo and leave the draft short on front-line control.
When: act on the crowd-control and isolation mechanic. Do not: ignore items, levels, Purify effects, or cooldowns.
Hayabusa Base Stats
Observed at level one without equipment, Emblem, skin, or match modifiers.
| HP | 2270 |
|---|---|
| Energy | 100 |
| HP Regen | 7.4 |
| Energy Regen | 4 |
| Physical Attack | 117 |
| Magic Power | 0 |
| Physical Defense | 17 |
| Magic Defense | 15 |
| Attack Speed | 1.06 |
| Movement Speed | 260 |
| Attack Speed Ratio | 100% |
Hayabusa Skins and Availability
Availability and displayed prices were observed August 8, 2026 and can change.
| Skin | Tag | Observed availability |
|---|---|---|
| Crimson Shadow | Default | Default/base appearance |
| Sushi Master | Summer | 749 Diamonds; Purchase |
| Future Enforcer | Elite | 599 Diamonds; Purchase |
| Spacetime Shadow | Common | 269 Diamonds; Purchase |
| Experiment 21 | Starlight | 2018 Starlight Fest Member |
| Shadow of Obscurity | Luckybox | Limited-time Event |
| Biological Weapon | Starlight | 07/2020 Starlight Member |
| Shura | 11.11 | Limited-time Event |
| Techie Ninja | Elite | S27 First Recharge |
| Exorcist Hayabusa | The Exorcists | Limited-time Event |
| Kakashi Hatake | Naruto Shippuden | Limited-time Event |
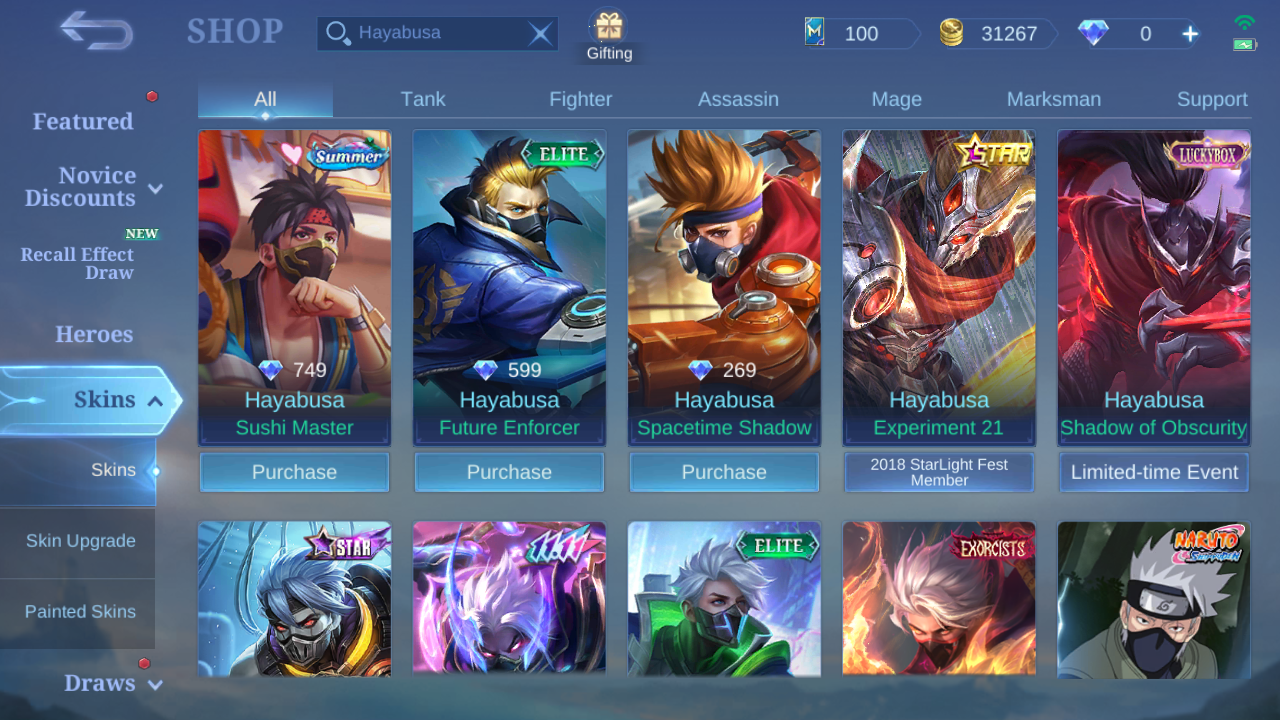
Sushi Master through Shadow of Obscurity.
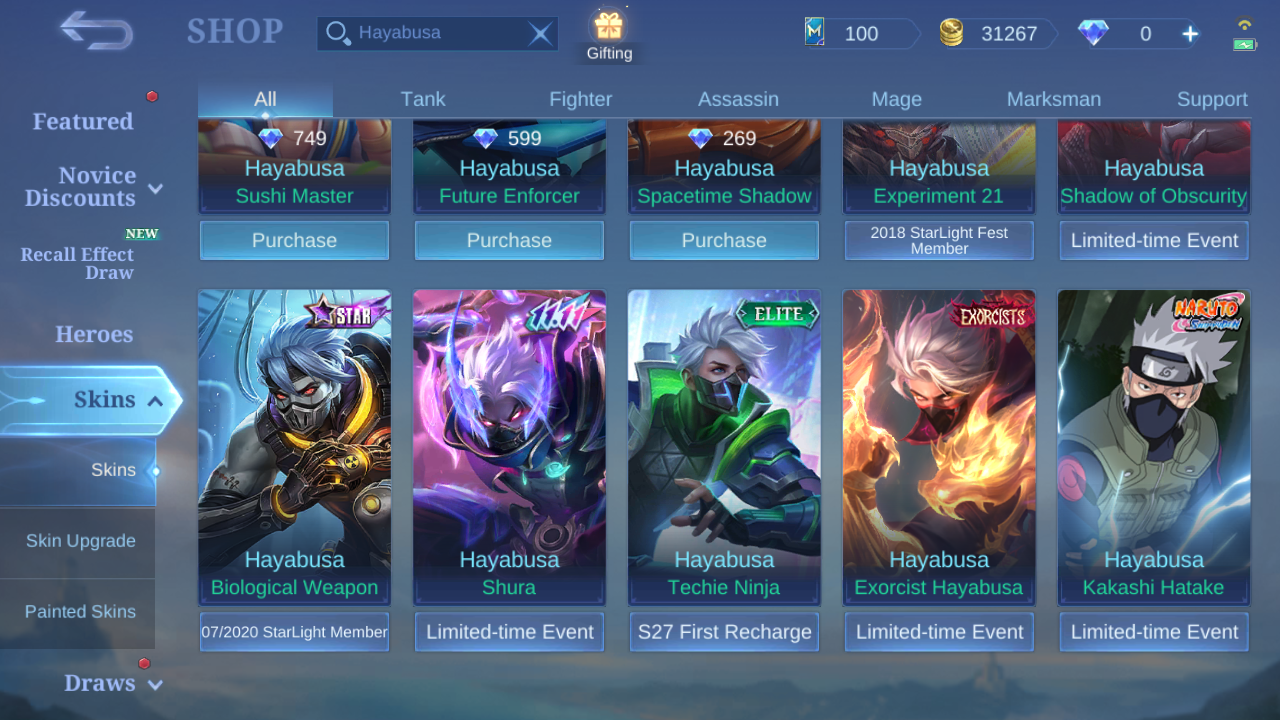
Biological Weapon through Kakashi Hatake.
Hayabusa Story
Hayabusa was raised as the Shadow Sect's second heir and sent to the Scarlet Sect as a hostage to preserve the balance between the two ninja orders. His bond with Hanabi, his encounter with Ame no Habakiri, and the illusion that tested his fear shaped a leader who chose his own nindo and walks into moonless battles without fear.
Related MLBB Guides
Compare Hayabusa with other high-mobility jungle routes in the Saber jungle guide and Fanny jungle guide.
Hayabusa FAQ
What role is Hayabusa?
He is an Assassin most commonly used in the jungle for chase and burst.
Which skill should Hayabusa level first?
Learn and prioritize Phantom Shuriken, use Quad Shadow as the backup upgrade, and upgrade Shadow Kill whenever available.
Which Emblem and spell should Hayabusa use?
Use Assassin Emblem with Rupture, Seasoned Hunter, and Killing Spree plus Retribution for the default jungle route.
Why does Hayabusa's ultimate miss the target?
Shadow Kill distributes attacks among valid enemies in the area, so minions and nearby heroes can dilute the burst. Isolate and mark the intended target first.
Verdict
Hayabusa wins through isolation, mark preparation, and disciplined exits. Connect Quad Shadow, land both directions of Phantom Shuriken, cast Shadow Kill only when its attacks stay concentrated, and keep one phantom for the retreat. Treat every sampled build as evidence for a decision, not a six-item command.
Top up Mobile Legends securely on ManaBuy



Copyright © FUTURE OUTLOOK TECHNOLOGY LIMITED.Company Registration No.: 77374965 All rights reserved.UNIT 135,1/F.,143 WAI YIP STREET,KWUN TONG HK