
Genshin Impact Lauma Lunar-Bloom Guide: EM Builds, Teams, And Pull Value

Lauma is a support whose value is tied to Bloom-family reaction ownership. She should not be built like a generic Dendro Catalyst; her best setup solves EM, Energy, Dendro uptime, and whether the account is actually using Lunar-Bloom mechanics. Build Lauma with ER or EM Sands, EM Goblet, EM Circlet, and a support set such as Silken Moon's Serenade or Deepwood Memories depending on team needs. She is strongest when Bloom-related damage is planned around her buffs, not when she is inserted into a random Dendro slot. The practical goal is to connect the build, rotation, team shell, material plan, constellation value, and common mistakes into one decision.
Quick answer: Build Lauma with ER or EM Sands, EM Goblet, EM Circlet, and a support set such as Silken Moon's Serenade or Deepwood Memories depending on team needs. She is strongest when Bloom-related damage is planned around her buffs, not when she is inserted into a random Dendro slot.


Rarity, element, weapon type, material data, talent names, and constellation names are checked against the HoYoLAB Wiki profile for Lauma.
Lauma Best Build Snapshot
Start here before spending resin. The snapshot below is the default build path; adjust the final pieces around Energy needs, team role, and actual artifact substats.
| Best role | Dendro support for Bloom, Lunar-Bloom, and reaction-focused teams. |
| Best artifact | 4pc Silken Moon's Serenade for Lunar-Bloom support; Deepwood if the team needs Dendro RES shred. |
| Main stats | ER or EM Sands / EM Goblet / EM Circlet. |
| Substats | ER until smooth, EM, HP or survivability if the team takes Bloom damage. |
| Talent priority | Skill and Burst first; Normal Attack is optional. |
How Lauma's Kit Works
Lauma's kit should be judged by what it does for reaction damage. If Bloom, Lunar-Bloom, or related Dendro reactions are not the team plan, her best support pieces can feel underused.
Full EM is attractive because Bloom-family damage values EM heavily, but ER still decides whether the rotation repeats. A Lauma who cannot Burst or refresh support on time loses more than a few EM substats can fix.
In Nilou-style teams, survival matters because Bloom self-damage is part of the gameplay. Lauma's team needs a healer or enough defensive comfort before the damage plan becomes reliable.
Lauma Talent Visual Notes
The talent visuals are included to connect the build advice with what the character actually does in combat: field time, range, setup speed, and which button deserves resin first.
 |  Combat preview for timing, range, and field-time planning. | Peregrination of Linnunrata This visual identifies the action that drives the rotation. Match it to the talent priority before spending books. |
 |  Combat preview for timing, range, and field-time planning. | Runo: Dawnless Rest of Karsikko Watch the animation length and range: it shows whether the ability is a setup button or a field-time commitment. |
 |  Combat preview for timing, range, and field-time planning. | Runo: All Hearts Become the Beating Moon The final talent in the trio is useful context, but upgrade it only when it changes the real damage or support window. |
Best Artifacts For Lauma
Artifact choice should answer one question: what job is Lauma doing in this exact team? The icon helps identify the set, while the final column explains when the set is actually worth farming.
 | Silken Moon's Serenade | Best when the team is actually enabling Lunar-Bloom and can use its support condition. |
 | Deepwood Memories | Use when no other teammate can provide Dendro RES shred for the Bloom or Dendro damage core. |
 | Instructor | Low-cost EM support set for budget reaction teams. |
Best Weapons For Lauma
Weapon ranking changes with Energy, CRIT balance, reaction ownership, and whether the account needs team utility. The weapon icon is paired with the practical reason to use it.
 | Nightweaver's Looking Glass | Signature Catalyst and strongest premium support fit. |
 | A Thousand Floating Dreams | Premium EM support option with team utility. |
 | Sacrificial Fragments | Accessible EM option with potential Skill uptime help. |
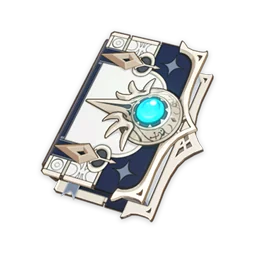 | Favonius Codex | Use when the team needs Energy more than extra EM. |
 | Prototype Amber | Comfort option if healing support and Energy smoothing are valuable. |
Lauma Main Stats And Substats
Main stats: ER or EM Sands / EM Goblet / EM Circlet. Substats: ER until smooth, EM, HP or survivability if the team takes Bloom damage. If the rotation feels inconsistent, solve Energy and team setup before chasing a prettier CRIT ratio.
Lauma Talent Priority And Materials
Talent order: Skill and Burst first; Normal Attack is optional. Spend crowns only after the team role is confirmed; a support crown and a carry crown do not create the same account value.
Lauma Ascension Material Checklist
Use these material icons as a farming checklist before committing resin, weekly boss drops, or conversion materials.
 | Mora | 420000 |
 | Nagadus Emerald Sliver | 1 |
 | Moonfall Silver | 168 |
 | Tattered Warrant | 18 |
 | Nagadus Emerald Fragment | 9 |
 | Lightbearing Scale-Feather | 46 |
 | Immaculate Warrant | 30 |
 | Nagadus Emerald Chunk | 9 |
 | Frost-Etched Warrant | 36 |
 | Nagadus Emerald Gemstone | 6 |
Lauma Talent Material Checklist
Plan talent books, enemy drops, weekly boss materials, Mora, and Crown usage around the talent priority above.
| Mora | 1652500 | |
 | Teachings of Moonlight | 3 |
| Tattered Warrant | 6 | |
 | Guide to Moonlight | 21 |
| Immaculate Warrant | 22 | |
 | Philosophies of Moonlight | 38 |
| Frost-Etched Warrant | 31 | |
 | Eroded Scale-Feather | 6 |
 | Crown of Insight | 1 |
Lauma Rotation And Gameplay Loop
The best rotation lines up buffs, aura order, field time, cooldowns, and survival. Use this loop as the baseline, then shorten or delay steps for enemy waves.
- Set Hydro and Dendro roles before fighting; Bloom teams punish random aura order.
- Use Lauma's support abilities early enough that Bloom-related damage receives the buff.
- Swap through Hydro and healer tools before the reaction wave becomes unsafe.
- Refresh Lauma before Dendro uptime falls off and seed creation slows down.
Best Lauma Teams
The best team is the one that lets Lauma perform the intended role repeatedly. The character icons below link to ManaBuy guides when a teammate already has a usable internal guide path.
| Lunar-Bloom core | Lauma + Nilou/Nefer + Hydro healer + Dendro/Hydro flex. Keep reaction ownership and survivability clear. |
| Nilou Bloom | Nilou + Lauma + Nahida/Baizhu + Kokomi/Yelan/Xingqiu. Stay within Hydro and Dendro rules for Bountiful Core teams. |
| Quickbloom support | Alhaitham/Clorinde + Lauma + Yelan/Xingqiu + Kuki Shinobu. Use only if Lauma's support adds more than Nahida or Baizhu would. |
| Budget Bloom | Lauma + Xingqiu/Barbara + Dendro Traveler/Collei + healer. This is slower but teaches aura and self-damage management. |












Is Lauma Worth Building Or Pulling?
Lauma is worth building if your account is committed to Bloom or Lunar-Bloom teams. She is less urgent for players who mainly use Aggravate, Spread, or Hyperbloom and already own Nahida or Baizhu for Dendro support.
Lauma Constellation Value
Constellations should be judged after the C0 team already works. The icons below are recognition aids, while the notes explain how to think about pull value.
 | C1: "O Lips, Weave Me Songs and Psalms" | Often the first real comfort or damage checkpoint. Compare this against missing teammates before pulling. |
 | C2: "Twine Warnings and Tales From the North" | Usually a stronger luxury breakpoint than C1, but still less important than a functional artifact and team core. |
 | C3: "Seek Not to Tread the Sly Fox's Path" | Read this as a spending checkpoint, not a requirement. Upgrade only if the constellation improves the role you actually play. |
 | C4: "Nor Yearn for the Great Bear's Might" | Read this as a spending checkpoint, not a requirement. Upgrade only if the constellation improves the role you actually play. |
 | C5: "If Truth May Be Subject to Witness" | Read this as a spending checkpoint, not a requirement. Upgrade only if the constellation improves the role you actually play. |
 | C6: "I Offer Blood and Tears to the Moonlight" | Whale-level endpoint. Do not plan around it for normal account value. |
Common Lauma Build Mistakes
- Building full EM while ignoring Burst uptime.
- Forgetting Bloom self-damage and running no real sustain.
- Using Silken Moon's Serenade outside the teams that activate its value.
- Breaking Nilou team rules with the wrong element mix.
Lauma Account Planning Tips
Build Lauma after deciding the exact team shell. Carries need their supports leveled, supports need enough ER to repeat their job, and reaction units need the correct trigger owner. Stop farming when the team performs reliably, then move resin to the weakest teammate in the rotation.
Lauma Related Genshin Impact Guides On ManaBuy
Use these Genshin Impact guides after you finish this build: compare roster roles, check newer system mechanics, and review safe spending steps before choosing a banner or package.
- Genshin Impact characters list and build hub - Compare elements, roster roles, and which build guide to open next.
- Genshin Impact Stellar Glimmer reactions guide - Check the newer Cryo reaction routes, Vortex loop, and Odette team prep.
- Are Genshin top-up sites legit? - Review UID, server, package, and password-safety checks before spending.
- Nefer Lunar-Bloom guide - Compare newer Lunar-Bloom team planning and Dendro carry value.
- Neuvillette Hydro DPS guide - Compare a high-value Hydro carry and account-planning baseline.
Lauma Build Guide FAQ
Is Lauma good with Nilou?
Yes, if the team stays inside Hydro and Dendro rules and has enough healing for Bloom self-damage.
Should Lauma use Deepwood?
Use Deepwood when nobody else holds it. If another teammate already provides it, her dedicated support set can be better.
Does Lauma need full EM?
EM is very important, but ER comes first if her support window does not repeat consistently.
Can Lauma replace Nahida?
Sometimes, but Nahida remains extremely strong. Decide based on the reaction shell and which support effects your team lacks.
Is Lauma future-proof?
She is tied to Bloom-family mechanics, so future Hydro, Dendro, and Lunar-Bloom characters can change her best teams.
Lauma Build Conclusion
Final take: A strong Lauma build is not one artifact set in isolation. It is the combination of role, talent priority, weapon, Energy, reaction plan, and teammates that makes the rotation repeat under pressure.



Copyright © FUTURE OUTLOOK TECHNOLOGY LIMITED.Company Registration No.: 77374965 All rights reserved.UNIT 135,1/F.,143 WAI YIP STREET,KWUN TONG HK