
Genshin Impact Nefer Build: Best Artifacts, Weapons, Teams & Stats

The best Nefer build turns her into an on-field Dendro Catalyst carry for Lunar-Bloom teams. This guide gives you an actionable artifact set, weapon ranking, stat targets, combos, teams, materials, and a clear C0-versus-C1-versus-R1 decision.
Updated for current Nefer and Reliquary of Truth information. Exact performance still varies with teammates, refinements, enemy resistance, and artifact quality.

Nefer Best Build at a Glance: Quick Answer
Best build: use 4-piece Night of the Sky’s Unveiling with EM Sands, EM Goblet, and usually a CRIT DMG Circlet. Aim for enough Energy Recharge to execute your chosen Burst schedule, then prioritize CRIT and Elemental Mastery. Nefer’s signature Catalyst, Reliquary of Truth, is her best weapon; Blackmarrow Lantern is the dependable craftable baseline.
 Best artifact4pc Night of the Sky’s Unveiling
 Best weaponReliquary of Truth
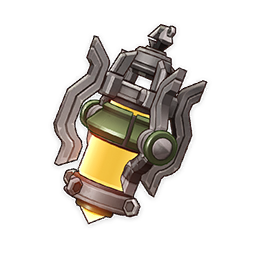 F2P baselineBlackmarrow Lantern
| Build slot | Recommendation | Why |
|---|---|---|
| Role | On-field Lunar-Bloom DPS | Nefer converts team setup into repeated special Charged Attacks. |
| Main stats | EM / EM / CRIT | EM directly supports Lunar-Bloom; CRIT balances her reaction damage. |
| Substats | ER requirement > CRIT > EM | Meet the rotation first, then improve damage. |
| Talent priority | Skill > Burst; Normal Attack last | Her important special Charged Attack scaling is tied to the Skill. |
| Team rule | Hydro + Lauma/second Dendro + flex | Hydro enables Bloom, while Lauma is Nefer’s strongest Lunar-Bloom partner. |
How Nefer and Lunar-Bloom Work
 NeferOn-field DPS
 DendroElement
 CatalystWeapon type
 Elemental SkillCore talent
Nefer is not a generic Dendro driver. Her field time revolves around her Elemental Skill state and special Charged Attacks. When the team creates the required reaction resources, Nefer consumes Verdant Dew to perform enhanced Charged Attacks that deal Lunar-Bloom damage. A normal Skill window supports three of these attacks; using the Skill again inside the full sequence enables six across the complete rotation.
That distinction changes how you build the entire team. Generic Normal Attack buffs do not automatically improve her important hits. Hydro application must be available before Nefer starts spending field time, and one teammate should maintain the 4-piece Deepwood Memories resistance reduction. Her support setup is therefore part of the Nefer build—not an optional afterthought.
What a successful rotation must accomplish
- Apply Dendro resistance reduction and establish off-field Hydro.
- Activate Lunar-Bloom support and other short-duration buffs before Nefer takes the field.
- Use Nefer’s Skill, consume all available Verdant Dew with special Charged Attacks, and fit Burst only when the team can fund it without delaying the next rotation.
Best Artifacts for Nefer
4-piece Night of the Sky’s Unveiling
Best overallBuilt for Ascendant Gleam and Lunar-Bloom damage. Best existing setUseful while farming the dedicated set.
 Temporary mix2pc EM + 2pc EM with strong substats.
Night of the Sky’s Unveiling is Nefer’s clear best set. Under Ascendant Gleam, its four-piece effect supplies 30% CRIT Rate, 10% Lunar-Bloom damage, and 80 Elemental Mastery. Those bonuses align with every major part of her damage profile and reduce the amount of CRIT Rate you need from the visible artifact screen.
If your new set is weak, do not throw away a much stronger temporary build just to force the four-piece bonus on day one. Gilded Dreams and mixed two-piece EM sets can bridge the gap. Replace them once the dedicated four-piece has competitive main stats and substats.
Artifact main stats and substats
| Slot | Default choice | When to reconsider |
|---|---|---|
| Sands | Elemental Mastery | Keep EM unless an unusual team or future mechanic changes her scaling. |
| Goblet | Elemental Mastery | Use the EM Goblet with the best overall CRIT and ER substats. |
| Circlet | CRIT DMG | CRIT Rate can be correct without Lauma, without 4pc uptime, or with a heavily CRIT-DMG-skewed weapon/build. |
| Substats | ER to requirement, then CRIT and EM | Stop adding ER once the intended Burst schedule is stable. |
Nefer Stats Targets: EM, CRIT and ER
A useful Nefer stats check must count buffs that do not appear permanently on the character screen. Treat the following as build guardrails, not rigid pass/fail numbers.
| Stat | Practical target | How to interpret it |
|---|---|---|
| Elemental Mastery | Work toward 800 EM after relevant combat buffs | 800 EM maxes the 14% base-DMG bonus from Nefer’s Moonsign Benediction passive. More EM can still contribute through other scaling, but this passive itself has reached its cap. |
| CRIT Rate | Balance after conditional bonuses | 4pc Night of the Sky’s Unveiling and Lauma can provide 40% CRIT Rate together. Do not build as if that bonus does not exist, or your combat CRIT can overflow 100%. |
| CRIT DMG | Increase after reaching reliable CRIT Rate | A CRIT DMG Circlet is usually efficient when the set and Lauma already cover much of the Rate requirement. |
| Energy Recharge | About 100% in double/triple Dendro; around 105% in solo Dendro when Bursting every other rotation | These are low reference points, not universal guarantees. Enemy particles, Favonius triggers, rotation length, and Burst frequency can raise or lower your real requirement. |
Why the visible CRIT Rate can look “too low”
Suppose the stat screen shows 55% CRIT Rate. If the four-piece set contributes 30% in combat and Lauma contributes another 10%, Nefer reaches 95% before any other conditional source. In that team, forcing a CRIT Rate Circlet may waste stats; in a Lauma-less team, the same artifact can be reasonable.
Best Nefer Weapons Ranked
| Nefer weapon | Tier and availability | Why it works | Main caveat |
|---|---|---|---|
| Reliquary of Truth | Best overall Limited 5★ | 542 ATK, 88.2% CRIT DMG, plus 8% CRIT Rate, EM and CRIT DMG from its R1 passive when Nefer activates both effects. | Premium weapon; its very high CRIT package changes artifact balancing. |
 Nightweaver’s Looking Glass Nightweaver’s Looking Glass | Best premium alternative Limited 5★ | Strong EM-oriented stat profile and effects that fit Lunar reaction teams. | Still another limited weapon; account value depends on who else can use it. |
| Surf’s Up / Tome of the Eternal Flow | CRIT stat sticks Limited 5★ | High CRIT stats can make artifact balancing easier. | Part of each signature passive is poorly matched or unreliable on Nefer. |
 Dawning Frost Dawning Frost | Strong 4★ Limited weapon banner | R1 can edge out R5 Blackmarrow Lantern; refinements improve its ceiling. | It is not a generally accessible weapon, and high refinements may require signature-banner pulls. |
| Blackmarrow Lantern | F2P baseline Craftable 4★ | Reliable EM-oriented option with refinements that do not depend on limited-banner luck. | Lower ceiling than the premium choices. |
 The Widsith The Widsith | Situational 4★ Gacha | R5 averages near R5 Blackmarrow in theory and supplies valuable CRIT DMG. | Only the EM song fully supports Nefer’s Lunar-Bloom damage, and the 30-second effect cycle makes results inconsistent. |
Reliquary of Truth passive in plain language
At R1, Reliquary of Truth grants 8% CRIT Rate. Casting Nefer’s Skill grants 80 EM for 12 seconds; dealing Lunar-Bloom damage grants 24% CRIT DMG for four seconds. When both effects are active, each is increased by 50%, producing 120 EM and 36% CRIT DMG during the overlap. This is why the weapon feels tailored rather than merely having a good stat line.
Which F2P weapon should you actually build?
Craft Blackmarrow Lantern if you need a stable, obtainable Nefer weapon. Use Dawning Frost only if it is already on your account or if its banner value makes sense for your wider roster. The Widsith is usable, but players who dislike resetting around random songs should prefer the consistent craftable option.
Nefer Talent Priority
1. SkillHighest priority 2. BurstSecond priority
 3. Normal AttackLowest priorityEfficient goalSkill first, then Burst
Level the Elemental Skill first because Nefer’s special Charged Attacks use its scaling. The Burst is the next meaningful upgrade. Her Normal Attack talent contributes little to the defining rotation, so it is the easiest place to save Mora and books. If resources are limited, crown the Skill before considering the Burst; triple-crowning is a preference project, not a build requirement.
Nefer Rotation and Combos
Full on-field combo
After support setup, a practical full sequence is Skill → three Charged Attacks with dash cancels → Skill → Charged Attack → Burst → Charged Attack. In compact notation: E 3[CD] E CD CQ CD. This spends six Verdant Dew charges while fitting the Burst into the field window.
Split-field combo
Use E 3[CD] → swap through supports → E 3[CD] when teammate cooldowns or buff refreshes favor a split rotation. This pattern can feel smoother in teams whose off-field Hydro or support windows do not cover one continuous Nefer sequence.
Comfort combo without dash cancels
If dash timing is uncomfortable, use E 3[C] E 3[C]. It is easier to execute and still teaches the key rule: consume all three charges in each Skill state. Do not chase theoretical animation savings if missed inputs reduce your real clear consistency.
Rotation troubleshooting
If Nefer begins her sequence without Hydro already active, Verdant Dew generation and Lunar-Bloom timing can fall apart. If Burst is unavailable, decide whether to skip it for one rotation or add Energy Recharge—do not extend the field time so far that every support buff expires.
Best Nefer Teams: Premium, F2P and Lauma-less
The basic shell is Nefer + Hydro + Lauma or another Dendro + flex. Hydro is mandatory for Bloom access. Lauma is strongly preferred because she improves the Lunar-Bloom package and helps Nefer’s CRIT setup. One teammate should carry 4-piece Deepwood Memories.
 NeferOn-field
 AinoHydro
 LaumaLunar support
 NahidaDendro flex
 KokomiHydro sustain
| Team shell | Deepwood holder | How it plays | Who should use it |
|---|---|---|---|
| Nefer / Aino / Lauma / Nahida | Nahida | Set Nahida and Lauma’s effects, establish Aino’s off-field Hydro, then run Nefer’s six-Charged-Attack sequence. | High-damage Lunar-Bloom core with no dedicated healer; requires comfort with survival. |
| Nefer / Aino / Lauma / Baizhu | Baizhu | Baizhu applies Deepwood and sustain, Aino supplies Hydro, Lauma buffs, then Nefer takes the field. | Comfort-focused premium team. |
| Nefer / Kokomi / Lauma / Nahida | Nahida | Place Kokomi’s Skill before Nefer’s window; refresh it when needed. Lauma and Nahida establish Dendro-side support. | Players who want healing and reliable area Hydro. |
| Nefer / Aino / Dendro Traveler / sustain | Dendro Traveler or sustain unit | Use Aino’s free off-field Hydro and keep Deepwood active before Nefer enters. | Accessible transitional build while waiting for Lauma. |
| Nefer / Xingqiu or Yelan / Lauma / flex | Lauma or flex | Insert Normal Attacks so coordinated Hydro attacks trigger; expect a longer or altered Nefer sequence. | Accounts without a better passive Hydro applicator. |
Important teammate caveats
Nilou can be used, but Nefer’s mechanics do not simply become a standard Bountiful Core team; their passives do not align cleanly. Furina’s Burst damage bonus does not buff Lunar-Bloom damage, so her value must come from the rest of the team package. Xingqiu and Yelan require Normal Attacks to trigger coordinated attacks, which can change or extend Nefer’s preferred combo.
Nefer Ascension and Talent Materials
 Nagadus Emerald1 / 9 / 9 / 6
 Moonfall Silver168
 Warrant series18 / 30 / 36
 Radiant Antler46
Character ascension totals: level 1 to 90
| Material | Total | Planning note |
|---|---|---|
| Nagadus Emerald | 1 Sliver, 9 Fragments, 9 Chunks, 6 Gemstones | Use Dust of Azoth conversion if your boss drops do not match. |
| Moonfall Silver | 168 | Mark a repeatable local-specialty route and use character-gathering passives when available. |
| Warrant series | 18 Tattered, 30 Immaculate, 36 Frost-Etched | Do not spend the same drops on talents before securing ascension. |
| Radiant Antler | 46 | World-boss drops determine how quickly level 90 is available. |
| Mora | 420,000 | This covers ascension only, not character EXP or talents. |
Talent materials
For one talent from level 1 to 10, prepare 3 Teachings, 21 Guides, and 38 Philosophies of Elysium; 6 Tattered, 22 Immaculate, and 31 Frost-Etched Warrants; 6 Ascended Sample: Rook; 1 Crown of Insight; and 1,652,500 Mora. Elysium books are available on Tuesday, Friday, and Sunday.
Triple-crowning requires three times those talent materials: 9 Teachings, 63 Guides, 114 Philosophies, 18 Tattered, 66 Immaculate, 93 Frost-Etched Warrants, 18 Rooks, 3 Crowns, and 4,957,500 Mora. Most accounts should stop earlier and spend first on Skill, then Burst.
Reliquary of Truth Weapon Materials
To level Nefer’s signature weapon from 1 to 90, prepare the following Nefer weapon materials. These totals use the current released material set—not older pre-release lists that circulated before launch.
| Material family | Level 1–90 total | Source note |
|---|---|---|
| Oasis Garden series | 5 Reminiscence, 14 Kindness, 14 Mourning, 6 Truth | Tower of Abject Pride on Tuesday, Friday, and Sunday. |
| Radiant Beast drops | 23 Lightless Bone, 27 Glowing Remains, 41 Radiant Exoskeleton | Farm Radiant Beasts and craft higher rarities at the alchemy bench. |
| Fungal drops | 15 Fungal Spores, 23 Luminescent Pollen, 27 Crystalline Cyst Dust | Activation or Scorching can change the drop family, so plan the elements used while farming. |
| Mora | 225,000 for weapon ascensions | Weapon EXP materials and their enhancement Mora are additional costs. |
Efficient pre-farm order
Secure time-gated domain materials first, then farm enemy drops in the open world. Do not overfarm the signature set before deciding whether you will actually pull the weapon; Blackmarrow Lantern remains a functional Nefer build at C0.
C0, C1 or R1: Nefer Pull Priority
Short answer
Start with C0 Nefer and a complete team. If you lack Lauma or a reliable Hydro/Deepwood setup, improving the team usually solves more real problems than immediately chasing personal upgrades. Once the core functions, choose C1 for character progression or R1 for the signature weapon package and account-specific weapon value.
| Investment | Best reason to choose it | Skip or delay when |
|---|---|---|
| C0 Nefer | Complete kit and the correct starting point for every account. | Never treat extra copies as required for basic function. |
| Lauma / team completion | Improves Nefer’s Lunar-Bloom environment, CRIT planning, and team consistency. | You already have the full support shell or prefer a Lauma-less transition team. |
| C1 Nefer | Direct character upgrade without tying value to a weapon user. | Your weapon options or team quality are still weak. |
| R1 Reliquary of Truth | Best Nefer weapon, easier stat balancing, and a signature passive tailored to her rotation. | You have a strong alternative, dislike weapon-banner risk, or need new characters more. |
KQM’s comparison places the improvement from Reliquary of Truth over R5 Blackmarrow Lantern in a similar range to C1. That makes the decision account-dependent rather than automatic: compare pity, guarantee, weapon reuse, available supports, and your existing Catalyst before spending.
Nefer Build FAQ
What is the best Nefer build in Genshin Impact?
Use 4-piece Night of the Sky’s Unveiling, EM Sands, EM Goblet, and usually a CRIT DMG Circlet. Meet your ER requirement, then prioritize balanced CRIT and EM. Reliquary of Truth is best-in-slot; Blackmarrow Lantern is the stable craftable option.
How much Elemental Mastery does Nefer need?
Aim to reach 800 EM after relevant combat buffs to cap the 14% base-DMG bonus from Moonsign Benediction. Do not sacrifice so much CRIT or rotation stability that the nominal EM target lowers real performance.
Does Nefer need Energy Recharge?
She needs only enough for the Burst schedule you intend to play. About 100% in double/triple Dendro and around 105% in solo Dendro can work when Bursting every other rotation, but particles and team choices may change the requirement.
Is Dawning Frost Nefer’s best F2P weapon?
No. Dawning Frost is a limited-banner four-star, so it should not be labeled universally accessible. Blackmarrow Lantern is the clearer F2P baseline because it is craftable.
Does Nefer need Lauma?
Nefer can function without Lauma, but Lauma is strongly recommended for the intended Lunar-Bloom package. A Lauma-less team is better treated as a transition or account-specific alternative, not the default ceiling.
Should I pull C1 Nefer or Reliquary of Truth?
Complete the C0 team first. After that, C1 and R1 are comparable upgrade directions, so choose based on pity, guarantee, weapon reuse, and whether you already own a strong Catalyst. Neither is required for Nefer to work.
Final Nefer Build Checklist
- Equip 4-piece Night of the Sky’s Unveiling with EM / EM / CRIT main stats.
- Count the set’s 30% CRIT Rate and Lauma’s 10% before judging the stat screen.
- Reach a stable rotation, then improve CRIT and work toward 800 in-combat EM.
- Level Skill first, Burst second, and leave Normal Attack for last.
- Use Hydro, assign a Deepwood holder, and establish support effects before Nefer enters.
- Choose Reliquary for maximum personal performance or Blackmarrow for a dependable F2P build.
Need Genesis Crystals for your next Genshin Impact pull?
Review your banner plan first, then use ManaBuy’s Genshin Impact top-up page if you decide to add currency. Spend within a fixed budget and verify the correct account details before checkout.
View Genshin Impact Top-UpRelated ManaBuy Guides
For more roster planning, compare the Genshin Impact character list, then read the dedicated Lauma guide, Nahida guide, and Nilou guide before committing resources.
Editorial sources: HoYoLAB Wiki for official character and weapon records; KeqingMains Nefer Quick Guide for mechanics, artifacts, stats, combos, team caveats, and comparative weapon guidance; current released material databases cross-checked for ascension totals. Game systems can change, so verify patch notes after balance or equipment updates.


Genshin 6.1 Luna II UGC Mode Early Preview and Customization Options
2025-10-11 17:44:33
Durin in Genshin 6.2? Pyro Sub-DPS With Support Utility, Pull Guide & Team Matrix (Leaks)
2025-09-30 17:39:00
Genshin Impact 6.1 Banners: 4-Star Weapon Review & Recommendations
2025-10-10 17:47:29
Genshin Impact 6.1 Banners: The Best Weapon and Character Choices
2025-09-26 16:53:25


Copyright © FUTURE OUTLOOK TECHNOLOGY LIMITED.Company Registration No.: 77374965 All rights reserved.UNIT 135,1/F.,143 WAI YIP STREET,KWUN TONG HK