
Free Fire Dreki Guide: Dragon Glare Healing Enemy Reveals, Rush Timing and Combos

Dreki is a punish pet for players who damage enemies and then lose them behind cover. Dragon Glare can reveal opponents using Med Kits nearby, which helps you stop resets, chase low HP players, and decide which wall or room to pressure next.
If you are deciding whether to unlock or upgrade Dreki, start with the trigger: Owner is able to spot 4 opponents who are using Med Kits within a 30m range, lasts for 5s. A pet is worth building only when that trigger appears in your real matches often enough to change a fight, a reset, or a rotation.
Use it when
Break or wrap the wall with a teammate instead of solo-swinging the front.
Skip Dreki if
Chasing every reveal without checking teammates.
How Dragon Glare Works in Real Matches
Dreki is strongest after you already created damage. The reveal matters because it tells you when an enemy is trying to turn a lost trade into a reset.
The best Dreki push is controlled. Confirm the healing target, throw utility or break the wall, then swing with a teammate instead of sprinting alone.
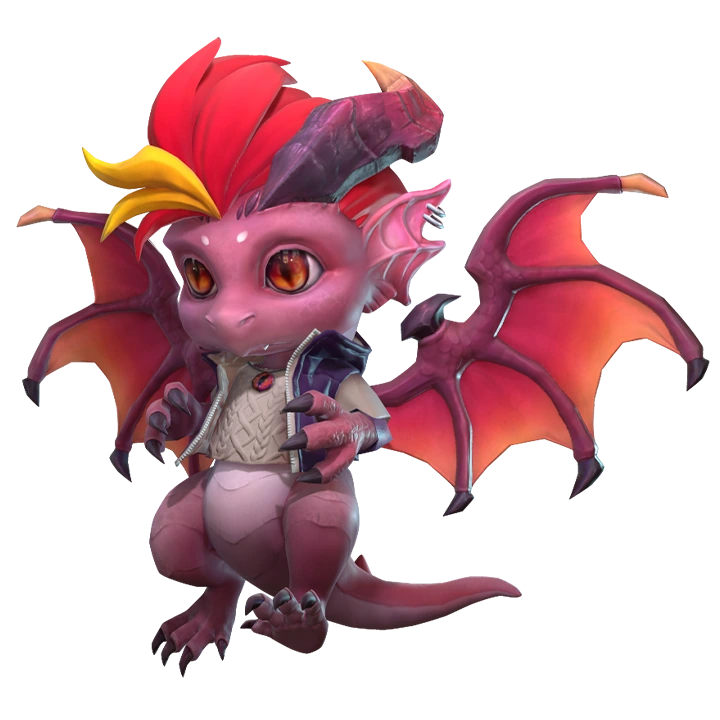

Watch: Garena Free Fire - FF Dreki Pet Ability Test. This clip is included so readers can see Dreki timing in motion; use the current in-game skill text above for final numbers.
Best Ways to Play Dreki in Battle Royale
- Use Dreki in compound fights where enemies often Med Kit behind corners or Gloo Walls.
- After tagging an enemy, pause half a second to read the reveal before choosing the route.
- If the reveal shows multiple healing targets, call it; your squad may have a clean collapse window.
Test Dreki with one stable character preset. If the skill never changes your route, heal timing or cover choice across several matches, another pet will fit the role better.
How Dreki Fits Clash Squad
Dreki is strong in CS because heal windows are short and walls are close. It helps rush squads punish enemies who think a Gloo Wall gives them a free reset.
| CS question | Practical answer |
|---|---|
| Does the pet affect the first fight? | Use it aggressively only if the trigger appears before or during the first trade. |
| Does the pet help the second fight? | Cooldown, wall, heal, and rescue pets often win value after the first exchange. |
| Should every CS player use it? | No. The pet should match your role: entry, support, anchor, utility, or rescue cover. |
Best Free Fire Character Pairings for Dreki
| Character pairing | Why it works with Dreki |
|---|---|
 OscarValiant Dash: Dashes towards the target direction, destroys Gloo Walls in the way, deals damage to and knocks back enemies encountered. OscarValiant Dash: Dashes towards the target direction, destroys Gloo Walls in the way, deals damage to and knocks back enemies encountered. | Oscar can dash through Gloo Wall pressure after Dreki exposes a healing target. |
 TatsuyaRebel Rush: Rushes forward quickly for 0.3s and resets the cooldown by knocking down an enemy within 10s after skill release. Cooldown: 90s. TatsuyaRebel Rush: Rushes forward quickly for 0.3s and resets the cooldown by knocking down an enemy within 10s after skill release. Cooldown: 90s. | Tatsuya gives the burst movement to close on a revealed low-HP enemy. |
 MocoEnigma's eye: Marks the enemy hit, exposes their location in the field of view, the minimap, and shares it with teammates for 4s. The enemy, if mo... MocoEnigma's eye: Marks the enemy hit, exposes their location in the field of view, the minimap, and shares it with teammates for 4s. The enemy, if mo... | Moco can extend target tracking after the first hit, pairing with Dreki's reset-punish role. |
 SkylerRiptide Rhythm: Unleashes forward a sonic wave that deals great damage to Gloo Walls. SkylerRiptide Rhythm: Unleashes forward a sonic wave that deals great damage to Gloo Walls. | Skyler breaks Gloo Walls that often protect healing enemies. |
Weapons, Squad Role and Item Priorities for Dreki
Dreki is for the chaser who can stay controlled. It belongs with players who damage enemies, read the heal, then push with a teammate.
| Choice | How to use it with Dreki |
|---|---|
 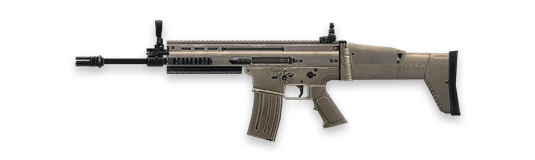 SMG + AR SMG + AR | Tag enemies at medium range, then close when Dragon Glare confirms a heal. |
| Punish the wall or corner that protects the healing target. | |
| One spare wall | Aggressive Dreki pushes still need a safe exit if the bait is fake. |
One Practice Drill for Dreki
After you tag an enemy, wait for the reveal before chasing. The drill is patience: do not sprint at every low-HP target. Dreki is strongest when you push confirmed healing, not when you guess and run into a crossfire.
Squad Callouts That Make Dreki Useful
Pet value is easier to convert when the squad hears a short call at the right moment. Do not only say the pet name. Say what changed, where the danger is, and what the next action should be. For Dreki, these callouts keep Dragon Glare connected to the fight instead of becoming background value.
| Callout | Use it when | Team response |
|---|---|---|
| Dragon Glare window | Enemy heals behind wall | Break or wrap the wall with a teammate instead of solo-swinging the front. |
| Skip Dreki | Chasing every reveal without checking teammates. | Do not force the pet trigger; rotate, wall, heal, or wait for a cleaner fight. |
| Reset then fight | The pet has created value but the enemy can still trade | Reload, share the call, and move with at least one teammate instead of chasing alone. |
Dreki Match Plans You Can Actually Use
| Match situation | Best play |
|---|---|
| Enemy heals behind wall | Break or wrap the wall with a teammate instead of solo-swinging the front. |
| Two enemies healing | Call the reveal and push the weaker side first. |
| Long-range tag | Do not chase too far; use Dreki to decide whether the enemy can rejoin the fight soon. |
How Dreki Compares With Similar Pets
| Alternative pet | When it may be better |
|---|---|
| Hoot | Hoot helps before the fight; Dreki punishes after damage creates a healing window. |
| Detective Panda | Panda rewards the elimination; Dreki helps you secure it. |
| Arvon | Arvon gives area count, while Dreki identifies healing opponents in range. |
Common Dreki Mistakes
- Chasing every reveal without checking teammates.
- Using Dreki as a passive information pet before any damage happens.
- Forgetting that enemies may fake a heal to bait your swing.
Treat Dreki as a tool for one phase of the fight. Define that phase before queueing, then review whether the pet created a safer or faster next move.
Related Free Fire Guides
- Free Fire Hoot Guide - Compare Dreki with Hoot for a nearby pet role.
- Free Fire Detective Panda Guide - Compare Dreki with Detective Panda for a nearby pet role.
- Free Fire Arvon Guide - Compare Dreki with Arvon for a nearby pet role.
- Free Fire Pets Guide 2026 - Compare the full pet roster, roles, and upgrade priorities.
- Free Fire Character Skills and Best Combos - Build character skills around the pet role you want to play.
Free Fire Dreki FAQ
Is Dreki good for rushers?
Yes, especially rushers who know how to push healing enemies with utility.
Does Dreki reveal healthy enemies?
Its core value is tied to opponents using Med Kits in range, so it is a reset-punish pet.
Is Dreki useful in CS?
Yes. CS walls and short heal windows make Dreki easy to convert.
What is the safest Dreki habit?
Use the reveal to plan a two-player push rather than chasing alone.
Final Pick
Choose Dreki if Dragon Glare solves a problem you see repeatedly in your Free Fire matches. Build the character combo around that problem, test it in the mode you actually play, and upgrade only after the pet feels useful without forcing awkward decisions. If the trigger feels rare, pick a more direct pet before spending resources.




Copyright © FUTURE OUTLOOK TECHNOLOGY LIMITED.Company Registration No.: 77374965 All rights reserved.UNIT 135,1/F.,143 WAI YIP STREET,KWUN TONG HK