Free Fire Moco Guide: Enigma's Eye Skill, Best Combos, Weapons, Skins and Team Tips

Moco is one of the best Free Fire characters for players who win fights through information instead of raw burst damage. Her passive skill, Enigma's Eye, marks enemies you hit and shares that target information with your team, which makes her valuable in squad pushes, third-party fights, roof-to-roof trades and late-zone cleanup. She does not heal, shield or dash, so Moco is rarely the only reason you survive a bad duel. Her value comes from making every bullet you land easier for your squad to convert.
Use Moco when your biggest problem is losing track of damaged enemies, letting knocked targets crawl away, or pushing rooms without knowing which direction the enemy rotated. If you prefer solo rush play, pair her with an active skill that gives movement, wall pressure or sustain. If you play squad support, use her to call targets and make every tag meaningful.
Quick answer: Moco is worth using if you play squads, like AR or marksman chip damage, and can communicate target calls. Enigma's Eye marks a hit enemy for 4 seconds, shares the location with teammates, and can extend the reveal up to 5.5 seconds when the marked enemy keeps moving. Build her with an active skill such as Alok, Skyler, Tatsuya or Wukong, then add passives that improve damage, sustain or scoped accuracy.
How Moco's Enigma's Eye Skill Works
Enigma's Eye is simple to trigger but easy to waste. When Moco hits an enemy, that target is marked in your view and on the minimap, and the location is shared with teammates for 4 seconds. If the marked enemy keeps moving, the reveal can stretch to 5.5 seconds. That is enough time for a coordinated squad to swing the correct side, block a revive, or pre-aim the next cover point.
That small window matters more than it looks. In Free Fire, enemies often survive by sliding behind a Gloo Wall, moving around a two-story building, crouching behind cover or crawling behind a teammate after a knock. Moco turns a single bullet into a short tracking window, so your squad can pre-aim the escape route instead of guessing.
Best role
Information support for squads, AR players and finishers who call targets.
Skill type
Passive, so it does not replace your active skill button.
Main weakness
No direct healing, shield, dash or damage burst. You must still win the aim duel.
Use the video as a character showcase, then test the mark timing in Training Ground or Clash Squad before relying on it in ranked.
Is Moco Worth Using?
Moco is worth using when your squad knows how to convert information. She is less flashy than a dash or wall-breaking active skill, but she creates value in every fight where the enemy tries to disengage. If your teammates push immediately after you tag a target, Moco can turn chip damage into a knock. If nobody reacts to the mark, the skill feels weak.
She is strongest in squad Battle Royale, ranked rotations, compound fights, and Clash Squad rounds where enemies reset behind walls. She is also useful for players who use a scoped AR, marksman rifle or controlled SMG spray. She is weaker for pure shotgun entry players who only shoot after they are already face-to-face, because the tracking window matters less when the fight ends instantly.
| Mode or role | Moco value | How to use her |
|---|---|---|
| BR squad | High | Tag one enemy before the push, call the mark, then let your entry player swing the correct side instead of clearing every angle blind. |
| Clash Squad | High | Use early chip damage to reveal the first enemy rotation. This is especially useful when enemies hide behind Gloo Walls or reposition after taking damage. |
| Solo BR | Medium | Moco helps you chase and finish, but she does not give safety by herself. Pair her with movement, sustain or wall pressure. |
| Shotgun-only rusher | Low to medium | The mark is useful after a tag, but shotgun fights often finish too fast. Use her only if you also carry an AR/SMG for opening damage. |
Best Moco Skill Combos
Because Moco is passive, she should support the active skill that defines your fight plan. Choose the active first, then add Moco because tracking helps that plan convert. A strong Moco build usually has one clear job: break Gloo Walls, chase a tagged target, stabilize ranked fights, ambush from distance, or give the squad more information before the next swing.
For squad play, treat Moco as the tracking slot rather than the whole build. Her mark tells you where the target went; your active skill and weapon choice decide whether you can actually punish that movement.
| Combo core | Best for | Why it works | Watch out for |
|---|---|---|---|
| Gloo Wall pressure | Skyler damages Gloo Walls, Moco tracks the damaged target, and Jota gives HP recovery when your shots connect. This is a strong Clash Squad and aggressive BR setup. | Do not waste Skyler before your squad is close enough to punish the revealed enemy. | |
| Fast chase | Tatsuya gives the movement to close distance after a tag. Moco tells you where the enemy is trying to escape, while Kelly supports faster movement and opening burst timing. | Chasing a marked player through open ground still gets punished. Use cover and Gloo Walls. | |
| Stable ranked play | Alok brings team movement/healing value, Laura helps scoped accuracy, and Moco converts AR tags into shared target information. This is safer than a pure entry build. | Good all-round build, but it lacks instant wall breaking unless your fourth slot covers it. | |
| Ambush and marksman play | Wukong supports surprise angles, Moco marks enemies after contact, and Maro adds value at distance, especially against marked targets. Good for patient players, not random rushing. | If you miss the opening shot, the build loses momentum quickly. | |
| Information squad | Koda helps locate enemies behind cover, Moco tracks damaged enemies, and Otho reveals nearby positions after an elimination. This setup is strongest when the team communicates. | Too much information and not enough damage can feel passive. Pair it with a strong entry teammate. |
Best Weapons and Fight Ranges for Moco
Moco does not require a specific weapon, but she rewards weapons that can tag enemies before the final push. That makes her more reliable with ARs, scoped rifles, marksman rifles and controllable SMGs than with panic shotgun-only play. If you need a wider weapon reference, use the Free Fire weapon tier list as the next read.
| Range | Best weapon style | How Moco helps | Simple habit |
|---|---|---|---|
| 0-10m | SMG + shotgun backup | Use the mark only if the enemy escapes behind a wall or door. Pure close-range trades are usually decided by movement and aim. | Tag, reload behind cover, then swing the side the enemy moved toward. |
| 10-35m | AR or SMG spray | This is Moco's best everyday range. One clean burst can reveal the enemy long enough for your team to push safely. | Call "marked left/right/roof" instead of only saying "one hit." |
| 35m+ | Marksman rifle or scoped AR | Longer tags punish rotations, revives and healing attempts. Moco also pairs well with Maro's distance-and-mark logic. | Do not chase too far; use the mark to hold the next cover line. |
How to Play Moco in Battle Royale and Clash Squad
In Battle Royale, Moco is strongest before and during the push. Tag one enemy from a safe angle, call the direction, then move as a team. If you tag a player rotating away from a compound, your squad can cut off the next cover instead of following directly behind. If you tag a rooftop player, your entry can decide whether to climb, nade, break wall pressure or rotate around the building.
In Clash Squad, use Moco earlier in the round. The first few seconds often decide whether the enemy controls the wall line or buys time for a revive. A short Moco tag can reveal which side the first damaged enemy retreats to. That helps your squad trade instead of all staring at the same Gloo Wall.
BR checklist
Tag before crossing, call the marked target, push from cover, and use the mark to stop revives or escapes.
CS checklist
Open with safe chip damage, track the first retreat, then use wall pressure or a fast swing before the mark expires.
Moco vs Other Information Characters
Moco is not the only information character in Free Fire. Her difference is that she rewards actually hitting the target. Clu and Koda are better for scanning before contact, Otho is better after an elimination, and Shirou is defensive because his mark starts when you are hit. Moco sits in the middle: she is simple, passive and team-friendly, but she needs your shots to connect.
| Character | Information type | Use instead of Moco when... |
|---|---|---|
| Marks enemies you hit | You can land opening damage and want the mark shared with teammates during the chase. | |
| Locates enemies not prone or crouching | You need to scan before committing and your squad is unsure where enemies are holding. | |
| Finds enemies behind cover during active window | You want an active information tool with movement speed and a defined scan window. | |
| Reveals nearby enemies after an elimination | Your squad already wins first contact and wants to chain the next fight after a knock or finish. |
Moco Skins, Rebirth Look and Diamonds
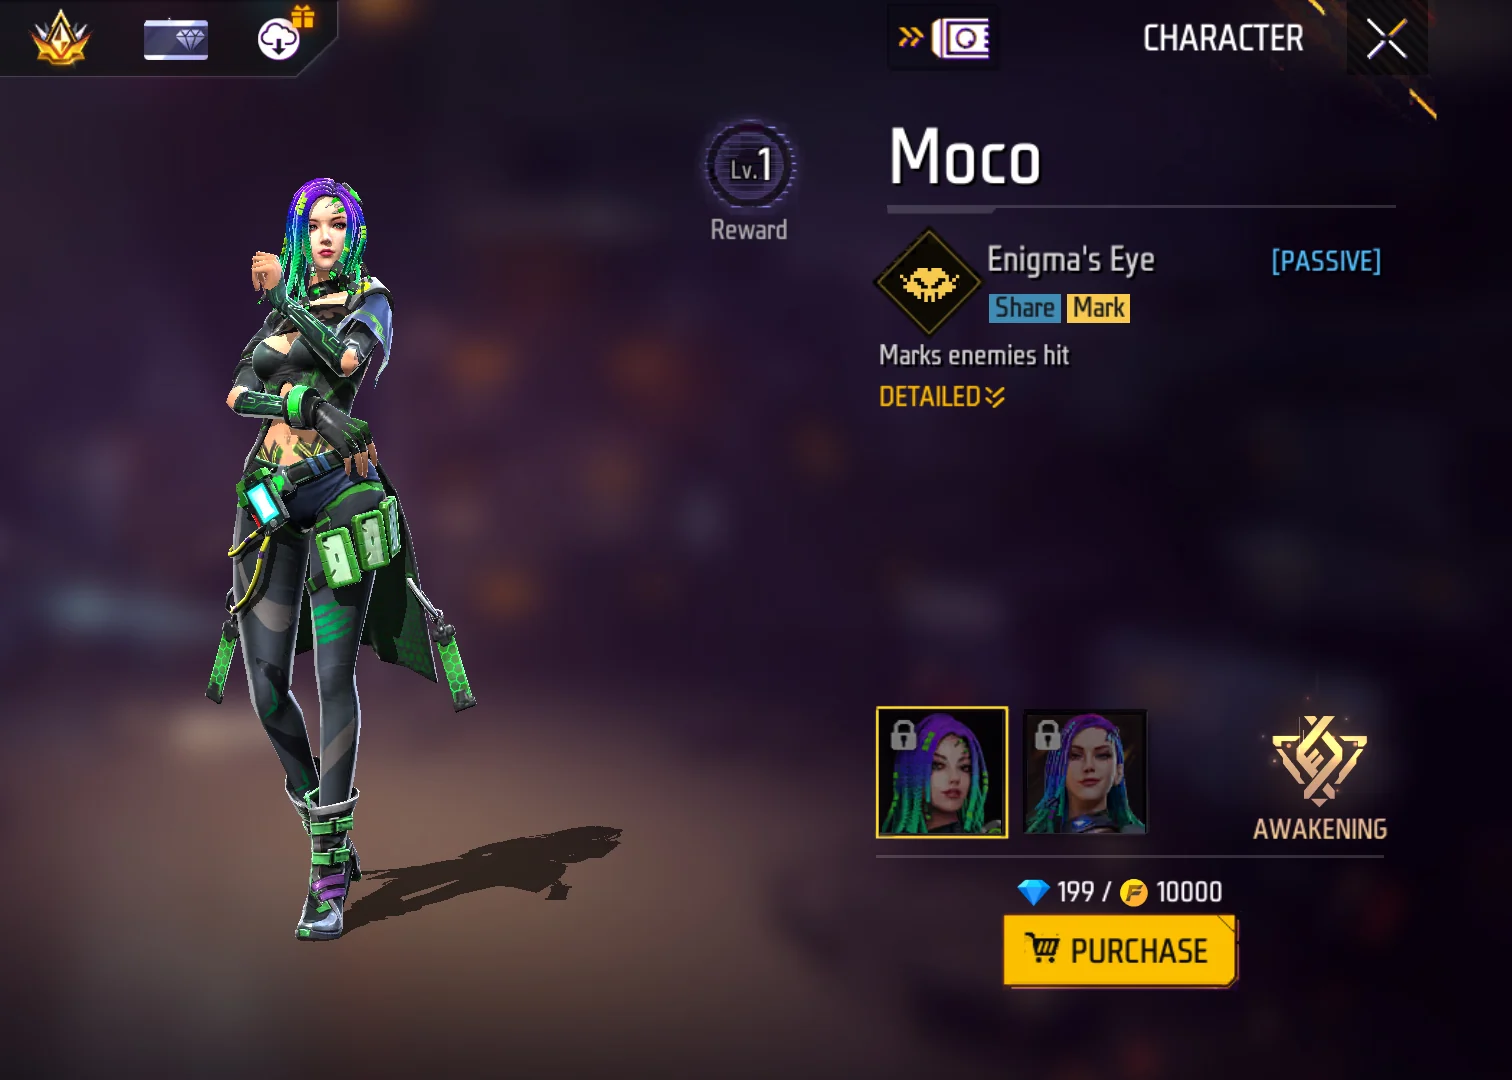
Moco is not only a tracking pick; her hacker theme is part of why players remember her. The normal Moco look leans into green cyber gear, while the Rebirth/Awakening look shifts toward brighter blue and purple tech styling. These looks help the character feel distinct, but they do not replace the gameplay decision: pick Moco because you want marks, target calls and chase pressure.
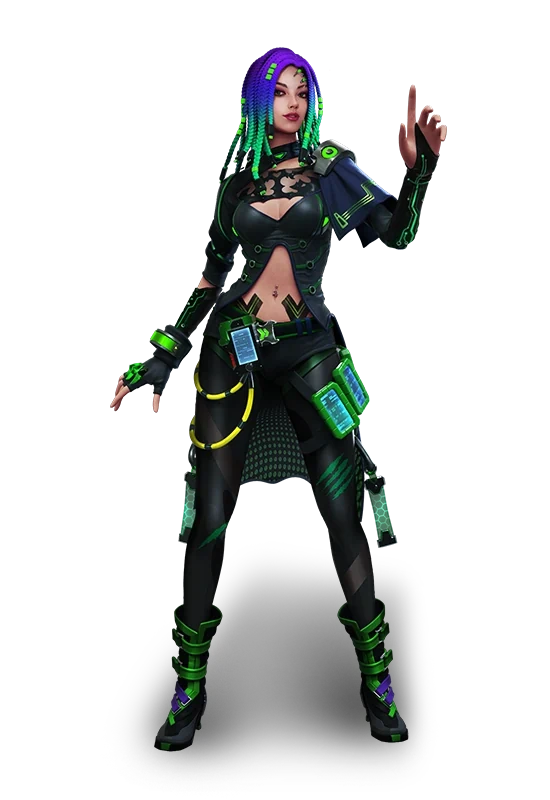
Moco default look
The classic hacker style: dark outfit, green tech accents and the familiar Moco hair color. It is the baseline look most players recognize when comparing Moco with her Rebirth version.
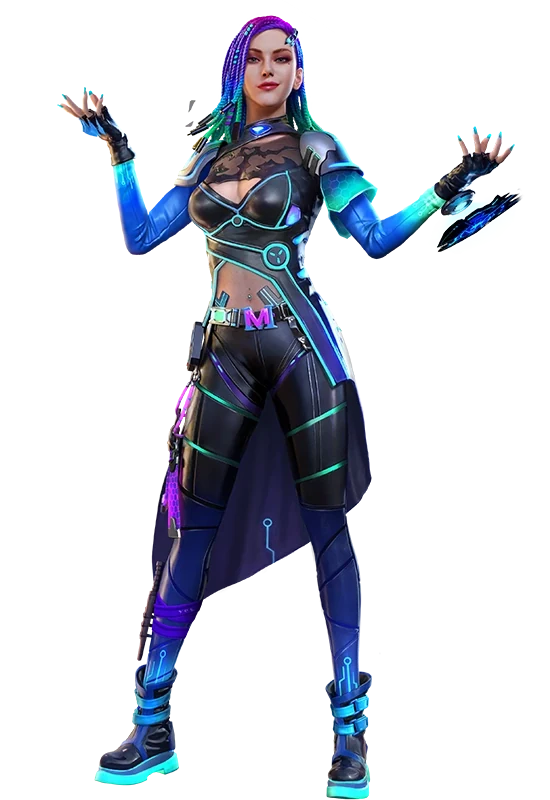
Moco Rebirth look
The upgraded cyber look is more vivid and easier to separate visually from normal Moco. It fits sections about Awakening, cosmetics or character identity.
When you unlock characters or cosmetic looks, check the live in-game store first. Character availability, coin options, Diamond prices and event routes can change by account, region and update. Use the common Moco unlock anchors as a budget check: 199 Diamonds or 10,000 coins when those options appear in your store. If your store offers a coin unlock, use coins first. Spend Diamonds only when Moco fits your build plan or when you also want cosmetics tied to the character.
Compare Free Fire Diamond top-up options separately from your gameplay build, then spend only after you know whether Moco is the character you actually need.
Top Up Free Fire DiamondsCommon Moco Mistakes
- Chasing every mark. A marked enemy is not always safe to push. They may be baiting you into a second angle.
- Tagging without a call. Moco is much stronger when you tell the team where the enemy moved.
- Using her as your only fight tool. She needs an active skill or squad plan to convert information into a knock.
- Ignoring prone/crouch behavior from other scans. Moco marks hit enemies, while scan characters have different limits. Do not treat every information skill as the same.
- Overbuilding information. Moco plus multiple scan tools can leave you short on healing, mobility or wall pressure.
Related ManaBuy Free Fire guides
Use these next if you are building a complete character setup around Moco:
Moco FAQ
Is Moco an active or passive character?
Moco is a passive information character. Her current skill, Enigma's Eye, triggers when you hit an enemy, so you can still use a separate active skill such as Alok, Skyler, Tatsuya or Wukong.
Does Moco reveal enemies to teammates?
Yes. A marked enemy's location is shared with teammates for 4 seconds. If the marked enemy keeps moving, the reveal can last longer, up to 5.5 seconds.
Is Moco good for solo players?
Moco can work in solo, especially if you use AR or marksman chip damage, but she is stronger in squads. Solo players should pair her with a survival or movement active skill because Moco does not heal, shield or escape for you.
What is the best Moco combo for Clash Squad?
Skyler + Moco + Jota is a strong Clash Squad core because it combines Gloo Wall pressure, enemy tracking and HP recovery on hits. Tatsuya + Moco also works if your style is fast chase and entry pressure.
Is Moco better than Clu?
They solve different problems. Moco is better after you hit a target and want to chase or call the mark. Clu is better when you need to locate enemies before first contact.
Should beginners unlock Moco first?
Beginners can use Moco, but she is not always the first unlock priority. If you do not have a comfortable active skill yet, build that first. Moco becomes more valuable once you can land opening shots and communicate target movement.
Final recommendation: Moco is a strong Free Fire pick when your team can turn short marks into fast decisions. She is not a replacement for aim, cover or a reliable active skill, but she makes every clean hit more valuable.
- Use her if you call targets, play AR/marksman angles, or push with a coordinated squad.
- Delay her if your build still lacks healing, movement or Gloo Wall pressure.
- Pair her with one clear active skill plan instead of stacking information tools only.


Copyright © FUTURE OUTLOOK TECHNOLOGY LIMITED. All rights reserved.UNIT 135,1/F.,143 WAI YIP STREET,KWUN TONG HK