Free Fire Pets Guide 2026: Best Pets, Skills and Character Pairings

A Free Fire pet is not just a lobby companion. The right pet can give you more Gloo Wall cover, shorten active skill downtime, feed EP sustain, protect you while healing, or create a small information advantage before a push. The wrong pet can do almost nothing for your build, especially if you pair an active-skill support pet with a passive character setup.
This Free Fire pets guide is written for players who want a practical choice, not a collector list. Use it to decide which pet to level first, which pets fit Battle Royale or Clash Squad, and which character pairings make the pet skill matter in real fights. Pet values and availability can change by server and update, so check the in-game pet page before spending Diamonds or pet food.
Best Free Fire Pets at a Glance
If you only want a fast decision, think in roles. A pet should solve one problem: cover, cooldown, healing safety, EP sustain, information, throwing range, or wall durability. The pets below are the easiest to justify before you start fine-tuning for one character.
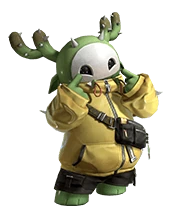
Kactus
EP recovery when you can safely hold position.
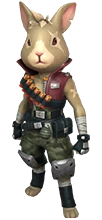
Agent Hop
Extra EP during Battle Royale zone movement.
Moony
Damage reduction while healing under pressure.
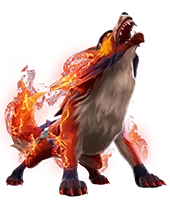
Yeti
Useful against explosive pressure in close rounds.
Flash
Back-damage protection for risky rotations.
Sensei Tig
Anti-mark value against tracking-heavy enemies.
How Free Fire Pets Work
Pets work beside your character skill. You choose one pet before the match, and its ability triggers automatically when its condition is met. You do not press a pet button during a fight, so the value comes from matching that passive trigger to the way you already play.
Most pet mistakes come from misunderstanding that trigger. Rockie is valuable only when your character has an active skill cooldown to reduce. Ottero-like EP pets matter most when your build can actually use EP. Kactus can help a slower survival player, but it is not ideal for a rusher who never stands still long enough to activate it.
Free Fire Pet Tier List for Ranked
The ranking below is role-based, not a permanent power list. Balance changes, event availability, and character changes can move a pet up or down. Use the table as a choice framework for 2026 ranked play.
| Tier | Pets | Best use | Why they matter |
|---|---|---|---|
| Core |  Mr.Waggor Mr.Waggor Rockie Rockie Dreki Dreki | Most ranked players | They solve common ranked problems: not enough Gloo Walls, active skill downtime, and enemies escaping after healing. |
| Strong | MoonyAgent Hop Beaston Beaston RoboYeti RoboYeti | Mode or squad-specific builds | These pets can be excellent, but only when the match type supports their trigger: healing pressure, EP sustain, throw range, wall durability, or explosive defense. |
| Situational | KactusFlashSensei Tig Ottero Ottero Finn Finn Zasil Zasil | Specific character or enemy setups | Good when their trigger is reliable, but less universal than the top picks. |
| Low priority |  Dr. Beanie Dr. Beanie Pug Pug | Fun, stealth, collection | They are not useless, but most players get more ranked value from cover, cooldown, EP or healing safety. |
Best Pets for Battle Royale Ranked
Battle Royale rewards survival, rotation and late-fight resources. In this mode, a pet that gives you extra cover or EP across several circles can be better than a pet that only helps in one short duel.
Mr. Waggor is usually the safest first choice because Gloo Walls decide so many Free Fire fights. Extra walls let you cross open ground, reset after a bad trade, block a third party, or buy enough time for a revive. If you often die because you run out of cover, Waggor is the pet that fixes a real ranked problem.
Agent Hop is better for long BR matches and EP-heavy builds. It becomes more valuable the longer the match goes, especially if you play around K, Xayne, or other skills that reward having EP available. Moony is strong when you often heal under pressure, because a few seconds of damage reduction can keep you alive through a bad angle.
Best Pets for Clash Squad
Clash Squad is shorter and more direct. You do not always get enough time for long EP scaling, so pets that affect the first wall fight, grenade exchange or active skill cycle usually feel better.
Rockie is one of the best Clash Squad pets when paired with Alok, Chrono, Dimitri, Skyler or another active-skill anchor. A smaller cooldown can give your team one more heal, shield, revive zone or wall-pressure skill before the round ends. Robo and Yeti are stronger when the enemy plays grenade-heavy or tries to break your Gloo Walls quickly.

Beaston is also worth considering for coordinated squads. Longer throw distance changes how you place Gloo Walls, grenades and utility. It is less flashy than a damage skill, but it can create better cover angles before the enemy expects it.
Best Pet and Character Pairings
A pet should support the character skill you already rely on. Here are practical pairings for common 2026 Free Fire builds.
| Pet | Best character pairing | Mode | Why it works |
|---|---|---|---|
| Rockie |  Alok Alok Chrono Chrono Dimitri Dimitri Skyler Skyler | BR and Clash Squad | Active skill cooldown reduction matters most when your whole fight plan depends on that skill coming back. |
| Mr.Waggor | Any ranked character | BR, solo, squad | More Gloo Wall access is useful for almost every role, from rusher to support. |
| Dreki |  Tatsuya Tatsuya Oscarother rushers Oscarother rushers | Aggressive BR and CS | Healing detection turns a weak enemy reset into a push timing. |
| Agent Hop |  KEP-heavy builds KEP-heavy builds | Battle Royale | Extra EP across zones gives sustain without spending every Med Kit early. |
| Moony | Dimitrihealing-heavy supports | Late BR, clutch rounds | Damage reduction while healing helps you survive interrupted resets. |
| Robo | Defensive squad anchors | Clash Squad | Wall durability makes close-range Gloo Wall fights less fragile. |
| Yeti | Defensive squad anchors | Clash Squad | Explosive resistance helps against grenade-heavy opponents. |
Which Pet Should You Get First?
If you are new or returning, choose based on your main problem. Pick Mr. Waggor if you run out of Gloo Walls. Pick Rockie if your favorite character has an active skill and you feel one cooldown too slow. Pick Dreki if you already play aggressively and need better timing before rushing a damaged enemy.
For players focused on Clash Squad, Robo and Yeti are practical defensive investments. For players focused on long BR matches, Agent Hop and Moony are more natural. Do not choose a pet only because it looks rare; choose the trigger you can activate every match.
Free Fire Pet Cost and How to Buy Pets
The easiest way to buy a pet is through the in-game Store or pet event page. Open the pet section, choose the pet you want, check whether it can be bought with Diamonds, Gold, an event token or a bundle, then confirm the purchase only after checking your current server price. After buying the pet, use pet food to level its skill; buying the pet and upgrading the pet are two different steps.
The Store often shows standard pets around 199 Diamonds or 10,000 Gold, while pet food can appear as a smaller upgrade item. Use the table as an observation checklist: prices and availability can change by server, event, bundle and owned status.
| Pet | Price to check in Store | Skill detail |
|---|---|---|
| Mr.Waggor | Often shown as 199 Diamonds / 10,000 Gold when listed in Store | Smooth Gloo When player has less than 2 Gloo Wall grenade, Mr. Waggor can produce Gloo Wall grenade every 100 seconds. |
| Rockie | Often shown as 199 Diamonds / 10,000 Gold when listed in Store | Stay Chill Cooldown time of equipped active skill decrease by 15%. |
| Dreki | Often shown as 199 Diamonds / 10,000 Gold when listed in Store | Dragon Glare Owner is able to spot 4 opponents who are using Med Kits within a 30m range, lasts for 5s. |
| Moony | Often shown as 199 Diamonds / 10,000 Gold when listed in Store | Paranormal Protection 35% damage reduction when owner is in interaction countdown (e.g. using Med Kit, repairing etc). |
| Agent Hop | Often shown as 199 Diamonds / 10,000 Gold when listed in Store | Bouncing Bonus When the Safe Zone shrinks, owner gains 50 EP. |
| Beaston | Often shown as 199 Diamonds / 10,000 Gold when listed in Store | Helping Hand Throwing distance of Grenade, Gloo Wall, Flashbang, and Smoke Grenade increases by 30%. |
| Robo | Often shown as 199 Diamonds / 10,000 Gold when listed in Store | Wall Enforcement Adds a shield to the gloo wall, providing additional 100 HP. |
| Yeti | Often shown as 199 Diamonds / 10,000 Gold when listed in Store | Frost Fortress Reduces 30% damage taken from explosives every 90s. |
| Ottero | Often shown as 199 Diamonds / 10,000 Gold when listed in Store | Double Blubber When using Treatment Pistol or Med Kit, the receiver will also recover some EP. Amount of EP recovered is 65% of HP recovered. |
 Falco Falco | Often shown as 199 Diamonds / 10,000 Gold when listed in Store | Skyline Spree 45% increase in gliding speed upon skydive. 50% increase in diving speed after parachute opens. (Applies to entire team) |
| Kactus | Often shown as 199 Diamonds / 10,000 Gold when listed in Store | Self-Sufficient When owner stays still for 6s, they will restore 10EP/s. Restoration stops once 100 EP is restored or upon movement/jumping. |
| Flash | Often shown as 199 Diamonds / 10,000 Gold when listed in Store | Steel Shell Reduces damage from FF Knife and bullets taken from behind by 25%, up to 150 durability points. CD: 90s. |
| Sensei Tig | Often shown as 199 Diamonds / 10,000 Gold when listed in Store | Nimble Ninja Reduces the duration of enemies' man-marking skills by 50%. |
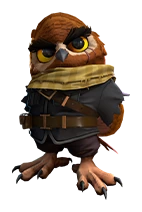 Hoot Hoot | Often shown as 199 Diamonds / 10,000 Gold when listed in Store | Far-sighted When using a scanning item or skill, owner can reach an added range of 10m and the scan duration will last for an extra 2.5s. Results are shared with teammates and no skill cooldown is required. |
 Fang Fang | Often shown as 199 Diamonds / 10,000 Gold when listed in Store | Wolf Pact Whenever owner's teammate is knocked down by an enemy, owner will receive 30 EP if HP is full or 15 HP if HP is not full. Does not exceed HP/EP limit. Cooldown: 25s. |
| Finn | Often shown as 199 Diamonds / 10,000 Gold when listed in Store | Dash Splash When any player is knocked down or eliminated within 20m radius, owner and teammates will receive a 4% movement speed boost. Lasts for 5s. Cooldown: 90s. |
| Zasil | Often shown as 199 Diamonds / 10,000 Gold when listed in Store | Extra Luck Every time owner consumes an Inhaler/Med Kit/Repair Kit, there's a 50% chance of getting an additional one. CD: 70s |
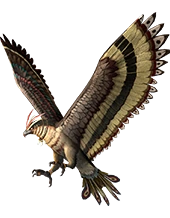
 Arvon Arvon | Often shown as 199 Diamonds / 10,000 Gold when listed in Store | Dinoculars Detect the number of enemies in an area, no matter what position they are in. |
 Shiba Shiba | Often shown as 199 Diamonds / 10,000 Gold when listed in Store | Mushroom Sense Marks one of the surrounding mushrooms on the map every 120 seconds. The mark lasts for 30 seconds. |
 Detective Panda Detective Panda | Often shown as 199 Diamonds / 10,000 Gold when listed in Store | Panda's Blessing Restores 10 HP after a kill. |
 Night Panther Night Panther | Often shown as 199 Diamonds / 10,000 Gold when listed in Store | Weight Training Increases inventory space by 45. |
 Spirit Fox Spirit Fox | Often shown as 199 Diamonds / 10,000 Gold when listed in Store | Well Fed Restores an extra 10 HP when using a Med Kit. |
| Dr. Beanie | Often shown as 199 Diamonds / 10,000 Gold when listed in Store | Dashy Duckwalk When in crouch position, movement speed increases by 60% |
| Pug | Owned, event or cosmetic listing varies | No active skill Cosmetic companion; no active pet skill listed on the official page. |
Common Pet Pick Mistakes
Using Rockie on passive builds
Rockie is only valuable when an active skill cooldown matters. If your build is mostly passive, use a universal pet instead.
Leveling too many pets at once
Pet food is limited. A half-leveled collection is less useful than one reliable ranked pet at a strong level.
Ignoring game mode
Long BR sustain and short Clash Squad pressure reward different pet skills. Do not force one pet into every queue.
Related Free Fire Guides
Free Fire Pets FAQ
What is the best pet in Free Fire?
For most players, Mr. Waggor is the safest universal pick because extra Gloo Wall cover helps every role. Rockie can be stronger if your main character depends on an active skill cooldown.
Can pets die in Free Fire?
No. Pets do not have their own HP bar and do not die during a match. They follow your character visually and provide their ability while equipped.
Can I equip more than one pet?
No. You choose one pet for a match. That is why the pet should match your character skill, role and mode instead of being picked only for looks.
Should beginners spend Diamonds on pets?
Only if the pet solves a clear gameplay problem and is available in your server. Beginners should usually wait for events, check their favorite character first, and avoid upgrading many pets at the same time.
Which pet is best for Clash Squad?
Rockie is excellent with active-skill characters, while Robo and Yeti are useful for defensive cover and explosive-heavy rounds. Beaston can also help squads that use utility throws carefully.
Summary
The best Free Fire pet is the one that supports your most common fight. Mr. Waggor is the easiest recommendation because Gloo Walls are useful everywhere. Rockie is the best partner for active-skill characters. Dreki rewards aggressive timing. Moony, Agent Hop, Beaston, Robo and Yeti become stronger when your mode or squad plan fits them.
Before spending Diamonds or pet food, check your main character, your queue, and the pet's trigger. A pet that activates often is better than a rare-looking pet that never changes the fight.


Copyright © FUTURE OUTLOOK TECHNOLOGY LIMITED. All rights reserved.UNIT 135,1/F.,143 WAI YIP STREET,KWUN TONG HK