
Best Free Fire Character Skill Combos for OB55

The best Free Fire character skill combo is built around one active skill, three passives, your mode and your squad role. A rush setup needs immediate entry value and recovery, while a Battle Royale rotation build needs information, sustain and a way to survive the next fight. These recommendations use the OB55 balance baseline and keep BR and Clash Squad decisions separate.
Build every combo with the 1–1–1–1 test
| Slot job | Question | Failure signal |
|---|---|---|
| Fight starter | How does the build create the first advantage? | The active skill is always used after the duel is already lost. |
| Survival | What prevents one mistake from ending the fight? | Every aggressive entry becomes a trade or elimination. |
| Damage / handling | Which weapon range does the build improve? | Bonuses rarely trigger with the selected weapons. |
| Reset / rotation | How does the build heal, reposition or prepare the next duel? | The first win leaves no resources for the second opponent. |
Test the same loadout across five comparable fights. Record whether losses came from entry, survival, damage or reset, then replace only the slot assigned to that job. Changing all four skills at once hides which adjustment worked.
Clash Squad rewards immediate value that repeats every round. Battle Royale gives rotation, recovery and resource effects more time to matter. Save one preset for short-round impact and one for longer rotations instead of forcing one “all-mode” combo.
OB55 Changes That Affect Free Fire Skill Combos
| Character or item | OB55 change | Combo impact |
|---|---|---|
| Kenta | New 8-second tempest passes through Gloo Walls, deals 25 damage, then can teleport Kenta and grant 20% damage reduction for 5 seconds. Cooldown: 45 seconds. | Now works as a real entry and reposition anchor instead of the old frontal-shield plan. |
| Morse | Aim-assist counterplay reaches 12 m during stealth; maximum stealth duration is 13 seconds. | Use him for timed flanks, not prolonged close-range invisibility. |
| Luna | Rate-of-fire bonus reduced from 8% to 5%; movement-speed conversion after a hit remains. | Still useful for mobile gunplay, but no longer deserves a slot only for raw fire-rate value. |
| Wukong | Transformation cooldown reduced from 90 to 75 seconds. | Ambush and reset routes become available more often. |
| Super Bonfire in CS | EP recovery reduced to 10 per second and firing-interval reduction to 8%. | Do not overvalue Bonfire when choosing sustain passives. |
Best Free Fire Character Skill Combos by Role
| Mode and role | Active + three passives | Why it works | Easy replacement |
|---|---|---|---|
| CS entry | Kenta + Jota + D-Bee + Hayato | Kenta creates the entry route and post-teleport defense; Jota supports close-fight recovery; D-Bee helps moving gunfights; Hayato adds pressure when HP drops. | Use Alok if you want simpler timing and team movement value. |
| CS team support | Alok + Moco + Kapella + Thiva | Alok stabilizes movement and healing, Moco creates shared information, Kapella improves recovery value, and Thiva speeds the revive cycle. | Swap Thiva for a weapon passive when your team already protects revives well. |
| BR aggressive | Alok + Jota + Moco + Kelly | Healing and speed support the entry, Jota rewards damage with SMGs or shotguns, Moco keeps the target visible, and Kelly improves chase and rotation speed. | Use D-Bee instead of Kelly if moving accuracy matters more than travel speed. |
| BR sustain and rotation | K + Miguel + Moco + Maxim | K and Miguel form an EP engine, Moco prevents lost targets, and Maxim shortens the vulnerable healing and mushroom-use window. | Use Kelly when route speed matters more than consumable speed. |
| Sniper and ambush | Wukong + Rafael + Laura + Maro | Wukong creates the ambush window, Laura improves scoped accuracy, Maro rewards range, and Rafael supports quieter sniper pressure. | Use Moco if your squad gains more from marked targets than silent shots. |
| Beginner preset | Xayne + Maxim + Shani + Luqueta | One visible active button plus straightforward sustain and durability effects makes the slot logic easier to learn. | Replace one passive only after identifying a repeated loss pattern. |
How to Use a Rush Combo
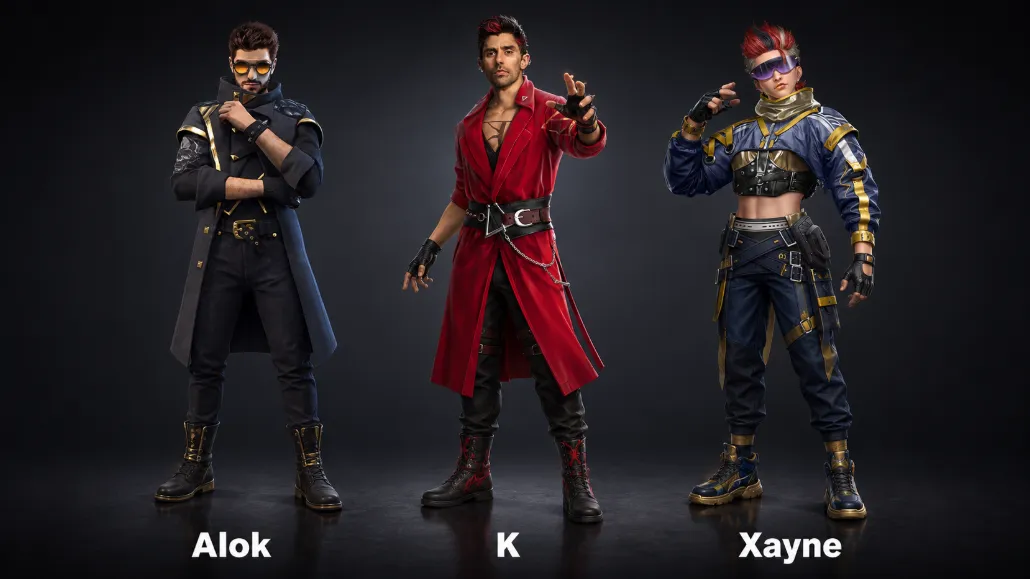
A rush combo should be judged over the whole fight: opening distance, crossing the first Gloo Wall, winning the trade and recovering before the next enemy arrives. Do not stack four damage ideas and leave no movement, healing or information slot.
- Trigger the active skill before the exposed crossing, not after taking heavy damage.
- Use the first passive for trade recovery.
- Use the second passive for moving accuracy, chase speed or target tracking.
- Use the third passive to solve the role's weakest moment.
How to Build for Battle Royale
BR gives skills more time to create value. A good build helps you rotate, detect a damaged enemy, survive a third party and reset with limited supplies. Information and sustain often beat one extra damage passive over a long match.
Pick Alok or Xayne as a visible active anchor, then add simple movement, recovery and durability passives.
Prioritize self-sufficient healing, information and escape value because coordinated follow-up is less reliable.
Split jobs. One player can carry marks, one can protect revives, and the entry player can spend more slots on close-range pressure.
Improve one working preset before unlocking several characters whose passives duplicate the same function.
How to Build for Clash Squad
CS rewards immediate value, round economy and cooldown timing. Kenta's OB55 rework fits a deliberate entry. Alok fits teams that want a simpler speed-and-heal window. Support passives matter when they help a teammate act now; a slow BR sustain loop may not pay back inside one round.
Sniper and Ambush Combo Timing
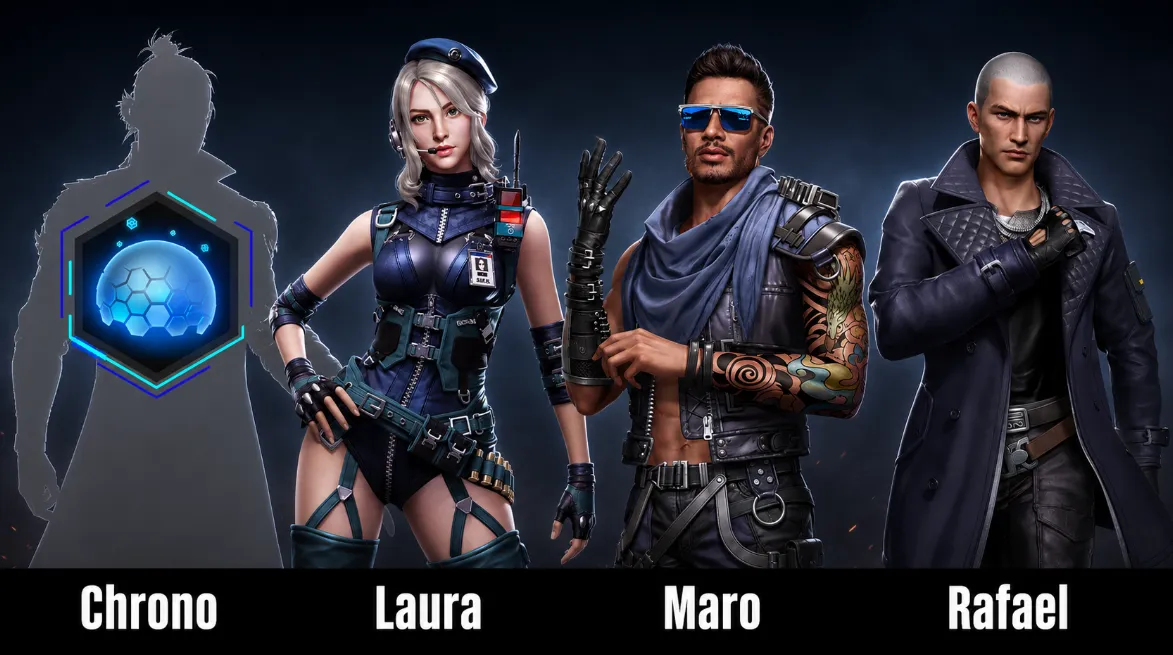
Start from the firing lane, not the character name. Laura and Maro help scoped long-range pressure; Rafael changes the information you reveal; Wukong gives a reposition or surprise window. If the map forces repeated close fights, replace the lowest-value range passive with movement or recovery.
Common Free Fire Skill Combo Mistakes
- Equipping more than one active skill idea when the loadout allows only one active anchor.
- Using the same combo in BR and CS without checking round length, economy and revive value.
- Copying an older Kenta plan after the OB55 rework.
- Stacking passives that all solve damage while leaving no sustain or information.
- Unlocking a character before testing whether the skill fixes a real loss pattern.
- Keeping Luna only for the old 8% fire-rate value after OB55 reduced it to 5%.
Free Fire Character Skill Combo FAQ
What is the best Free Fire skill combo in OB55?
There is no universal four-character answer. Kenta + Jota + D-Bee + Hayato is a strong CS entry framework; Alok + Jota + Moco + Kelly is a forgiving BR aggressive framework; Wukong + Rafael + Laura + Maro suits long-range ambush play.
Can I equip two active skills?
No. Build around one active skill and fill the other three slots with passives.
Should BR and Clash Squad use the same combo?
Usually not. BR values rotation, sustain and third-party recovery; CS values immediate round impact, cooldown timing and economy.
Is Kenta still a defensive shield character?
OB55 replaced the old plan with Tempest Raid, an advancing tempest that can teleport Kenta and grant temporary damage reduction.
What should a beginner unlock first?
Choose one active anchor that is easy to read in combat, then add affordable passives that fix movement, recovery and information. Avoid unlocking several characters with overlapping jobs.
Related Free Fire Skill Guides

Compare the live product page only if you need Diamonds for a planned unlock, event or cosmetic.
Final Combo Rule
Choose the active skill first, then make every passive solve a different part of the same fight. Recheck the official patch notes and the in-game description after major updates because the best combo can change when one cooldown, range or sustain value moves.




Copyright © FUTURE OUTLOOK TECHNOLOGY LIMITED.Company Registration No.: 77374965 All rights reserved.UNIT 135,1/F.,143 WAI YIP STREET,KWUN TONG HK