
AWM PUBG MOBILE Guide: Best Attachments, Recoil and Ranked Tips

AWM is the PUBG MOBILE sniper rifle that changes how a squad treats open space. It uses .300 Magnum, comes from airdrops, and punishes exposed helmets harder than normal world-spawn snipers. The value is not only damage. AWM forces enemies to respect sightlines, delay revives and rotate with more smokes. The risk is that many players die trying to get it before they ever fire a meaningful shot.
Take AWM when the crate is safe enough, your squad can protect the looter, and your position gives real long-range angles. Do not take it just because it is rare. Ranked points come from survival and conversion, so use the PUBG MOBILE Ranked Push Guide logic: a great weapon is only worth it if the route, cover and next circle still make sense.
How to Play AWM in PUBG MOBILE Ranked Matches
Build priority: Scope comfort and reload safety matter because every .300 Magnum round is limited.
Fight range: Use AWM to control revives, crossings and ridges, not to chase random shots.
Ranked habit: After a knock, call it and move; do not stare through the scope too long.
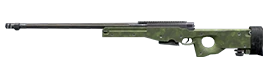
Best AWM Attachments in PUBG MOBILE
AWM does not need many parts to be scary, but the right parts make each limited round count. Since .300 Magnum is scarce, attachment decisions should improve first-shot confidence and follow-up speed rather than encourage random shots at every movement. For the full attachment system, keep the PUBG MOBILE Attachments Guide nearby.
| Attachment | Why it matters | Match tip |
|---|---|---|
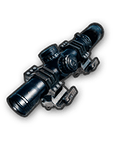 8x Scope 8x Scope | Best long-range sight when the map gives open angles. | Use it on ridges, Miramar lines and late rotations where enemies must cross. |
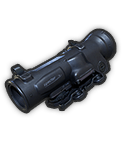 6x Scope 6x Scope | More flexible if enemies are closer or moving fast. | Lower zoom can make quick re-peeks easier than 8x in messy circles. |
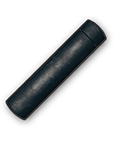 Suppressor (Snipers) Suppressor (Snipers) | Hides sound direction better than a loud sniper shot. | Strong when third parties are nearby, but do not sacrifice position just to stay quiet. |
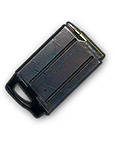 Extended Quickdraw Mag (Snipers) Extended Quickdraw Mag (Snipers) | Improves reload safety with a tiny magazine. | Useful after a knock, miss or body shot when the revive window is short. |
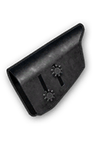 Cheek Pad (Snipers) Cheek Pad (Snipers) | Reduces shake for steadier follow-up shots. | Helpful when you must re-peek quickly after the enemy ducks or smokes. |
AWM Target Priority and Shot Discipline
AWM recoil is not the hard part. Shot discipline is. Every miss spends rare ammo and tells the lobby that an AWM is in play. Prioritize enemies who are reviving, crossing open ground, healing behind predictable cover, driving slowly, or holding a head-glitch that stops your squad from rotating.
After a knock, do not stare at the downed player while the rest of the squad repositions. Call the knock, watch the revive smoke, and let teammates pressure the body. AWM creates fear, but your squad has to turn that fear into space.
Take the shot
Helmet exposed, revive started, enemy crossing no-cover ground, or a driver slows near a known angle.
Hold the shot
Enemy is baiting, only legs are visible, the circle is closing behind you, or the squad has no follow-up angle.
Move after shot
If two teams can hear the AWM, assume one team is already looking for your ridge.
AWM Sensitivity and Gyroscope Settings
AWM does not use spray recoil settings. Its sensitivity should help clean scope movement, micro-adjustments and drag shots without making 8x feel nervous. Start low, then raise only when you cannot follow a slow crossing target.
| Setting | Starter range | How to use it |
|---|---|---|
| 4x camera / ADS | 18-28 | Useful if the final circle is too close for 8x but you still need sniper precision. |
| 6x camera / ADS | 10-16 | Flexible long-range setting for most AWM shots after the first scope-in. |
| 8x camera / ADS | 8-14 | Keep this calm. Small overcorrections miss helmets at long range. |
| Gyroscope: 6x | 60-110 | Use for tiny vertical and horizontal corrections while scoped. |
| Gyroscope: 8x | 40-80 | Best for controlled micro-movement, not fast flicking. |
10-minute AWM tuning loop
Micro-adjust test
Scope at a small target and move only one helmet width. If you overshoot, lower 8x camera or gyro.
Crossing target test
Track a running target without firing. Raise 6x/8x only if you cannot keep up smoothly.
Shot-reset habit
After every shot, unscope or shift cover. Sensitivity cannot fix tunnel vision.
AWM Range, Maps and Squad Role
AWM becomes much easier to use when you define its job before the fight starts. Use the range notes below to decide whether this gun should lead the push, support a rotation, or hand the fight to your second weapon.
| Range or map context | Best use |
|---|---|
| 80m+ | Best range. Use it to punish revives, ridges and forced crossings. |
| 40-80m | Still dangerous, but swap scopes if enemies are moving quickly or closing in. |
| Open map role | Strongest when your squad owns a ridge, vehicle stop or rotation gate with cover. |
AWM Ranked Playbook
Use the weapon around a role, not around a highlight clip. The table below keeps the ranked decision simple: when to use it, what to do, and what usually throws the fight away.
| Situation | Best play | Avoid |
|---|---|---|
| Airdrop approach | Scout first, smoke second, loot fast, leave with a vehicle or hard cover route. | Do not let the whole squad stand around the crate inventory. |
| Mid-game pick | Use AWM to break a strong head angle before rotating. | Do not waste ammo on enemies your squad cannot pressure after a knock. |
| Final circles | Hold forced crossings and revives. AWM can win by denying space without firing constantly. | Do not tunnel vision through the scope while a close enemy crawls into your blind side. |
Best AWM Loadouts
| Loadout | Why it works |
|---|---|
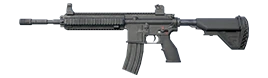
AWM+M416 | Best balanced pairing for most players. M416 covers close-mid fights while AWM controls long lanes. |
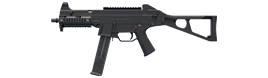
AWM+UMP45 | Strong for compounds and final circles, but mid-range pressure can be thin. |
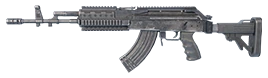
AWM+M762 | High damage loadout for confident players who can protect themselves after a missed sniper shot. |
Common AWM Mistakes
- Dying for an airdrop that the next circle already made irrelevant.
- Shooting every moving pixel and wasting .300 Magnum.
- Keeping an 8x on when enemies have already closed the gap.
- Forgetting that AWM needs teammates to convert knocks into pressure.
Related PUBG MOBILE Guides
- PUBG MOBILE Ranked Push Guide - decide when crate risk is worth the placement cost.
- PUBG MOBILE Maps and Landing Spots Guide - find positions where a sniper actually controls rotations.
- PUBG MOBILE Weapon Tier List - compare AWM with M24, Kar98K, AMR and DMR choices.
- PUBG MOBILE Vehicles and Rotation Guide - use vehicles and cover to approach or leave airdrops safely.
AWM PUBG MOBILE FAQ
Is AWM the best sniper in PUBG MOBILE?
AWM is the most threatening bolt-action sniper because of its damage and airdrop status. It is not always the best decision if the crate is unsafe or the circle gives no long sightlines.
What is the best AWM scope?
8x is best for long open angles. 6x is often more flexible when enemies are closer, moving fast or peeking from compounds.
Should I always pick up AWM from a drop?
No. Pick it up only if your current position, ammo count and squad cover make it useful. A risky crate can cost more ranked value than the weapon adds.
What should I pair with AWM?
Pair AWM with a stable AR such as M416, or a close-range gun like UMP45 if your squad already has mid-range pressure. Do not leave yourself helpless in close fights.
Bottom line: AWM is not a trophy. It is a pressure tool. Take it when the map lets you convert shots into space, and leave it when the crate is only bait.


Copyright © FUTURE OUTLOOK TECHNOLOGY LIMITED.Company Registration No.: 77374965 All rights reserved.UNIT 135,1/F.,143 WAI YIP STREET,KWUN TONG HK