Natalia MLBB Guide: Roam and Jungle Builds, Counters, and Tips


Natalia is best treated as a Jungle, Roam Assassin pick built around Chase, Finisher. Recent match stats show 52.35% / 0.29% / 1.59% for win, pick, and ban context, so read the hero as a draft-dependent tool, not an automatic answer in every lobby. The clean plan is to follow the skill priority, convert the combo only when the opener can land, and respect hard matchups such as Minsitthar, Kaja. Skin collection belongs after the gameplay decision: check active shop or event availability first, then top up only if Diamonds are actually needed.
Pick Natalia when your team needs a assassin hero who can turn a clean opener into a repeatable fight plan. Main skill priority: Upgrade Skill 1 at Level 1 and prioritize upgrading Skill 1 with Skill 2 as backup. Upgrade the Ultimate whenever it is available. The best use case is against Novaria, Irithel, while the biggest risk is drafting into Minsitthar, Kaja without vision, cooldown tracking, or ally follow-up.
Natalia at a Glance
Hero icon: ![]()
| Field | Detail |
|---|---|
| Role | Assassin |
| Specialty | Chase, Finisher |
| Recommended lane | Jungle, Roam |
| Damage type | Physical |
| Basic attack type | Melee |
| Difficulty | 90 |
| Release date | December 2016 |
| Price | 32,000 Battle Points or 599 Diamonds |
| Win / pick / ban snapshot | 52.35% / 0.29% / 1.59% |
| Identity hook | An assassin exiled by the Empire. |
How Natalia's Skills Work
Read Natalia's kit as a practical fight plan: one part starts the pressure, one part keeps the target inside range, and one part converts the damage or control window.
| Icon | Skill | CD / Cost | Tags | What it means in play |
|---|---|---|---|---|
 |
Assassin Instinct | Passive | Buff | Assassin Instinct is the passive layer that rewards Natalia for taking or using actions repeatedly, so track its stacks before committing. |
 |
Claw Dash | CD: 10 | Mobility, AOE | Claw Dash is the movement or engage button. Save it for entry, chase, or escape instead of spending it only for poke. |
 |
Smoke Bomb | CD: 12 | Buff, Slow | Smoke Bomb helps keep enemies inside Natalia's threat area, which makes follow-up control and damage easier. |
 |
The Hunt | CD: 3 | Buff | The Hunt is the movement or engage button. Save it for entry, chase, or escape instead of spending it only for poke. |
The practical pattern is simple: check which skill starts the fight, which skill protects the recovery window, and which skill should be saved for the target that matters.
Best Skill Priority
Upgrade Skill 1 at Level 1 and prioritize upgrading Skill 1 with Skill 2 as backup. Upgrade the Ultimate whenever it is available.
That priority matters because Natalia's early levels decide whether the hero can contest lane, protect an ally, or threaten a rotation. Treat the priority as a tempo clue, not only as a damage chart: the main skill creates the normal play pattern, while the backup skill fills the control, mobility, or damage gap between major fights.
Best Combos for Lane and Teamfights
| Combo type | Icon sequence | Skill sequence | How to use it |
|---|---|---|---|
| Teamfight Combos | Basic Attack -> Smoke Bomb -> Claw Dash -> The Hunt -> Basic Attack -> Claw Dash -> The Hunt | Use Basic Attack -> Smoke Bomb -> Claw Dash -> The Hunt -> Basic Attack -> Claw Dash -> The Hunt after the enemy commits to a fight, then reset if the first control window misses. | |
| Laning Combos | Basic Attack -> Smoke Bomb -> Claw Dash -> Claw Dash | Use Basic Attack -> Smoke Bomb -> Claw Dash -> Claw Dash when the target has already spent mobility or is forced to contest an objective entrance. |
The key is not to press the sequence mechanically. Start the combo only when the target cannot easily walk away, blink out, or punish the recovery window. If the first part misses, reset and use the next wave, bush, or objective entrance instead of spending every cooldown.
Teamfight Combos
| Timing cue | What to do |
|---|---|
| Start condition | Begin only when the target has used the movement or immunity tool that would break Natalia's setup. |
| Clean sequence | Basic Attack -> Smoke Bomb -> Claw Dash -> The Hunt -> Basic Attack -> Claw Dash -> The Hunt |
| Why it works | Use Basic Attack -> Smoke Bomb -> Claw Dash -> The Hunt -> Basic Attack -> Claw Dash -> The Hunt after the enemy commits to a fight, then reset if the first control window misses. |
| Conversion window | After Basic Attack connects, keep the target inside ally damage or objective pressure before committing The Hunt. |
| Reset rule | If the opener misses, back out, wait for cooldowns, and look for the next wave, bush, or objective entrance. |
Laning Combos
| Timing cue | What to do |
|---|---|
| Start condition | Begin only when the target has used the movement or immunity tool that would break Natalia's setup. |
| Clean sequence | Basic Attack -> Smoke Bomb -> Claw Dash -> Claw Dash |
| Why it works | Use Basic Attack -> Smoke Bomb -> Claw Dash -> Claw Dash when the target has already spent mobility or is forced to contest an objective entrance. |
| Conversion window | After Basic Attack connects, keep the target inside ally damage or objective pressure before committing Claw Dash. |
| Reset rule | If the opener misses, back out, wait for cooldowns, and look for the next wave, bush, or objective entrance. |
How to Play Natalia by Phase
| Phase | What to focus on | Common mistake |
|---|---|---|
| Early game | Protect the first wave path, check river movement, and use Natalia's control to stop easy invades. | Forcing a fight before allies can follow. |
| Mid game | Move first for Turtle, turret dives, and bush control; start fights only when damage dealers are in range. | Starting with crowd control while the carry is still clearing a wave. |
| Late game | Hold the key control skill until an enemy core steps too far forward. | Using the engage tool on a tank when the enemy back line is still safe. |
| Objectives | Zone entrances, punish face checks, and reset if the first engage misses. | Staying in the pit when the better job is cutting the enemy approach. |
Best Counters and Hard Matchups
Use these matchups as a draft check before locking Natalia. The icons separate favorable targets from picks that can punish the combo.
| Matchup type | Hero icons | Why it matters | Draft cue |
|---|---|---|---|
| Good targets | Natalia is comfortable here when the opener controls Novaria, Irithel before they can reset the fight. | Draft Natalia when these heroes need to walk through the same control or damage window. | |
| Hard matchups | Minsitthar, Kaja can punish the setup window, so wait for their mobility, immunity, or burst tool before committing. | Play slower, wait for the punish tool, and avoid blind engages without ally follow-up. |
How to Draft Around Those Matchups
Natalia can pressure Novaria, Irithel when the fight follows the kit's preferred pattern. Do not chase that advantage into fog, because the matchup is only useful if the opener still connects.
The dangerous matchups are Minsitthar, Kaja. Respect these picks in draft and avoid spending the full combo just to start a low-value skirmish.
Matchup Watchlist
| Watchlist hero | Score lift | Win rate | Pick rate | How to use this row |
|---|---|---|---|---|
| Ling | 7.99% | 50.76% | 0.31% | Review whether Natalia's opener still starts safely into Ling. |
| Wanwan | 5.55% | 48.54% | 0.13% | Review whether Natalia's opener still starts safely into Wanwan. |
| Masha | 5.40% | 57.05% | 0.11% | Review whether Natalia's opener still starts safely into Masha. |
| Hanzo | 5.07% | 50.27% | 0.33% | Review whether Natalia's opener still starts safely into Hanzo. |
| Baxia | 4.46% | 53.89% | 0.28% | Review whether Natalia's opener still starts safely into Baxia. |
Best Teammates and Team Comps
The best teammates for Natalia are heroes that convert the same timing window: someone starts or extends the fight, someone keeps the target controlled, and someone supplies damage before the enemy resets.
| Best teammates | Hero icons | Teamfight reason | Draft cue |
|---|---|---|---|
| Yi Sun-shin, Vexana | Yi Sun-shin, Vexana add follow-up damage, protection, or control during Natalia's main timing window. | Pair Natalia with allies who can layer damage, control, or protection during the main timing window. |
If your lineup lacks follow-up, use Natalia more as a zone-control pick than as a forced engage pick.
Teammate Watchlist
| Watchlist hero | Score lift | Win rate | Pick rate | How to use this row |
|---|---|---|---|---|
| Lolita | 6.22% | 56.36% | 0.09% | Check whether Lolita adds follow-up, damage, or protection for Natalia's timing window. |
| Edith | 4.88% | 51.67% | 0.23% | Check whether Edith adds follow-up, damage, or protection for Natalia's timing window. |
| Baxia | 4.61% | 53.89% | 0.28% | Check whether Baxia adds follow-up, damage, or protection for Natalia's timing window. |
| Khufra | 4.56% | 53.94% | 0.21% | Check whether Khufra adds follow-up, damage, or protection for Natalia's timing window. |
| Faramis | 4.12% | 51.40% | 0.07% | Check whether Faramis adds follow-up, damage, or protection for Natalia's timing window. |
Build, Emblems, and Battle Spell Notes
Build for durability, movement, and dependable setup. Because the kit leans on AOE, Buff, Mobility, Slow, roam utility and defensive timing are safer than forcing damage items before your team can follow.
Use the embedded Hero Spotlight below when you want to check timing visually after reading the combo and matchup sections. Watch the skill and combo moments first, then use the build and matchup notes to confirm how the written plan fits real movement.
| Time | Chapter | Why it matters |
|---|---|---|
| 0:05 | HERO SKILLS | Use this section to check range, delay, and hit-confirm details. |
| 1:23 | COMBO TIPS | Use this section to compare the written sequence with real timing. |
| 2:15 | SKILL TIPS | Use this section to check range, delay, and hit-confirm details. |
| 2:55 | BUILDS | Use this section to verify setup choices after you understand the kit. |
| 3:10 | BATTLE SPELLS | Use this section to verify setup choices after you understand the kit. |
| 3:35 | RELATIONS | Use this section to review counters and teammate fit. |
| 3:59 | BEST WITH | Use this section to review counters and teammate fit. |
| 4:08 | TACTICS | Use this section as a quick visual check before playing. |
Current Play Notes
Natalia guides can age quickly when skill timing, item value, or matchup pressure changes. Use the combo, counter, and teammate sections above as the current play plan, then test the timing in game before copying an older build habit.
Skins and Availability Notes
Use these skins as collection checks, not as proof that every skin is currently sold in the shop. Starlight and event skins can rotate, so confirm the active in-game shop or event page before topping up.
| Skin preview | Skin | Availability note |
|---|---|---|
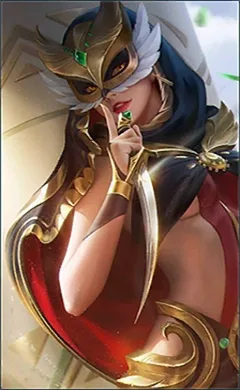 |
Phantom Dancer | Starlight Member, 2017-04 |
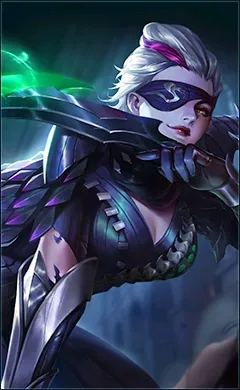 |
Deadly Mamba | Limited-time event |
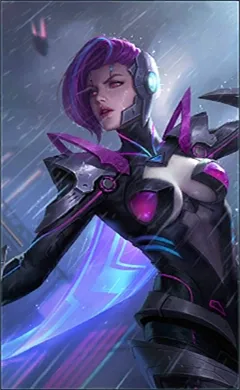 |
Grim Strangler | Limited-time event |
Not every listed skin is a direct Diamond purchase. If the note says Starlight, event, collaboration, or check in game, treat it as an availability warning first and a top-up decision second.
Check the current in-game shop or event page first. If you need Diamonds after confirming availability, use ManaBuy's MLBB top-up page.
Lore and Personality
An assassin exiled by the Empire.
Related ManaBuy Links
- Mobile Legends: Bang Bang blog hub
- Roam, Jungle hero ranking guide
- Mobile Legends: Bang Bang top-up page
FAQ
Is Natalia good for beginners?
Natalia is beginner-friendly only if the player understands the main job first: Chase, Finisher. The difficulty value is 90, but real difficulty depends on whether the player can use the combo at the correct time.
What lane should Natalia play?
Use Jungle, Roam as the default lane unless your draft needs a special flex pick. The important part is matching the lane job to Natalia's engage, damage, or control timing.
What is the best Natalia combo?
For teamfights, use Basic Attack -> Smoke Bomb -> Claw Dash -> The Hunt -> Basic Attack -> Claw Dash -> The Hunt. Stop the sequence if the opener misses or the target escapes before the follow-up can connect.
Who counters Natalia?
The hardest listed matchups are Minsitthar, Kaja. Play slower into those picks, wait for cooldowns, and avoid starting fights without allied follow-up.
Which teammates work well with Natalia?
Yi Sun-shin, Vexana work well because they add damage, control, or protection during Natalia's main timing window.
Which Natalia skins are worth checking?
Start with the skin table above, then confirm the active in-game shop or event page. Treat Starlight, event, and collaboration notes as availability warnings rather than guaranteed current-shop offers.


Copyright © FUTURE OUTLOOK TECHNOLOGY LIMITED. All rights reserved.UNIT 135,1/F.,143 WAI YIP STREET,KWUN TONG HK