
How to Play The Hood in Marvel Rivals: Combos, Teams & Counters

The Hood is a close-range brawl Vanguard who converts damage, well-timed blocks, and Void Walk into Demonic Energy. At full energy he enters Half-Demon State, gaining sustained fire and lifesteal. His job is to hold a dangerous short angle, reduce incoming pressure with Abyssal Veil, and create a transformation window his team can actually use.
Season 10 reduced his health to 550, increased Mantle of Oblivion’s cooldown to 12 seconds, lowered Veil mitigation, and trimmed Half-Demon damage. That makes resource and escape discipline more important than raw aggression.
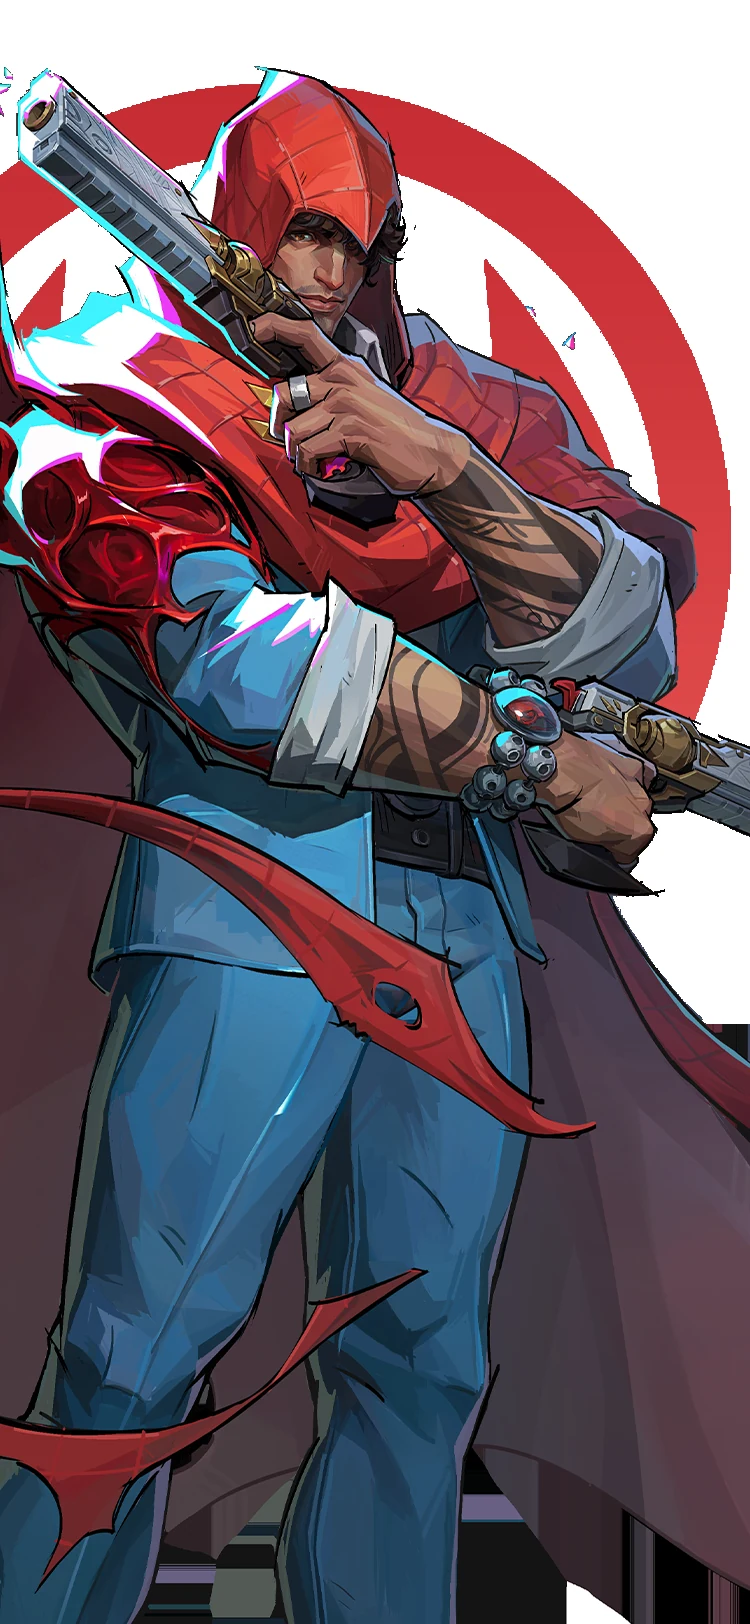
Image source: Marvel Rivals Official — The Hood artwork, Vanguard role, and ability values.
The Hood’s current Season 10 kit
| Ability | Key numbers | Real job |
|---|---|---|
| Accursed Pistols | 26 damage per round; falloff starts at 8m | Build energy while holding a short angle, not from distant poke. |
| Leaded Transformation | Infinite ammo, 10% lifesteal, up to 100 Bonus Health conversion | Pressure a committed target while sustaining through return fire. |
| Mantle of Oblivion | 12s cooldown; 1s barrier; larger above 50 energy | Block a predictable burst and turn blocked damage into energy. |
| Abyssal Veil | 10s cooldown; 6s duration; 20% enemy damage/healing reduction | Shape the brawl and accelerate energy when your shots pass through it. |
| Void Walk | 15s cooldown; 1.2s max; grants 20 energy | Escape, cross a lethal gap, or finish energy for a decisive transform. |
| Demon of the End | Six piercing shots; final shot hits hardest; grants nearby Bonus Health | Break a committed team fight, not start one from maximum range. |
Read Demonic Energy as a three-state decision
| Energy state | Weapon change | Correct priority | Common throw |
|---|---|---|---|
| Below 50% | Standard 26-damage rounds at 0.2-second intervals | Shoot through Veil, catch a real burst with Mantle, and keep cover close. | Walking into open space only to farm low-value pistol hits. |
| 50–99% | Faster 0.15-second fire with 21 damage per round; Mantle radius also expands | Hold the short angle and prepare a target, ally follow-up, and exit for transformation. | Confusing the faster rhythm with permission to abandon cover. |
| 100% | Half-Demon State triggers automatically | Pressure the already-committed target and use lifesteal while the team can follow. | Reaching full energy after the enemy has already disengaged. |
The numbers explain why eight meters matters. Standard pistol output is about 130 raw damage per second before reloads, while the faster above-50% rhythm is about 140; the larger gain is not a magical long-range spike. It is the combination of faster energy conversion, a larger defensive sphere, Veil interaction, and a prepared Half-Demon window.
The repeatable Hood rotation
- Approach through cover. Pistol falloff begins at eight meters, so distant damage is mostly energy-starved noise.
- Place Abyssal Veil where both teams interact. Shoot through it to accelerate energy and force the enemy to accept reduced damage/healing or change position.
- Use Mantle on a readable burst. A one-second barrier rewards timing. Blocking random chip wastes the long cooldown.
- Transform with a target already under pressure. Half-Demon State is strongest when the enemy cannot simply disengage.
- Leave before the sustain disappears. Keep Void Walk available when the enemy still has crowd control or burst.
How to use Demon of the End
The ultimate gives The Hood 1,000 Demon-State health and up to six piercing shots. The first five deal flat damage plus 10% of target maximum health; the final shot rises to 15%. Each firing can provide Bonus Health to The Hood and nearby allies, capped at 200.
Cast after the enemy commits to a lane or objective. Line shots through multiple bodies and barriers, keep allies within the eight-meter support radius, and protect the final shot from a forced disengage. Using the ultimate only to chase one mobile Duelist wastes both its piercing path and team sustain.
Best team-up choice
Scarlet Witch: Chaos Collision
This option creates an arcane zone, stacks damage and healing reduction, and lets The Hood reactivate to teleport into it. With Scarlet Witch, the teleport adds a shockwave that pulls nearby enemies toward him. Choose it when your team wants a deliberate engage or combo zone.
Moon Knight: New Moon’s Shadow
The Lunar Barrier version strengthens Veil into a projectile-blocking barrier. With Moon Knight, it reaches 300 health and allows shots passing through it to bounce up to three times within a six-meter detection range, losing damage on each bounce. Choose it into grouped enemies and projectile lanes.
Teams and partners
| Partner type | Examples | Why it works |
|---|---|---|
| Close-range follow-up | Magik, Iron Fist, Blade | They exploit enemies forced to respect Veil and The Hood’s brawl space. |
| Stable healing | Mantis, Rocket Raccoon, Ultron | They keep him active after his one-second barrier is spent. |
| Team-up enabler | Scarlet Witch or Moon Knight | They add engage control or projectile/bounce value. |
| Second frontline | Peni Parker, Magneto, The Thing | A second Vanguard prevents The Hood from absorbing every cooldown alone. |
Counters and difficult matchups
Current third-party tracked matchup data flags Wolverine, Cloak & Dagger, and Iron Fist as difficult opponents. Treat that as a scouting signal, not a universal rule. Wolverine threatens maximum-health damage and displacement, Iron Fist contests the same close range, and Cloak & Dagger can disrupt a straightforward brawl with healing and utility.
Against hard pressure, hold Void Walk until the enemy commits mobility. Against long-range teams, move cover-to-cover rather than feeding them low-value pistol damage. If the enemy can walk away from every Veil, change the angle instead of repeating the same placement.
Five mistakes to stop
- Poking from beyond eight meters and mistaking hit markers for useful pressure.
- Spending Void Walk for 20 energy with no escape plan.
- Dropping Veil behind the actual fight, where neither team must interact with it.
- Holding Mantle until health is already gone instead of blocking the predictable burst.
- Ulting before allies are close enough to benefit from Bonus Health.

Master the post-nerf loop first, confirm the live bundle price in game, then compare only the Lattice package that fits the purchase.
The Hood’s fight loop as four decisions
Stand where enemies must enter pistol range to contest, while your retreat remains one movement away.
Use Abyssal Veil or Mantle on predictable pressure; random defensive timing leaves the real enemy cooldown unanswered.
Full energy is not a command to rush. Enter Half-Demon State when an enemy is committed and allies can follow.
Void Walk is valuable because it turns a winning trade into survival. Spend it early only when the engage is decisive.
Adjust by map geometry
| Map space | Positioning rule | Failure to avoid |
|---|---|---|
| Narrow choke | Offset from the center so Veil covers the dangerous lane without trapping your team. | Standing in the doorway and absorbing every angle. |
| Open objective | Rotate through cover and attack a short side lane. | Poking from long range where pistol falloff erases pressure. |
| Vertical flank | Track the attacker, but keep the main team inside rescue distance. | Chasing one Duelist and abandoning the objective. |
| Final overtime touch | Sequence defense, transformation, and ultimate for survival time. | Using all mitigation before the enemy commits. |
Cooldown accounting separates pressure from feeding
Before entering, name the enemy ability that can cancel the transformation window or displace you out of Veil. After it is spent, advance with one defensive answer still available. If the enemy retains both crowd control and burst, hold the corner rather than trading health for low-value pistol hits.
After each fight, review the order of three resources: Veil, Mantle, and Void Walk. Losing with all three available means you reacted too late; losing immediately after spending all three means the engage lacked a second phase. The goal is not maximum button usage—it is preserving one response for the point where the opponent commits.
Related Marvel Rivals guides
The Hood FAQ
Is The Hood a tank or damage hero?
He is officially a Vanguard. His pistol damage and transformation support a close brawl, but his responsibility is still space, mitigation, and team survival.
What range should The Hood play?
His pistol damage falloff begins at eight meters, so he is most efficient around short brawl angles with nearby cover.
Should Void Walk start every fight?
No. Its mobility is often your escape. Use it aggressively only when the 20 energy or reposition creates a clearly winning transformation window.
Bottom line
The Hood wins by controlling one short piece of space at the right time. Veil sets the lane, Mantle catches the burst, energy creates the transformation, and Void Walk preserves the exit. If any one of those tools is spent without the next step, his Season 10 durability disappears quickly.




Copyright © FUTURE OUTLOOK TECHNOLOGY LIMITED.Company Registration No.: 77374965 All rights reserved.UNIT 135,1/F.,143 WAI YIP STREET,KWUN TONG HK