
Balmond MLBB Guide

Balmond is a Fighter who wins by staying close long enough for Cyclone Sweep, item burn damage, and takedown healing to matter. He is best when fights happen around minion waves, jungle camps, Turtle, Lord, or narrow entrances where enemies cannot easily walk out of his spin. The practical plan is simple: use Soul Lock for contact or escape, keep Cyclone Sweep connected, and hold Lethal Counter until the target or objective is already low.
Quick Answer: How Should You Play Balmond?
Play Balmond as a sustained-contact bruiser or jungle objective fighter, not as a one-shot assassin. Cyclone Sweep is the center of the kit, Soul Lock creates the angle, and Lethal Counter is the finisher. Cursed Helmet, War Axe, Queen's Wings, Guardian Helmet, Oracle, Blade Armor, and Immortality all show up in the captured Pro Setups because Balmond needs enough time alive to finish the spin.
- In lane: trade near the wave, then use Bloodthirst healing from minion kills to reset before the next exchange.
- In jungle: use fast clears and Lethal Counter timing to pressure Turtle and Lord, but do not spend the execute before the objective is low.
- In teamfights: enter after the first control tools are used, then stay attached with Cyclone Sweep.
- At draft: avoid forcing Balmond into heavy suppression, repeated airborne control, or long-range kiting without your own engage support.
your team wants simple front-to-back pressure, fast wave or camp control, and an execute threat around low-HP heroes or objectives.
the enemy can repeatedly stop Cyclone Sweep, pull him away from targets, or kite outside Soul Lock range before your team can follow.

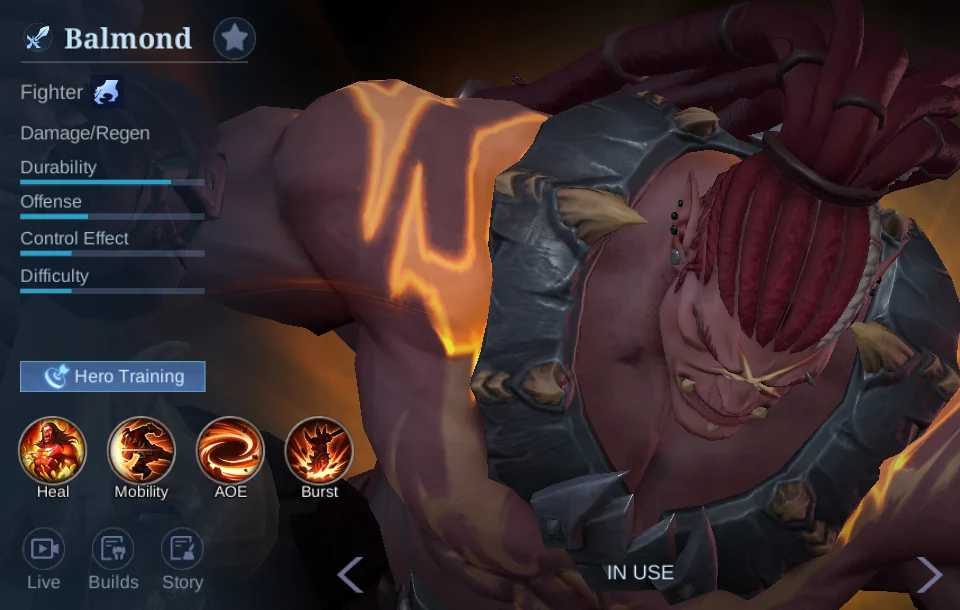
Balmond Skills Explained
Balmond's kit is built around contact time. Bloodthirst rewards cleanup, Soul Lock decides whether he reaches or leaves a fight, Cyclone Sweep turns close range into repeated damage and Physical Defense reduction, and Lethal Counter converts low HP into a kill or objective secure.
 Bloodthirst
Passive. Balmond recovers 5% Max HP after killing a minion or creep, and 10% Max HP on a kill or assist.
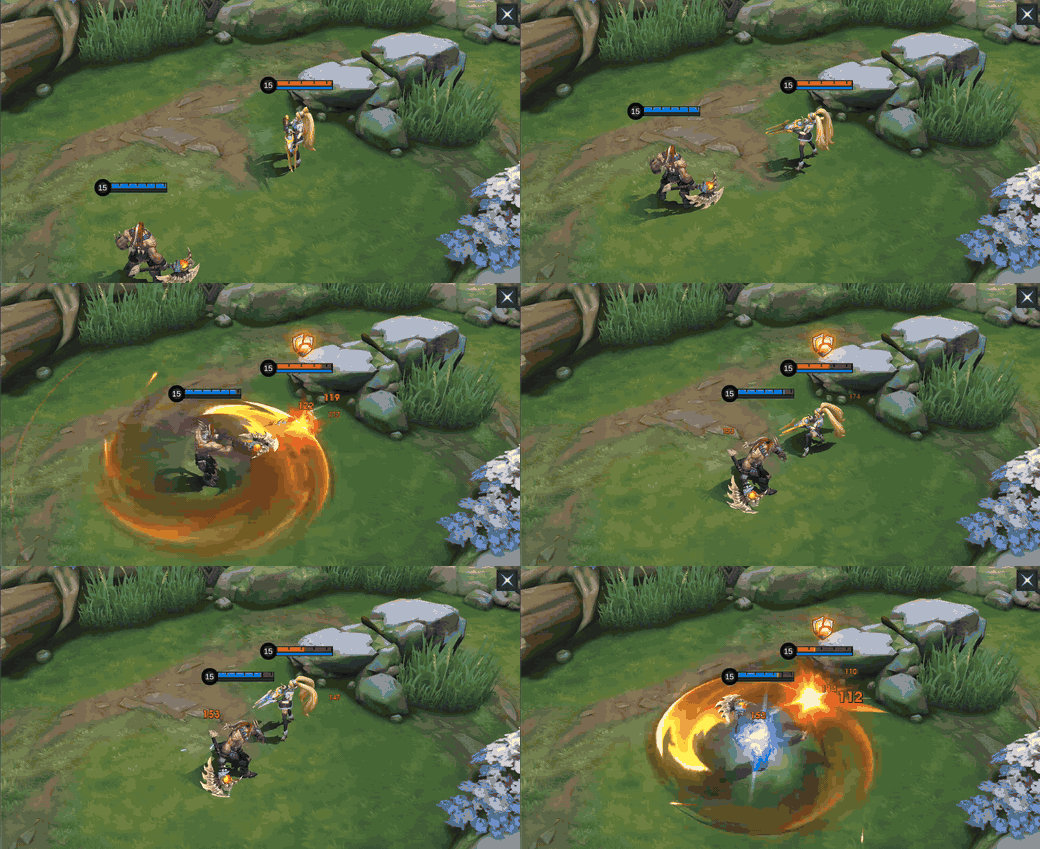
Note: Max HP: The maximum amount of HP that the hero can currently have.
 Soul Lock
CD: 8.0. Balmond charges in the target direction for a set distance or until he hits an enemy hero, dealing 150 (+60% Total Physical Attack) Physical Damage to enemies along the way. The enemy hero hit will be knocked back slightly, and have their Movement Speed reduced by 40% for 3s.
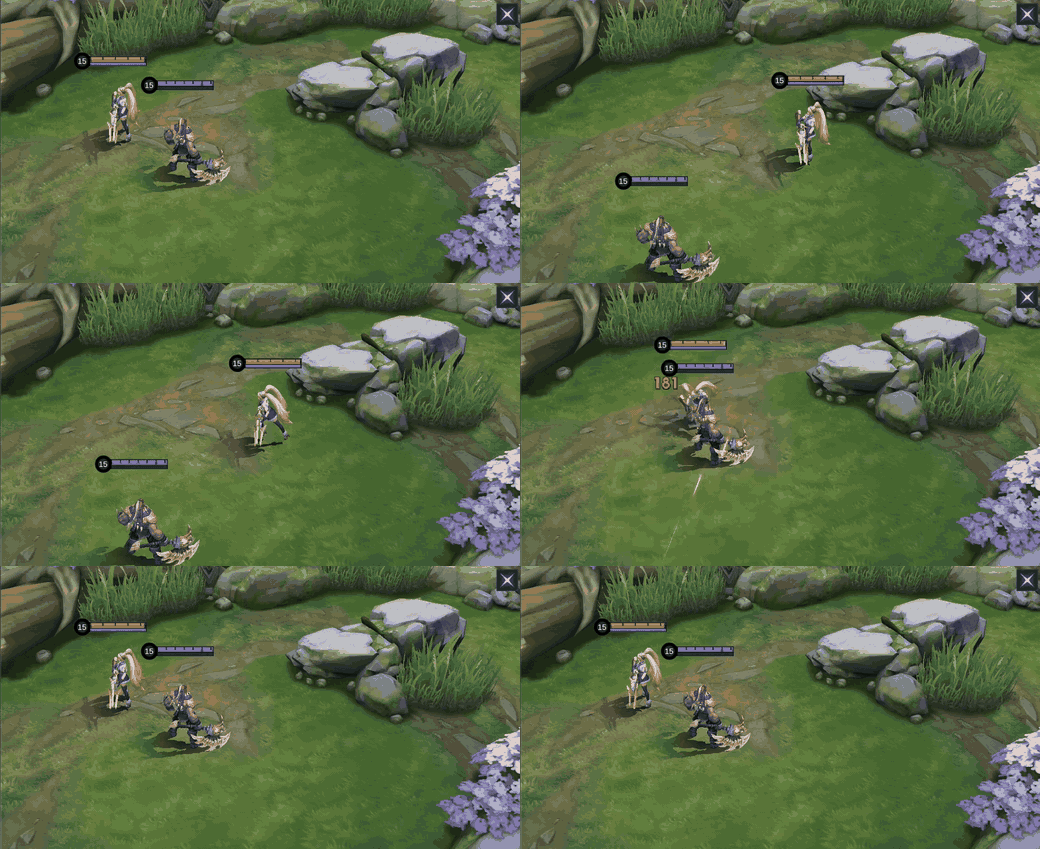
Note: Blink: Movement ability that can pass through obstacles.; Physical Damage Skill: Deals Physical Damage to enemies. Triggers Spell Vamp.; Movement Speed: Movement Speed in battlefield. Calculated Movement Speed = Basic Movement Speed * (100% + All Speedup Effect% - All Slowdown Effect%). Usually calculated and actual Movement Speed are equal. But when Movement Speed is below 160 or over 420, both Slowdown and Speedup Effect will decay.
 Cyclone Sweep
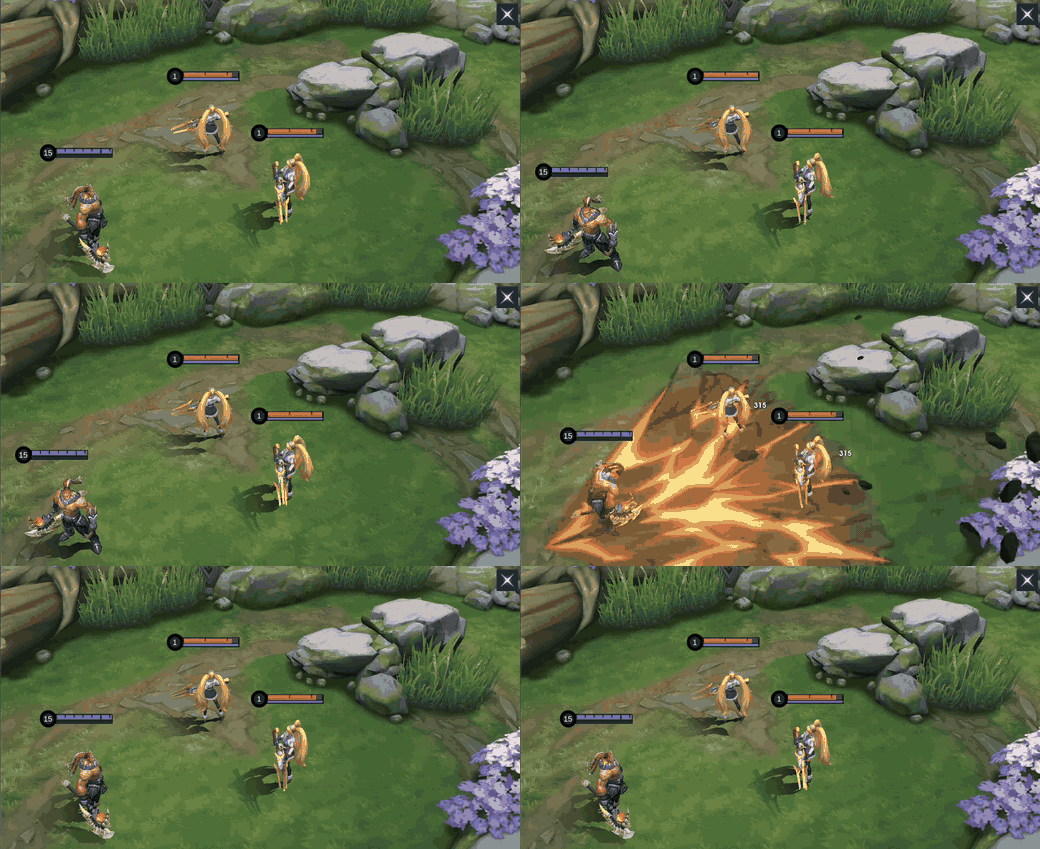
CD: 6.0. Balmond gains 15% Movement Speed and spins with his axe for 3s, dealing 30 (+1.3% Total HP) (+25% Total Physical Attack) Physical Damage per hit to nearby enemies up to 14 times.
Each hit reduces the target's Physical Defense by 5% (up to 40%).
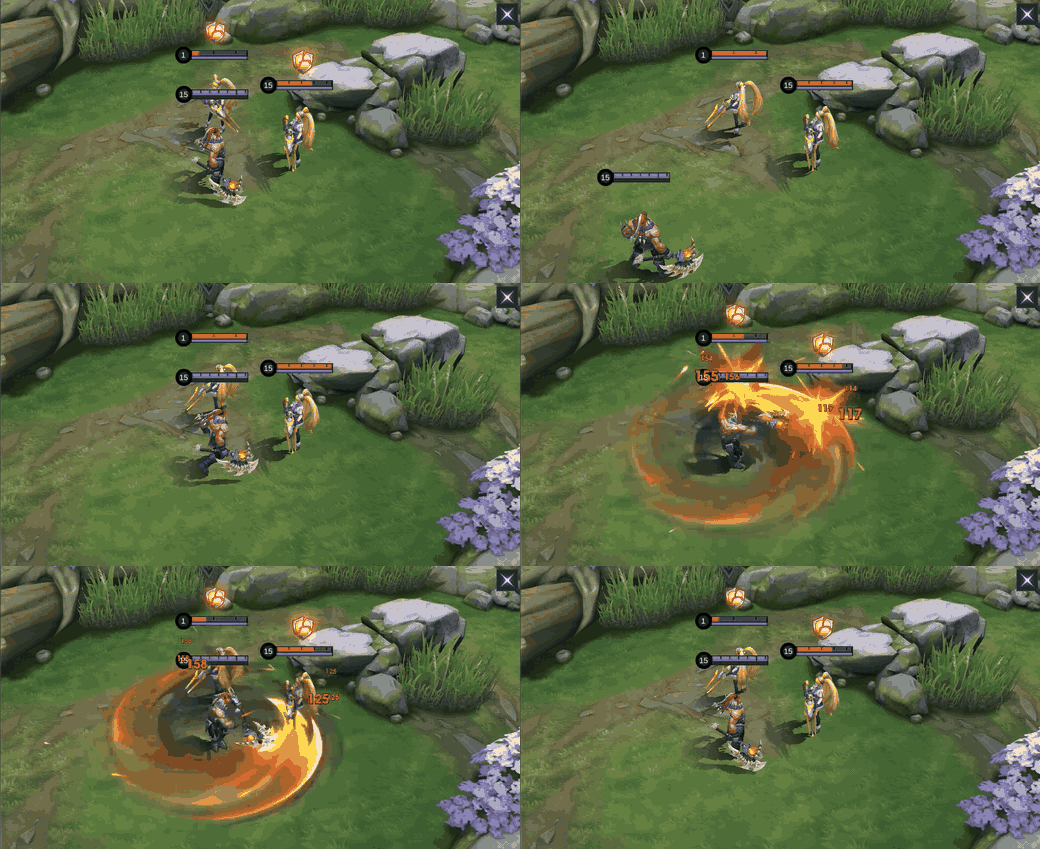
Note: Physical Damage Skill: Deals Physical Damage to enemies. Triggers Spell Vamp.
 Lethal Counter
CD: 34.0. Balmond unleashes a huge strike in the target direction (this skill can only be interrupted by Suppression), dealing True Damage equal to 150 (+70% Total Physical Attack) plus 30% of the target's lost HP.
This skill only deals up to 1000 damage to non-hero units.
Note: True Damage Skill: Deals True Damage to enemies. Triggers Spell Vamp.; Lost HP: Lost HP = Max HP - Current HP; True Damage: If there is no way to reduce damage taken, you can try increasing Max HP.
Skill Priority
Level 1: unlock Cyclone Sweep first. It is Balmond's fastest clear tool and the skill the current priority data recommends opening with.
Upgrade order: prioritize Cyclone Sweep, level Soul Lock second, and upgrade Lethal Counter whenever it becomes available.
Balmond Skill Combos and Why They Work
Teamfight Combo: Soul Lock -> Cyclone Sweep -> Lethal Counter
Why it works: Soul Lock starts the contact, Cyclone Sweep keeps repeated damage on the target, and Lethal Counter comes last because its value rises after HP has already dropped.
Execution note: in a 5v5 fight, wait until your team has started the engage or the enemy's main control is spent. Do not dash in alone just to copy the icon order.
Laning Combo: Soul Lock -> Cyclone Sweep -> Basic Attack -> Lethal Counter

Why it works: the extra Basic Attack fits lane trades where the target survives the spin but is still close enough to punish. Use it only when it does not cost the Lethal Counter timing.
Execution note: if the enemy is about to escape, skip the extra attack and use Lethal Counter while the low-HP window is still available.
How to Play Balmond by Game Phase
Early Game: Trade Around Waves
Use the wave as your recovery tool. If Balmond takes chip damage, finishing minions or nearby creeps activates Bloodthirst and keeps him ready for the next exchange. Soul Lock should either guarantee Cyclone Sweep contact or protect him from a bad rotation; using it for small damage alone removes his escape.
Mid Game: Fight Where Enemies Have Less Room
Balmond is strongest near Turtle, Lord, river entrances, jungle corners, and tower dives. These spaces reduce enemy kiting and make Cyclone Sweep harder to avoid. Enter after your team has started the fight or after the enemy's first interrupt is gone.
Late Game: Become the Second Entry
Late-game Balmond is durable, but a direct first entry into every control spell can still fail. Look for clumped enemies, punish the nearest target, and save Lethal Counter for the target or objective that is already low. One patient execute is worth more than a rushed ultimate at full HP.
Five Mistakes That Cost Balmond Fights
- Opening with Lethal Counter: the skill is strongest after HP is already missing.
- Spinning after contact is lost: stop chasing in open space and reset the angle.
- Burning Soul Lock for poke: keep it for real contact, chase, or escape.
- Copying one Pro Setup blindly: change armor and recovery items for the enemy damage pattern.
- Entering before control is used: suppression, airborne effects, and displacement can ruin the whole spin window.
Emblem and Battle Spell Notes
Balmond's captured in-game material did not include a dedicated emblem screen, so this guide treats emblem and spell choices as role notes that should be rechecked in the current Battle Setup screen before relying on a fixed setup. Choose the setup that supports your role: jungle Balmond needs Retribution-compatible play, while EXP lane Balmond can choose a mobility or finishing spell only based on the current in-game presets.
Use the Behemoth Hunter boot setups as evidence that jungle builds exist in the captured Pro Setups. Pair the role with objective patience and Lethal Counter timing.
Prioritize lane recovery, second entry, and defensive item changes. Recheck the live Battle Setup screen before relying on a fixed preset in match preparation.
Best Balmond Build: What to Buy and When
The captured Pro Setup snapshot does not point to a glass-cannon Balmond. All five ranked setups invest heavily in HP, defense, recovery, or late-fight survival, while Cursed Helmet and War Axe appear as the repeated pressure core. Use the snapshot as evidence, then adapt the last defensive slots to the enemy damage pattern.

Win Rate 54% | Matches 592 | Power 7942
Default bruiser sustain build
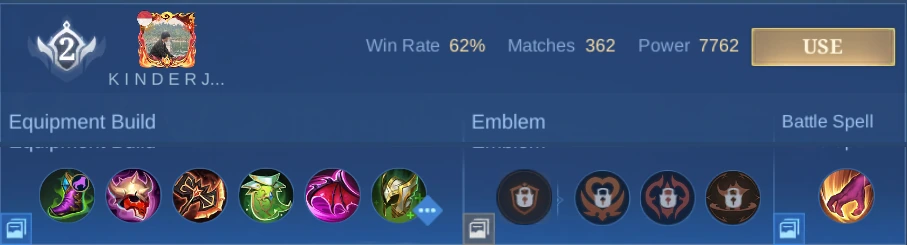
Win Rate 62% | Matches 362 | Power 7762
Jungle objective build
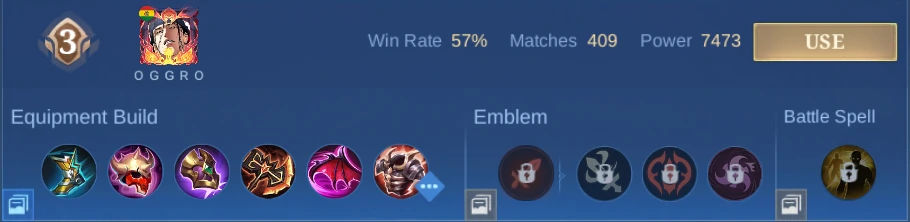
Win Rate 57% | Matches 409 | Power 7473
Rotation and anti-slow build
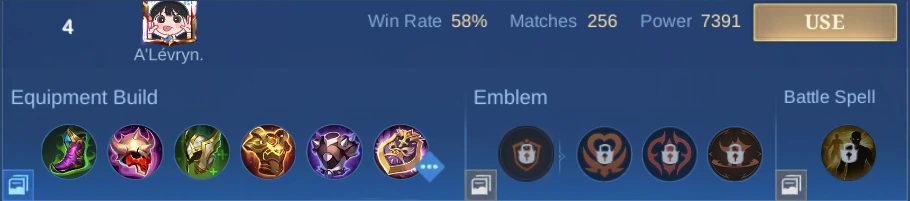
Win Rate 58% | Matches 256 | Power 7391
Heavy defensive EXP/frontline build
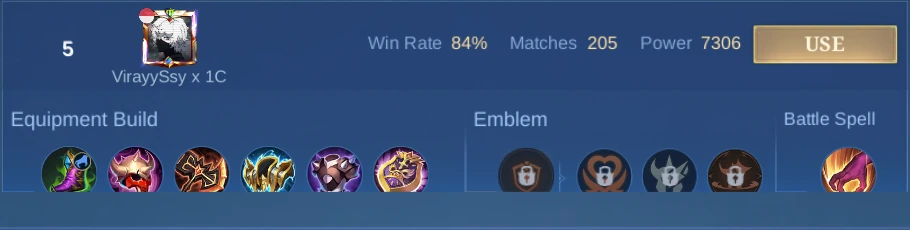
Win Rate 84% | Matches 205 | Power 7306
Jungle objective build













Source: current in-game Balmond Pro Setups captured July 24, 2026. Player display names, rankings, win rates, matches, power, and item order are time-sensitive observations from that capture.
Equipment Choice Matrix
Source: item tooltip screenshots from the captured top five Pro Setups, in-game, July 24, 2026. The table keeps tooltip stats, attributes, and passive effects separate from the gameplay recommendation.
Best Teammates, Threats, and Favorable Matchups
Balmond's matchup question is not only who wins a duel. The key is whether a hero helps him keep contact, gives him enough survivability to finish Cyclone Sweep, or breaks the contact before Lethal Counter becomes lethal.
 Angela - Official compatibility
Mechanism: Shield and follow-up support
Do: Use Angela when Balmond must keep contact through a second spin or objective fight. Her support window helps him delay Lethal Counter until HP is actually low.
Do not: Do not chase beyond your team just because Angela can attach; ranged kiting and suppression still punish overextension.
 Rafaela - Official compatibility
Mechanism: Mobility and survivability support
Do: Use Rafaela when Balmond needs speed and healing to stay attached after Soul Lock. This pairing is better when fights happen around lanes, river entrances, or grouped objectives.
Do not: Do not treat the speed-up as a guaranteed engage into several control skills. Wait for a real angle.
 Layla - Favorable target
Mechanism: Squishy hero with limited escape
Do: Balmond can punish Layla when Soul Lock reaches her before she has enough space. Keep Cyclone Sweep connected, then finish after her HP drops.
Do not: Do not run straight through her team or chase across open ground where her range advantage returns.
 Eudora - Favorable target
Mechanism: Squishy burst mage after cooldowns
Do: If Eudora spends control or burst first, Balmond can close the gap and force a short kill window. Use terrain and second entry instead of walking into her full combo.
Do not: Do not engage first while her stun and burst are ready.
 Lesley - Official counter threat
Mechanism: Ranged damage outside Balmond reach
Do: Use brush, flanks, and teammate crowd control to shorten the distance. Balmond needs contact before Lesley can keep firing from outside his range.
Do not: Do not build only HP and walk at her in a straight line; she punishes predictable approaches.
 Irithel - Official counter threat
Mechanism: Mobile ranged pressure
Do: Force Irithel toward walls, narrow lanes, or objective zones before committing. Short contact windows are safer than long chases.
Do not: Do not spend Soul Lock early if she can reposition and keep attacking while moving.
 Cici - Most-countered-by signal
Mechanism: Kiting and sustained poke
Do: Use fog, side angles, and teammate control to make the first contact real. If she keeps distance, reset instead of spinning through open space.
Do not: Do not chase Cici across open ground where Cyclone Sweep cannot stay connected.
 Fredrinn - Low compatibility warning
Mechanism: Competes for front-line timing
Do: Draft this pairing only when the team has enough damage and clear engage roles. Balmond and Fredrinn can both want the same front-line space.
Do not: Do not pick both as a low-damage front line if your team lacks backline damage or reliable finish.
 Lukas - Best-counter signal
Mechanism: Official relationship list flag
Do: Treat Lukas as a matchup to recheck in draft notes: the official relationship data flags him as a strong Balmond-side counter signal, so review the current hero kit and team context before relying on the lane.
Do not: Do not turn this single relationship label into a universal lane promise; matchups still depend on build, role, and patch context.
Source: Balmond matchup and compatibility data from the current MLBB hero material, cross-checked with captured Balmond skill mechanics. Hero icons are from MLBB hero assets.
Balmond at a Glance
Balmond can front fights better than many damage dealers, but he still needs item timing and support.
His damage depends on contact time and missing-HP execution rather than instant burst.
Soul Lock slows and slightly knocks back, but Balmond is not the team's main controller.
The inputs are simple; the real skill is choosing when to enter and when to hold Lethal Counter.
Source: in-game Balmond hero page. Low, Moderate, and High are player-facing ratings. The smaller percentages are measured from each colored fill against the captured UI track; MLBB does not provide native numerical ratings for these bars.
Base Stats Without Skin, Equipment, or Emblem Bonuses
Source: in-game Story and Attributes panel, captured with no visible skin, equipment, or emblem bonus context.
All Balmond Skins, Prices, and Availability
Skin prices, discounts, and event labels rotate. Treat the values below as a July 24, 2026 shop observation and check the current shop before spending Diamonds or planning around a limited skin.
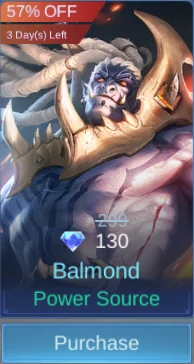

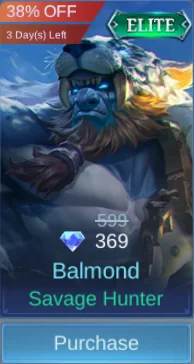
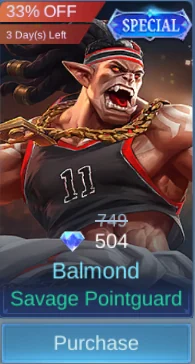
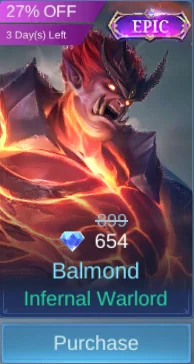



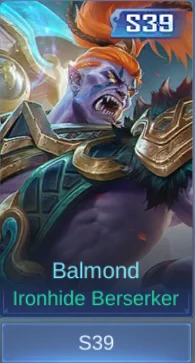
Source: individual in-game Balmond skin cards from Shop search. Prices, discounts, timers, and acquisition methods are capture-time observations and may rotate.
Balmond's Story
Balmond's current story, The Shattering, presents him as an Orc survivor driven by freedom and revenge. He survives Alice's trap, awakens an ancient Orc bloodline, forges strength from the Basalt Wyrm, and keeps a public connection to the Abyss while secretly working to reunite the Orc tribes.
Source: in-game Balmond Story pages, in-game, captured July 24, 2026. Story text is summarized here.
Related MLBB Guides
If you are still deciding where Balmond fits in your ranked hero pool, start with the MLBB Hero and Meta Guide. For role fundamentals, map movement, and early account progression, use the MLBB Beginner Guide.
Balmond FAQ
Is Balmond beginner-friendly?
Yes. His captured Difficulty bar measured about 28% of the displayed track. The controls are simple, but good Balmond play still depends on entry timing and objective patience.
Which Balmond skill should I max first?
Max Cyclone Sweep first. It is his main clear tool, sustained fight damage, and repeated-hit source for Physical Defense reduction.
When should I use Lethal Counter?
Use it after the target or objective is already low. The captured skill text shows True Damage based on lost HP, so early casting wastes its strongest condition.
What stops Balmond's Cyclone Sweep?
Suppression, airborne control, displacement, slows, and clean disengage all reduce the value of Cyclone Sweep. Wait for those tools or enter from a flank.
Can Balmond jungle?
Yes, the captured Pro Setups include Behemoth Hunter boot lines. Jungle Balmond should value clear speed and objective timing, especially when holding Lethal Counter for low-HP Turtle or Lord windows.
Are Balmond skin discounts permanent?
No. The visible discounts and countdown labels are shop observations from July 24, 2026. Recheck the current shop before buying or waiting for a specific skin.
Final Verdict
Balmond is strongest when he turns simple inputs into disciplined timing. Let Bloodthirst reset trades, use Soul Lock for real contact instead of poke, keep Cyclone Sweep attached only when the target cannot easily leave, and save Lethal Counter for the low-HP moment. If your team can hold enemies in place, Balmond becomes a reliable bruiser and objective finisher; if the enemy keeps breaking contact, shorten the fight and wait for a cleaner entry.








Copyright © FUTURE OUTLOOK TECHNOLOGY LIMITED.Company Registration No.: 77374965 All rights reserved.UNIT 135,1/F.,143 WAI YIP STREET,KWUN TONG HK