
Genshin Impact Sigewinne Build Guide: Best Artifacts, Weapons, Teams, Talent Priority

Sigewinne is a Hydro healer whose value sits in comfort, team sustain, and supporting off-field Skill damage. She is not meant to replace every Hydro damage dealer; she is best when healing and safe rotations matter. The sections below give a complete build route: role, artifacts, weapons, stats, talent priority, teams, rotation, materials, constellations, mistakes, and pull planning.
Quick answer: Build Sigewinne with HP, Healing Bonus, Energy comfort, and a support set that matches the team. Ocean-Hued Clam, Song of Days Past, and Tenacity can all work, while Recurve Bow and Favonius Warbow are practical low-cost weapons.

5-Star Hydro Bow - Hydro healer and Skill support.

Sigewinne character profile art used for build orientation.
Sigewinne Character Facts And Role
Sigewinne is a comfort support. Her build should keep the team alive and make Skill-based teammates easier to run, not chase a fake main-DPS plan. For exact character facts, talent names, constellations, and material entries, keep Sigewinne on HoYoLAB Wiki as the profile reference while you review the build.

Hydro

Bow
5-Star
Hydro healer and Skill support
Fontaine
HP
Sigewinne Best Build Snapshot
Start with this snapshot, then change only the part that your account cannot support yet: Energy, shield comfort, reaction uptime, or artifact substats.
| Build Slot | Recommendation | Player Decision |
|---|---|---|
| Artifact set | Ocean-Hued Clam | Healing-to-damage route for consistent sustain. |
| Sands | HP% or Energy Recharge | Choose the option that keeps the rotation and reaction plan stable. |
| Goblet | HP% | Use the elemental or scaling bonus that supports the main job. |
| Circlet | Healing Bonus or HP% | Balance CRIT or healing/support value before chasing screenshots. |
| Substats | HP%, Energy Recharge, Flat HP, then CRIT Rate only for Favonius builds | Uptime and correct stat balance beat one high-looking number. |
| Talent priority | Elemental Skill > Elemental Burst > Normal Attack | team healing and Skill support |
| Team condition | Furina Comfort | Sigewinne keeps the team healthy while Hydro teammates contribute damage. |
How Sigewinne's Kit Changes The Build
Sigewinne is a comfort support. Her build should keep the team alive and make Skill-based teammates easier to run, not chase a fake main-DPS plan. The talent table should be read as rotation logic rather than a screen-by-screen upgrade order.
| Icon | Talent | Build Note |
|---|---|---|
 | Targeted Treatment | Normal Attack line; upgrade first only when the field-time combo uses it. |
 | Rebound Hydrotherapy | Elemental Skill; check whether this starts the main damage, healing, or support window. |
 | Super Saturated Syringing | Elemental Burst; prioritize when the rotation depends on its damage, uptime, or utility. |
Sigewinne Combat Preview
Use the preview to judge range, startup, recovery, and whether your planned teammates can cover the vulnerable part of the rotation.

Sigewinne combat preview for checking timing, range, and swap safety.
Best Artifacts For Sigewinne
Do not farm in a vacuum. Choose the artifact set after deciding the team, field time, and whether the character needs support utility or personal damage.
| Artifact Set | When To Use It |
|---|---|
 Ocean-Hued Clam Ocean-Hued Clam | Healing-to-damage route for consistent sustain. |
 Song of Days Past Song of Days Past | Healing support buff option. |
 Tenacity of the Millelith Tenacity of the Millelith | Team ATK buff when Skill uptime can maintain it. |
| 2-piece HP + 2-piece Healing | Simple transition route while farming. |
Best Weapons For Sigewinne
Pick the weapon that solves the weakest part of the build first. A premium weapon is wasted if the team cannot keep the main window active.
| Weapon | Priority | Why It Fits |
|---|---|---|
 Silvershower Heartstrings Silvershower Heartstrings | Signature / premium HP | Best fit for her HP support profile. |
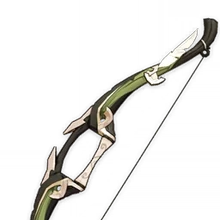 Recurve Bow Recurve Bow | Budget HP option | Very accessible and useful for HP scaling. |
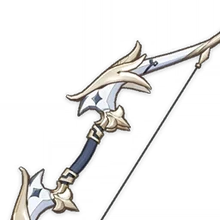 Favonius Warbow Favonius Warbow | Team Energy | Helps team rotations if CRIT Rate is built enough. |
 Sacrificial Bow Sacrificial Bow | Skill comfort | Useful if extra Skill uptime is more valuable than HP. |
 Elegy for the End Elegy for the End | Premium team support | Niche option when team buffs matter more than healing stats. |
Sigewinne Main Stats And Substats
| Piece | Main Stat | Notes |
|---|---|---|
| Sands | HP% or Energy Recharge | Use the first listed option unless the team or weapon creates a different bottleneck. |
| Goblet | HP% | Elemental goblets remain the normal damage route unless the role is pure support. |
| Circlet | Healing Bonus or HP% | Keep the visible stat aligned with the actual job. |
| Substats | HP%, Energy Recharge, Flat HP, then CRIT Rate only for Favonius builds | Stop farming once the rotation is stable enough for the content you play. |
Sigewinne Rotation And Gameplay Loop
The rotation below is a baseline. Adjust the order only when your teammates have different cooldowns, weapons, or constellations.
- Use Sigewinne Skill early so healing and support value begin before the carry window.
- Set off-field Skill damage dealers.
- Swap to the carry while Sigewinne's support is active.
- Use Burst only when healing, damage, or Energy timing justify the field time.
- Refresh Skill before the next damage window starts.
Best Sigewinne Teams
Use these as job templates. Do not link every name in the sentence; the linked chips point to ManaBuy guides only when that teammate already has a published guide.
Furina Comfort



Sigewinne + Furina + Yelan + Kaedehara Kazuha Sigewinne keeps the team healthy while Hydro teammates contribute damage.
Use Xingqiu for more defensive Hydro utility.
Neuvillette Support

Sigewinne + Neuvillette + Furina + Kaedehara Kazuha A Hydro-heavy comfort shell where healing supports Furina value.
Use Zhongli instead of Kazuha if interruption is the issue.
Skill Damage Shell



Sigewinne + Fischl + Yae Miko + Nahida Sigewinne supports off-field Skill-focused teammates while adding Hydro healing.
Swap Dendro/Electro units around reaction needs.
Sigewinne Materials And Farming Quantities
Farm fixed materials before chasing artifact perfection. The quantity column is the planning anchor, while the note tells you which items usually block progress.
| Icon | Material | Qty | Planning Note |
|---|---|---|---|
 | Mora | x2,072,500 | x2,072,500 total for leveling plus key talents; do this before artifact min-maxing. |
 | Varunada Lazurite Sliver | x1 | x1 in the Hydro gem chain; convert only after boss drops are counted. |
 | Romaritime Flower | x168 | x168 local specialty; route this early because respawn timing is the real bottleneck. |
 | Transoceanic Pearl | x24 | x24 enemy-drop tier; craft upward after the lower-tier count is safe. |
 | Varunada Lazurite Fragment | x9 | x9 in the Hydro gem chain; convert only after boss drops are counted. |
 | Water That Failed To Transcend | x46 | x46 boss material; finish this before chasing small artifact upgrades. |
Is Sigewinne Worth Building Or Pulling?
Sigewinne is worth building if your account needs Hydro healing, Furina comfort, or support for Skill-based teams. She is less urgent if you already have Kokomi, Baizhu, Jean, or other sustain units covering the same need.
If you are considering wishes or a top-up for this character, decide the team, pity status, guarantee, UID, server, and spending limit first. Genesis Crystals should support a clear plan, not replace it.

Check your Genshin top-up plan
Confirm UID, server, package budget, and pity plan before spending for Sigewinne or their weapon.
Sigewinne Constellation Value
Use constellations as an account upgrade, not as the entry ticket. Build and test C0 first unless you already know this character is a long-term favorite.
| Constellation | Value | Recommendation |
|---|---|---|
| C0 | Comfort baseline | Healing and support role works. |
| C1 | Support improvement | Useful for players who rely on her Skill support. |
| C2-C5 | Luxury sustain/damage | Helpful but not required. |
| C6 | Favorite-only | Not needed for normal support value. |
Common Sigewinne Build Mistakes
Related ManaBuy Genshin Guides
Sigewinne Build Guide FAQ
What stats does Sigewinne need?
HP%, Healing Bonus, and Energy Recharge are the core support stats.
Is Recurve Bow good for Sigewinne?
Yes. It is a simple budget HP bow.
Does Sigewinne work with Furina?
Yes. Her healing can make Furina teams easier to play.
Should Sigewinne use Ocean-Hued Clam?
Use Clam when you want healing converted into damage; use support sets when team buffs matter more.
Is Sigewinne worth pulling?
She is worth it for comfort and Hydro healing, not if you only need a damage carry.
Sigewinne Build Conclusion
Sigewinne is strongest when the build, weapon, teammates, and rotation all support the same job. Start with the snapshot, test the team in real fights, then spend resin or wishes only on the upgrade that fixes the clearest weakness.



Copyright © FUTURE OUTLOOK TECHNOLOGY LIMITED.Company Registration No.: 77374965 All rights reserved.UNIT 135,1/F.,143 WAI YIP STREET,KWUN TONG HK