
Genshin Impact Kaedehara Kazuha Build Guide: Best Artifacts, Weapons, Teams, And Pull Value

Kaedehara Kazuha is a 5-star Anemo Sword character in Genshin Impact whose best value comes from their role as Anemo support, grouper, Swirl enabler, and elemental damage buffer. Kaedehara Kazuha is a top-tier Anemo support. Build him with 4-piece Viridescent Venerer, full Elemental Mastery main stats when possible, enough Energy Recharge to Burst in the teams that need it, and rotations that Swirl the correct element before your main damage window. This evergreen guide focuses on practical account decisions: how the kit works, which stats to prioritize, what teams actually use the character well, and when a weapon, constellation, or banner pull is worth your Primogems.
Quick answer: Kaedehara Kazuha is a top-tier Anemo support. Build him with 4-piece Viridescent Venerer, full Elemental Mastery main stats when possible, enough Energy Recharge to Burst in the teams that need it, and rotations that Swirl the correct element before your main damage window.


Kaedehara Kazuha Character Profile
Use this profile block to quickly confirm the character's element, weapon type, region, rarity, and ascension direction before reading the build advice.
 ElementAnemo
 WeaponSword
Kaedehara Kazuha Gallery And Motion Reference
These Gallery animations help readers recognize the character's presentation and motion style without relying only on a small portrait.
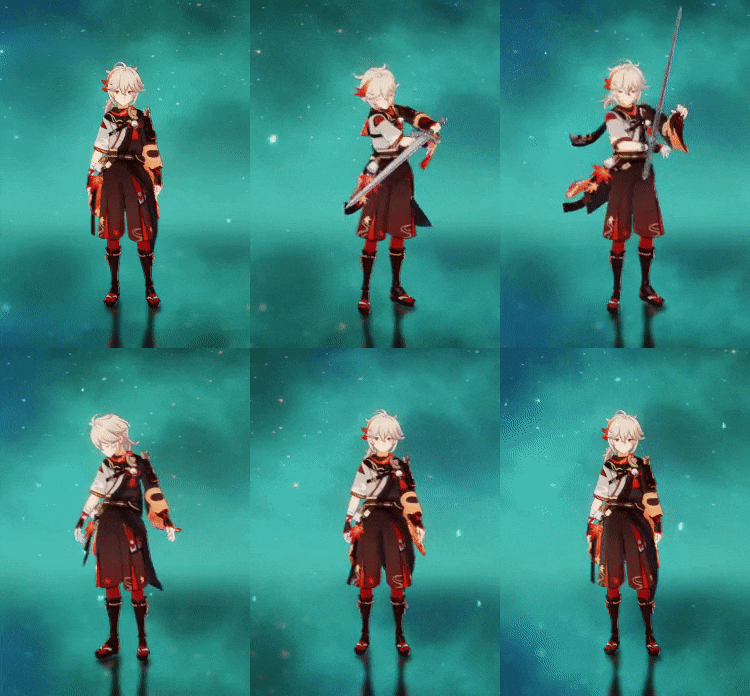 Idle Animation 1
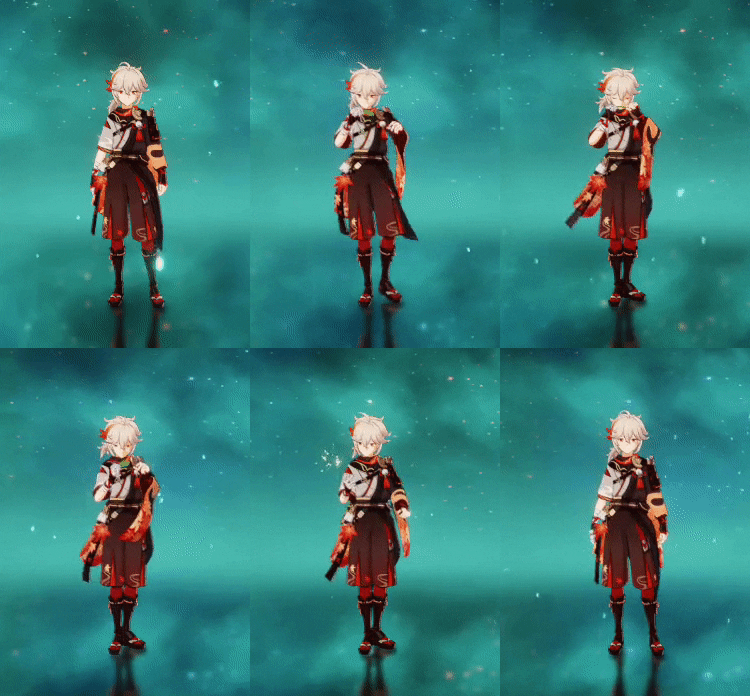 Idle Animation 2
Kaedehara Kazuha Best Build Snapshot
Build focus: Start with this snapshot, then tune the final pieces around your actual Energy needs, available weapons, and teammates. A build that keeps the rotation stable usually beats a prettier stat screen that fails in repeated Abyss chambers.
| Best role | Elemental buffer and crowd-control support |
| Artifact set | 4pc Viridescent Venerer |
| Main stats | EM Sands / EM Goblet / EM Circlet |
| Substats | ER to rotation, EM, then CRIT Rate if using Favonius Sword |
| Talent priority | Talents are secondary to level 90, EM, and VV; Skill/Burst can be leveled for damage |
How Kaedehara Kazuha's Kit Works
Kazuha's Skill pulls enemies, launches him, and triggers Swirl. His Burst creates a field that can absorb Pyro, Hydro, Electro, or Cryo, then repeatedly apply that element.
His Ascension passive converts his Elemental Mastery into an elemental damage bonus for the element he Swirls. This is why EM is the default support stat.
Viridescent Venerer resistance shred is a major part of his value. Kazuha must Swirl the element your carry actually deals, not just press buttons before the rotation.
Kaedehara Kazuha Talent Visual Reference
Use these talent icons to connect the build advice with the character's actual kit buttons. The upgrade priority still follows the role explained below.
 | Garyuu Bladework | This icon includes Kazuha's sword attacks and plunge follow-up, mainly relevant after using his Skill. |
 | Chihayaburu | Chihayaburu is Kazuha's pull and launch Skill, grouping enemies while enabling fast Swirl setup. |
 | Kazuha Slash | Kazuha Slash creates the field that repeatedly deals Anemo damage and can absorb another element. |
Kaedehara Kazuha Talent GIF Reference
Talent animations are useful for build guides because they show whether an ability is a quick swap button, a field-time commitment, a summon, or a Burst window.
 | Garyuu Bladework | The GIF shows the plunge-style motion that can Swirl after Chihayaburu, tying his movement to crowd control and buffs. |
 | Chihayaburu | The animation shows the lift and plunge sequence; this is the core visual for his grouping, particles, and Swirl timing. |
 | Kazuha Slash | The GIF shows the wide Burst field; watch the absorbed element because it changes reaction setup and team damage. |
Best Artifacts For Kaedehara Kazuha
Artifact rule: Artifact choice should follow role first. The correct set is the one that improves the team's real damage window, defensive comfort, or reaction ownership without breaking Burst uptime.
| 4pc Viridescent Venerer | Mandatory default for Pyro, Hydro, Electro, and Cryo teams because of resistance shred and Swirl damage. |
| EM main stats | Best support direction. Level 90 matters because Swirl scales heavily with character level. |
| ER or CRIT adjustments | Only adjust main stats if you cannot Burst when needed or if Favonius Sword requires CRIT consistency. |
Kaedehara Kazuha Artifact Visual Reference
These icons help readers recognize the artifact sets mentioned in the build table before they start farming domains or strongbox pieces.
 | Viridescent Venerer | Viridescent Venerer is the Anemo support set: Swirl the right element to shred enemy resistance. |
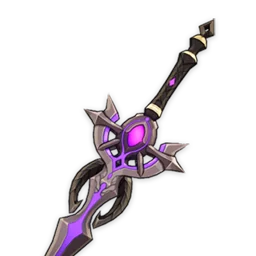 | Festering Desire | Festering Desire is an Energy Recharge sword visual, so read it with the weapon notes rather than artifact-set logic. |
Kaedehara Kazuha Main Stats And Substats
EM Sands / EM Goblet / EM Circlet is the default main-stat direction. For substats, prioritize ER to rotation, EM, then CRIT Rate if using Favonius Sword. If the character cannot repeat the intended rotation, add Energy Recharge or utility stats before chasing more CRIT value.
For reaction teams, check who actually triggers the reaction. Hyperbloom and Burgeon damage belongs to the trigger, Vaporize and Melt depend on aura order, and Swirl value depends heavily on character level and Elemental Mastery. This is the difference between copying a build and building the team correctly.
Best Weapons For Kaedehara Kazuha
Weapon rule: Weapon ranking changes with Energy, team buffs, and artifact quality. Use the list below as a decision table rather than a strict rarity ladder.
| Freedom-Sworn | Premium support weapon with EM and team buffs. |
| Xiphos' Moonlight | Excellent team Energy utility when available. |
| Favonius Sword | Often the best practical weapon because it solves team Energy. Build CRIT Rate. |
| Iron Sting | Craftable EM option for pure buffing when Energy is fine. |
| Sacrificial Sword | Comfort option for extra Skill use and grouping, though rotations can lengthen. |
Kaedehara Kazuha Weapon Visual Reference
Use these weapon icons to identify recommended weapons quickly, then follow the notes above for when each weapon actually fits.
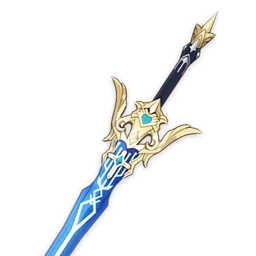 | Freedom-Sworn | Freedom-Sworn is a premium support sword that adds EM and team damage buffs after reactions. |
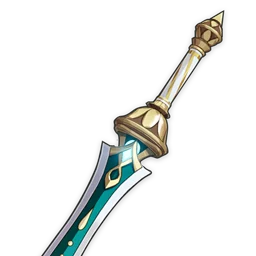 | Xiphos | Xiphos converts EM into Energy Recharge support, helping Anemo or reaction supports keep Burst uptime. |
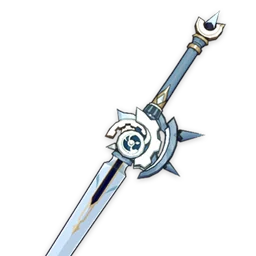 | Iron Sting | Iron Sting is a craftable EM sword, useful when reaction damage or Swirl share matters more than CRIT stats. |
 | Sacrificial Sword | Sacrificial Sword can reset Skill cooldown, giving extra particles and smoother Burst uptime on Energy-hungry sword supports. |
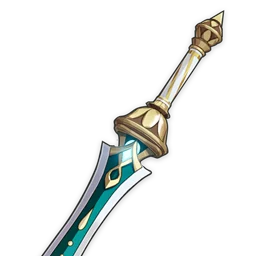 | Xiphos' Moonlight | Xiphos' Moonlight converts EM into Energy Recharge support, helping reaction supports keep Burst uptime. |
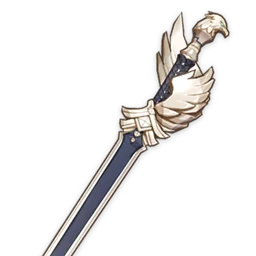 | Favonius Sword | Favonius Sword solves Energy for the holder and team, but it needs enough CRIT Rate to trigger particles reliably. |
Kaedehara Kazuha Talent Priority
Talents are secondary to level 90, EM, and VV; Skill/Burst can be leveled for damage. Talent books and weekly materials are expensive, so level the part of the kit that changes real team output first. If the character is only an off-field support, Normal Attack levels are usually the lowest priority unless a specific on-field build is planned.
Kaedehara Kazuha Ascension Material Checklist
Use these ascension material types as a farming checklist before you spend resin, convert drops, or plan weekly boss runs.
 | Mora | 420000 |
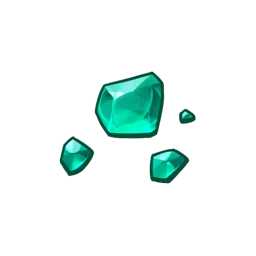 | Vayuda Turquoise Sliver | 1 |
 | Sea Ganoderma | 168 |
 | Treasure Hoarder Insignia | 18 |
 | Vayuda Turquoise Fragment | 9 |
 | Marionette Core | 46 |
 | Silver Raven Insignia | 30 |
 | Vayuda Turquoise Chunk | 9 |
 | Golden Raven Insignia | 36 |
 | Vayuda Turquoise Gemstone | 6 |
Kaedehara Kazuha Talent Material Checklist
Use these talent material types to plan books, enemy drops, weekly boss drops, Mora, and Crown usage.
 | Mora | 1652500 |
 | Teachings of Diligence | 3 |
 | Treasure Hoarder Insignia | 6 |
 | Guide to Diligence | 21 |
 | Silver Raven Insignia | 22 |
 | Philosophies of Diligence | 38 |
 | Golden Raven Insignia | 31 |
 | Gilded Scale | 6 |
 | Crown of Insight | 1 |
Kaedehara Kazuha Rotation And Gameplay Loop
A good rotation makes the character's strongest window line up with buffs, reactions, and Energy generation. Use this as the baseline loop, then shorten or extend it based on enemy waves and cooldowns.
- Apply the element you want to buff before Kazuha enters.
- Use Kazuha Skill or Burst to Swirl that element and trigger VV shred.
- Swap into the main DPS during the buff window.
- In double-Swirl teams, practice aura order carefully instead of guessing in Abyss.
Best Kaedehara Kazuha Teams
The best team is not just four strong characters. It needs the right aura order, enough Energy, a clear field-time plan, and enough survivability to repeat the rotation under pressure.
| Vaporize | Childe/Hu Tao/Yoimiya/Neuvillette variants + Kazuha + Hydro/Pyro supports. Swirl the damage element before the nuke window. |
| Freeze | Ayaka/Wriothesley/Ganyu + Hydro + Kazuha + Cryo battery. Grouping and Cryo shred are the main value. |
| Electro teams | Raiden/Keqing/Yae + Kazuha + Electro/Dendro/flex. He buffs Electro damage and groups enemies. |
| Mono element | Mono Pyro, Mono Hydro, or Mono Electro cores use Kazuha to stack damage bonus and VV shred reliably. |








Is Kaedehara Kazuha Worth Building Or Pulling?
Kazuha is a high-value 5-star because he improves many teams without demanding field time. C0 is already complete for support. His signature weapon and constellations are luxury upgrades; most accounts gain more from new team pieces than from pushing Kazuha past C0.
Top-up check: before spending Primogems or Genesis Crystals, confirm whether this character solves a real account problem, then verify UID, server, product, and order details before payment.





Kaedehara Kazuha Constellation Visual Reference
This visual reference helps readers match constellation names with the pull-value discussion. The icons are useful for recognition, but the upgrade decision should still be based on team impact, budget, and whether the character already performs their core role at C0.
 | C1: Scarlet Hills | C1 is the first duplicate checkpoint; compare this icon with the guide's C0 comfort notes before spending pulls. The name to match in-game is Scarlet Hills. |
 | C2: Yamaarashi Tailwind | C2 is often the first high-impact investment tier, so this row should be weighed against weapons and teammates. The name to match in-game is Yamaarashi Tailwind. |
 | C3: Maple Monogatari | C3 usually raises one key talent level; value depends on whether that talent is central to the build. The name to match in-game is Maple Monogatari. |
 | C4: Oozora Genpou | C4 is a mid-constellation utility or damage node, worth checking only after the lower breakpoints make sense. The name to match in-game is Oozora Genpou. |
 | C5: Wisdom of Bansei | C5 usually improves another talent level, so its value follows how much the build actually uses that talent. The name to match in-game is Wisdom of Bansei. |
 | C6: Crimson Momiji | C6 is the luxury endpoint; read this row as a major playstyle or ceiling check, not a baseline requirement. The name to match in-game is Crimson Momiji. |
Common Kaedehara Kazuha Build Mistakes
- Swirling the wrong element and buffing the wrong teammate.
- Using ATK/Anemo/CRIT by default when the team wants EM support.
- Ignoring ER and losing Burst in rotations that need absorption uptime.
- Forgetting to level Kazuha to 90 for Swirl damage.
- Using him in Dendro-focused teams where VV cannot shred Dendro damage.
Kaedehara Kazuha Account Planning Tips
Build Kaedehara Kazuha after you know which team slot they own. A support usually needs level, weapon, Energy, and set bonus before perfect artifacts. A reaction trigger may need level 90 and Elemental Mastery before talent levels. A carry needs more complete investment because teammates, CRIT balance, and field-time execution all affect the result.
For long-term resin planning, stop farming when the build clears its job consistently. Move resin to teammates if they are missing talents, weapon levels, artifact sets, or Energy Recharge. Most strong Genshin teams improve faster from four functional builds than from one character with slightly better substats.
Kaedehara Kazuha Related Genshin Impact Guides On ManaBuy
- Genshin Impact characters list and build hub for comparing roles, elements, and future character-guide links.
- Genshin Impact top-up support - Genesis Crystals and Welkin Moon product page.
- Core support build guides to compare next: Bennett, Xingqiu, Xiangling, Fischl, Kazuha, Nahida, Furina, Zhongli, Yelan, Raiden, Kuki Shinobu, and Sucrose.
Kaedehara Kazuha Build Guide FAQ
Does Kazuha need 1000 EM?
No exact number is mandatory. More EM improves his buff, but enough ER and correct Swirl timing matter more than chasing a round number.
Is Iron Sting good for Kazuha?
Yes. It is a strong craftable EM weapon when your team does not need Favonius particles.
Should Kazuha use Favonius Sword?
Often yes, especially in teams with high Burst costs. Build enough CRIT Rate to trigger the passive.
Can Kazuha buff Dendro?
He cannot shred or buff Dendro directly through VV and his usual Swirl-based buff, but he can still help Electro, Hydro, Pyro, or Cryo teammates in Dendro teams.
Is C1 or Freedom-Sworn required?
No. C0 Kazuha with 4pc Viridescent Venerer and a 4-star weapon is already excellent.
Kaedehara Kazuha Build Conclusion
Kaedehara Kazuha is worth building when the guide's role, stats, weapon, artifacts, and team plan all point in the same direction. Start with rotation reliability, choose artifacts and weapons that solve the character's actual job, and treat constellations or signature weapons as upgrades only after the team already works. That approach keeps this guide useful across banners, reruns, and future artifact farming.



Copyright © FUTURE OUTLOOK TECHNOLOGY LIMITED.Company Registration No.: 77374965 All rights reserved.UNIT 135,1/F.,143 WAI YIP STREET,KWUN TONG HK