
Genshin Impact 7.2 Stygian Onslaught Guide: Teams, Mechanics, and Retry Checks

The Version 7.2 Stygian Onslaught cycle runs from November 11, 2026 at 10:00 to December 15 at 03:59 server time. The three battles are Wavebinder, Emperor of Fire and Iron, and Radiant Moongecko. The official event notice gives the schedule and lineup; this guide adds the practical details that current player clears repeatedly expose: where the three teams compete for the same supports, what each mechanic actually checks, and when a failed run needs a role change rather than more damage.
Quick answer: reserve frequent Electro for Wavebinder, AoE Hydro for the Emperor's small crabs, and a teamwide healer plus Geo or blunt damage for Moongecko. Build all three teams together—do not finish one “perfect” team and leave the other two without their mechanic roles.
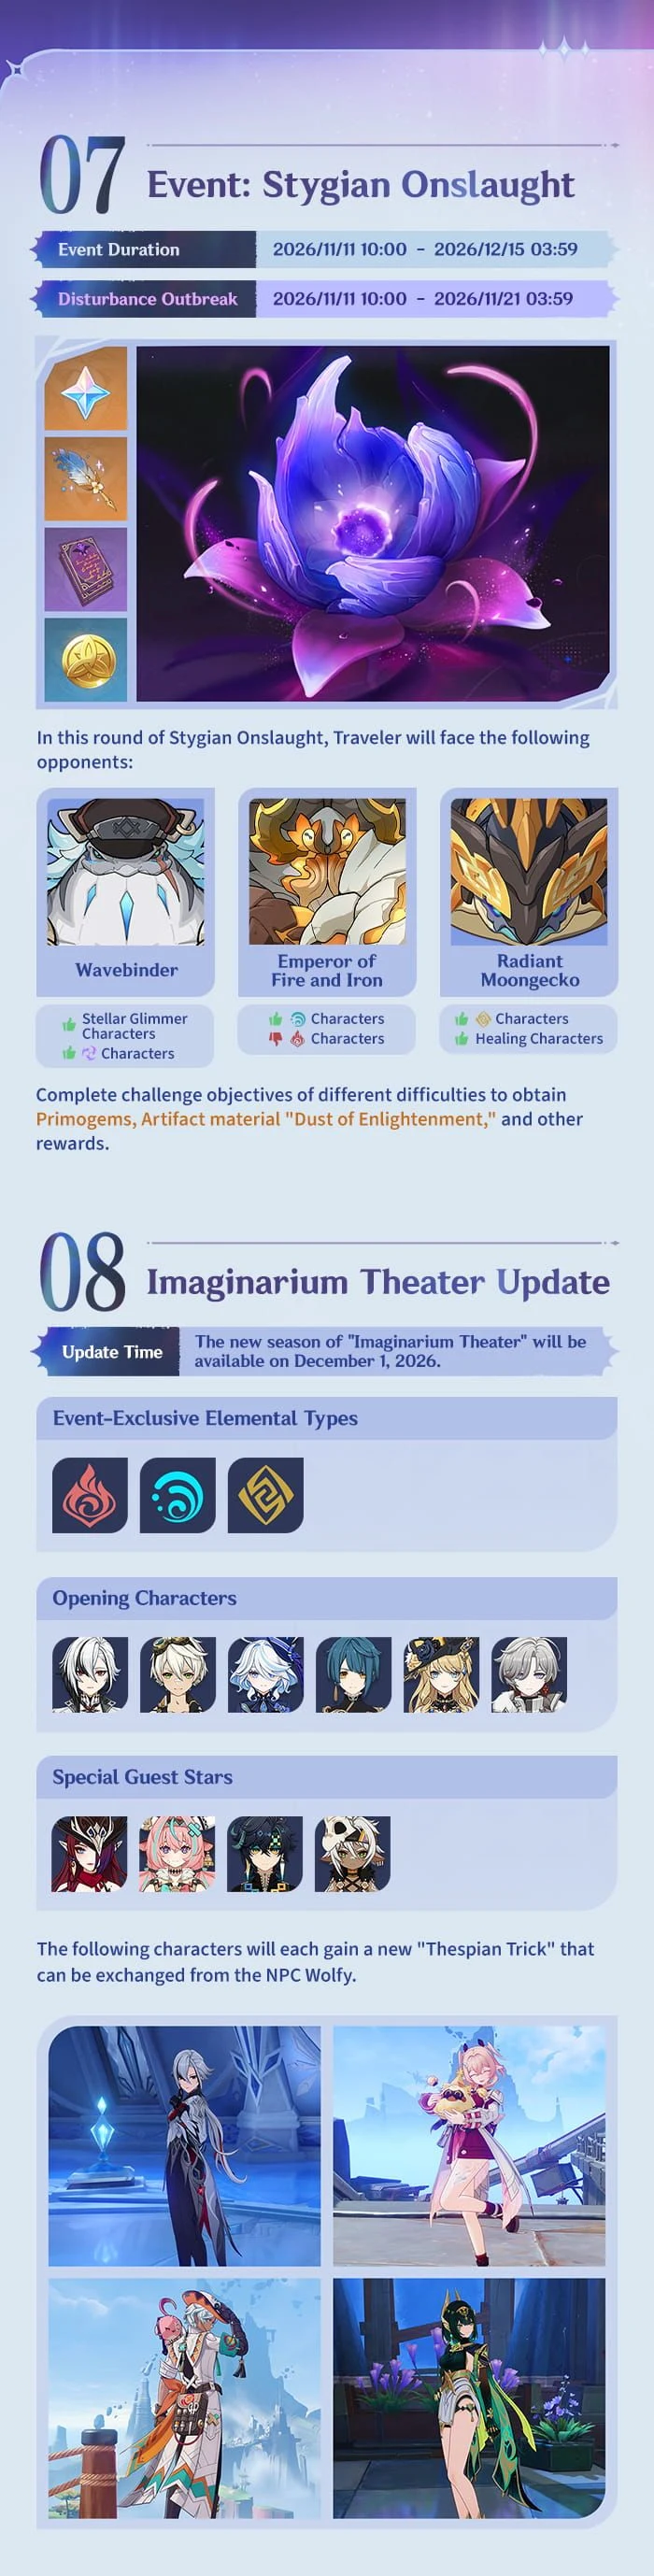
ManaBuy single-board layout based on the Genshin Impact event notice. Click the board to open the complete source artwork at full size.
Event rules and the sensible difficulty target
- Unlock requirement: Adventure Rank 20 and Archon Quest Prologue Act III; “Perilous Trail” is recommended.
- Six difficulties: Normal, Advancing, Hard, Menacing, Fearless, and Dire. Hard and above unlock in sequence.
- Up to 16 Exalted Ones can provide buffs, but Dire disables those buffs.
- Fearless and Dire rewards require a solo clear. All difficulties support co-op, but matchmaking is limited to the lower three tiers.
- The Disturbance Outbreak runs through November 21 at 03:59 server time. AR45+ players can spend Resin on selected Domain of Blessing rewards during this period.
Treat the difficulty ladder as three different goals:
| Goal | What matters most | Stop line |
|---|---|---|
| Normal–Menacing | Bring the correct element and learn the loop | Clear the available rewards; perfect rotations are unnecessary |
| Fearless | Three complete mechanic teams plus enough damage | The practical target for Primogems and the event cosmetic reward |
| Dire | No Exalted One buffs, strict timing, and deep vertical investment | Prestige challenge; do not pull a character only to force this clear |
That last distinction matters. A first-day Dire clear posted by a player used multiple constellations and signature-level investment across all three teams. It proves the route works; it does not make those exact teams a baseline recommendation.
Draft the three teams before filling flex slots
On high difficulty, the same character, weapon, or artifact set cannot be reused across the three battles. Current discussions repeatedly run into the same allocation problem: Odette or another reaction enabler is wanted by Wavebinder, the strongest Hydro supports are wanted by the Emperor, and Moongecko still needs a real healer plus an anchor breaker.
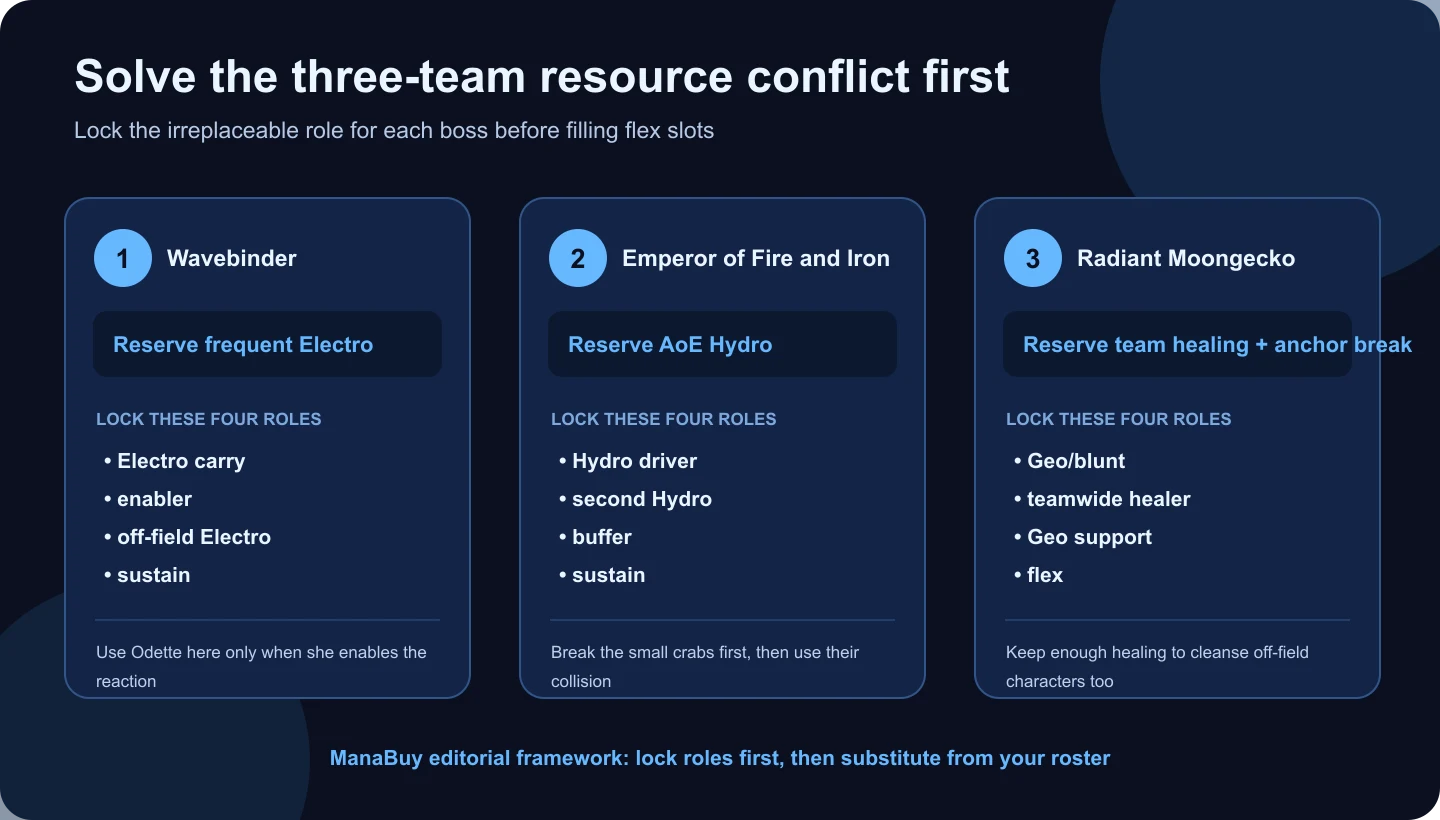
Use this order:
- Lock a teamwide or very fast healer for Moongecko.
- Lock enough AoE Hydro to remove the Emperor's small-crab shields.
- Give Wavebinder the fastest remaining Electro application, then add a Stellar Glimmer enabler if the roster supports it.
- Fill buffers and premium supports only after all three mechanic checks are covered.
If your Wavebinder team functions without Odette, freeing her can solve a second team's sustain or reaction problem. If it does not, keep her there and solve Moongecko with a different healer. This is the real roster decision; copying four character names does not solve it.
Mechanic floor vs. damage ceiling
| Boss | Minimum mechanic floor | Stronger solution | Common false assumption |
|---|---|---|---|
| Wavebinder | Frequent Electro to reduce Courage/Valiant pressure | Electro damage from the matching Stellar Glimmer reaction | “Any Stellar team is required at every difficulty” |
| Emperor | AoE Hydro on the summoned crabs, then exploit their collision | A Hydro driver who damages several crabs while preserving the burst window | “Just hit both horns with Hydro” |
| Moongecko | Full-heal affected characters and break the Moonstone Anchor | Teamwide healing plus Geo damage during the anchor phase | “One claymore automatically solves the fight” |
The floor is what makes the boss vulnerable. The ceiling is what turns that vulnerable window into a fast clear. When the floor is missing, adding more CRIT or pulling another general buffer rarely fixes the run.
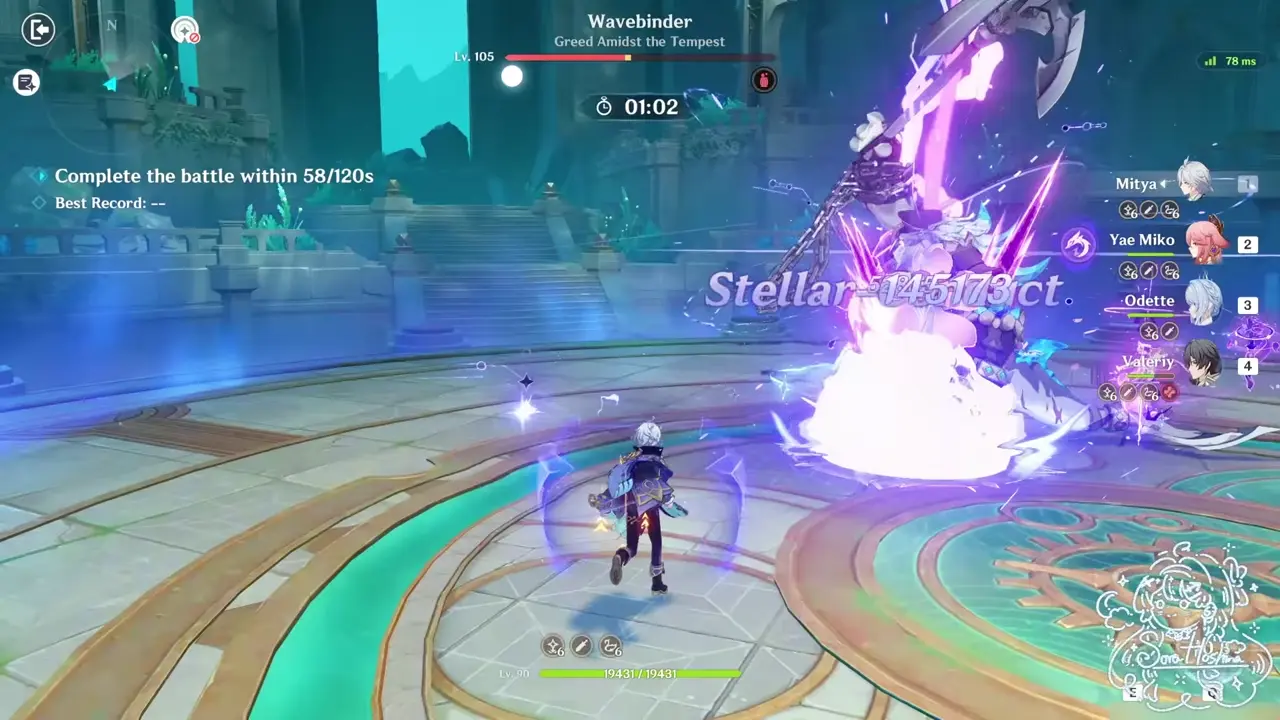
Source: SoraHoshina's Version 7.2 Fearless run, published November 11, 2026. This moment shows Electro Stellar-Conduct controlling Wavebinder's Courage cycle. Source run.
Battlefield 1: Wavebinder
Wavebinder drinks to build Courage. At full Courage it enters Valiant, gains a shield, and sharply raises all resistance. The official Version 7.2 update details confirm that Electro reduces Courage and that Electro damage from the corresponding Stellar Glimmer reaction is more effective. This is why the correct wording is “frequent Electro is the floor; Electro Stellar Glimmer is the premium answer,” not “Stellar is universally mandatory.”
Wavebinder rotation
- Open with the reaction enabler, then establish off-field Electro before the main carry begins.
- During the drinking animation, prioritize continuous Electro hits over a visually perfect rotation. Some Stellar Glimmer attacks can also interrupt the drinking sequence in player testing.
- If Valiant activates, stop dumping non-Electro Bursts into the raised resistance. Drain the state first.
- Refresh buffs just before the shield breaks, then commit the carry's strongest sequence during the backlash and vulnerability window.
- If the first Valiant shield consumes most of the timer, change Electro frequency or rotation order before farming more artifacts.
Team shells and substitutions
| Shell | Example structure | What must not change |
|---|---|---|
| Electro Stellar Glimmer | Mitya or Cyno / Odette or Cryo Traveler / Fischl or Yae Miko / sustain | Reliable reaction setup and repeated Electro hits |
| Flins route | Flins / reaction enabler / off-field Electro / sustain | Keep the enabler active before the damage sequence |
| Mechanic-first fallback | Best-built Electro carry / Cryo Traveler / Fischl / healer | Accept lower peak damage for stable gauge control |
A current Fearless demonstration cleared this battle with Mitya / Yae Miko / Odette / Valeriy using four-star weapons in the showcase. That is evidence that the shell can work, not that every account will match its damage or constellations. Players without a polished Stellar roster should first test a frequent-Electro shell at their target difficulty instead of assuming the event is impossible.
Wavebinder failure checks
- A slow, single-hit Electro source that cannot control the first Courage cycle.
- Starting the carry before the enabler and off-field Electro are active.
- Spending the full Burst package into Valiant resistance.
- Giving Wavebinder the only healer capable of cleansing Moongecko's off-field units.
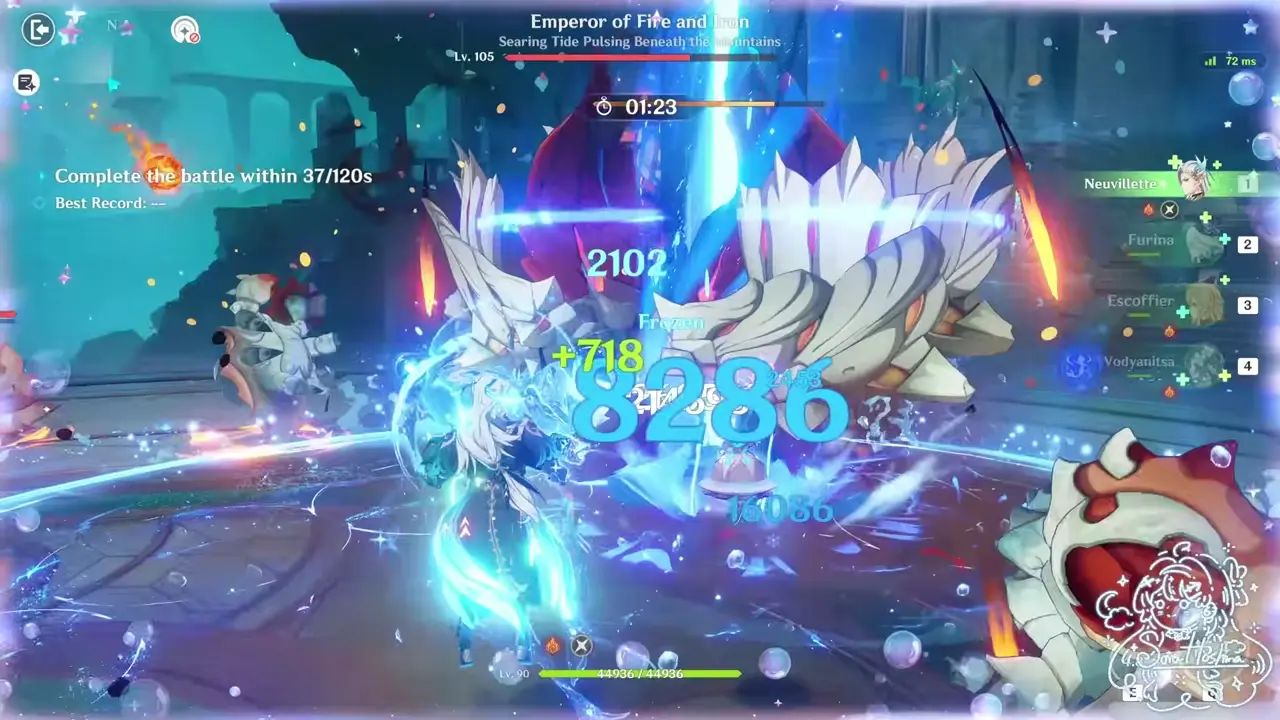
Source: SoraHoshina's Version 7.2 Fearless run, published November 11, 2026. The frame shows why wide Hydro coverage must reach the small crabs before the main shield opens. Source run.
Battlefield 2: Emperor of Fire and Iron
The basic version of this fight teaches players to remove the Emperor's Pyro horns with Hydro. On high difficulty, that summary is incomplete. The decisive loop includes three small armored crabs: strip their shields, let them charge into the Emperor, and use the collision to remove the main shield and return stored damage. Current live guides and player discussion agree that Hydro is especially effective for both the crab shields and the transferred damage.
Emperor rotation
- Group or line up the small crabs and aim wide Hydro attacks at them, not only at the Emperor.
- Break the crab shields quickly. Each defeated crab charges the boss and advances the main shield break.
- Keep setup skills running, but hold the carry's expensive Burst until the Emperor is about to open.
- As the last collision lands, refresh short buffs and unload the full damage sequence into the lowered-resistance window.
- Rebuild Energy while the next crab cycle begins instead of continuing a low-value rotation into the restored shield.
Player testing commonly reports that the crabs “remember” damage and return a much larger share when that damage is Hydro. Exact transfer values are community observations rather than numbers published in the event notice, so use them as a team-building direction—not a universal damage calculator.
Emperor team shells
| Team shell | Why it fits | Watch for |
|---|---|---|
| Neuvillette / Furina / Anemo or buffer / sustain | Broad, sustained Hydro can tag several crabs and capitalize immediately | Do not start the full beam sequence before the crabs are positioned |
| Skirk / Furina or Xingqiu / Cryo support / sustain | Maintains Hydro coverage while preserving a separate Moongecko healer | Make sure the Hydro source actually reaches every crab |
| Mualani / second Hydro / buffer / sustain | Large payoff after the shield opens | Single-target hits can make the crab phase slower |
| Hydro driver / Xingqiu / Anemo / healer | Mechanic-first, lower-cost shell | Needs grouping and clean Energy management |
The current four-star-weapon Fearless showcase used Neuvillette / Furina / Escoffier / Vodyanitsa. Treat it as one demonstrated route. If Neuvillette already handles the crab wave, do not automatically spend the account's best universal supports here; Moongecko may need them more.
Emperor failure checks
- Locking onto the main body while the small crabs remain shielded.
- Bringing Hydro that hits hard but cannot cover multiple targets.
- Spending all Bursts before the final crab collision.
- Repeating the same rotation after the first crab wave clearly fails to open the boss.
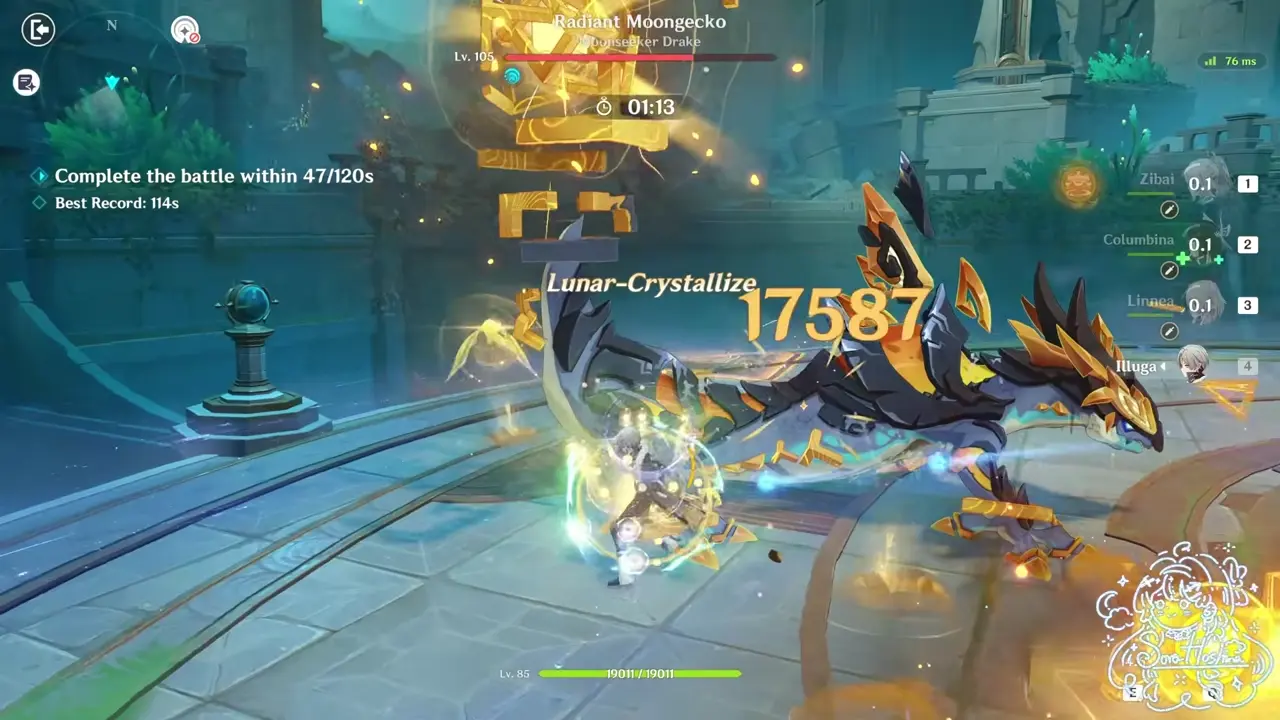
Source: SoraHoshina's Version 7.2 Fearless run, published November 11, 2026. The frame shows Geo damage being applied during the Moonstone Anchor phase. Source run.
Battlefield 3: Radiant Moongecko
Moongecko combines two separate checks: Radiant Cocoon tests healing, while the Moonstone Anchor tests attack type and damage transfer. Solving only one of them creates the common “the mechanic worked, but the timer still expired” run.
Radiant Cocoon: heal each affected character fully
Radiant Cocoon applies to characters individually. Community testing reports heavy offensive penalties, reduced incoming healing, and a CRIT penalty until that character returns to full HP. The cleanse then becomes a buff instead of a debuff.
This changes healer selection:
- An on-field carry with three disposable supports may get away with a fast single-target heal.
- A team relying on off-field damage cannot. Those characters remain Cocooned—and can even die off field—unless the healer restores them too.
- Teamwide healing is therefore the safest default. If using single-target healing, rotate through every damage-contributing character deliberately.
Moonstone Anchor: break it and transfer useful damage
- Save Geo, claymore, plunge, or Overload-type blunt attacks for the layered Anchor ward.
- Deal real damage while breaking it; the anchor phase is not merely a shield-tax animation.
- Destroy the Anchor before the charge completes to interrupt the large attack and return damage to Moongecko.
- Use the post-break resistance window for the main rotation.
Current player testing often cites roughly 70% damage transfer for Geo versus about 10% for non-Geo during the high-difficulty Anchor phase. These are observed community values, not official patch-note numbers, but they explain why “a claymore can break it” and “Geo is the stronger answer” are both true. A claymore flex may pass the mechanic floor while still failing the damage ceiling.
Moongecko team shells
| Shell | Example structure | Key requirement |
|---|---|---|
| Geo carry | Navia, Zibai, or Linnea / Geo support / teamwide healer / flex | Cleanse all relevant units, then convert Anchor time into Geo damage |
| Geo dual-core | Itto or Noelle / Geo support / healer / buffer | Enough Geo hits without sacrificing the full-heal check |
| Non-Geo carry | Main DPS / Geo or blunt breaker / teamwide healer / support | Two mechanic slots are mandatory; the carry must cover the remaining damage |
| Overload alternative | Electro-Pyro core / Chevreuse-style support / healer or sustain / flex | Can break the Anchor, but must still solve Cocoon and total damage |
The current Fearless showcase used Zibai / Columbina / Linnea / Illuga. Other community clears show that Overload and claymore routes can break the Anchor, but they are not automatically equal in transferred damage. This is why a player can “do the mechanic correctly” and still miss Dire.
The 30-second retry check
Do not spend ten minutes repeating a run whose first mechanic already proves the team is wrong.
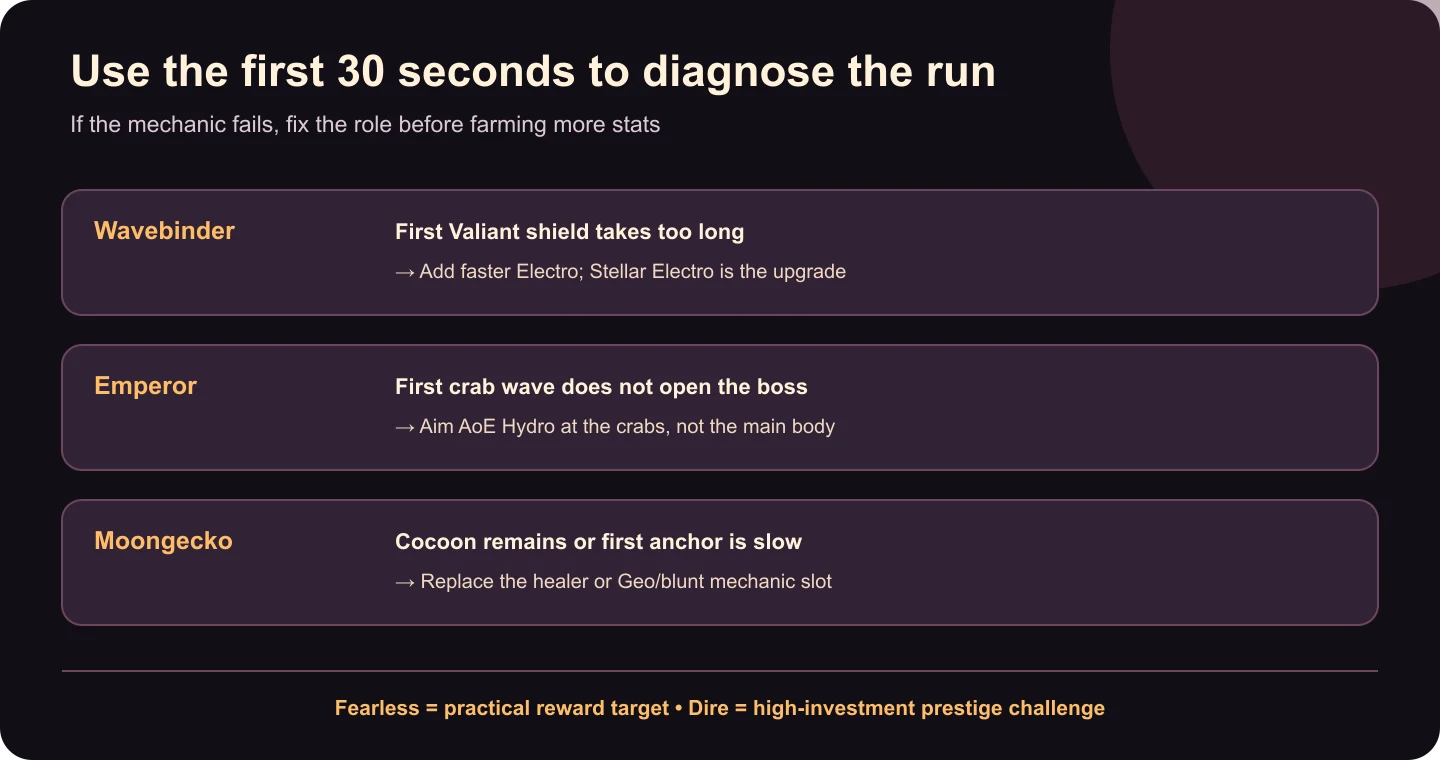
| First-cycle symptom | Diagnose it as | First adjustment |
|---|---|---|
| Wavebinder's first Valiant state lasts too long | Electro application/rotation issue | Add off-field Electro or start it earlier |
| The first crab wave does not open the Emperor | Targeting, AoE Hydro, or grouping issue | Aim at crabs and widen Hydro coverage |
| Cocoon remains on off-field units | Healer coverage issue | Switch to teamwide healing or rotate the roster through full heals |
| Moonstone Anchor breaks but damage is still far behind | Damage-transfer/slot-cost issue | Add Geo damage or replace a low-output mechanic flex |
Upgrade order before pulling a new character
Current community questions often jump from a failed first clear to “which new unit do I need?” Use this cheaper order first:
- Level the weapon, relevant talents, and the reaction-enabling unit—not only the on-field carry.
- Fix Energy Recharge until the first two rotations are repeatable.
- Reorder the opener so the mechanic is active before damage begins.
- Replace the flex slot that failed the 30-second check.
- Only then evaluate whether a new character solves a specific missing role across more than one team.
This prevents a common trap: increasing sheet damage while the boss remains shielded or the team remains Cocooned.

Related ManaBuy guides
Genshin Impact Stygian Onslaught FAQ
Is a Stellar Glimmer team mandatory for Wavebinder?
No at every difficulty. Officially, ordinary Electro reduces Courage, while the matching Stellar Glimmer Electro damage is more efficient. Frequent Electro is the mechanic floor; the intended Stellar route becomes increasingly valuable for Fearless and Dire.
Should I use a claymore or Geo against Moongecko?
Both can help break the Anchor. Geo is usually better for high-difficulty damage transfer, while claymore, plunge, and Overload attacks are fallback break tools. Neither replaces the need to fully heal Cocooned characters.
Which boss should get my strongest supports?
Give each boss its irreplaceable role first. In practice, Moongecko often consumes the scarcest support package because it needs both healing coverage and Anchor damage. The Emperor can use a self-sufficient Hydro core, while Wavebinder primarily needs fast Electro/reaction uptime.
When should I stop pushing?
If the account has secured its intended rewards at Fearless, Dire is optional prestige. First-day community clears show that Dire can demand substantial constellations, signatures, and roster depth even when the mechanics are understood.
Bottom line: solve the mechanic before adding damage
Build three functional teams around the bosses' irreplaceable checks: frequent Electro for Wavebinder, a stable Hydro core for the Emperor, and healing plus Anchor damage for Moongecko. Use the first 30 seconds to diagnose the failed mechanic, move scarce supports before farming more stats, and stop at Fearless when the remaining Dire reward does not justify the roster or spending cost.




Copyright © FUTURE OUTLOOK TECHNOLOGY LIMITED.Company Registration No.: 77374965 All rights reserved.UNIT 135,1/F.,143 WAI YIP STREET,KWUN TONG HK