
Free Fire Clash Squad Guide: Best Characters, Weapons, Economy and Team Roles

Clash Squad is Free Fire's fastest discipline test. The map is smaller, the rounds are shorter and every buy matters. You cannot rely on one lucky loot path or a late-zone comeback. Your team needs a plan from the first round: who enters, who trades, who holds the flank, who buys utility and who saves enough economy to keep the next round playable.
This Free Fire Clash Squad guide covers the pieces that decide most ranked and casual CS rounds: economy, roles, character picks, weapon buys, Gloo Wall timing and the mistakes that make a team look good for two rounds and collapse after one enemy adjustment.
How Clash Squad Is Different From Battle Royale
Clash Squad Ranked has long been treated as a separate competitive path from classic Battle Royale, and that difference matters. BR rewards long survival and rotation. Clash Squad rewards repeated execution across short rounds. If your team loses one round, you immediately get a chance to change the buy and route.
| Clash Squad factor | What it changes | Winning habit |
|---|---|---|
| Round economy | You choose equipment before the fight. | Buy for team roles, not four solo highlight plays. |
| Short sightlines | Enemies reach contact quickly. | Use pairs and pre-aim common rush lanes. |
| Repeated opponents | Patterns appear after every round. | Punish repeated rushes, camps and flank habits. |
| Utility pressure | Walls and throwables decide revives and entries. | Spend utility when it wins position, not when panic starts. |
Team Roles: Entry, Trade, Anchor and Support
A Clash Squad team does not need complicated strategy, but it does need role discipline. The entry player creates first contact. The trade player follows close enough to punish the enemy who shoots the entry. The anchor watches flank or late swing. The support saves utility and protects revives.
Entry
Starts pressure with a shotgun, SMG or wall-break skill. Must call contact and avoid rushing too far ahead.
Trade
Stays close enough to secure the return knock. A good trade turns risky entry into controlled pressure.
Anchor
Holds the lane the enemy likes to flank. Patience matters more than damage in this role.
Support
Buys utility, protects revive timing and stops the team from wasting every wall in the first ten seconds.
Best Weapon Buys for Clash Squad
Clash Squad weapon choices should match the round. If your team is rushing a tight lane, shotguns and SMGs are better than a slow long-range setup. If the enemy keeps holding deep, an AR or marksman option can punish them before the final close-range fight.
| Buy type | Best use | Risk |
|---|---|---|
| Shotgun buy | Close corners, stairs, fast rushes and wall-edge duels. | Missed shots are expensive and require fast cover. |
| SMG buy | Flexible short fights, entry pressure and tracking moving enemies. | Can lose to shotguns at point-blank range. |
| AR buy | Mid-range holds and anti-rush lanes. | Weak if your team lets enemies close the gap for free. |
| Utility buy | Crossing, reviving, blocking sight and forcing reloads. | Wasted utility leaves no answer for the final trade. |
Characters and Gloo Wall Pressure
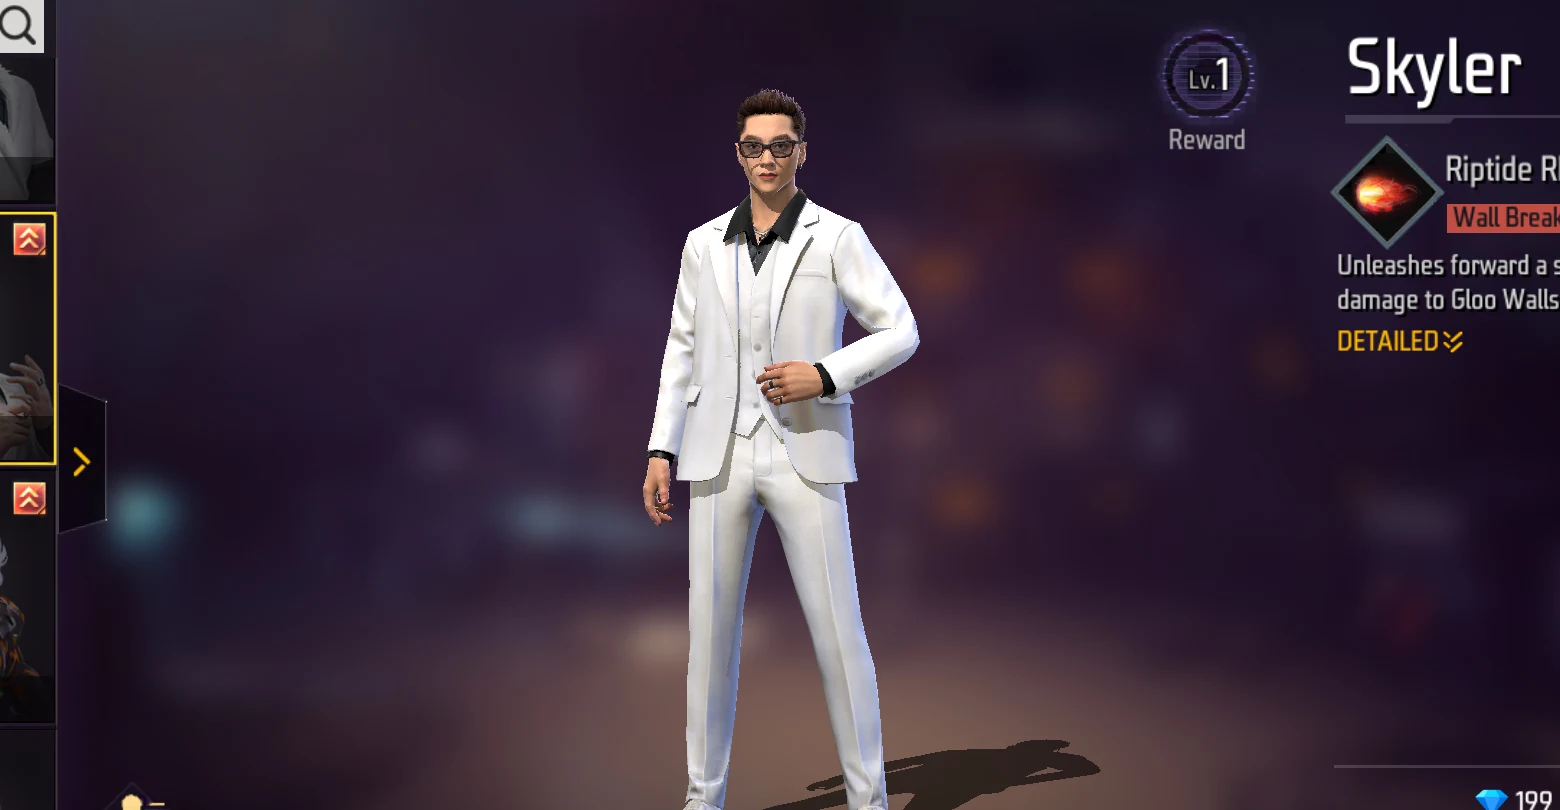
Clash Squad magnifies character skills because fights repeat in similar spaces. Skyler pressures wall campers, Nairi supports wall durability and healing, Oscar can break through early cover, Rin adds passive wall damage, and Nero can deny wall placement in a zone. The best pick is the one your team can execute around.
Round Plan Examples
Anti-rush round: two players hold crossfire, one watches flank, one saves wall for revive or reset.
Slow split: one pair pressures with utility while the other pair waits for the enemy rotation.
Full rush: entry walls forward, trade follows, support blocks the return angle, anchor prevents counter-flank.
Comeback round: buy cheaper and safer. Win the first knock instead of forcing expensive hero weapons.
OB54 Clash Squad Economy: Perk Points and Buy Choices
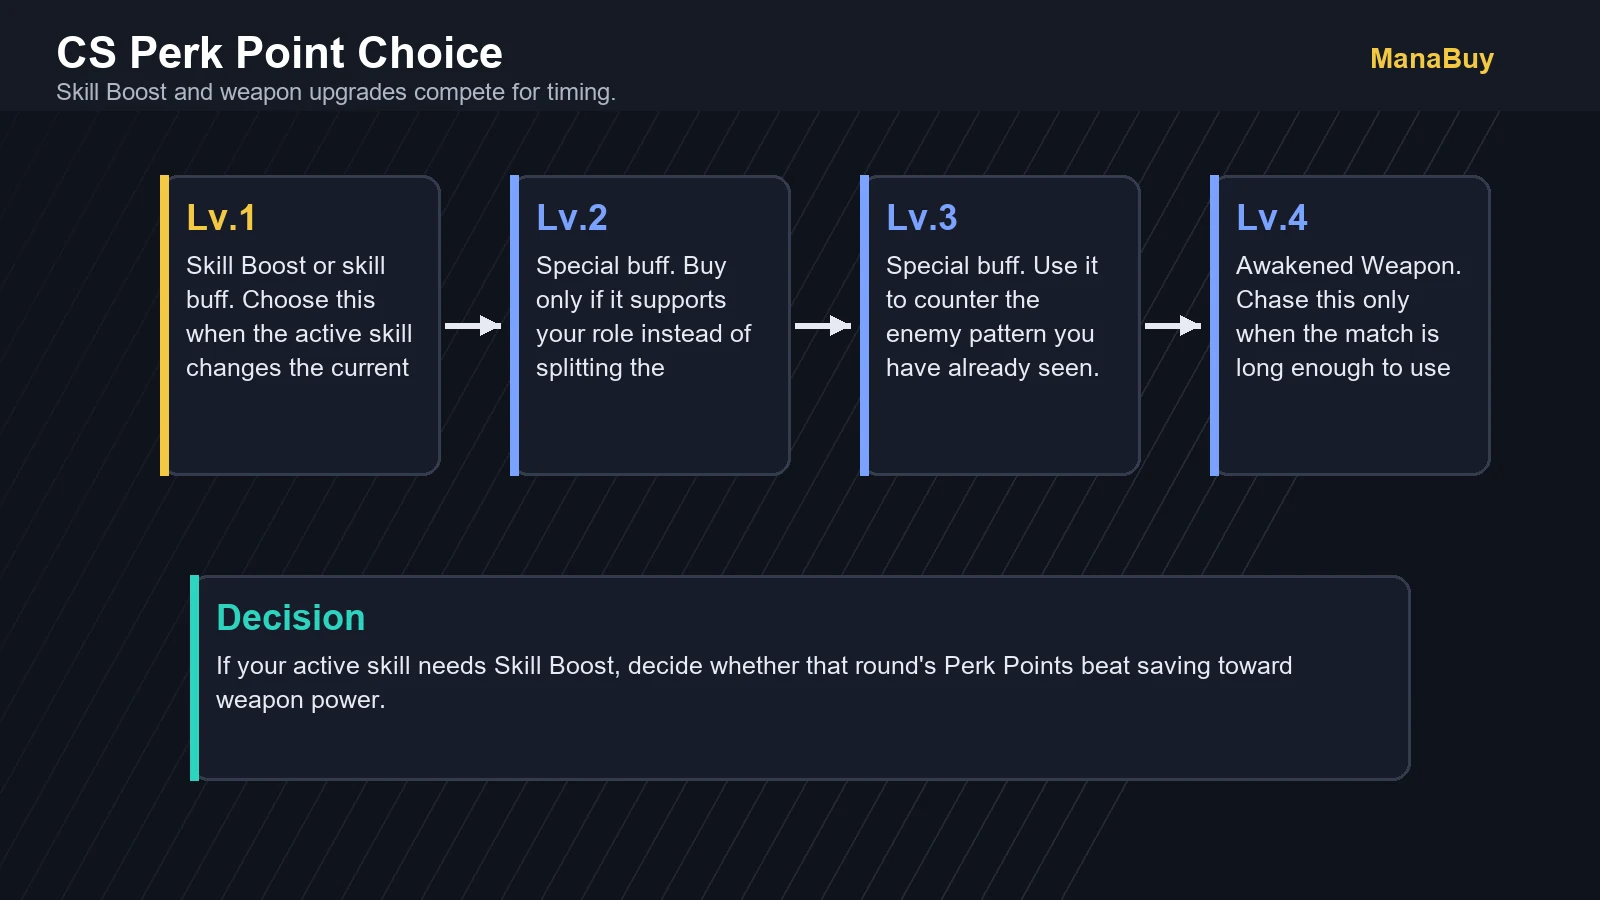
OB54 added a stronger growth layer to Clash Squad. Perk Points can unlock Skill Boosts, special buffs and eventually Awakened Weapons. The important part for players is not memorizing every upgrade. It is deciding whether an early Skill Boost helps the round more than saving toward later weapon power. If your team has several players competing for early boosts, your buy plan can become messy fast.
| Round need | Better Perk/Buy logic | Example decision |
|---|---|---|
| You need first-contact power | Prioritize the entry player's skill or close-range weapon. | Skyler or Oscar pressure if enemies stack Gloo Walls. |
| You keep losing late rounds | Save resources toward weapon awakening or stronger team utility. | Do not spend every early point on small individual gains. |
| Enemy plays slow | Buy information, utility and mid-range control. | Hold angles, force them to cross, then trade. |
| Random teammates are broke | Drop a weapon or buy simpler so all four players can fight. | A full team with decent guns beats one rich player and three weak buys. |
Seven-Round Buy Plan
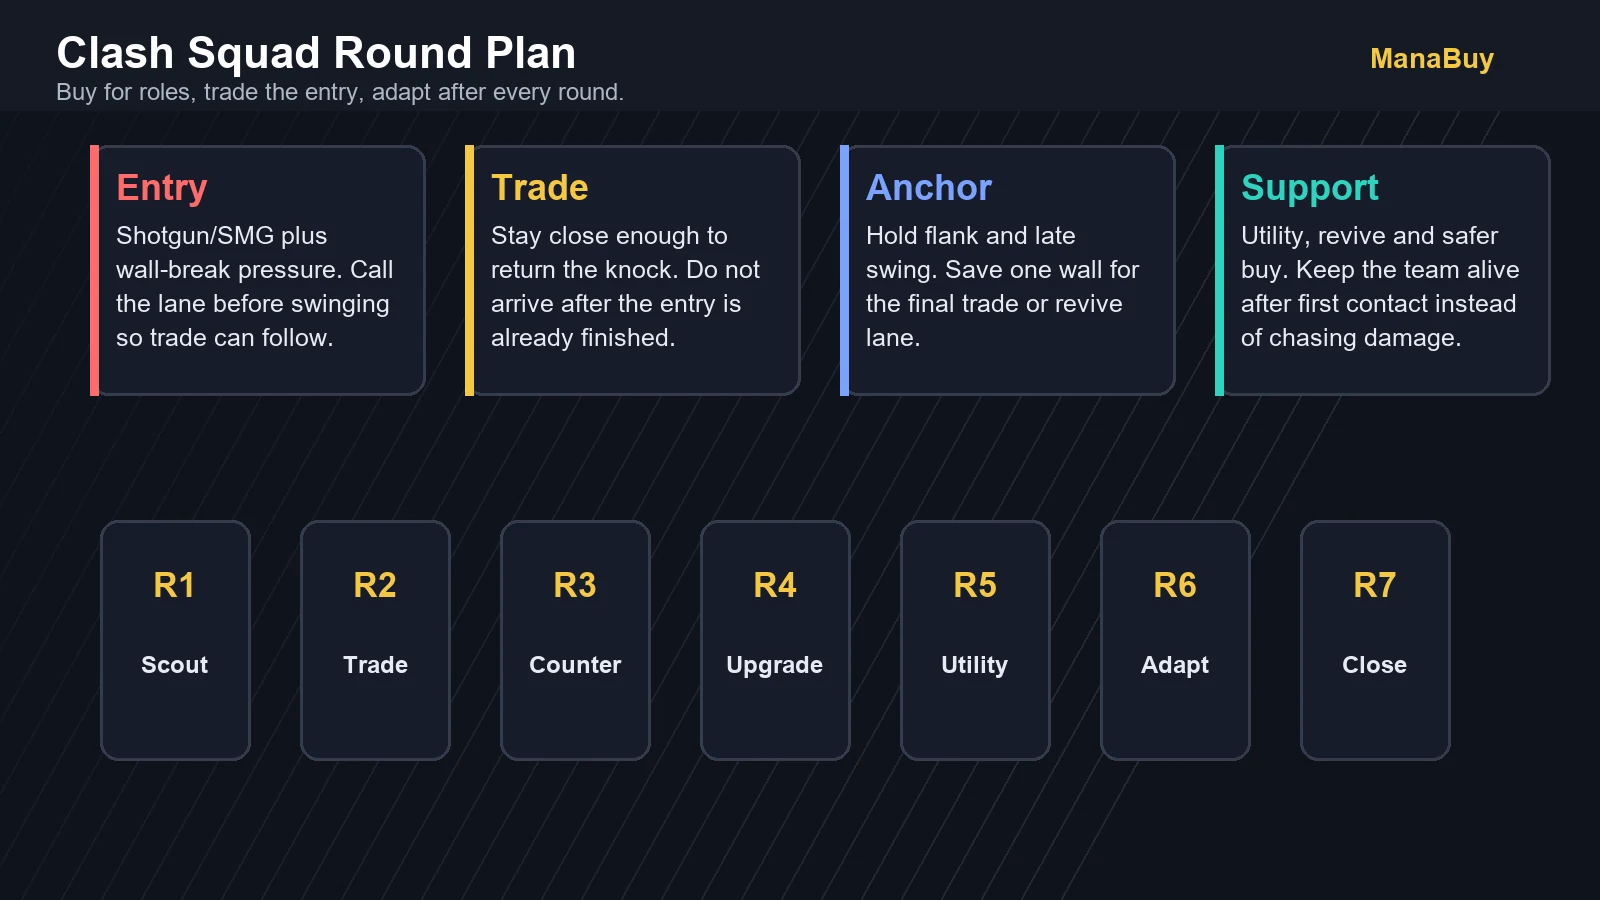
Clash Squad rounds are short, but the match is not random. The first round tests basic spacing. Rounds two and three show enemy habits. Mid rounds decide whether your team adapts. Final rounds punish wasted walls and bad economy.
| Round window | Team focus | Buy priority | Callout |
|---|---|---|---|
| Round 1 | Scout enemy route and close-range confidence. | Simple weapon, at least one wall, no hero purchase. | "Find their rush lane." |
| Rounds 2-3 | Exploit first pattern or counter their adjustment. | Entry weapon plus utility for trade player. | "Trade me, do not follow late." |
| Rounds 4-5 | Perk/upgrade decision and anti-rush setup. | Balance Skill Boost, weapon power and wall count. | "Hold crossfire, save wall for revive." |
| Rounds 6-7 | Close the match with disciplined utility. | Enough walls for final trades, not only expensive guns. | "Do not peek one by one." |
Character Combos By CS Role
Strong CS guides usually go deeper than one "best character" answer. Use these role directions as a safer ManaBuy version instead of overclaiming one universal meta.
| Role | Active direction | Passive direction | Why it works |
|---|---|---|---|
| Entry rusher | K, Tatsuya, Oscar or Skyler | Jota, Hayato, Dasha, Antonio | Close fights need burst entry, armor pressure, recoil comfort and round-start durability. |
| Wall breaker | Skyler or Oscar | Shirou, Maro, Dasha | Break the wall, punish the exposed player and keep recoil stable during the swing. |
| Anchor | Alok, Koda or Homer | Kelly, Moco, Antonio | Anchor needs information, movement and enough durability to win late 1v1s. |
| Support | Kassie, Alok or K | Olivia, Kapella, Antonio | Support keeps the team alive after first contact and protects revives. |
Random Teammate Strategy
If you queue with randoms, play anchor more often. Hold the angle your team ignores, type short callouts, drop a spare weapon when a teammate is broke and avoid following a bad solo rush into the same death. You cannot control their aim, but you can control spacing, trades and whether the team gets flanked.
Top Up Free Fire Diamonds for Clash Squad Loadouts
Clash Squad improvement starts with roles, trades, and round economy. If you also want characters, bundles, or weapon cosmetics for your loadout, compare current Free Fire Diamond packages below.





Related Free Fire Guides
How To Review A Lost CS Round
Do not review a lost Clash Squad round only by asking who missed shots. First ask whether the team bought enough walls and whether the entry had a trade player within one second. Then ask whether anyone died while isolated from the rest of the squad. Only after those answers should you blame aim. Many CS rounds are lost before the first knock because the team stacks four players behind one angle, wastes utility, or lets the enemy take the revive lane for free.
Use the next buy round to fix one mistake. If the enemy rushes the same side every round, assign an anchor and save one wall for the counter-swing. If your team keeps losing to Gloo Wall pressure, give wall-breaking responsibility to one player instead of having everyone shoot different walls. If your random teammates overpush, stay close enough to trade the first knock but do not follow them into a second bad angle.
Free Fire Clash Squad FAQ
What is the best weapon for Clash Squad?
Shotguns and SMGs are the safest short-range choices, but ARs matter when the enemy holds longer angles. The best buy depends on the round route.
How do I stop losing after a 2-0 lead?
Assume the enemy has learned your pattern. Change your route, delay the rush, hold a crossfire or buy utility before they counter your first strategy.
Is Clash Squad good for ranked practice?
Yes, especially for peeking, trading, Gloo Wall timing and close-range aim. It does not replace BR rotation practice.
Which character role matters most?
Entry and trade matter most in fast teams. Support and anchor matter most when the enemy punishes reckless pushes.
Final Takeaway
Clash Squad rewards small discipline. Buy with a purpose, move as pairs, trade quickly and adapt after every round. Once the team stops playing four solo matches, CS becomes much easier to control.



Copyright © FUTURE OUTLOOK TECHNOLOGY LIMITED.Company Registration No.: 77374965 All rights reserved.UNIT 135,1/F.,143 WAI YIP STREET,KWUN TONG HK