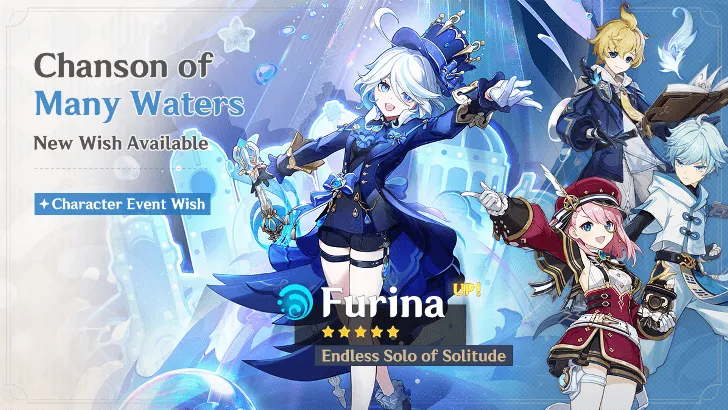
In-Depth Analysis of 6.1 Banners: Arlecchino or Furina, Who is More Worth Your Constellations?
You want to use your Primogems in the best way. You should know which character is worth your constellations. Furina is the best choice for most players. She is used by 95.4% of people. Arlecchino is only used by 8.8% in the Spiral Abyss. Furina helps many team types and makes teams stronger in the current meta. Arlecchino has special mechanics and does a lot of damage. Her value changes based on your team. Think about how you play and what your team needs before you do your own In-Depth Analysis. If you decide to pull for a constellation, ManaBuy can help you get the Genesis Crystals you need.
In-Depth Analysis of 6.1 Banners
Banner Structure
You want to know how the 6.1 banners work before you make any decisions. The banners in this update follow a clear structure. You see both 5-star and 4-star characters featured. This helps you plan your pulls and understand your chances.
Here is a table that shows the structure of the 6.1 banners:
|
Character Type |
Number |
|
5-Star |
4 |
|
4-Star |
3 |
You get four 5-star characters and three 4-star characters in the banners. This setup gives you more options and increases your chances to get a character that fits your team. When you do an In-Depth Analysis, you should look at which roles these characters fill and how they match your needs.
Featured Characters
The 6.1 banners highlight some of the most popular and powerful characters in the game. Each character brings a unique playstyle and role to your team. Here is a table that shows two of the main featured characters and their roles:
|
Character |
Role |
Description |
|
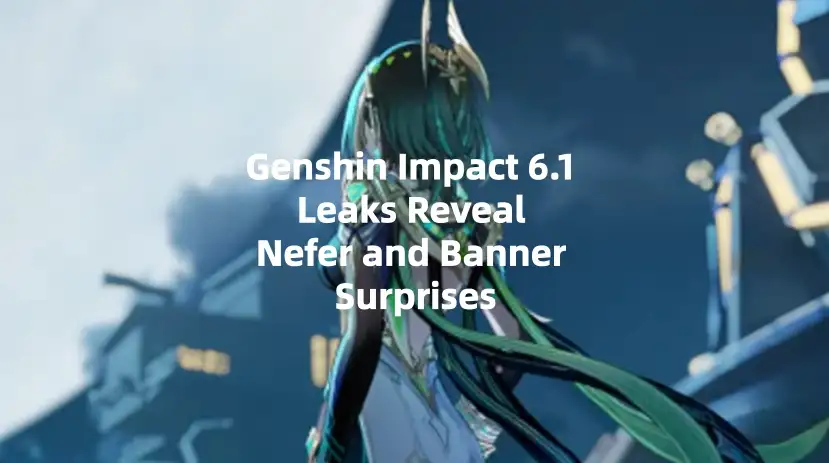
Nefer |
DPS |
5-star Dendro character using a catalyst, enables Lunar-Bloom reactions, enhances Charged Attacks with stacks. |
|
Furina |
Sub-DPS/Healer |
Best Hydro character, operates as off-field sub-DPS, deals consistent Hydro DMG, buffs party. |
You see that Furina stands out as a top Hydro support. She works well in many teams and boosts your party’s power. Nefer acts as a strong Dendro DPS, focusing on reactions and charged attacks. When you do an In-Depth Analysis, you should think about how these roles fit your current team.
Furina’s banner has become one of the most successful in Genshin Impact. She has generated over 69.4% of the total banner revenue. Many players choose her because she supports many team types and brings strong buffs. This popularity shows her value in the current meta.
You should always do your own In-Depth Analysis before spending your Primogems. Look at the banner structure, featured characters, and how each one can help your team. This way, you make the best choice for your account.
Character Comparison
Roles
You want to see how Arlecchino and Furina work in your team. Each one has a different main job and special skills. The table below shows what they do:
|
Character |
Primary Role |
Additional Notes |
|
Arlecchino |
Main DPS, Pyro-Enabler |
Uses Normal Attacks and gets stronger with Vaporize. Works well with Hydro characters like Yelan. |
|
Furina |
Hydro-Enabler |
Can lower the team's HP, which does not match Arlecchino's style but works with healers like Bennett. |
Arlecchino is your main damage dealer. She uses Pyro attacks and makes strong reactions. You build teams around her to get the most damage. Furina helps your team by adding Hydro and boosting damage. She fits in many teams, but you must watch her HP-draining effect.
Strengths
You want a character who helps your team the most. Both Arlecchino and Furina have strong points that make them good in the game. The table below lists their main strengths:
|
Character |
Strengths |
|
Arlecchino |
Top Pyro DPS with Bond of Life, giving flexible damage in many teams. |
|
Furina |
Buffs all teams with HP scaling, making her very useful. |
Many players say Furina fits in almost every team. She helps you finish hard fights faster. Arlecchino is best if you build your team for her special skills.
Weaknesses
No character is perfect. You should know their weak points before you spend your resources. Here are some things players and theorycrafters have noticed:
- Furina sometimes does not seem as strong or wise as an Archon. Some players wonder about her real story.
- Arlecchino’s reasons are not always clear. Some people do not trust her in the story or in teams.
- Some think Furina does not have the full Archon feeling. This might mean she has a curse or is split from her true self.
You should think about these weak points in your own In-Depth Analysis. Think about how they might change your fun and your team's power.
Constellation Value
Arlecchino
You want to know how Arlecchino’s constellations change her power. Each constellation gives her new abilities or boosts her damage. The most important breakpoints are C1, C2, and C6. You can see their effects in the table below:
|
Constellation |
Effect |
Importance |
|
C1 |
Enhances Masque of the Red Death by 120%, increases interruption resistance during Normal Attacks. |
High |
|
C2 |
Blood-Debt Directives are immediately Blood-Debt Due, unleashing a 900% ATK AoE Pyro DMG every 10s. |
High |
|
C6 |
Increases DMG of Balemoon Rising by 700% of current Life Bond percentage, grants 10% CRIT Rate and 70% CRIT DMG for 20s after using All is Ash. |
Priority |
C1 gives you more damage and makes Arlecchino harder to interrupt. You can attack without stopping. C2 gives you a big Pyro attack every 10 seconds. This helps you clear groups of enemies faster. C6 turns Arlecchino into a top-tier DPS. You get huge damage and better critical stats for a long time. If you want the best results, you should aim for C2 or C6.
Furina
Furina’s constellations help your team in different ways. She boosts healing, damage, and team flexibility. You can use her in many team setups. Her constellations do not change her main role, but they make her buffs stronger. You get more healing and Hydro application. Furina’s constellations work well with other supports and healers. You can build teams that last longer and deal more damage.
Breakpoints
You want to know which constellation levels give the biggest upgrades. For Arlecchino, C2 and C6 stand out. C2 gives you a 27.3% DPS increase in Vaporize teams. C3 boosts Overloaded teams by 62.3%. C4 and C5 do not help much. You can see the details in the table below:
|
Constellation |
Effect |
DPS Increase vs. C0 |
Rating |
|
C2 |
Blood-Debt Directives are now already Blood-Debt Due when first applied, unleashing AoE Pyro DMG and increasing RES |
27.3% (Vaporize) |
4.5/5 |
|
C3 |
Increases Normal Attack level, enhancing DPS |
62.3% (Overloaded) |
3/5 |
|
C4 |
Reduces CD of Burst and restores Energy |
0% (DPS decrease) |
1/5 |
|
C5 |
Increases Burst level, negligible impact on damage |
0.1% |
N/A |
You can see the DPS increase for each constellation in the chart below:
Tip: You should focus on C2 for Arlecchino if you want a big jump in damage. C6 is for players who want the highest numbers and can invest a lot.
Furina’s constellations do not give huge DPS spikes, but they make her more flexible. You can use her in more teams and get better healing. Her constellations help you build teams that survive longer and deal steady damage.
Constellations change how you build your teams. Arlecchino’s breakpoints give you more damage and new ways to play. Furina’s constellations help you support your team and keep everyone alive. You should use your own In-Depth Analysis to decide which character fits your needs best.
Team Synergy
Current Meta
You want your team to do well right now. Arlecchino and Furina are both strong in top teams. The table below shows some popular team setups:
|
Team Composition |
Description |
|
Arlecchino + Sigewinne + Wriothesley + Bennett |
Pure Pyro team for steady damage |
|
Arlecchino + Yelan + Zhongli + Bennett |
Vape team for big reactions |
|
Arlecchino + Signora + Cythria + Bennett |
Melt team for the most damage |
Arlecchino is the main damage dealer in these teams. You can use Bennett for healing and attack boosts. Furina works as a sub-DPS and healer. She fits in many teams and helps your damage go up. You can pair her with top meta characters for better results.
Here is a look at their strengths and weaknesses in teams:
|
Character |
Strengths |
Weaknesses |
|
Arlecchino |
High single-target damage, good AoE skills |
Needs skill because of healing |
|
Furina |
Boosts team damage, gives healing, strong off-field DPS |
Needs a strong healer at C0 |
Pick your team based on what you want. If you want big damage, choose Arlecchino. If you want more support and healing, pick Furina.
Tip: Many players say, "That Abyssal Mantle transformation? Chef's kiss!" This means people really like Arlecchino’s playstyle.
Future Potential
You want your team to stay strong later too. Arlecchino and Furina will work well with new team setups. The table below shows some possible future teammates and synergies:
|
Preferred Teammates |
Potential Synergy |
|
Bennett |
ATK boost and emergency healing |
|
Chevreuse |
Overload team specialist |
|
Xianyun |
Helps with plunge attacks |
More characters will work well with Arlecchino and Furina as the game grows. Players say things like, "Finally, a DPS that rewards my YOLO playstyle!" This means Arlecchino will stay fun and useful. Some players worry about team HP drain, but strong healers can help.
- Arlecchino is great for teams that want high damage and fast fights.
- Furina gives you more healing and buffs, making your team safer and flexible.
Think about how you like to play and which teams you want. Both characters have strong synergy now and in the future.
Investment Recommendation
F2P
If you play Genshin Impact without spending money, you want the most value from your Primogems. Furina gives you strong support for many teams, even at C0. You do not need high constellations to see her full power. She fits well with many characters and helps you clear hard content. Arlecchino needs more constellations to reach her best damage. You may not have enough resources to get her to C2 or higher. For F2P players, Furina is the safer and smarter choice. If you're just a few wishes short, a small top-up from ManaBuy can make all the difference.
Tip: Save your Primogems for Furina if you want a character who works in almost every team.
Meta-Chasers
You want the best teams and the highest damage. You follow the meta and want to clear Spiral Abyss with top scores. Furina stands out in the current meta. She boosts team damage and healing. Many top players use her in their strongest teams. If you want to push your account to the limit, you should aim for Furina’s constellations. C2 gives you a big boost, but even C0 works well.
Arlecchino can shine if you invest in her constellations. C2 and C6 make her a top-tier DPS. If you love her playstyle and want to see big numbers, you can go for her constellations. Most meta-chasers still pick Furina first because she fits more teams.
|
Player Type |
Best Constellation Investment |
|
F2P |
Furina C0 |
|
Meta-Chaser |
Furina C2 or Arlecchino C2+ |
Collectors
You want every character and constellation. You enjoy building full collections and trying new playstyles. Both Furina and Arlecchino offer unique mechanics. You may want to pull for both, but Furina gives you more value in most teams. Arlecchino brings a fresh DPS style and cool animations. If you collect for fun, choose the character you like most.
Note: Collectors often pull for both, but Furina offers more team flexibility and long-term value.
You now know Furina helps most teams a lot. Arlecchino does big Pyro damage with her constellations. If you want good advice, look at trusted sources. These sources give you new meta tips and constellation info:
|
Source |
Focus |
Details |
|
KQM Theorycraft |
Team Builds |
New guides for team synergy |
|
Honey Impact |
Constellations |
Info about constellation effects |
Pick Furina if you want more team choices. Pick Arlecchino if you want strong damage. Talk with other players to learn more and make your team better. And remember, ManaBuy is your trusted source for secure top-ups!
FAQ
Can you use Furina and Arlecchino on the same team?
You can use both together, but their mechanics may clash. Furina drains HP, so you need a strong healer. Arlecchino works best with stable HP. Try pairing them with Bennett for better results.
Which constellation gives the biggest boost for Arlecchino?
C2 gives Arlecchino a huge damage increase. You see a big jump in her AoE Pyro attacks. If you want top performance, aim for C2 or higher.
Does Furina need constellations to be strong?
Furina works well at C0. You get strong buffs and healing without extra constellations. Higher constellations add flexibility, but you do not need them for most teams.
What teams work best with Furina?
You can use Furina in many teams. She fits with Neuvillette, Ayato, and Nilou. Her Hydro application and buffs help most team setups. You see better results with healers.
Should you pull for Arlecchino or Furina first?
You should pull for Furina first if you want more team options. She supports many characters. Arlecchino is best if you want a main Pyro DPS and enjoy her playstyle.


Copyright © FUTURE OUTLOOK TECHNOLOGY LIMITED. All rights reserved.UNIT 135,1/F.,143 WAI YIP STREET,KWUN TONG HK